


Personal settings
The gear icon in the top right corner of the SQL editing window supports some common settings.
Type |
Configuration |
Description |
|---|---|---|
| Session | MySQL Commit Mode | Sets the default commit mode for transactions in MySQL mode. |
| Session | Oracle Commit Mode | Sets the default commit mode for transactions in Oracle mode. |
| Result Set | Retrieve Result Set Column Information | Before SQL execution, you can choose to enable or disable retrieving column information. Disabling this option when there are many table columns will not query column comments and editable column information, reducing SQL execution time. |
| Result Set | Query Row Limit | Sets the maximum number of rows that can be queried in a single query. |
| Result Set | Result Set Display |
|
| SQL Execution | Enable Full-Chain Tracing | Specifies whether to enable full-chain tracing during SQL execution. |
| SQL Execution | Continue Execution on Error | Specifies whether to continue execution when an error occurs during SQL execution. |
| SQL Execution | Delimiter Setting | Modifies the end delimiter of the SQL statement. |
| Object | Object Drag-and-Drop Statement Type | Automatically generates SQL statements of a specified type by dragging database objects (such as tables and views) to the editing area. |
| Style | Theme | Editor theme, including OceanBase, VSCode, GitHub, etc. |
| Style | Font | Editor font size, supporting small, normal, and large sizes. |
| Shortcut | Run SQL | Sets the shortcut key for running all current SQL statements. |
| Shortcut | Run Selected SQL | Sets the shortcut key for running the currently selected SQL statement. |
SQL Assistant
The SQL editing window supports SQL Assistant, which can help you query knowledge about OceanBase Database and SQL development techniques, and perform intelligent processing such as SQL generation, rewriting, error correction, and formatting. For more information, see Intelligent SQL development.
Editing area of SQL window
The toolbar in the editing area of SQL window supports the following functional keys:

Icon |
Description |
|---|---|
 |
Run all SQL statements in the current SQL window. All SQL statements can be run via the shortcut Ctrl+Enter. |
 |
Runs all currently selected SQL statements or the SQL statement where the cursor is at. You can run the current statement through the shortcut key Ctrl+Shift+Enter. |
 |
Click this icon to view the estimated execution plan (execution result of EXPLAIN) for the SQL statement that is selected or on which the pointer hovers. The displayed execution data may be slightly different from the data generated after statement execution. You can use this feature to evaluate an SQL statement. Click the Plan icon. On the Plan Details tab, click View Formatting Info to switch to the formatted view. |
 |
Click this icon and enter text in the search field to find the specific content and enter text in the replacement field to replace the content found. |
 |
Click this icon to undo the previous operation. |
 |
Click this icon to reverse an Undo operation. |
 |
Click this icon to apply formatting, such as indentation, line break, and keyword highlighting, to the selected SQL statements or all the SQL statements in the current SQL window. |
 |
Click this icon to convert the copied rows or columns into the specified format during queries. After you paste the copied data to the SQL editing area, select the copied data and click IN Value Conversion to convert it into the in('A','B') format.
|
 |
The system supports three capitalization formats: All Caps, All Lowercase, and Capitalize First Letter. Click this icon to convert the selected statements in the script to the corresponding capitalization format. |
 |
You can add indents to or delete indents from the statements that you selected. |
 |
You can click Add Comment to convert the statements that you select into comments or click Delete Comment to convert comments to SQL statements. |
 |
|
Table
Table attribute management
Basic information
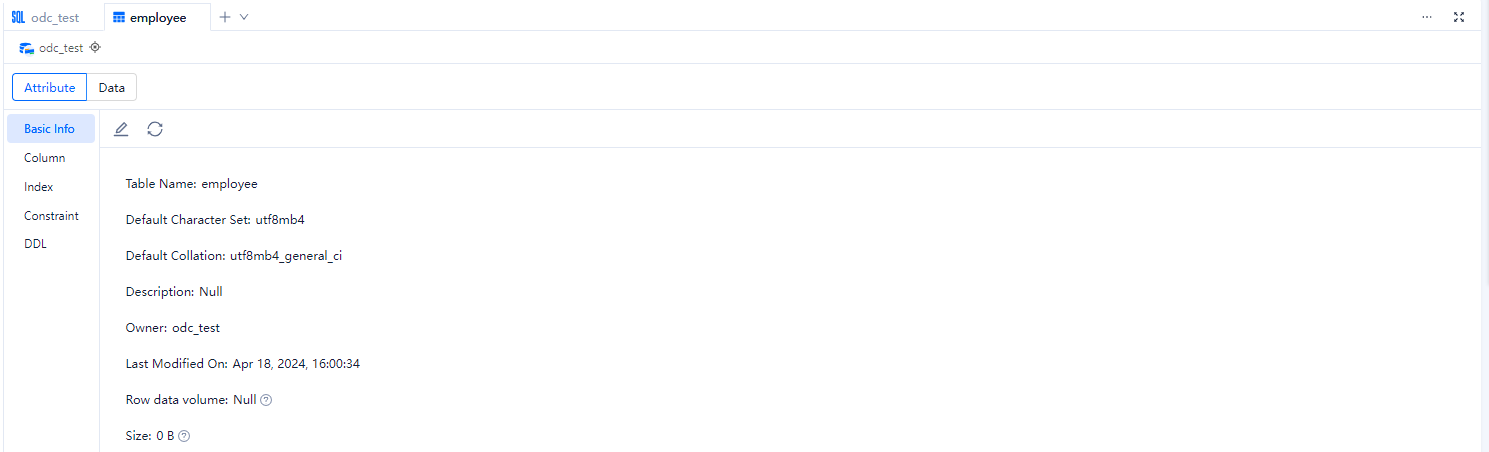
Click Basic Information in the left-side navigation pane of the Attribute tab to view the basic information of the current table.
Parameter |
Description |
|---|---|
| Table Name | Displays the name of the current table. You can rename the table here. |
| Default Character Set | Displays the character set that the table uses. |
| Default Sorting Rule | Displays the sorting rule that the table uses. |
| Description | Displays the description that you specified when you created the table. You can also modify the table description here. |
| Owner | Displays the database to which the table belongs. |
| Last Modified On | Displays the date on which the table was last modified. |
| Row Data Volume | Displays the number of rows in the table. |
| Size | Displays the size of data in the table. |
Column information
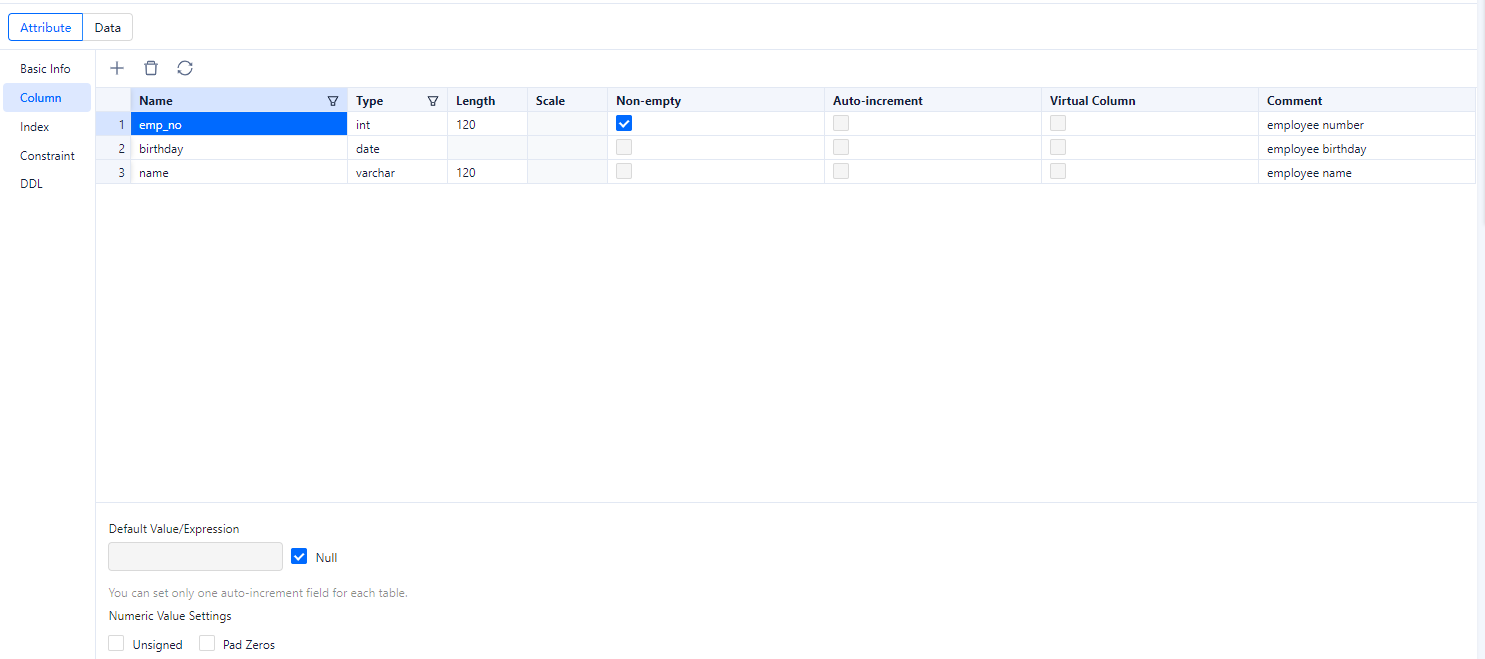
Field |
Description |
|---|---|
| Name | The name of the column. |
| Type | The data type of the column. |
| Length | The length of the data type. |
| Scale | The number of decimal places of the data type. |
| Non-empty | Specifies whether the value of the column must be specified. |
| Auto-increment | Specifies whether to set the column to an auto-increment column. This parameter is valid in the MySQL compatible mode.
NoticeOnly one auto-increment column is allowed for each table. |
| Virtual Column | Specifies whether to set the column to a virtual column.
Notice
|
| Default Value/Expression | The default value or expression of the column. |
| Comment | The additional information about the column. |
The following table describes operations that you can perform on the column setting page.
Operation |
Description |
|---|---|
| Toolbar operations | You can add or delete columns by using the top toolbar of the page. |
| Click a row ID | - You can click a row ID to select the row and display the quick access toolbar that allows you to add or delete a row. - You can click a row ID to select the row, and then drag the row to adjust its order. |
| Right-click a row | You can right-click a row to select it, and then select Copy or Move Down from the context menu that appears. |
Index information

Field |
Description |
|---|---|
| Index Name | The name of the index. |
| Scope | The default value is GLOBAL. Valid values: GLOBAL and LOCAL. |
| Method | The default value is BTREE, which is applicable to a global index. Valid values: Empty, BTREE, and HASH.
|
| Index Type | The default value is NORMAL. Valid values: NORMAL, UNIQUE, and FULLTEXT.
|
| Columns | The columns to be indexed. Pay attention to the order of the indexed columns. |
| Invisible | Specify whether the index is invisible. |
Constraint information
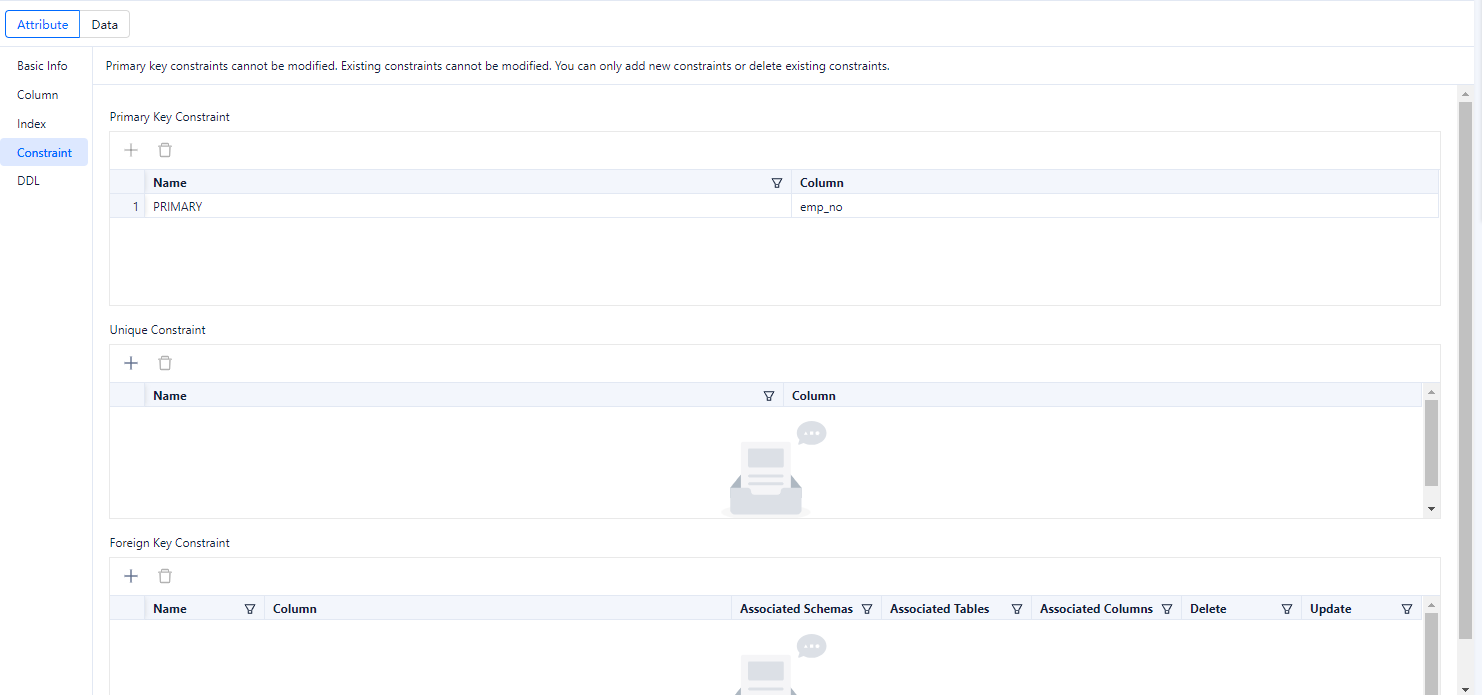
OceanBase Cloud supports different constraints in the MySQL compatible and Oracle compatible modes, and different constraints require different information. Therefore, you need to specify the required information based on the constraint you selected and the requirements on the page.
Field |
Description |
|---|---|
| Constraint Name | The name of the constraint. |
| Column Information | The field or a group of fields specified as the constraint. |
| Associated Schema | The schema where the associated table is located when Foreign Key Constraint is used. The associated table is the parent table. This field is valid only in the Oracle compatible mode. |
| Associated Database | The database where the associated table is located when Foreign Key Constraint is used. The associated table is the parent table. This field is valid only in the MySQL compatible mode. |
| Associated Table | The associated table when Foreign Key Constraint is used. The associated table is the parent table. |
| Associated Field | The associated field when Foreign Key Constraint is used. The associated field is in the parent table. |
| Delete | Specifies the action to be performed on the current table when the data in the associated table is deleted. The current table is the child table, and the associated table is the parent table. The following four types of action are supported: CASCADE, NO ACTION, RESTRICT, and SET NULL. OceanBase Cloud supports different foreign key actions in the MySQL compatible and Oracle compatible modes.
Notice At present, OceanBase Cloud does not support SET NULL. For more information about the syntax, see Create a table, or the official documentation of MySQL or Oracle. |
| Update | Specifies the action to be performed on the current table when the data in the associated table is updated. The current table is the child table, and the associated table is the parent table. The following four types of action are supported: CASCADE, NO ACTION, RESTRICT, and SET NULL. OceanBase Cloud supports different foreign key actions in the MySQL compatible and Oracle compatible modes.
Notice At present, OceanBase Cloud does not support SET NULL. For more information about the syntax, see Create a table, or the official documentation of MySQL or Oracle. |
| Check Condition | Specifies the check rules for data verification when Check Constraint is enabled. |
Partition information

The definition of a partition in the MySQL compatible mode is different from that in the Oracle compatible mode. So, the values of the following fields vary in different modes. You need to specify the following fields based on the selected partitioning method.
Field |
Description |
|---|---|
| Partitioning Method | Specifies the partitioning method. The partitioning methods supported in the MySQL compatible mode are different from those in the Oracle compatible mode.
|
| Field | The column that is used as the partition key. |
| Expression | Partitions are divided based on the return value of the expression. The partition expression is not supported in the Oracle compatible mode. |
| Partition | Based on the value specified for Partitioning Method, you may need to specify information such as Partition Name, Partition Quantity, Upper Limit, and Value Enumeration. You can add multiple partitions and drag selected fields to adjust their order. |
DDL information

Click DDL in the left-side navigation pane of the attribute tab to view the DDL statement of the current table, namely, the SQL statement that defines the table. This statement cannot be edited. The following table describes the icons provided in the toolbar.
Table data management

The navigation bar of the result tab provides the following icons.
Icon |
Description |
|---|---|
 |
Click Edit to enable the editing mode for the current result set. The editing mode supports the following operations: Add, Copy Current Row, Delete, Cancel, Confirm Modification, which submits a transaction when autocommit is enabled, and Modify and Submit, which is displayed when autocommit is disabled. In editing mode, you can either double-click the target data to directly modify it or click the preceding icons for convenient operations. When you edit a cell, you can right-click the cell and choose Copy or Set to Null from the context menu. |
|
Click this icon to view the estimated execution plan (execution result of EXPLAIN) for the SQL statement that is selected or on which the pointer hovers. The displayed execution data may be slightly different from the data generated after statement execution. You can use this feature to evaluate an SQL statement. Click the Plan icon. On the Plan Details tab, click View Formatting Info to switch to the formatted view. |
 |
View end-to-end trace details of the execution of the current SQL statement. Through end-to-end trace diagnosis, you can quickly locate the execution time of SQL/transactions on each node, making it easy to locate abnormalities. |
 |
Enter a keyword in the search box to search for the desired results. |
 |
Click this icon to select the columns to be displayed on the page. |
 |
Click this icon to display the selected data row in the form of a table. On the Column Mode tab, you can switch to the previous or next row. The column mode makes it easier to view data in a row that has many columns. Procedure: 1. Select the data that you want to view and click Column Mode  . . 2. On the Column Mode tab, click the left or right arrow to switch between the column values of adjacent rows. 3. Hover the pointer over a value field and click the zoom-in icon  to view the details. to view the details. 4. In the table on the Column Mode tab, you can view the comments for a column in the Remarks column. Perform the following steps to modify the comments: a. In the left-side navigation pane, right-click the target table and select View Table Structure to go to the Attribute tab. b. In the left-side navigation pane of the Attribute tab, click the Column tab. c. Select a field and click the Edit icon. The field editing dialog box appears. d. In the Comment field, edit the comments, and click OK. e. In the SQL Confirmation dialog box, click Execute. f. View the modified comments on the Column Mode tab. |
View

The toolbar on the editing page provides the following buttons.
Icon |
Description |
|---|---|
 |
Click this button to apply formatting, such as indentation, line break, and keyword highlighting, to the selected SQL statements or all the SQL statements in the current SQL window. |
 |
Click this button and enter text in the search field to find the specific content and enter text in the replacement field to replace the content found. |
 |
Click this button to undo the last operation. |
 |
Click this button to reverse an Undo operation. |
|
The system supports three capitalization options: All Caps, All Lowercase, and Capitalize First Letter. Click the corresponding option to convert the selected statements in the script to the desired capitalization format. |
|
You can add indents or delete indents from the statements that you selected. |
|
You can click Add Comments to convert the statements that you selected into comments or click Delete Comment to convert comments to SQL statements. |
|
A format such as A B can be converted to ('A','B') format. |
| Previous | Click this button to go back to the Create View page, where you can continue to edit or modify the parameters in the Basic Info, Select Base Tables, and Select Fields sections. |
Function
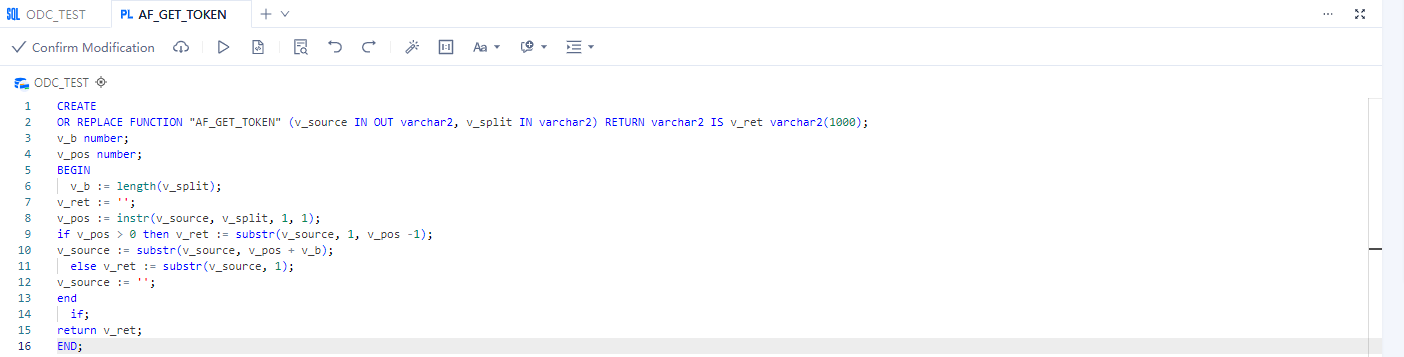
The toolbar on the editing page provides the following buttons.
Icon |
Description |
|---|---|
| Confirm Modification | Click this button to apply the current modification. |
 |
Download the SQL file for the function object. |
 |
Click this button to execute the statements in the code area. |
 |
Click this button to compile the statements on the current page. |
|
You can enter text in the search field to find the specific content and enter text in the replacement field to replace the content found. |
|
Click this button to undo the last operation. |
|
Click this button to reverse an Undo operation. |
|
Click this button to apply the formatting, such as indentation, line break, and keyword highlighting, to the selected SQL statements or all the SQL statements in the current SQL window. |
 |
Click this button to convert the copied rows or columns into the specified format during queries. After you paste the copied data to the SQL editing area, select the copied data and click IN Value Conversion to convert it into the in('A','B') format.
|
 |
The system supports three capitalization options: All Caps, All Lowercase, and Capitalize First Letter . Click the corresponding option to convert the selected statements in the script to the desired capitalization format. |
 |
You can click Add Comments to convert the statements that you select into comments or click Delete Comment to convert comments to SQL statements. |
 |
You can add indents or delete indents from the statements that you selected. |
Stored procedure

The toolbar on the editing page provides the following buttons.
Icon |
Description |
|---|---|
| Confirm Modification | Click this button to apply the current modification. |
|
Download the SQL file for the stored procedure object. |
|
Click this option to execute the stored procedure. |
|
Click this option to compile the stored procedure. |
|
You can enter text in the search field to find the specific content and enter text in the replacement field to replace the content found. |
|
Click this button to undo the last operation. |
|
Click this button to reverse an Undo operation. |
|
Click this button to apply the formatting, such as indentation, line break, and keyword highlighting, to the selected SQL statements or all the SQL statements in the current SQL window. |
|
Click this button to convert the copied rows or columns into the specified format during queries. After you paste the copied data to the SQL editing area, select the copied data and click IN Value Conversion to convert it into the in('A','B') format.
|
|
The system supports three capitalization options: All Caps, All Lowercase, and Capitalize First Letter . Click the corresponding option to convert the selected statements in the script to the desired capitalization format. |
|
You can click Add Comments to convert the statements that you select into comments or click Delete Comment to convert comments to SQL statements. |
|
You can add indents or delete indents from the statements that you selected. |
Trigger

The toolbar on the editing page provides the following buttons.
Icon |
Description |
|---|---|
| Confirm Modification | Click this button to apply the current modification. |
|
You can enter text in the search field to find the specific content and enter text in the replacement field to replace the content found. |
|
Click this button to undo the last operation. |
|
Click this button to reverse an Undo operation. |
|
Click this button to apply the formatting, such as indentation, line break, and keyword highlighting, to the selected SQL statements or all the SQL statements in the current SQL window. |
|
Click this button to convert the copied rows or columns into the specified format during queries. After you paste the copied data to the SQL editing area, select the copied data and click IN Value Conversion to convert it into the in('A','B') format.
|
|
The system supports three capitalization options: All Caps, All Lowercase, and Capitalize First Letter . Click the corresponding option to convert the selected statements in the script to the desired capitalization format. |
|
You can click Add Comments to convert the statements that you select into comments or click Delete Comment to convert comments to SQL statements. |
|
You can add indents or delete indents from the statements that you selected. |
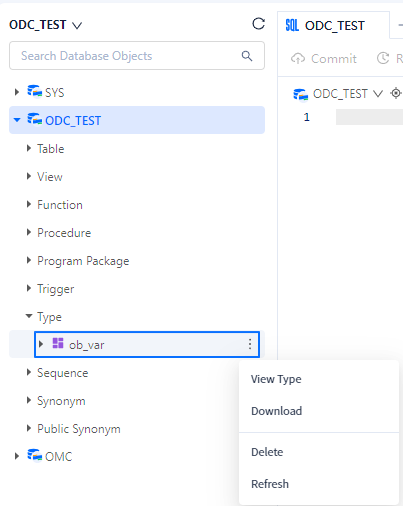
Type
The toolbar on the editing page provides the following buttons.
Icon |
Description |
|---|---|
|
You can enter text in the search field to find the specific content and enter text in the replacement field to replace the content found. |
|
Click this button to undo the last operation. |
|
Click this button to reverse an Undo operation. |
|
Click this button to apply the formatting, such as indentation, line break, and keyword highlighting, to the selected SQL statements or all the SQL statements in the current SQL window. |
|
Click this button to convert the copied rows or columns into the specified format during queries. After you paste the copied data to the SQL editing area, select the copied data and click IN Value Conversion to convert it into the in('A','B') format.
|
|
The system supports three capitalization options: All Caps, All Lowercase, and Capitalize First Letter . Click the corresponding option to convert the selected statements in the script to the desired capitalization format. |
|
You can click Add Comments to convert the statements that you select into comments or click Delete Comment to convert comments to SQL statements. |
|
You can add indents or delete indents from the statements that you selected. |