


The data development module of OceanBase Cloud is an efficient and closed-loop solution specifically designed for the development of small data warehouses. It offers powerful features such as collaborative development in a worksheet, data visualization, workflow orchestration (coming soon), and sample dataset management, making data development easier and more convenient.
User interface
Workspace
After the project admin creates a workspace, you can enter it to create worksheets, develop SQL scripts, import sample datasets, and configure workspace settings.

You can enter a workspace by the following methods:
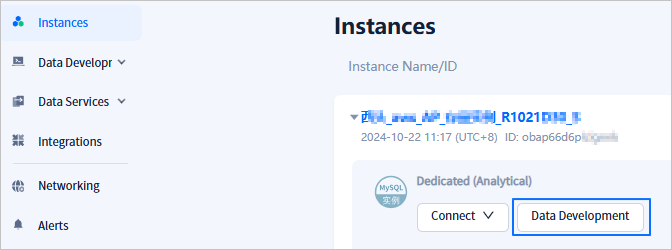
Method 1: If your project role is Project Admin, Data Read/Write, or Data Services Admin, go to Instances page, and click Data Development in the row of the target instance.
Method 2: If your project role is Instance Admin or Project Member, click the workspace name in the workspace list.

Worksheet
A worksheet provides an interactive SQL development environment that allows you to query, edit, and visualize data within an instance.

Sample dataset
OceanBase Cloud provides a dedicated module that contains various public datasets. You can choose and import sample datasets into the target database as needed.
Worksheet editor
Manage database objects
The database object list displays all objects in the current database. In this area, you can switch database accounts, and create and manage database objects such as tables, views, and stored procedures under the current account. For more information about database object management, see Database object management.

Edit SQL statements
You can handle your data in the SQL editing area. For more information about how to edit and execute SQL statements, see SQL editing and execution.

The result display area shows three tabs, each displaying relevant content regarding the execution of SQL statements.
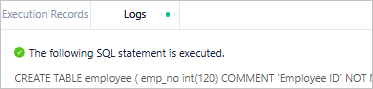
Record tab: Displays the execution records of each SQL statement in the current connection process.

Logs tab: Shows the execution logs of the current SQL window.
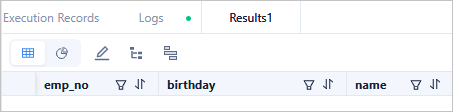
Results tab: Presents the execution results of the current SQL statement. On this tab, you can also sort, filter, add, edit, and delete data, and execute database objects. For more information, see Result set editing.
Query the result set
On the Results tab, click ![]() to edit the result set.
to edit the result set.

Quick start
The following figure shows a procedure to help you quickly get started with an analytical OceanBase Cloud instance.

Operation |
Description |
|---|---|
| Workspace management | An OceanBase Cloud workspace allows you to develop and manage data in an integrated environment. You can use a workspace for collaborative development, resource management, and access control. |
| Worksheet management | In an OceanBase Cloud workspace, you can create and manage worksheets. |
| SQL editing and execution | In the SQL window of OceanBase Cloud, you can edit and execute SQL statements. |
Log in to the OceanBase Cloud console, and click Instances in the left-side navigation pane to create an analytical instance. For more information about analytical instances, see Overview.
Choose Data Development > Workspace > Create Workspace.
Notice
- You must log in to the database with a super account.
- If your project role is Project Admin, you can create workspaces. Otherwise, you can join existing workspaces.
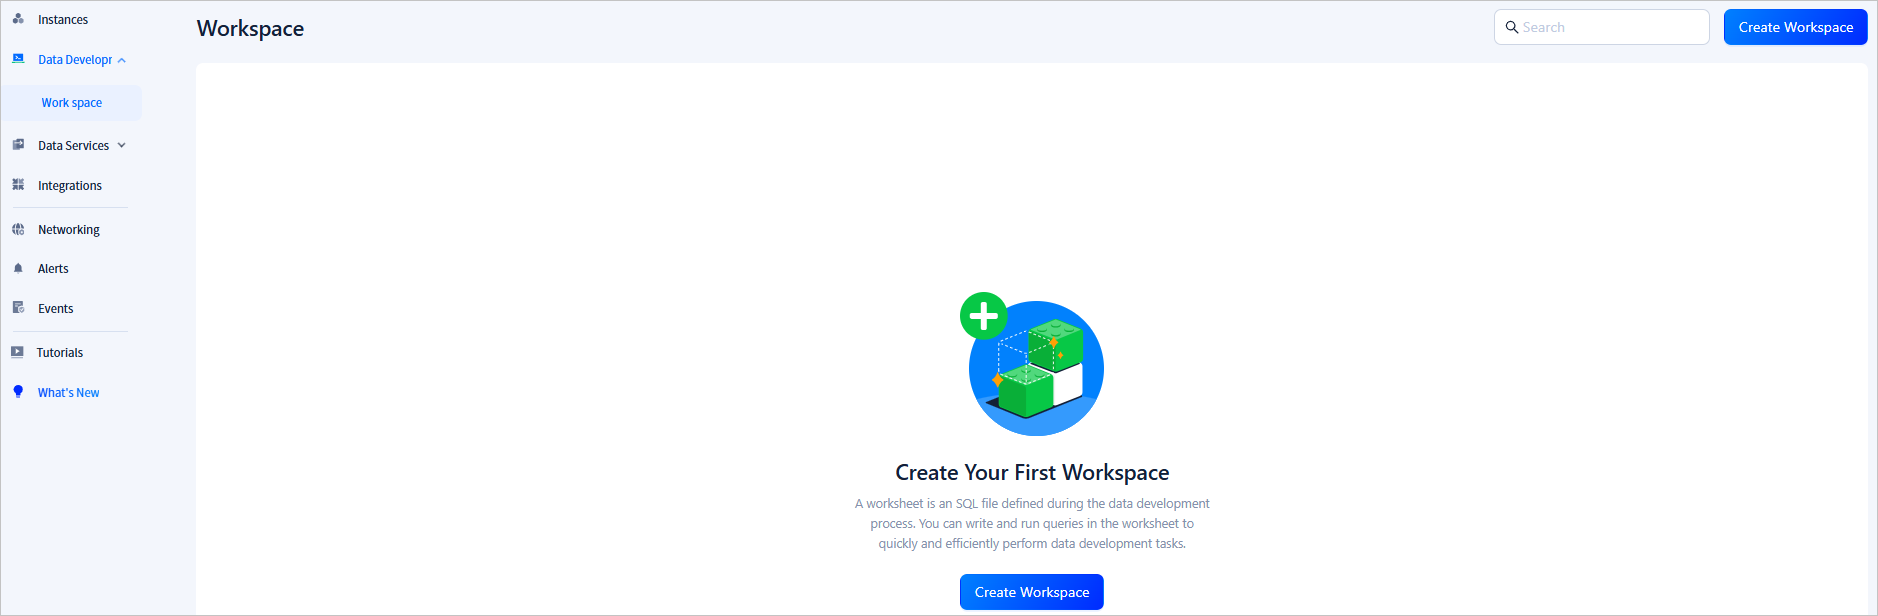
In the workspace list, click the workspace name to enter the workspace.
In the left-side navigation pane of the page that appears, click Worksheets. On the Worksheets page, click Create.

- Worksheet: Select this button to open the SQL window to create and edit an SQL file.
- Folder: Select this button to create a worksheet folder.
- Batch Import: Select this button to upload multiple SQL files at a time.
In the SQL window, write an SQL statement to create a table named
employeein thedefault_databasedatabase.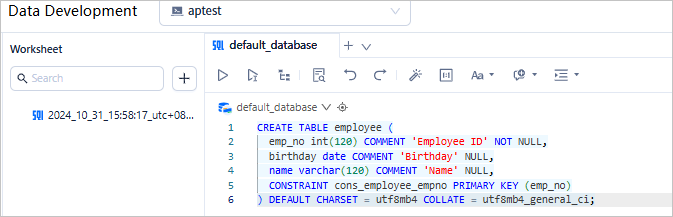
CREATE TABLE employee (emp_no int(120) COMMENT 'Employee ID' NOT NULL, birthday date COMMENT 'Birthday' NULL,name varchar(120) COMMENT 'Name' NULL,CONSTRAINT cons_employee_empno PRIMARY KEY (emp_no)) DEFAULT CHARSET = utf8mb4 COLLATE = utf8mb4_general_ci;After you complete SQL editing, click the
 icon in the toolbar to execute all SQL statements in the current SQL window.
Click the database icon in the left-side navigation pane, right-click the employee table, and select View Table Data. Alternatively, execute a
SELECTstatement in the SQL window.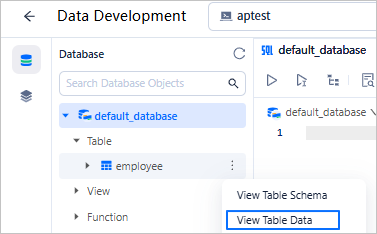
In the Results tab, click
 to edit the result set.