


After editing and executing SQL statements in the SQL window, you can manipulate the data in the Results tab by sorting, filtering, adding, editing, deleting, and executing database objects. This topic illustrates how to insert data into a table in the OceanBase MySQL type within the result set tab.
Prerequisites
You need to have the database account and password for the current tenant to log in to the SQL Console.
Procedure
Log in to the SQL Console and execute the SQL statement in the SQL window to query data from the
employeetable.SELECT `emp_no`, `birthday`, `name` FROM `employee`;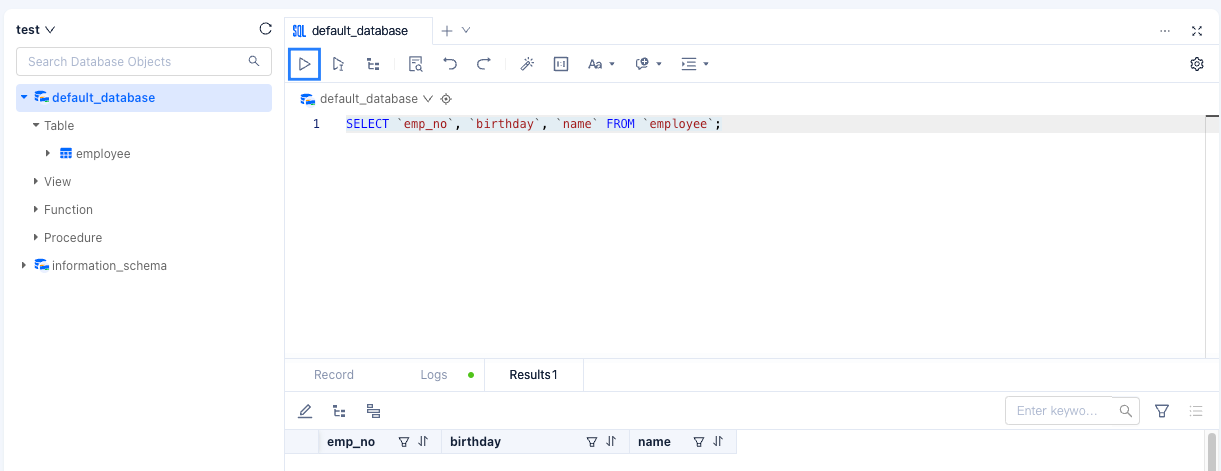
In the Results tab, click
 to edit the result set.
Notice
SQL Console does not support editing result sets containing SET or ENUM field types.
Click + to add a row and edit the data.

Click Confirm Modification.
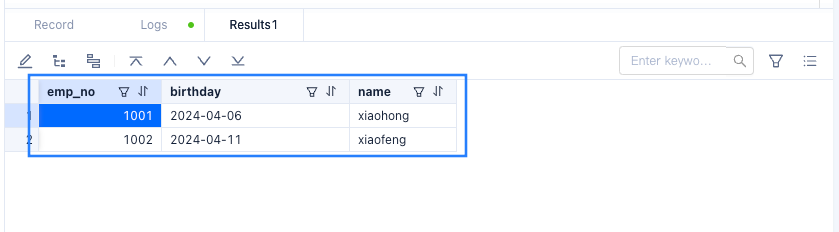
In the confirmation dialog box, click Execute to confirm the execution of the SQL statement. Once completed, you can see that the edited data has been added to the Results tab.
The Results tab provides the following interactive operations for daily development work:
OperationDescriptionSelect target range with mouse The returned result set supports selecting the target range with the mouse and directly copying it to an external file using keyboard shortcuts. You can click on field names or row numbers to select entire rows or columns directly. You can also use the Export tool in the toolbar to export data from the result set to a local file. Select multiple rows/columns - Press the Shift key to select multiple consecutive rows/columns.
- Press the Ctrl/Command key to select non-consecutive multiple rows/columns.
Right-click on cell Provides Copy/Output to Clipboard functional keys to directly copy data to an external file. Right-click on row number Provides Copy Row/Freeze This Row/Unfreeze All Rows/Output to Clipboard functional keys. - Copy Row: Copy the selected row.
- Freeze This Row: Pin and freeze the selected row, frozen rows and table headers allow vertical scrolling of content below. Supports freezing multiple rows.
- Unfreeze All Rows: Restore all frozen rows.
- Output to Clipboard: Output the entire row data in SQL/CSV format to the clipboard.
Zoom icon When the data in a cell is too long to be fully displayed, you can click on the zoom icon to view all data in the cell:
1. Place the mouse cursor over the target cell.
2. Click the zoom icon , and you can view all the data in the cell in the pop-up large field display window.
Note
If it is a large field, the default display is text, and you can switch to hexadecimal view and support downloading large field content to the local computer.
BLOB large objects In the result set tab: - Under the Oracle compatible mode, CLOB, BLOB, RAW support direct editing of text content, editing of hexadecimal data, and uploading of files (size limit: text 2 MB, hexadecimal 200 KB, and image 20 MB).
- Under the MySQL compatible mode, BLOB, MEDIUMBLOB, TINYBLOB, and other XLOBs support direct editing of text content, editing of hexadecimal data, and uploading of files.
Right-click on the tab name of the result set (e.g., Result1) Click Pin in the pop-up list to keep the current result set tab displayed. When executing a new query, the current result will not be overwritten but will generate a new result display tab for comparison with different query results. Click Unpin to cancel the pinning of the target result set tab. Filter, sort, and search buttons Each field name in the result set provides filter, sort, and search buttons, allowing direct filtering, sorting, and searching of data in a single column. Drag column name Supports directly dragging column names in the result set to adjust the order of each field. Adjust column width Supports dragging to adjust column width. Status Bar Displays Field Type and Remarks Click on a field in the result set, and the bottom status bar will display specific information such as the type and remarks of the field.