If you choose the PrivateLink connection type when creating your data source, you need to first configure AWS PrivateLink. This topic introduces how to configure AWS PrivateLink.
Prerequisites
You have created the Aurora MySQL DB cluster. Refer to the AWS documentation for more information.
Terms and definitions
PrivateLink: A scalable and highly available technology that supports secure connections between your VPC and supported AWS services. For more information on PrivateLink, refer to the AWS documentation.
Target Group: The target group for the Network Load Balancer, used to route incoming requests to one or more registered targets.
Network Load Balancer: A load balancer that distributes incoming traffic to your services using the protocol and port specified during target group creation.
Endpoint Service: As the service provider, you can create an endpoint service to allow service consumers to connect to your endpoint service.
Video tutorial
Obtain the IP address of the Aurora MySQL DB instance
Log in to the AWS console, and locate the target Aurora MySQL DB instance that you created.
Click the name of the target instance, and under the Connectivity & security tab, copy the endpoint name.
If the Aurora MySQL DB instance allows public access, execute the following command on any device capable of connecting to the public internet to obtain the IP address of the instance.
// Replace <example.example-region.rds.amazonaws.com> with the endpoint name you copied from the previous step

nslookup <example.example-region.rds.amazonaws.com>
Here is an example of the returned result.
// ...
Name: example.example-region.rds.amazonaws.com
Address: xxx.xxx.xxx.1
//...
Navigate to the Network Interfaces page, and search for the address you obtained from the previous step in the search box to find the corresponding primary private IPv4 address.
Copy the private IPv4 address you obtained from the previous step. It will be used in Create a target group when you create the target group.
Create a target group
Log in to the AWS console and navigate to the Target groups page.
Click Create target group at the top right corner of the page.
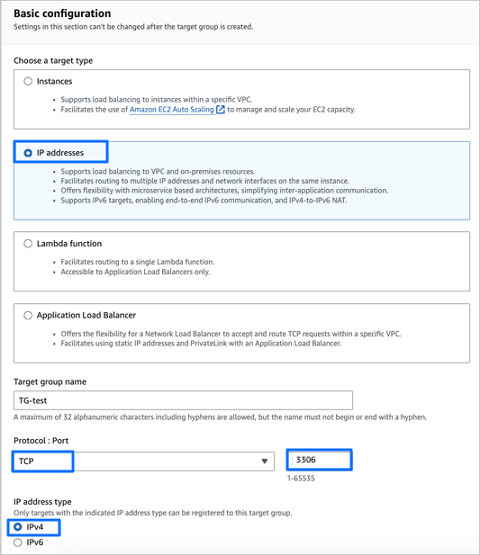
In the Basic configuration section, complete the following configurations.
 Configuration ItemDescription
Choose a target type Choose IP addresses. Target group name Enter a name for your target group. Protocol Choose TCP. Port Enter 3306. IP address type Choose IPv4. Click Next.
Complete the configurations for the IP addresses section.
For Step 1: Choose a network, choose the VPC that your Aurora MySQL DB instance belongs to from the Network drop-down list.
For Step 2: Specify IPs and define ports, under IPv4 address, enter the IP address of the Aurora MySQL DB instance you obtained earlier.
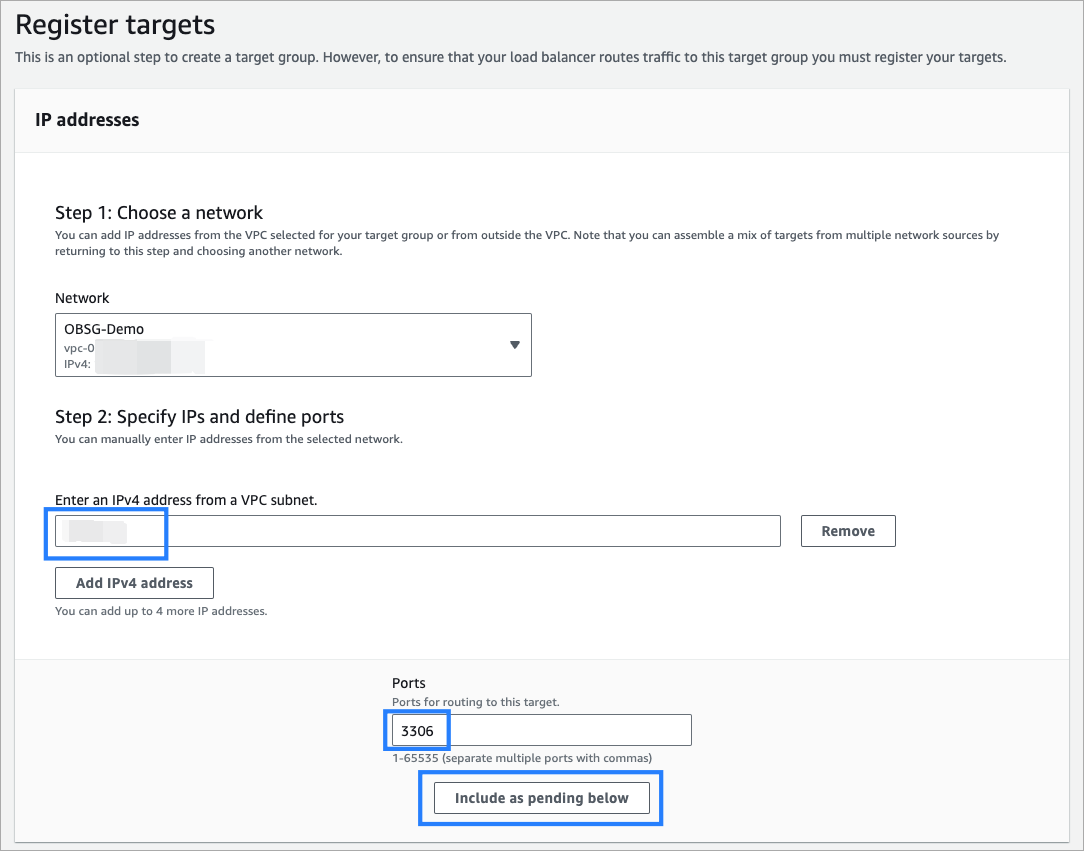
Click Include as pending below.
In the Review targets section, confirm your configurations are correct, and then click Create target group.
Create a Network Load Balancer
Log in to the AWS console and navigate to the Load balancers page.
Click Create load balancer.
On the Select load balancer type page, click Create under Network Load Balancer.
Based on your needs, complete the configurations in the Basic configuration and Network mapping sections.
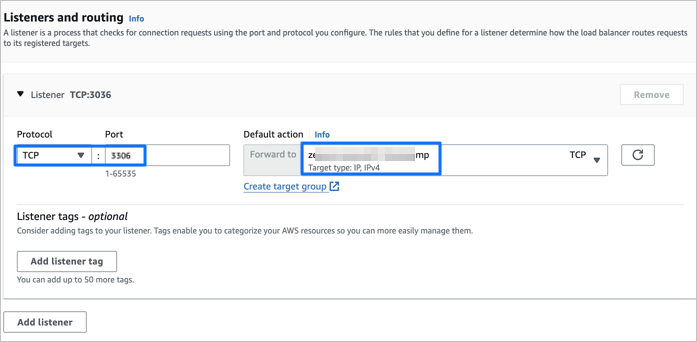
In the Listeners and routing section, complete the following configurations.
 Configuration ItemDescription
Protocol The listener protocol. Choose TCP. Port Choose 3306. Default Action Choose the target group created in the Create a target group step above. Scroll down to the bottom of the page, and click Create load balancer to create the Network Load Balancer.
Navigate back to the Load balancers page, and select the Network Load Balancer just created. Then click Actions > Edit load balancer attributes.
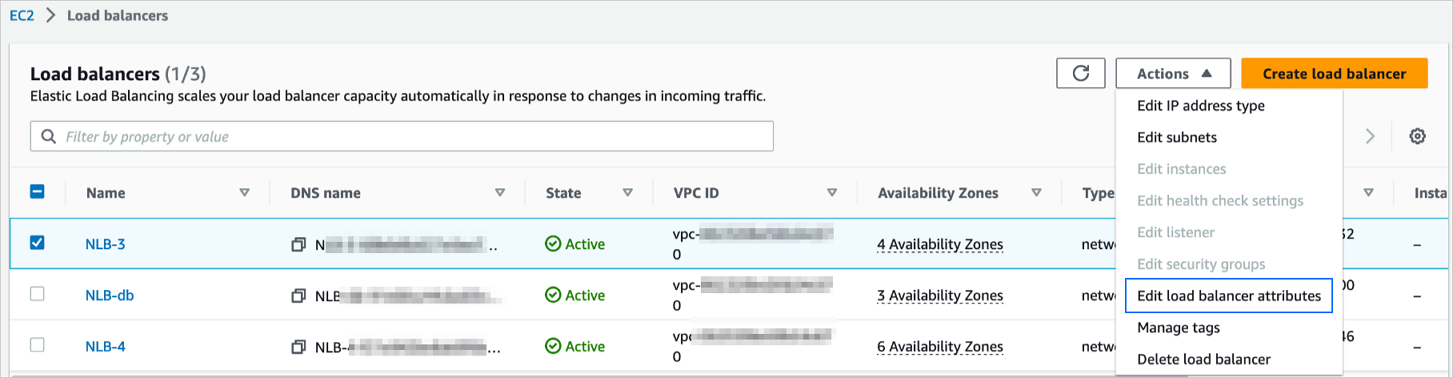
In the Target selection configuration section of the Edit load balancer attributes page, enable Cross-zone load balancing, and then click Save changes.
Create an endpoint service
Log in to the AWS console and navigate to the Endpoint Services page.
Click Create endpoint service at the top right corner of the page.
On the Create endpoint service page, complete the following configurations.
ConfigurationDescriptionName - optional Enter a name for your endpoint service. Load balancer type Choose Network. Available load balancers Choose the Network Load Balancer created in the Create a Network Load Balancer step above. If the page shows no load balancers available, please wait until the state of the load balancer created turns Active, and then refresh the page. In the Additional settings section, complete the following configurations.
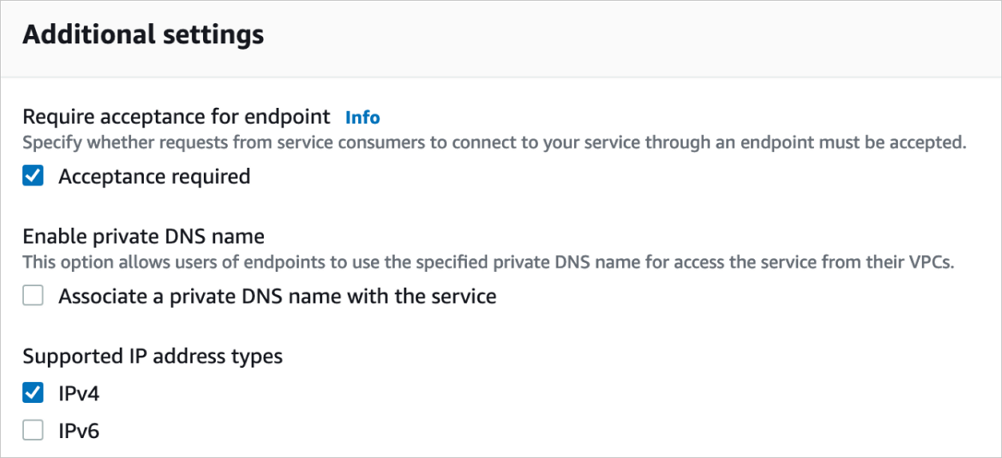 Configuration ItemDescription
Require acceptance for endpoint - If you select Acceptance required, when you try connecting with PrivateLink for the first time, you will be prompted in the OceanBase Cloud console to accept the endpoint connection request in the AWS console first.
- If you do not select Acceptance required, then you will not receive such a prompt.
Enable private DNS name Do not select this option here. Supported IP address types Choose IPv4. Click Create.
Allow access to the endpoint service created.
On the Endpoint services page, select the endpoint service just created.
Click the Allow principals tab, and then click the Allow principals button in the tab.
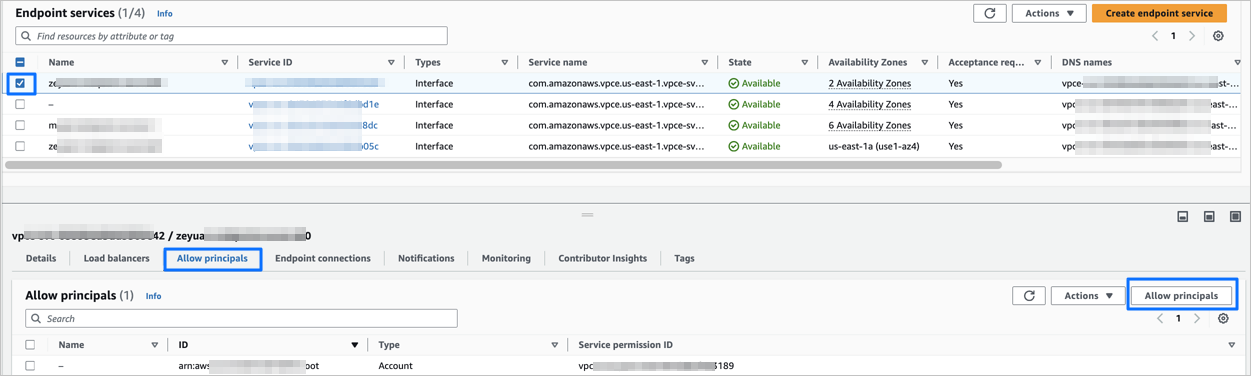
In the Principals to add section, enter the ARN of the account to be authorized.
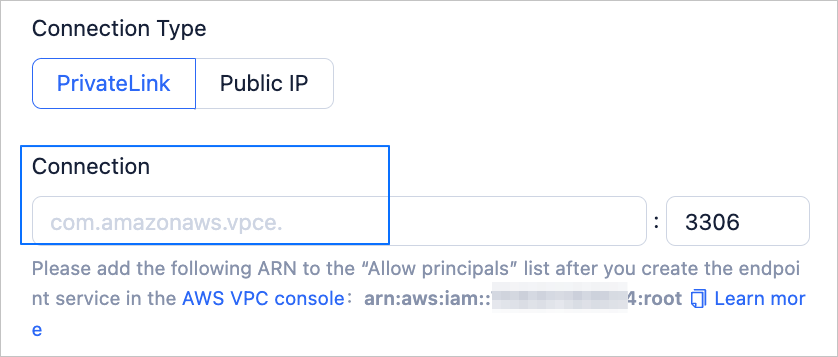
To obtain the ARN of the account to be authorized, you need to log in to the OceanBase Cloud console, and choose PrivateLink as the connection type when creating the online assessment task. You should be able to copy the ARN information in the format
arn:aws:iam::aws-account-id:<type>/<id>in the console. For more information on creating the online assessment task, refer to Perform online assessment.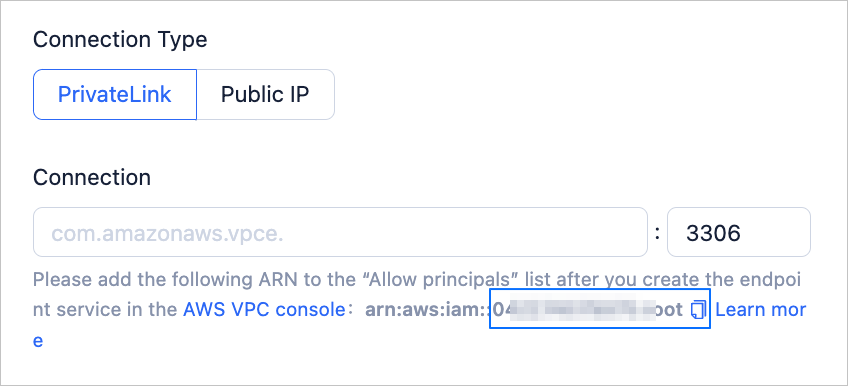
Click Allow principals.
Use Endpoint Service
After you create an endpoint service, copy the endpoint service name. Enter it in Amazon Cloud > PrivateLink > Connection on the online assessment task creation page. For information about how to perform online compatibility assessment for a database, see Perform online assessment.
To obtain the endpoint service name:
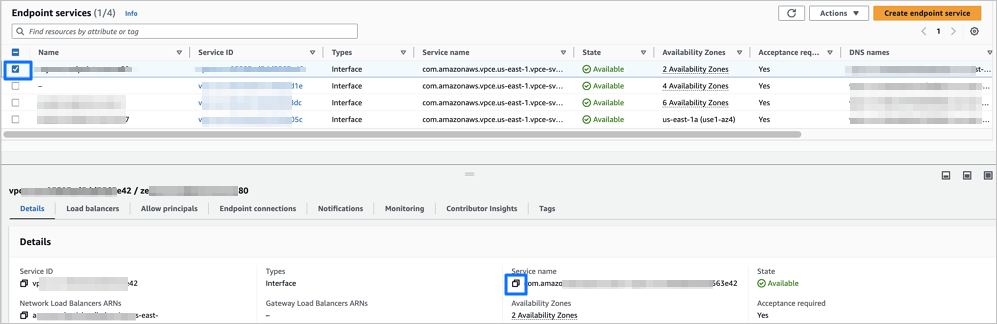
Log on to the AWS console and navigate to the Endpoint Services page.
Select the endpoint service you just created.
In the Details tab, copy the endpoint service name under Service name.