


This topic describes how to create and manage workspaces in OceanBase Cloud.
Background information
An OceanBase Cloud workspace is an essential unit for data development and management. You can use a workspace for collaborative development, resource management, and access control.
A workspace serves as an integrated environment. You can associate a workspace with an analytical OceanBase cluster instance to efficiently manage data sources, data integration, and worksheets with ease.

The following example describes how to create a workspace named aptest in the OceanBase Cloud console, if your project role is Project Admin.
Note
All data in this example is for reference only. You can replace the data as needed.
Prerequisites
An analytical cluster instance has been created.
A super account has been created in the OceanBase Cloud console for connecting to the analytical database.
You have permission to manage accounts under the analytical cluster instance.
Your project role is Project Admin.
Create a workspace
Note
- If your project role is Project Admin, you can choose Data Development > Workspace in the left-side navigation pane of the OceanBase Cloud console to create workspaces.
- If your project role is Instance Admin or Project Member, you can choose Instances > Data Development in the left-side navigation pane of the OceanBase Cloud console to join existing workspaces.
- If your project role is Data Read/Write or Data Services Admin, you can choose Data Development > Workspace in the left-side navigation pane of the OceanBase Cloud console to join existing workspaces.
Log in to the OceanBase Cloud console, and click Instances in the left-side navigation pane to create an analytical instance. For more information about analytical cluster instances, see Overview.
In the Instances list, click the instance name to create a super account.
Method 1: In the Overview page of the instance, click Account Management in the left-side navigation pane. On the page that appears, click Create Account in the upper-right corner.

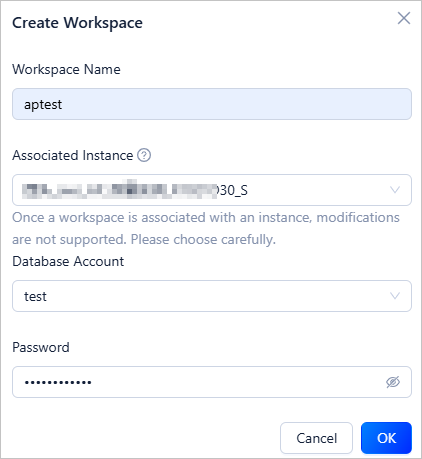
Method 2: In the Create Workspace dialog box, specify related parameters and click Create Account.
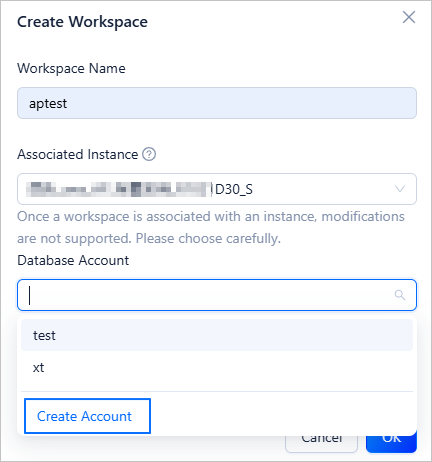
Choose Data Development > Workspace > Create Workspace.
In the Create Workspace dialog box, enter a workspace name, select an analytical cluster instance to bind, specify the account and password for connecting to the database, and click OK.
In the workspace list, view the created workspace.

In the workspace list, you can perform the following operations:
To enter the workspace, click the workspace name.
To rename the workspace, click Settings in the Actions column.
To delete the workspace, click Delete in the Actions column.
Enter a workspace
In a workspace, you can create worksheets, develop SQL scripts, import sample datasets, and configure workspace settings. You can enter a workspace by the following methods:
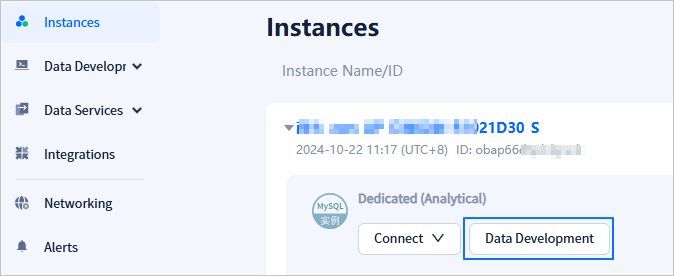
Method 1: If your project role is Project Admin, Data Read/Write, or Data Services Admin, go to Instances page, and click Data Development in the row of the target instance.
Method 2: If your project role is Instance Admin or Project Member, click the workspace name in the workspace list.
Configure workspace settings
On the workspace settings page, you can edit the workspace name, associated instance, and the database account.
