The SQL window is the user interface for handling data. This topic aims to explain how to edit and execute SQL statements in the SQL window. Using the creation of a table as an example, this topic demonstrates how to create a table named 'employee' in the 'odc_test' database within the SQL window.
Note
The data used in this topic are examples. You can replace them with actual data as needed.
Prerequisites
You need to have the database account and password for the current tenant to log in to the SQL Console.
Edit SQL statements
Log in to the SQL Console and open the SQL window.
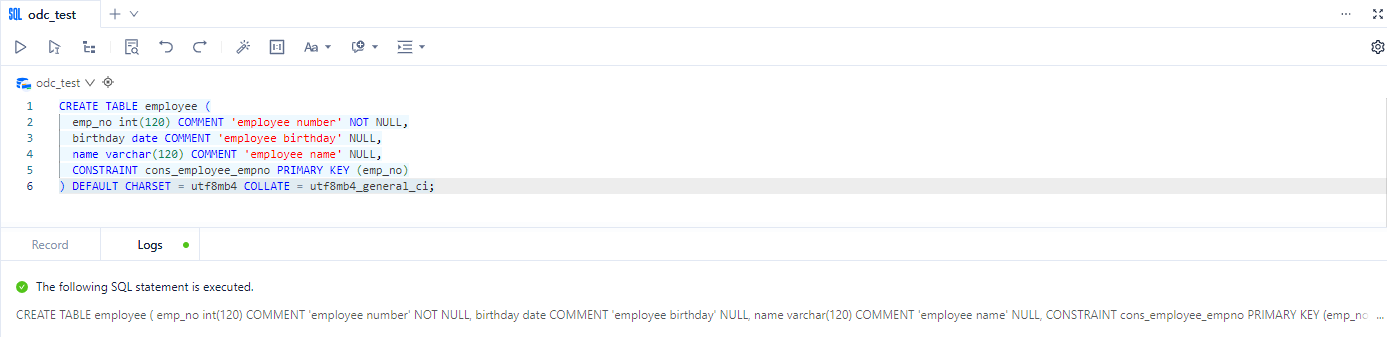
In the SQL window, edit the SQL statement to create the 'employee' table in the 'odc_test' database.

CREATE TABLE employee (emp_no int(120) COMMENT 'employee number' NOT NULL, birthday date COMMENT 'employee birthday' NULL, name varchar(120) COMMENT 'employee name' NULL, CONSTRAINT cons_employee_empno PRIMARY KEY (emp_no)) DEFAULT CHARSET = utf8mb4 COLLATE = utf8mb4_general_ci;Syntax Format:
CREATE TABLE table_name (column_name column_type, column_name column_type,.......);ParameterDescriptionCREATE TABLE Used to create a table with the given name, must have CREATE table permissions. table_name The name of the table to be created, which must conform to identifier naming rules. column_name column_type Specifies the name and data type of each column (field) in the data table, separated by commas if creating multiple columns. As shown in the image above, click
 in the SQL window to switch databases.
For details on the SQL window toolbar, refer to Functional keys in SQL Console.
Execute SQL statements
After completing the SQL statement editing, click ![]() in the toolbar of the SQL window to execute all SQL statements in the current SQL window.
in the toolbar of the SQL window to execute all SQL statements in the current SQL window.
View data
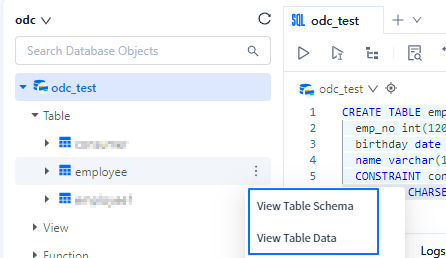
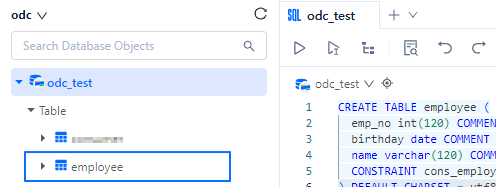
In the left navigation bar of the SQL window, confirm whether the table employee has been created in the database odc_test.
Right-click on the table employee and select View Table Data, or edit a SELECT statement in the SQL window.