


Background information
Web OceanBase Developer Center (ODC) V4.2.0 and later allow a user with the project creation permission to create a project and add members to the project. A project member can add and change databases in the project.
This topic describes how to implement database changes through project collaboration.
Technical mechanism

The ODC system administrator grants the project creation permission to a user. Then, the user can create a project and add members to the project.
The project admin or database administrator (DBA) adds a database to the project.
A project member initiates a database change ticket.
ODC determines the risk level of this ticket based on the risk level identification rules and selects the corresponding approval process for this ticket.
After the ticket is approved, the database change is automatically executed by ODC or manually executed by the user.
The project admin archives the project after all tickets in the project are executed and no active scheduled tasks exist. Databases and sensitive columns added to the project are released when it is archived. An archived project is unrecoverable and no longer supports any collaboration activities.
After the project is archived, the project admin deletes the project. The data of a deleted project is unrecoverable.
Create a project
Method 1: Create a project as a user with the project creation permission
The system administrator grants the project creation permission to a user.
The project admin creates a project and adds members to the project.
Note
An ODC user with the project creation permission can create projects. By default, the user who creates a project is granted the administrator role of this project. After the project admin assigns ODC users as members of the project, the members can access this project after logging in to the ODC console with their own accounts, and work as a team in the project.
ParameterDescriptionProject Name The name of the project. Administrator A user that has all permissions of the project. DBA A user that has all permissions of the project, except for member management, message configuration, and project setting. Developer (Optional) A user that can log in to all databases, execute SQL statements, and submit tickets, who is usually a developer. Security Administrator (Optional) A user that has all participant permissions and can manage sensitive columns of the project. Participant (Optional) A user that can view basic information of the project, request database permissions, and submit tickets. Description (Optional) The description of the user.
Method 2: Join a project
An ODC user can apply for project permissions to join an existing project.
On the Projects or Tickets tab, click the corresponding button to apply for project permissions.
a. Apply for permissions on the Projects tab.
b. Apply for permissions on the Tickets tab.
Select a project, specify a role, enter the reason for application, and then click Apply.
View the approval status on the Tickets tab.
View the project that you joined in the project list.
Archive a project
After all tickets in a project are executed and no active scheduled tasks exist, and the project is no longer in use, the project admin can archive the project.
Notice
- Databases and sensitive columns added to the project are released when it is archived. An archived project is unrecoverable and no longer supports any collaboration activities.
- If a partitioning plan task is in progress when you archive the project, the partitioning plan task will be automatically terminated after the project is archived.
In the project list, click the name of the project to be archived.
On the Settings tab of the project, click Archive Project.
In the dialog box that appears, click OK.
When the project is archived, you can view it on the Archived Projects tab.
Delete a project
The project admin can delete an archived project.
Notice
The data of a deleted project is unrecoverable.
On the Archived Projects tab, click the More icon in the row of the archived project and select Delete Project. To batch delete archived projects, select the archived projects and click Delete Project on top of the project list.

In the dialog box that appears, type
deleteand click Delete.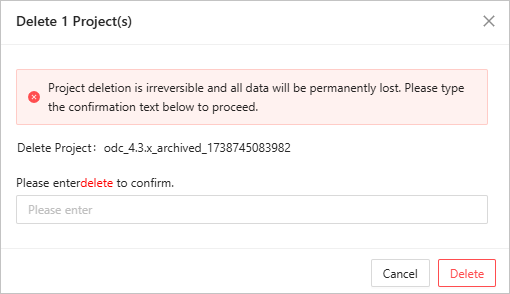
Manage databases
Method 1: Add a database as a user with database permissions
Click the name of a project to go to the project management page.
Add a database.
A member can export data, import data, perform database changes, and log in to databases. The project admin or DBA can set a database administrator and change the project to which a member belongs.

Note
If a data source has been bound to a project, you cannot transfer the databases in the data source to other projects.
Method 2: Apply for database permissions
Notice
- To apply for database permissions, make sure that you have joined the corresponding project.
- You can apply for permissions on databases only in the project that you have joined.
You can apply for the query, export, and change permissions on databases.
On the Projects or Tickets tab, click the corresponding button to apply for database permissions.
a. Apply for permissions on the Projects tab.
b. Apply for permissions on the Tickets tab.
Select the project, databases, permission types, and permission validity period, enter the reason for application, and then click Apply.
Manage tables and views
A project member can apply for permissions on tables and views in any database in the project.
A project member can click Table Permission Application to apply for the query, export, and change permissions on tables and views.
Notice
- You can apply for permissions only on tables in the project that you have joined.
- If a table is transferred to another database or the database to which the table belongs is transferred to another project, the original permissions on the table become invalid.
On the Projects or Tickets tab, click Table Permission Application to apply for table permissions.
a. Apply for permissions on the Projects tab.
b. Apply for permissions on the Tickets tab.
Select the project, tables, views, permission types, and permission validity period, enter the reason for application, and then click Apply.
After the application, you can manage tables and views based on the permission types.
- If you have the query permission on a table, you can execute query statements on the table in the SQL window.
- If you have the change permission on a table, you can execute change statements on the table in the SQL window.
- If you have the export permission on a table, you can initiate a ticket to export the table.
- If you have the query permission on a view, you can execute query statements on the view in the SQL window.
- If you have the export permission on a view, you can initiate a ticket to export the view.
- If you have the query permission on a database, you can execute query statements on the database in the SQL window.
- If you have the change permission on a database, you can execute change statements on the database in the SQL window and initiate tickets for the database except regular export tickets and result set export tickets.
- If you have the export permission on a database, you can initiate export tickets for the database.
- If you have the query and export permissions on a database, you can initiate a result set export ticket for the database.
For more information, see Create and manage tables in SQL, Visually create and manage tables, Database change management, and Create a view.
Manage tickets
A project member without the database editing permission can submit a ticket to execute a data export, data import, data mocking, database change, online schema change, SQL plan, or data archiving task.
Manage members
The project admin can add, edit, or remove members as well as manage database and table permissions on the Members tab.
Configure message notifications
A project member can specify the ticket events for which notifications are sent and add notification channels such as DingTalk, Lark, WeCom, and custom webhooks on the Notification tab. When a specified ticket event occurs, ODC sends a change message to notify the project member. For more information about notification management, see Overview.
Configure project settings
The project admin can rename the project and archive the project on the project settings page.