


This topic describes how to configure a custom channel.
Parameters
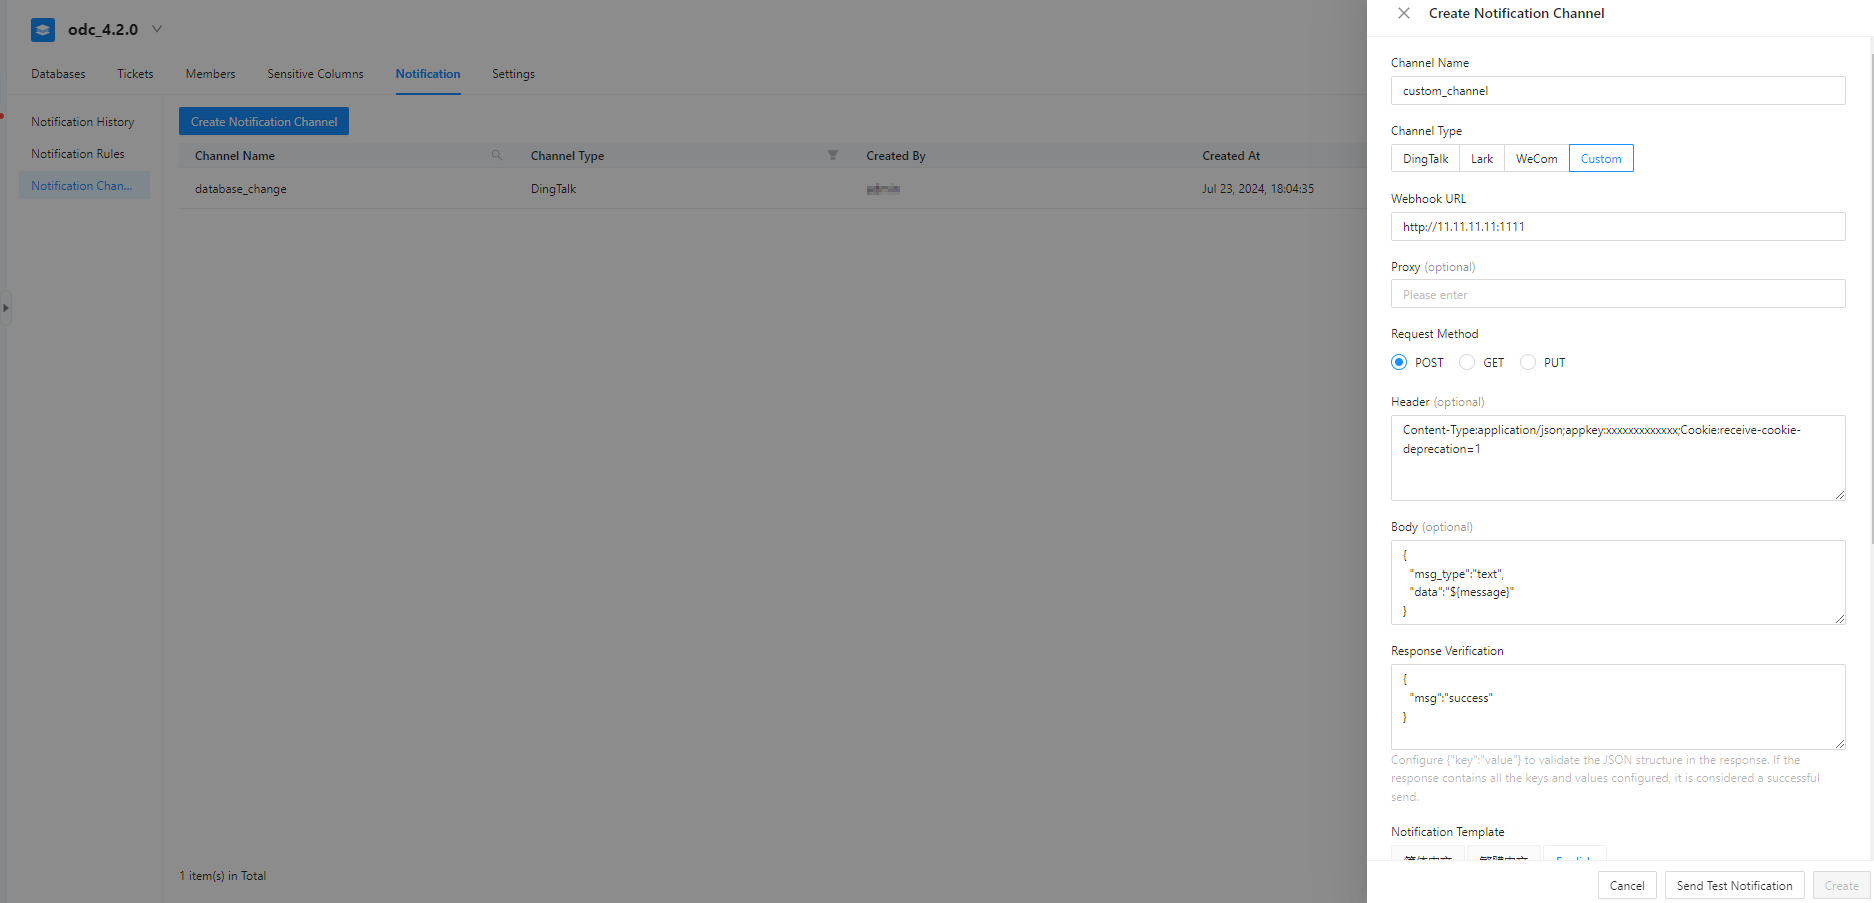
The following table describes the parameters to be specified when Channel Type is HTTP.
Parameter |
Description |
|---|---|
| Webhook URL | The destination URL for receiving notifications, which must start with http:// or https://. |
| Proxy (optional) | The proxy server that sends notifications, in the format of http://ip:port. In the format, ip represents the IP address of the proxy server, and port represents the port that is assigned to send notifications. For example, if the IP address of the proxy server is xxx.xxx.xxx.xxx and port 80 is assigned, you can set Proxy to http://xxx.xxx.xxx.xxx:80. |
| Request Method | Select the request method as needed. The default value is POST. |
| Header | Enter the template for HTTP headers. Separate the parameters with semicolons (;), for example, Content-Type:application/json;charset:utf-8. |
| Body | Specify the template for the notification content. If this parameter is not specified, no HTTP body is used. You can use a template to reference variables. For the list of variables, see Create a notification channel. |
| Response Verification | Responses vary depending on channels. You must configure the response verification information for ODC to accurately determine whether a notification is successfully sent.
|
Example
As shown in the preceding figure, if the task ID corresponding to the event is 10001, ODC will send a request similar to the following one to the specified webhook. The value of the data field is the generated notification.
curl -XPOST -H "Context-Type:application/json" -H "charset:utf-8" -H "appkey:xxxxxx" http://xxx.xxx.xxx.xxx:80 -d '{"jsonrpc":" 2.0","params": {"output":" extend"},"auth":" *******","data":" ..." ,"task_id":" 10001"}'
If the received response contains the key-value pair "message":" success", ODC considers that the notification is successfully sent.