


OceanBase Cloud supports connecting to an OceanBase Cloud database by using the official MySQL JDBC driver. This topic describes how to connect to an OceanBase Cloud database by using MySQL Connector/J.
 Download the mysql-connector/j sample project
 Prerequisites
- You have downloaded and installed IntelliJ IDEA.
- You have downloaded JDK 1.8.0.
- You have downloaded and configured Maven in IntelliJ IDEA.
- You have downloaded the sample code for the project described in this topic.
Version compatibility
MySQL Connector/J Version |
Recommended Version |
Description |
|---|---|---|
| 5.x | 5.1.40 ~ 5.1.49 | Stable version |
| 8.x | 8.0.7 ~ 8.0.25, 8.2.0 ~ 8.4.0 | Supports new features |
Features
- Supports standard JDBC API
- Provides connection pool management
- Supports SSL connections
- Supports batch operations
- Supports prepared statements
Post-installation checks
Check whether JDK is installed:
java -versionCheck whether Maven is installed:
mvn -version(Optional) Check whether Maven is correctly configured in IntelliJ IDEA:
This topic provides a simple sample project for your reference. If you want to develop more complex samples, you can download the Maven version suitable for your development environment and configure it in IntelliJ IDEA.
Check whether Maven is installed:
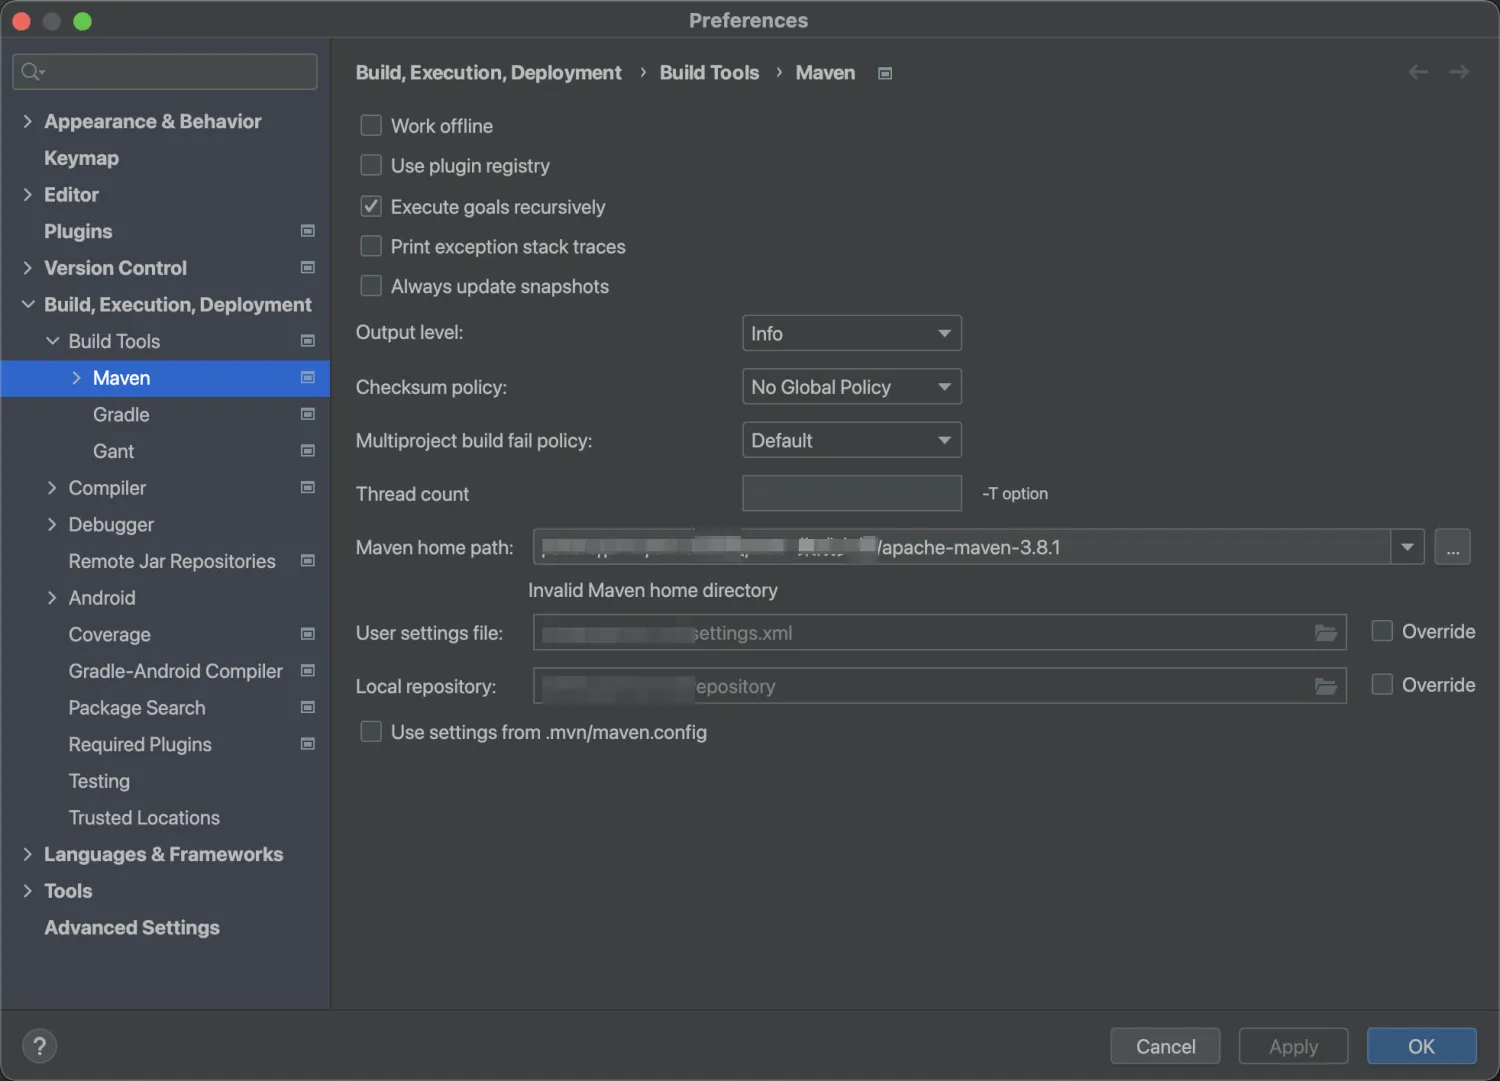
mvn -versionOpen IntelliJ IDEA and choose IntelliJ IDEA > Settings > Build,Execution,Development > Build Tools > Maven. Set the Maven home path to the installation path of Maven.
Procedure
- Obtain the connection information of the cloud database of OceanBase Cloud.
- Modify the downloaded sample code.
- Run the sample code.
Create a Java application
Step 1: Obtain the database connection string
Log in to the OceanBase Cloud console. In the instance list, expand the information of the target instance, and in the target tenant, choose Connect > Get Connection String.
For more information, see Obtain a connection string.
Fill in the following URL with the information of the created OceanBase Cloud database.
obclient -h$host -P$port -u$user_name -p$password -D$database_nameParameter description:
$host: the connection address of the OceanBase Cloud database, for example,t********.********.oceanbase.cloud.$port: the connection port of the OceanBase Cloud database, which is 3306 by default.$database_name: the name of the database to be accessed.Notice
The account for connecting to the tenant must have the
CREATE,INSERT,DROP, andSELECTprivileges on the database. For more information about account privileges, see Create and manage an account.$user_name: the account for accessing the database, specified by the-uparameter.$password: the password of the account.
Here is an example:
obclient -h t********.********.oceanbase.cloud -P3306 -u mysql001 -p****** -D test
Step 2: Modify the sample project code
Decompress the downloaded sample project.
Open IntelliJ IDEA, choose File > Open, and add the sample project file.
Modify the database connection parameters in the JDBCTest file of the JDBCDemo > src > main > java directory based on the connection string obtained in Step 1.
Modify the database connection parameters in the code. Reference the following fields and concatenation method, and use the values obtained from the database connection string in Step 1.
connection = DriverManager.getConnection("jdbc:mysql://{host}:{port}/{dbname}?user={username}&password={******}") //Example jdbc:mysql://t********.********.oceanbase.cloud:3306/test?user=r***&password=******`host: the connection address of the OceanBase Cloud database, specified by the
-hparameter.port: the connection port of the OceanBase Cloud database, specified by the
-Pparameter.dbname: the name of the database to be accessed, specified by the
-Dparameter.username: the account for accessing the database, specified by the
-uparameter.password: the password of the account, specified by the
-pparameter.
After the modification, the code is as follows:
//Example
Connection connection = DriverManager.getConnection("jdbc:mysql://t********.********.oceanbase.cloud:3306/test?user=r***&password=******");
Notice
If you use MySQL Connector/J 8.x, the account password must not contain
#. Otherwise, an error will be returned when you run the sample project.
After you install MySQL Connector/J 5.1.47 and configure the environment, you can use the following sample code in the Test.java file to connect to and use the database.
Notice
If you use MySQL Connector/J 8.x, replace com.mysql.jdbc.Driver with com.mysql.cj.jdbc.Driver in Class.forName("com.mysql.jdbc.Driver").
Here is the complete code:
import java.sql.Connection;
import java.sql.DriverManager;
import java.sql.ResultSet;
import java.sql.Statement;

public class JDBCTest {

    public static void main(String[] args) {
        try {
            //load driver
            Class.forName("com.mysql.jdbc.Driver"); //mysql-jdbc 5
//            Class.forName("com.mysql.cj.jdbc.Driver"); //mysql-jdbc 8

            //create connection
            Connection connection = DriverManager.getConnection("jdbc:mysql://t********.********.oceanbase.cloud:3306/test?user=r***&password=");
            System.out.println("jdbc version : " + connection.getMetaData().getDriverVersion());
            Statement stmt = connection.createStatement();

            //create table
            stmt.execute("drop table if exists test");
            stmt.execute("create table test (id int, name varchar(25))");
            System.out.println("create table successfully");

            //insert data
            stmt.execute("insert into test values (1, 'aaa'),(2, 'bbb')");
            System.out.println("insert data successfully");

            //query data
            System.out.println("query data : ");
            ResultSet rs = stmt.executeQuery("select * from test");
            while (rs.next()) {
                System.out.println(rs.getString("id") + "\t" + rs.getString("name"));
            }

            //update data
            stmt.execute("update test set name = 'bbb' where id = 1");
            System.out.println("update data successfully");

            //query data after update
            System.out.println("query data after update : ");
            rs = stmt.executeQuery("select * from test");
            while (rs.next()) {
                System.out.println(rs.getString("id") + "\t" + rs.getString("name"));
            }

            //delete data
            stmt.execute("delete from test where id = 1");
            System.out.println("delete data successfully");

            //query data after delete
            System.out.println("query data after delete : ");
            rs = stmt.executeQuery("select * from test");
            while (rs.next()) {
                System.out.println(rs.getString("id") + "\t" + rs.getString("name"));
            }

            //drop table
            stmt.execute("drop table test");
            //close
            rs.close();
            stmt.close();
            connection.close();
        } catch (Exception e) {
            System.out.println("error!");
            e.printStackTrace();
        }
    }
}
Step 3: Run the application
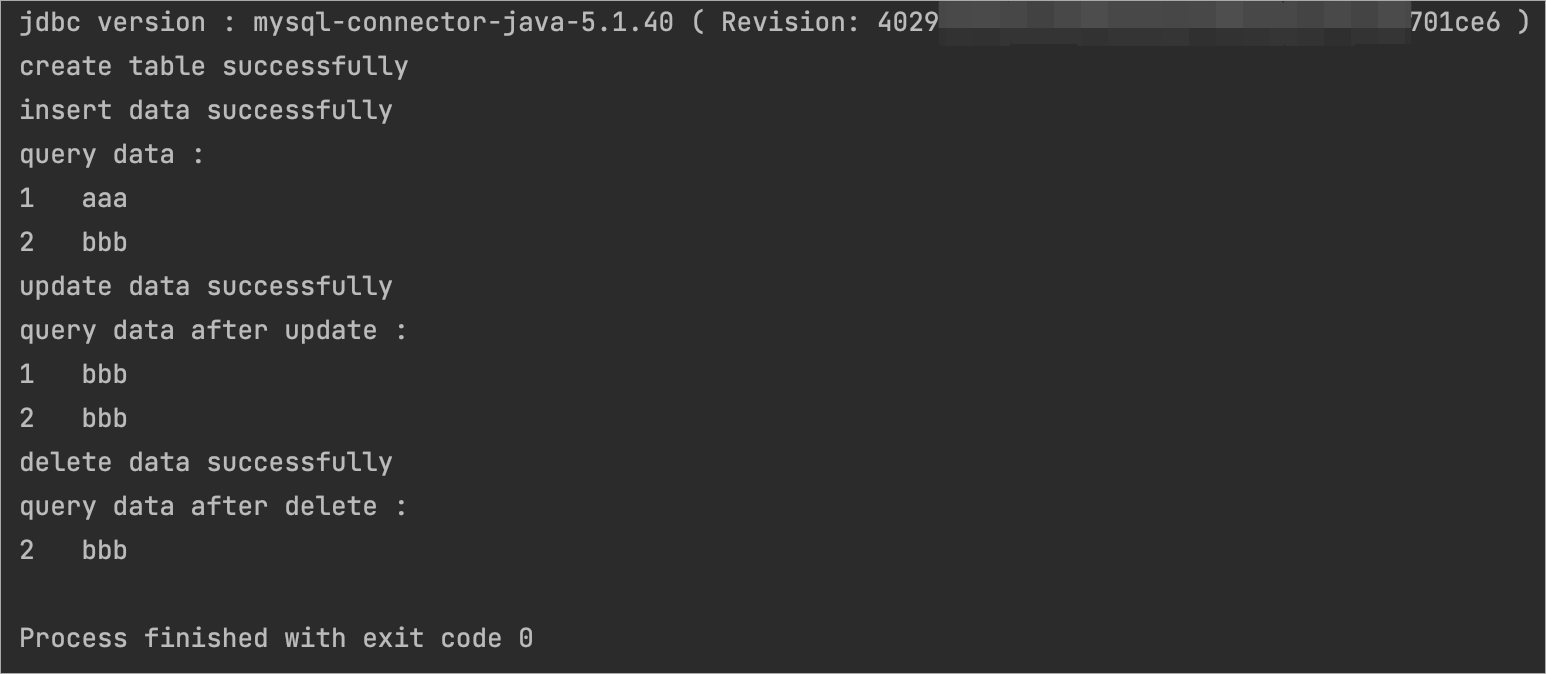
Run the sample project in IntelliJ IDEA. If the following result is returned, the database connection is successful and the sample project is executed correctly.
Project code
Click mysql-connector/j to download the project code, which is a compressed file named JDBCDemo.zip.
After decompressing the file, you will find a folder named JDBCDemo. The directory structure is as follows:
JDBCDemo
├── src
│   └── main
│       └── java
│           └── JDBCTest.java
└── pom.xml
File description:
src: the root directory for source code.main: the main code directory, containing the core logic of the application.java: the directory for Java source code.JDBCTest.java: the main class, which includes logic for creating tables and inserting data.pom.xml: the configuration file for the Maven project, used to manage project dependencies and build settings.
Introduction to the pom.xml file
The pom.xml file is a configuration file for Maven projects. It defines the dependencies, plugins, and build rules of the project. Maven is a Java project management tool that can automatically download dependencies, compile, and package projects.
The code in the pom.xml file in this topic mainly includes the following parts:
The file declaration statement.
This statement declares that the file is an XML file, using XML version
1.0and character encodingUTF-8.Sample code:
<?xml version="1.0" encoding="UTF-8"?>The POM namespace and POM model version.
- Use
xmlnsto specify the POM namespace ashttp://maven.apache.org/POM/4.0.0. - Use
xmlns:xsito specify the XML namespace ashttp://www.w3.org/2001/XMLSchema-instance. - Use
xsi:schemaLocationto specify the POM namespace ashttp://maven.apache.org/POM/4.0.0and the location of the POM XSD file ashttp://maven.apache.org/xsd/maven-4.0.0.xsd. - Use the
<modelVersion>element to specify the POM model version used by the POM file as4.0.0.
Sample code:
<project xmlns="http://maven.apache.org/POM/4.0.0" xmlns:xsi="http://www.w3.org/2001/XMLSchema-instance" xsi:schemaLocation="http://maven.apache.org/POM/4.0.0 http://maven.apache.org/xsd/maven-4.0.0.xsd"> <modelVersion>4.0.0</modelVersion> <!-- Other configurations --> </project>- Use
Basic information.
- Use
<groupId>to specify the project group ascom.example. - Use
<artifactId>to specify the project name asJDBCDemo. - Use
<version>to specify the project version as1.0-SNAPSHOT.
Sample code:
<groupId>org.example</groupId> <artifactId>JDBCDemo</artifactId> <version>1.0-SNAPSHOT</version>- Use
The components that the project depends on.
Add the
mysql-connector-javadependency library to interact with the database:Note
This part of the code defines that the project depends on MySQL Connector/J V5.1.40. For information about other versions, see MySQL Connector/J.
- Use
<groupId>to specify the dependency group asmysql. - Use
<artifactId>to specify the dependency name asmysql-connector-java. - Use
<version>to specify the dependency version as5.1.40.
Sample code:
<dependency> <groupId>mysql</groupId> <artifactId>mysql-connector-java</artifactId> <version>5.1.40</version> </dependency>- Use
JDBCTest.java
The JDBCTest.java file is part of the sample program. It demonstrates how to perform database operations using MySQL Connector/J. The file first specifies the database connection information and then creates a JDBCTest object to perform database operations. The code also includes examples of creating tables, inserting data, and querying data.
The JDBCTest.java file contains code that is divided into the following sections:
Import the Java classes needed for using JDBC API in the Java program.
- Connection is used to establish a connection between an application and a database.
- DriverManager is responsible for managing a set of JDBC drivers.
- A ResultSet is used to handle data returned by an SQL query.
- Statement is used to execute static SQL statements and to return the execution results.
The following sample code shows how to create an external table:
import java.sql.Connection;
import java.sql.DriverManager;
import java.sql.ResultSet;
import java.sql.Statement;
Create a
JDBCTestclass and define amainmethod.- Create a class named
JDBCTestto serve as the program's entry point. Ensure the class name matches the file name. - Define a public static method
mainas the starting point for program execution. - Other database operations.
Sample code:
public class Main { public static void main(String[] args) { // Database connection information // create a data source // Create a table. // Insert data into the collection // Update data // Delete data } }- Create a class named
Define the database connection information.
- Use
Class.forName()to load and register the MySQL JDBC driver. - The
DriverManager.getConnection()method defines the URL, username, and password for connecting to the database. You need to replace$host,$port,$database_name,$user_name, and$passwordwith the actual database connection information.
Code:
    Class.forName("com.mysql.jdbc.Driver"); //mysql-jdbc 5
    //Class.forName("com.mysql.cj.jdbc.Driver"); //mysql-jdbc 8
    Connection connection = DriverManager.getConnection("jdbc:mysql://t********.********.oceanbase.cloud:3306/test?user=meYSQL001&password=********");
Parameter Description:
$host: the address for connecting to an OceanBase Cloud database, such ast********.********.oceanbase.cloud.$port: The port for connecting to a MySQL server on the cloud. Default port number is 3306.$database_name: the name of the database to be accessed.$user_name: the username for accessing the database.$password: specifies the account password.
- Use
Create and execute an SQL statement.
    Statement stmt = connection.createStatement();
    stmt.execute("...");
Create a table.
The code is as follows:
    // Drop the table named "test" if it exists by using an SQL statement.
    stmt.execute("drop table if exists test");
    // Create a new table named "test" with two fields: "id" of integer type and "name" of character type.
    stmt.execute("create table test (id int, name varchar(25))");
            // Print a message indicating that the table was created successfully.
    System.out.println("create table successfully");
Insert data.
Here is the sample code:
    // Insert two rows of data into the "test" table
    stmt.execute("insert into test values (1, 'aaa'),(2, 'bbb')");
    // Print the message indicating that the data was inserted.
    System.out.println("insert data successfully");
Query data.
Here is the code:
    // Log the data.
    System.out.println("query data : ");
    // Execute the query SQL statement to obtain all data from the "test" table.
    ResultSet rs = stmt.executeQuery("select * from test");
    // Traverse the result set.
    while (rs.next()) {
    // Print the "id" and "name" fields of each record.
    System.out.println(rs.getString("id") + "\t" + rs.getString("name"));
Update the data.
Here is the code:
    // Update the name of the record with the ID 1 in the "test" table to 'bbb'
    stmt.execute("update test set name = 'bbb' where id = 1");
    // Print a message indicating that the data has been updated successfully.
    System.out.println("update data successfully");
Delete data.
The sample code is as follows:
    // Drop the "test" table.
    stmt.execute("drop table test");
    // Close result set, statement, and database connection.
    rs.close();
    stmt.close();
    connection.close();
Exception handling.
Any exceptions that occur during the execution of the database operations are captured, and error information and stack trace details are printed.
Sample code:
    } catch (Exception e) {
    System.out.println("error!");
    e.printStackTrace();
    }
Full code snippet
<?xml version="1.0" encoding="UTF-8"?>
<project xmlns="http://maven.apache.org/POM/4.0.0"
         xmlns:xsi="http://www.w3.org/2001/XMLSchema-instance"
         xsi:schemaLocation="http://maven.apache.org/POM/4.0.0 http://maven.apache.org/xsd/maven-4.0.0.xsd">
    <modelVersion>4.0.0</modelVersion>

    <groupId>org.example</groupId>
    <artifactId>JDBCDemo</artifactId>
    <version>1.0-SNAPSHOT</version>

    <properties>
        <maven.compiler.source>8</maven.compiler.source>
        <maven.compiler.target>8</maven.compiler.target>
    </properties>

    <dependencies>
        <dependency>
            <groupId>mysql</groupId>
            <artifactId>mysql-connector-java</artifactId>
            <version>5.1.40</version>
        </dependency>
        <!--        <dependency>-->
        <!--            <groupId>com.mysql</groupId>-->
        <!--            <artifactId>mysql-connector-j</artifactId>-->
        <!--            <version>8.0.33</version>-->
        <!--        </dependency>-->
    </dependencies>
</project>
import java.sql.Connection;
import java.sql.DriverManager;
import java.sql.ResultSet;
import java.sql.Statement;

public class JDBCTest {

    public static void main(String[] args) {
        try {
            //load driver
            Class.forName("com.mysql.jdbc.Driver"); //mysql-jdbc 5
//            Class.forName("com.mysql.cj.jdbc.Driver"); //mysql-jdbc 8

            //create connection
            Connection connection = DriverManager.getConnection("jdbc:mysql://{host}:{port}/{dbname}?user={username}&password={******}");
            System.out.println("jdbc version : " + connection.getMetaData().getDriverVersion());
            Statement stmt = connection.createStatement();

            //create table
            stmt.execute("drop table if exists test");
            stmt.execute("create table test (id int, name varchar(25))");
            System.out.println("create table successfully");

            //insert data
            stmt.execute("insert into test values (1, 'aaa'),(2, 'bbb')");
            System.out.println("insert data successfully");

            //query data
            System.out.println("query data : ");
            ResultSet rs = stmt.executeQuery("select * from test");
            while (rs.next()) {
                System.out.println(rs.getString("id") + "\t" + rs.getString("name"));
            }

            //update data
            stmt.execute("update test set name = 'bbb' where id = 1");
            System.out.println("update data successfully");

            //query data after update
            System.out.println("query data after update : ");
            rs = stmt.executeQuery("select * from test");
            while (rs.next()) {
                System.out.println(rs.getString("id") + "\t" + rs.getString("name"));
            }

            //delete data
            stmt.execute("delete from test where id = 1");
            System.out.println("delete data successfully");

            //query data after delete
            System.out.println("query data after delete : ");
            rs = stmt.executeQuery("select * from test");
            while (rs.next()) {
                System.out.println(rs.getString("id") + "\t" + rs.getString("name"));
            }

            //drop table
            stmt.execute("drop table test");
            //close
            rs.close();
            stmt.close();
            connection.close();
        } catch (Exception e) {
            System.out.println("error!");
            e.printStackTrace();
        }
    }
}
Best Practices
Batch operations
Use batch processing to improve performance:
PreparedStatement pstmt = connection.prepareStatement("INSERT INTO test VALUES (?, ?)");
for (int i = 0; i < 1000; i++) {
    pstmt.setInt(1, i);
    pstmt.setString(2, "name" + i);
    pstmt.addBatch();
}
pstmt.executeBatch();
Preprocessing statements
Use prepared statements to prevent SQL injection:
PreparedStatement pstmt = connection.prepareStatement("SELECT * FROM test WHERE id = ?");
pstmt.setInt(1, 1);
ResultSet rs = pstmt.executeQuery();
FAQ
1. Connection timeout
Configure the connection timeout parameter:
jdbc:mysql://host:port/database?connectTimeout=30000&socketTimeout=60000
2. Character set
Set the correct character set:
jdbc:mysql://host:port/database?characterEncoding=utf8&useUnicode=true
3. SSL connection
Enable SSL connection:
jdbc:mysql://host:port/database?useSSL=true&requireSSL=true
4. Special characters in the account password
If the account password contains special characters (such as #), URL encoding is required:
String encodedPassword = URLEncoder.encode(password, "UTF-8");
Notice
When using MySQL Connector/J 8.x, avoid using the # character in the account password, as it may cause the connection to fail.
More information
For more information about how to create a Java sample application, see Java Sample Application in the open-source community of OceanBase Cloud.