


A cost unit contains the management and allocation information of resources under an organization and the related configurations.
Considerations
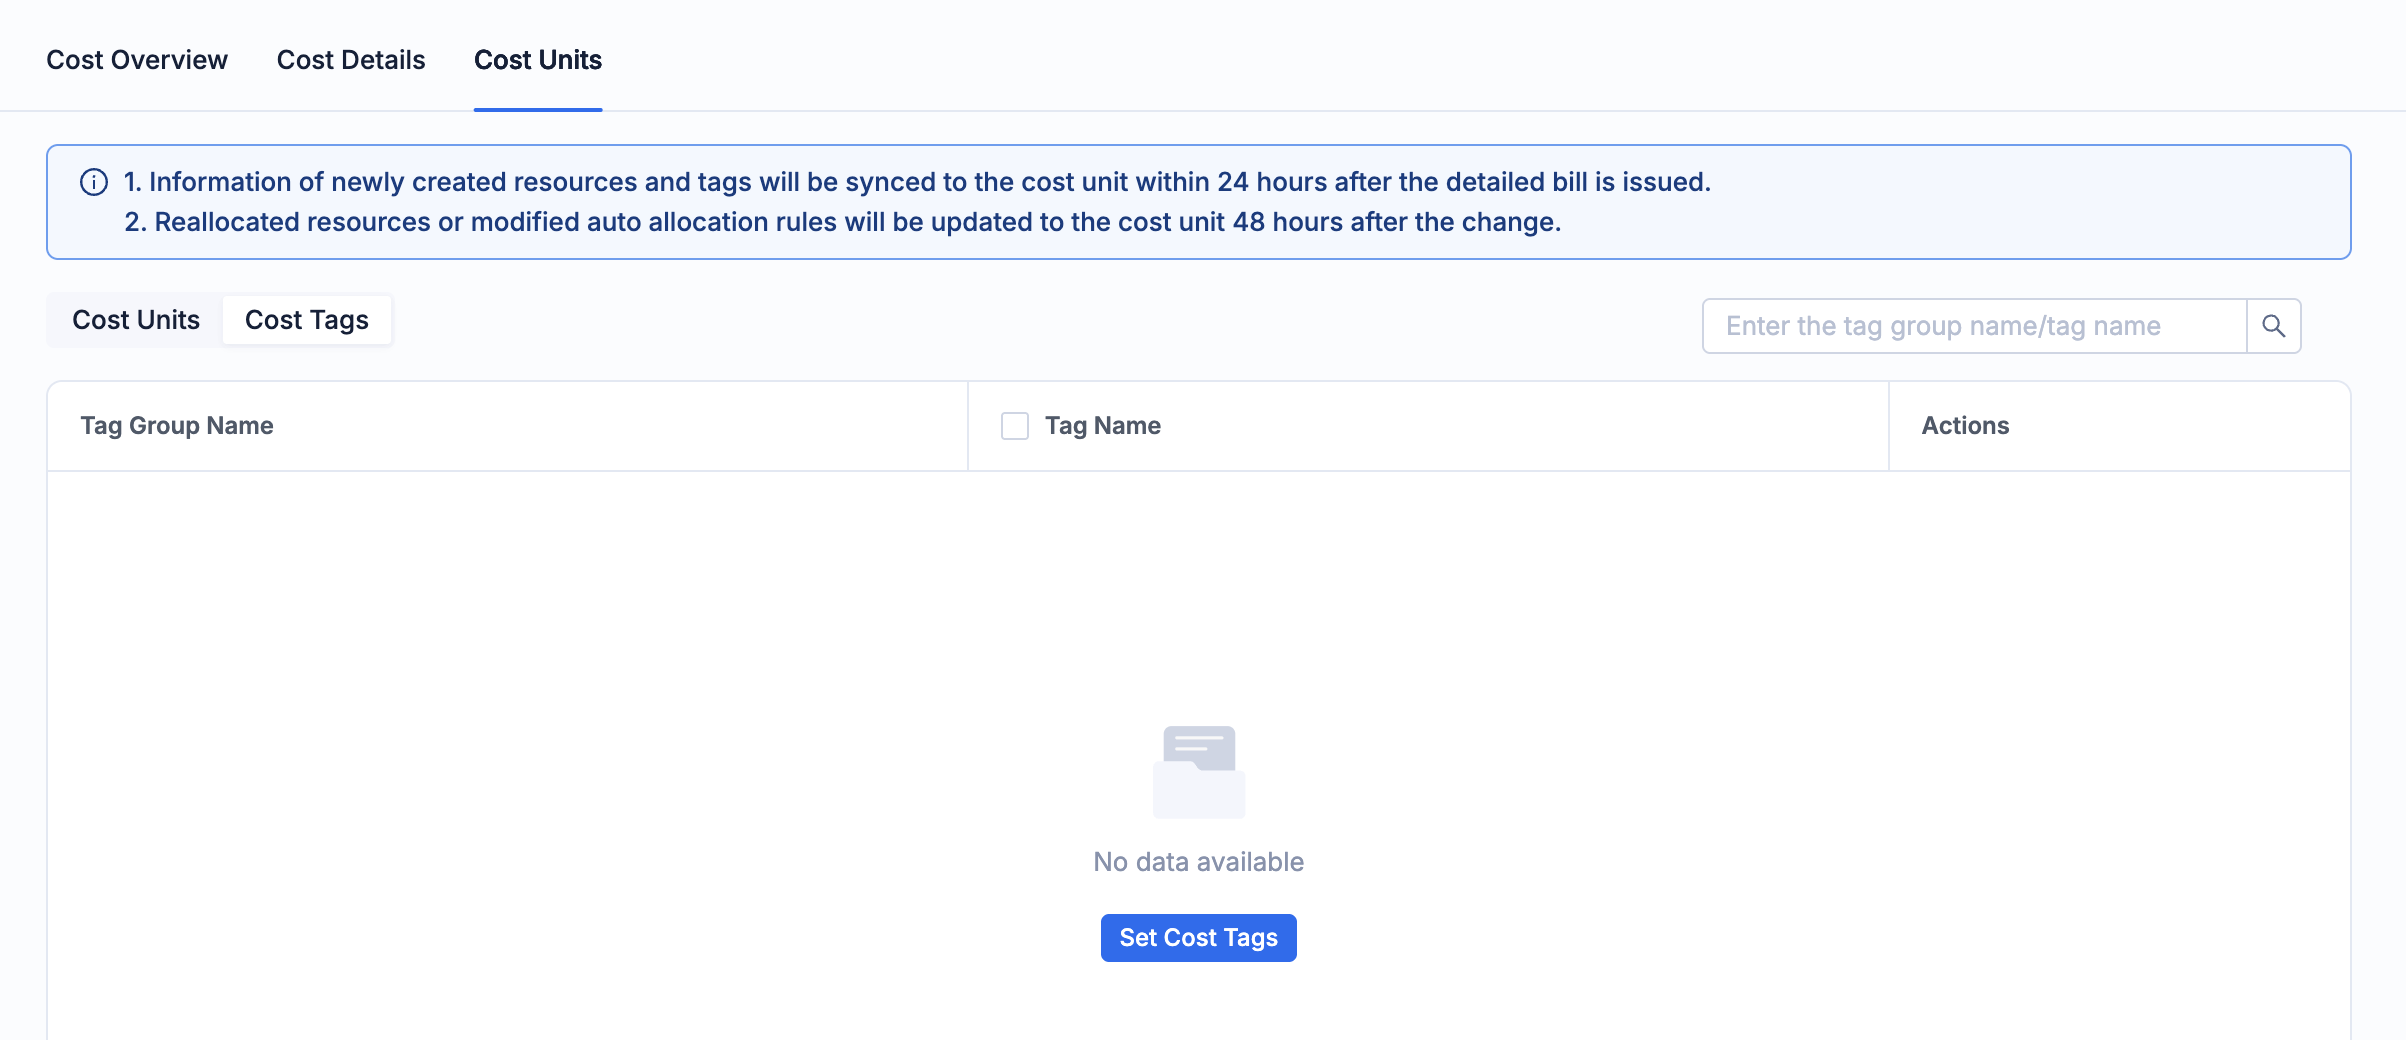
- Information of newly created resources and tags will be synchronized to the cost unit 24 hours after the detailed bill is issued.
- Reallocated resources or modified auto allocation rules will be updated to the cost unit 48 hours after the change is made.
View cost units
Log in to the OceanBase Cloud console.
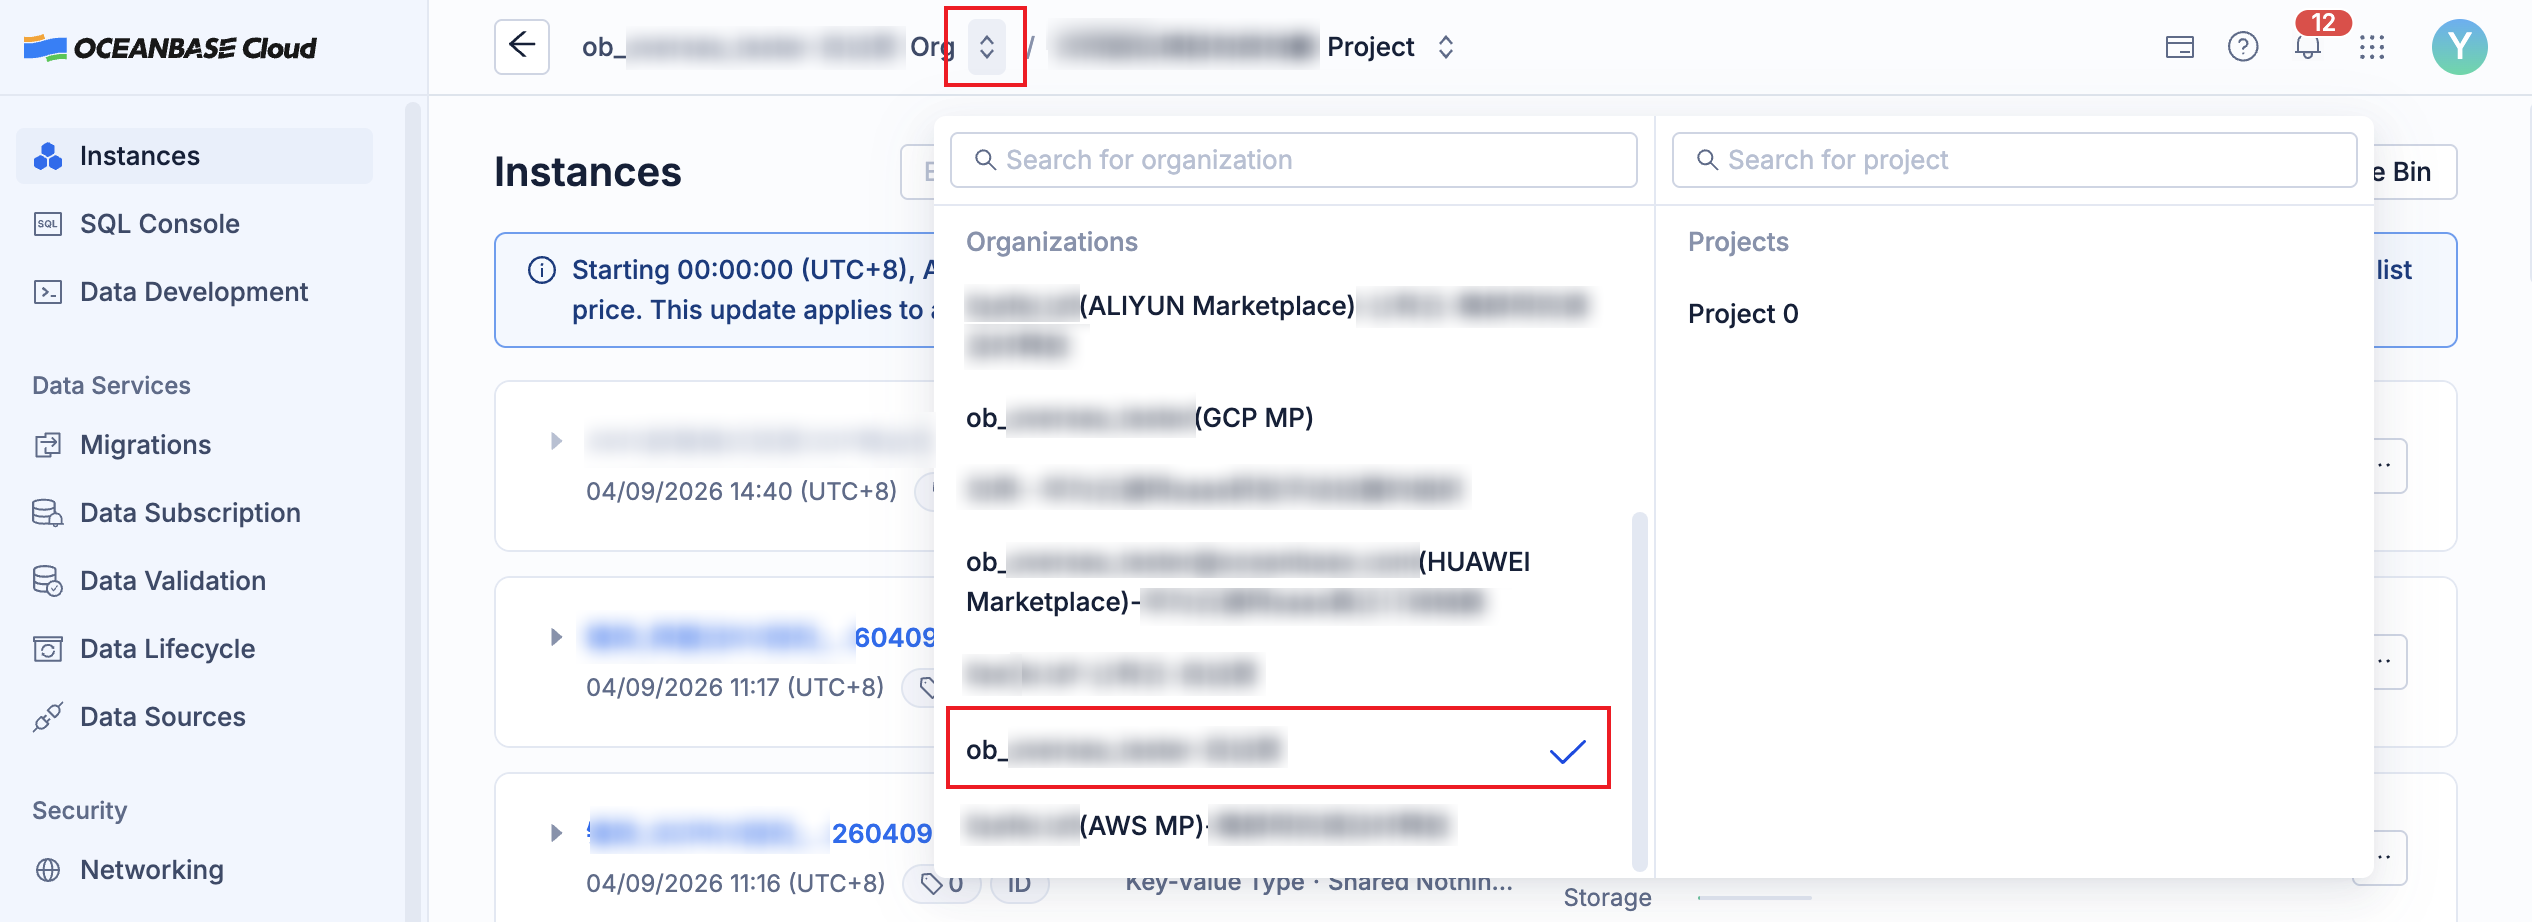
Click the arrow on the right of the organization name at the top of the page, and click the name of the target organization from the drop-down list.
In the left-side navigation pane, click Costs.
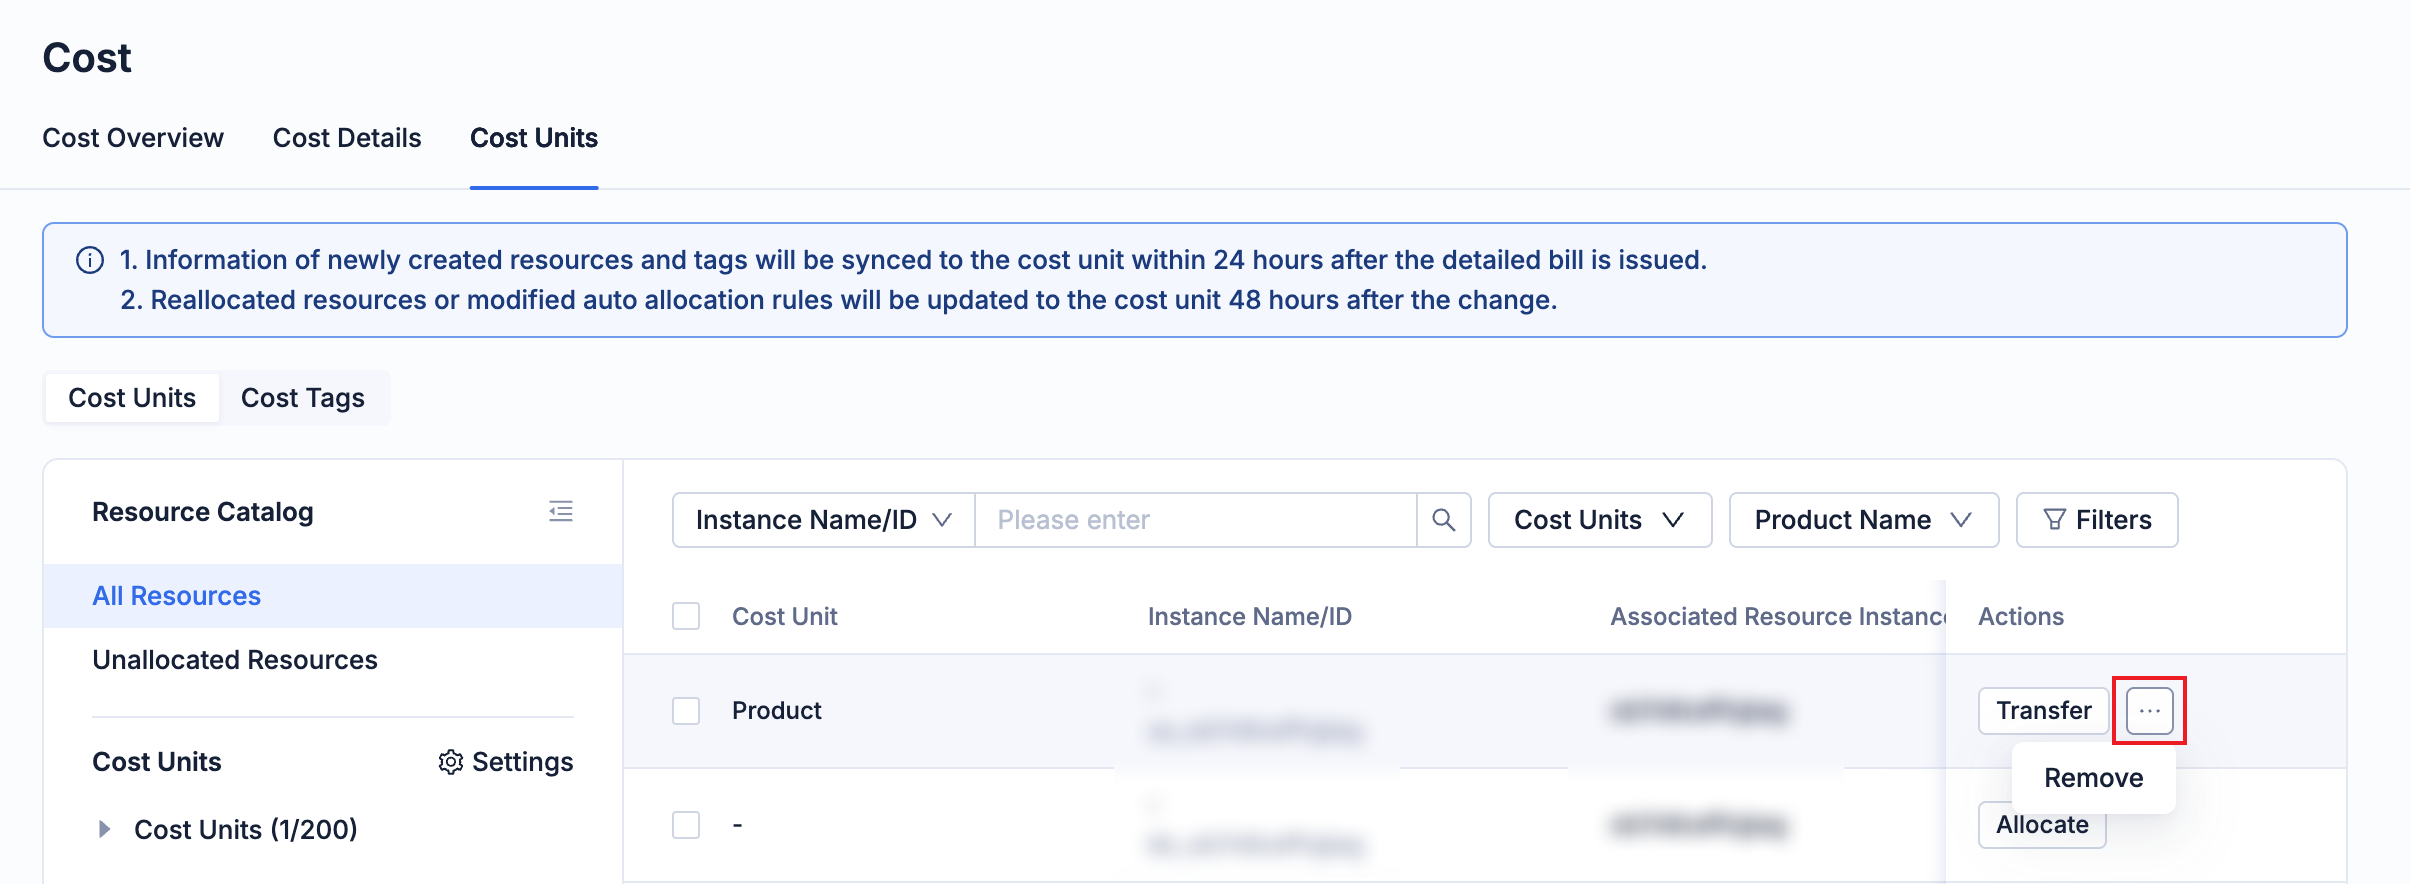
On the cost page, click Cost Units to view the information of all resources and cost units under the organization.

Resource catalog
- All Resources: Displays the information of all resources under the organization.
- Unallocated Resources: Displays the information of unallocated resources under the organization.
Cost units: The catalog tree of cost units that are configured. You can click a cost unit to view the information of resources that belong to the cost unit.
Cost tags: Tags used for cost allocation and analysis. These tags are simple tools for cost allocation.
Resource list: The detailed information of resources. You can filter resources by cost unit, product name, or item name. You can also query resources by instance name/ID or associated resource instance.
Allocate resources
You can allocate unallocated resources to a cost unit.
On the Cost Units tab, click Unallocated Resources under Resource Catalog to view the information of unallocated resources under the organization.
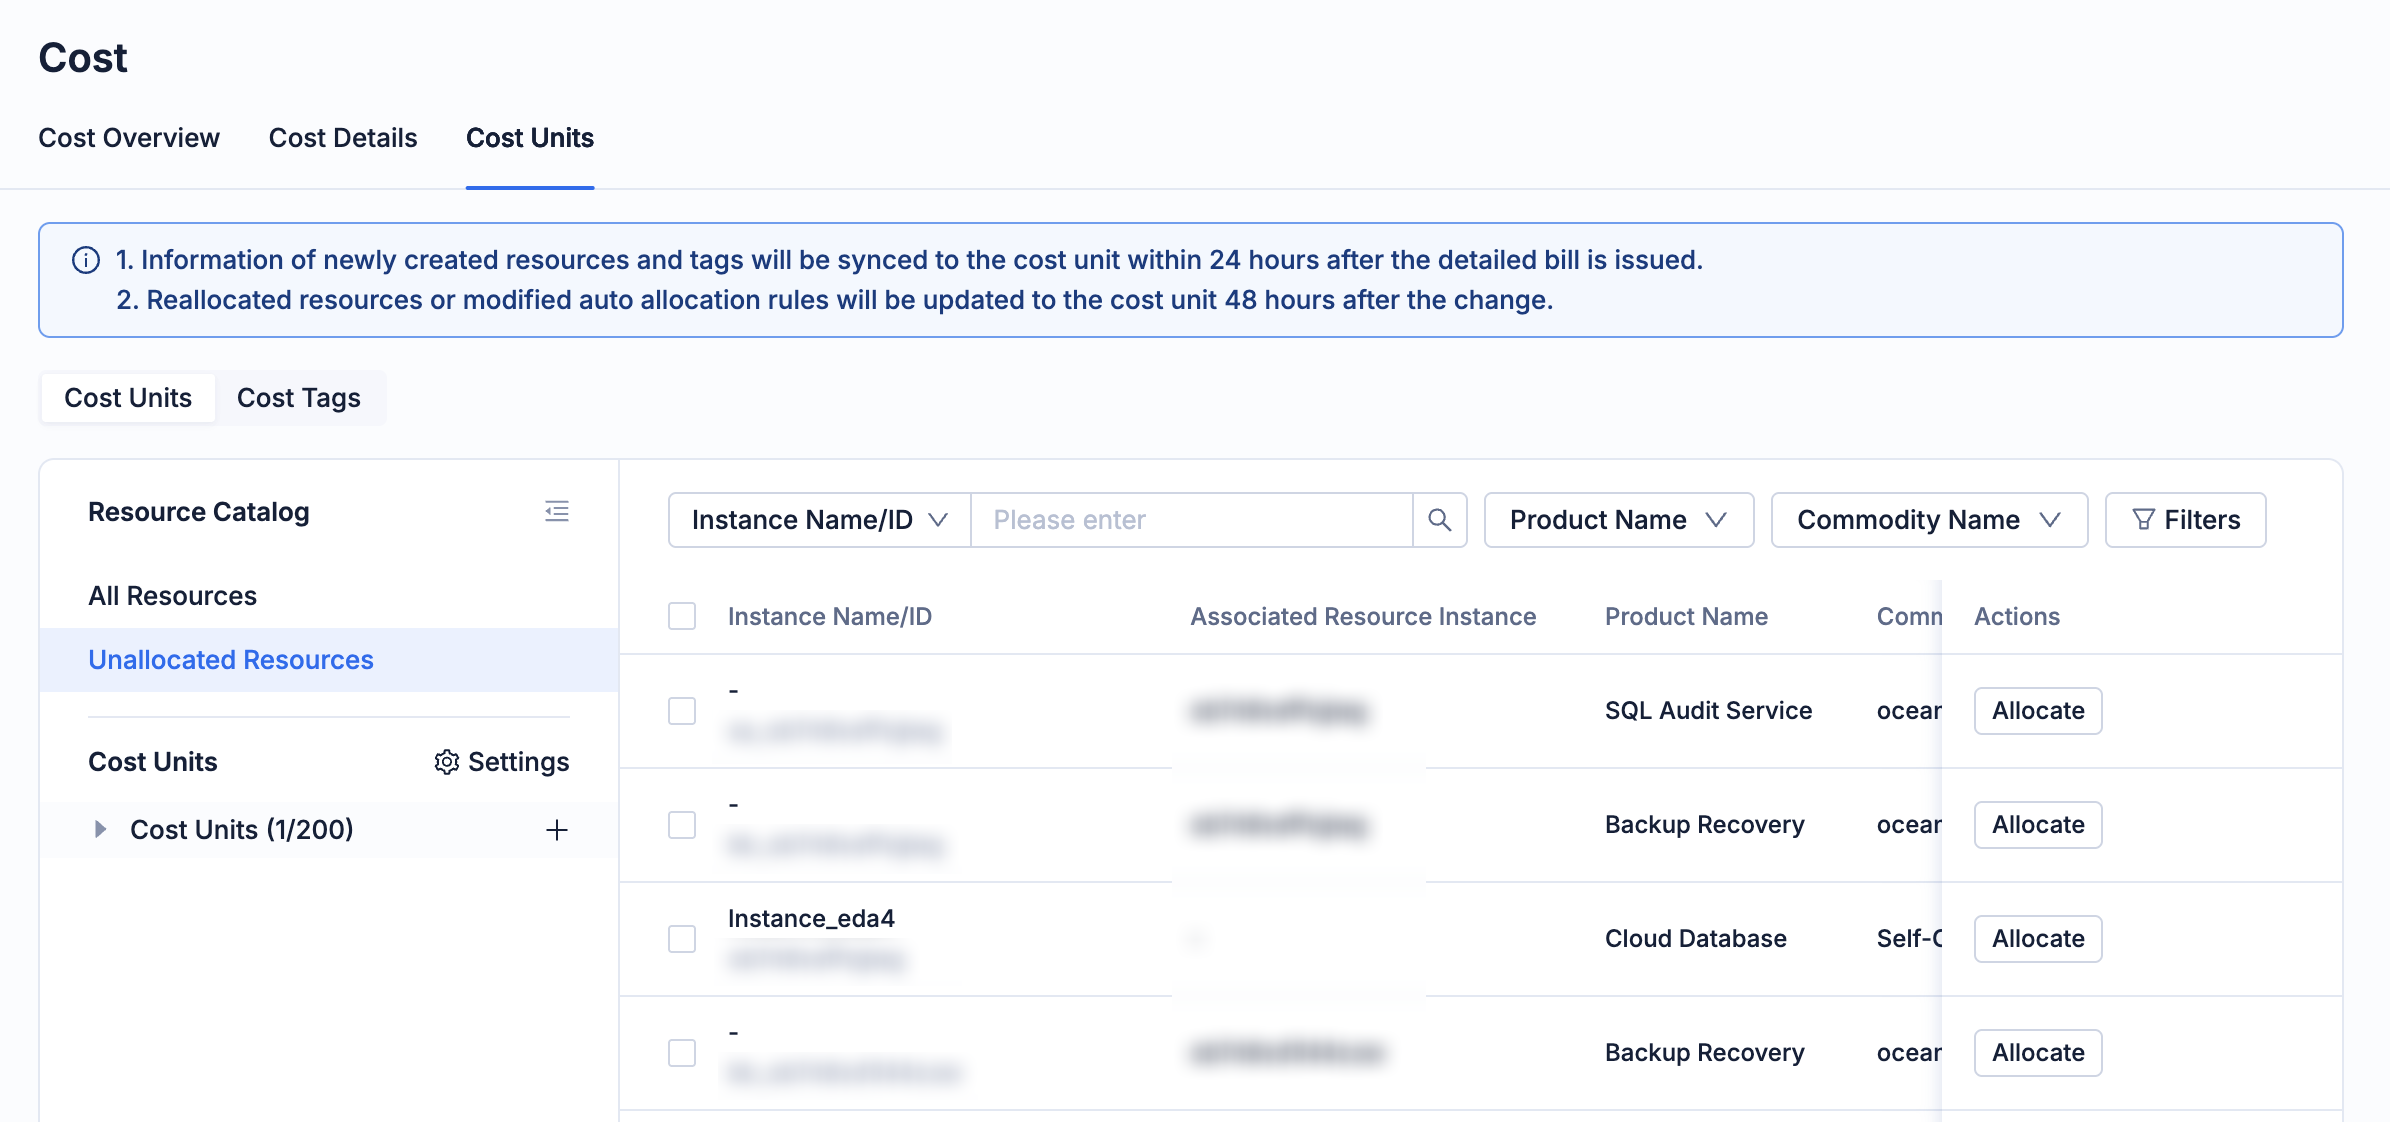
In the resource list, select the target instance resource and click Allocate in the Actions column.
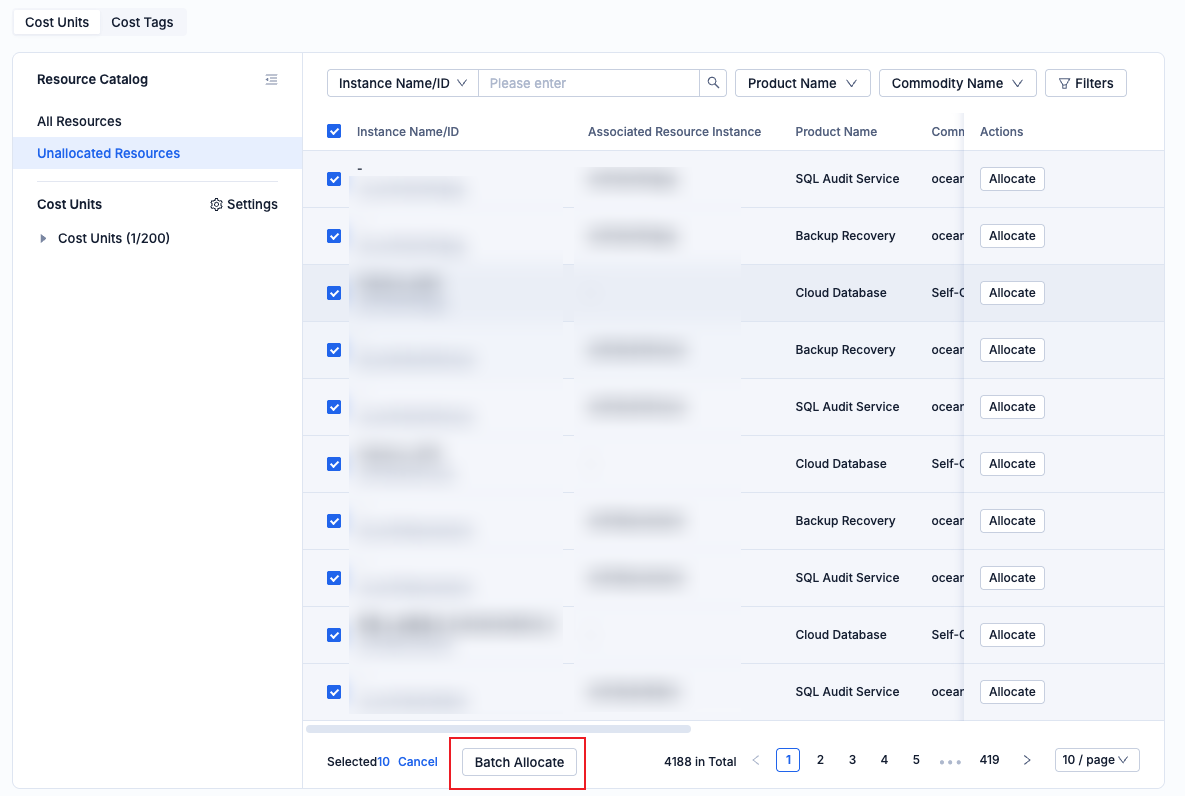
You can also select multiple instance resources in the resource list and click Batch Allocate at the bottom of the list.
In the allocation dialog box, select the target cost unit and click OK.
Transfer resources
You can transfer resources that are allocated to a cost unit to another cost unit.
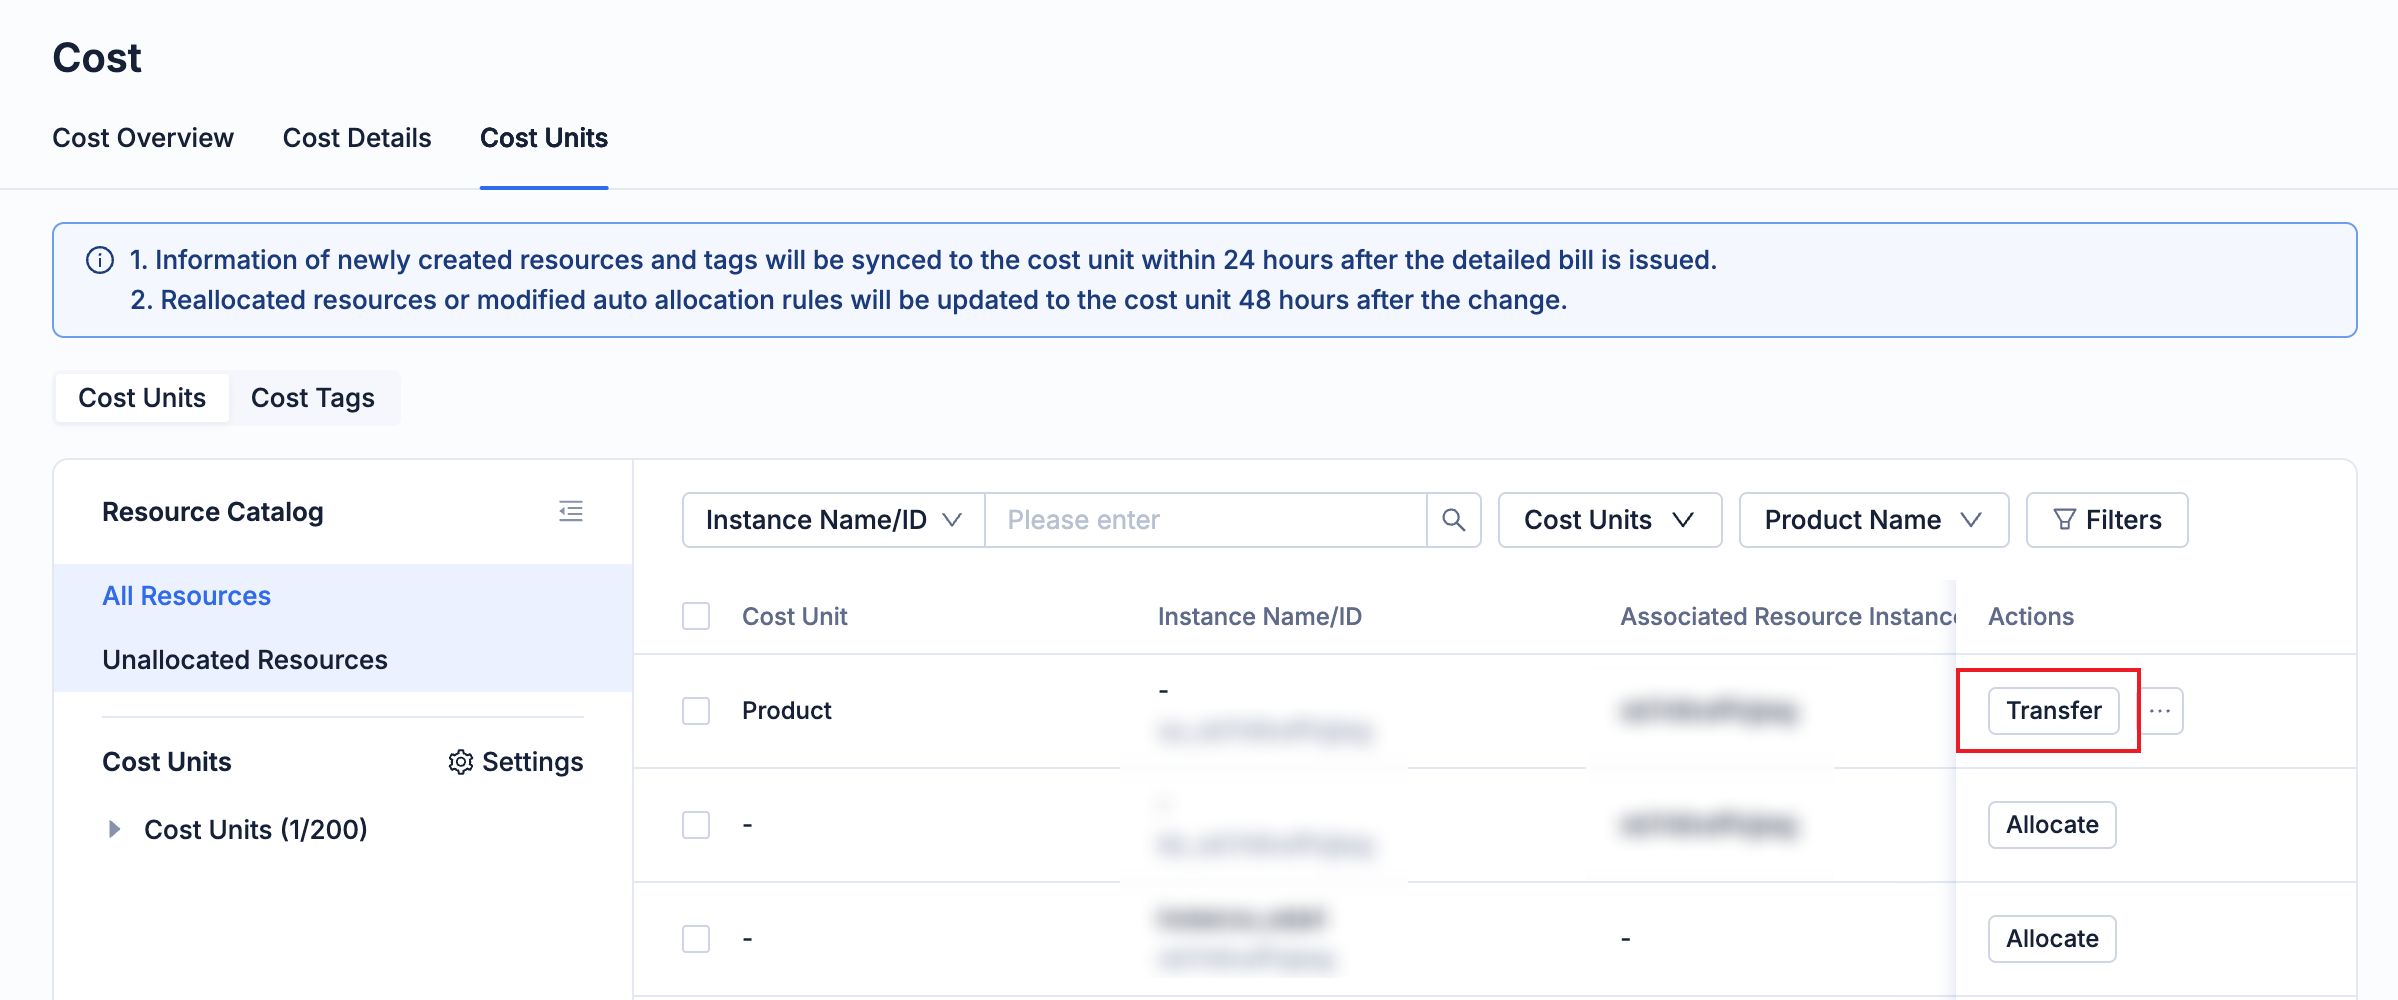
On the Cost Units tab, click All Resources under Resource Catalog to view the information of all resources under the organization. You can also click the name of a cost unit to view the resources allocated to the cost unit in the details page of the cost unit.
In the resource list, select the target instance resource and click Transfer in the Actions column.
You can also select multiple instance resources in the resource list and click More > Batch Transfer.
In the transfer dialog box, select the target cost unit and click OK.
Remove resources
You can remove resources that are allocated to a cost unit from the cost unit.
On the Cost Units tab, click All Resources under Resource Catalog to view the information of all resources under the organization. You can also click the name of a cost unit to view the resources allocated to the cost unit in the details page of the cost unit.
In the resource list, select the target instance resource and click ··· > Remove.
You can also select multiple instance resources in the resource list and click More > Batch Remove.
In the remove dialog box, click OK.
Cost unit configuration
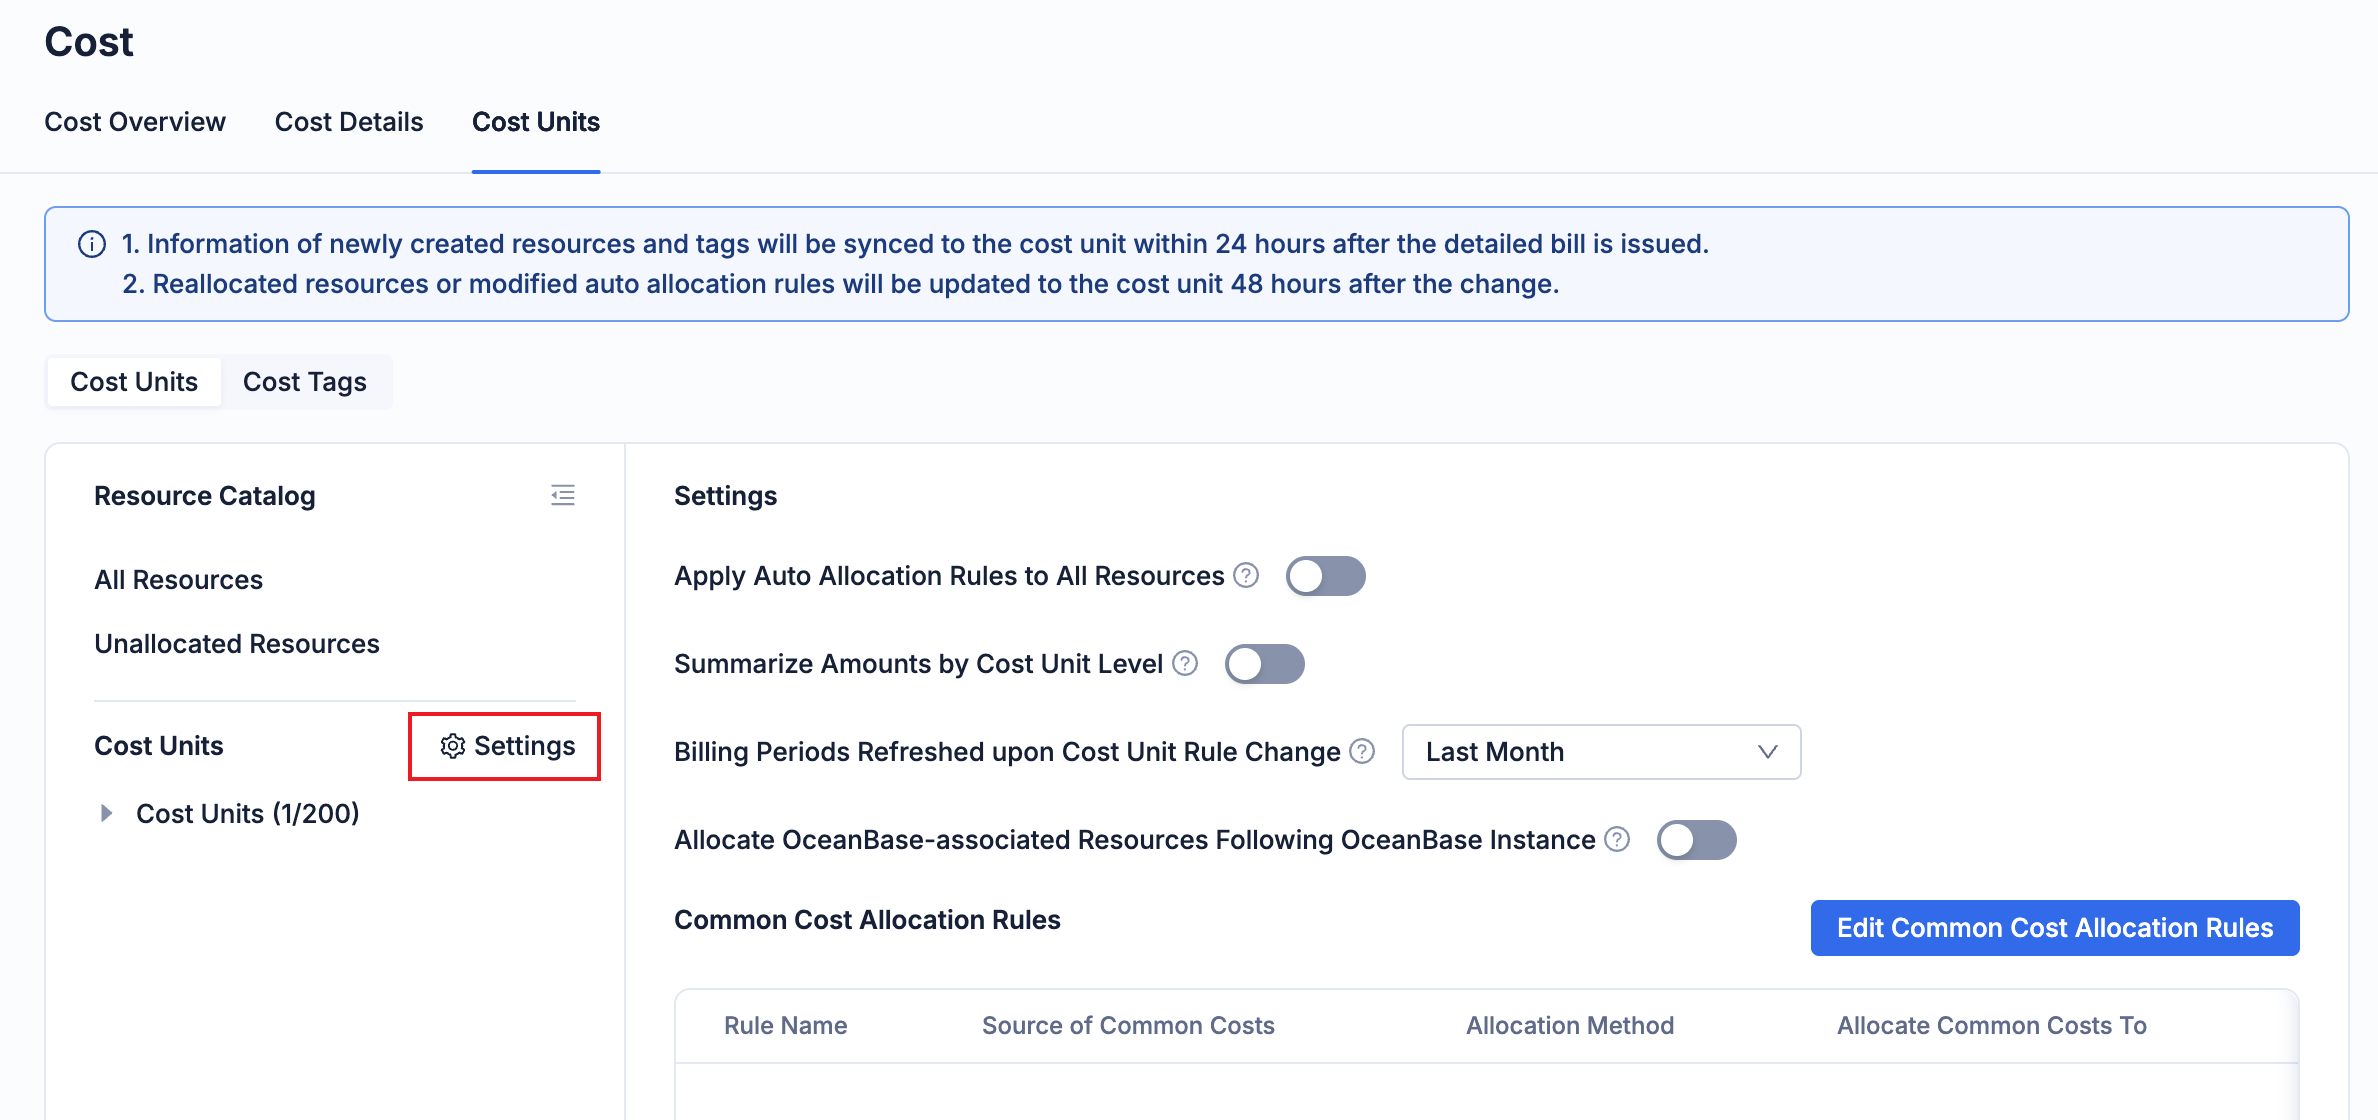
On the Cost Units tab, you can view the information of the cost units that have been configured. You can click the Settings button in the upper-right corner to configure some basic settings for the cost units.
Configuration item |
Description |
|---|---|
| Apply Auto Allocation Rules to All Resources | Configure whether the automatic allocation rules are enabled. For more information, see Configure automatic allocation rules.
|
| Summarize Amounts by Cost Unit Level |
|
| Billing Periods Refreshed upon Cost Unit Rule Change | After a cost unit rule is changed, the system refreshes the bill data for the latest N months based on the new rule. Historical billing periods are not refreshed. The N months include the current month. For example, if N is 1, it refers to the current month. |
| Allocate OceanBase-associated Resources Following OceanBase Instance | If this option is enabled, the associated resources of an OceanBase instance will automatically be allocated to the same cost unit as the instance. |
| Common Cost Allocation Rules | You can customize the common cost allocation rules. For more information, see Configure common cost allocation rules. |
Add a cost unit
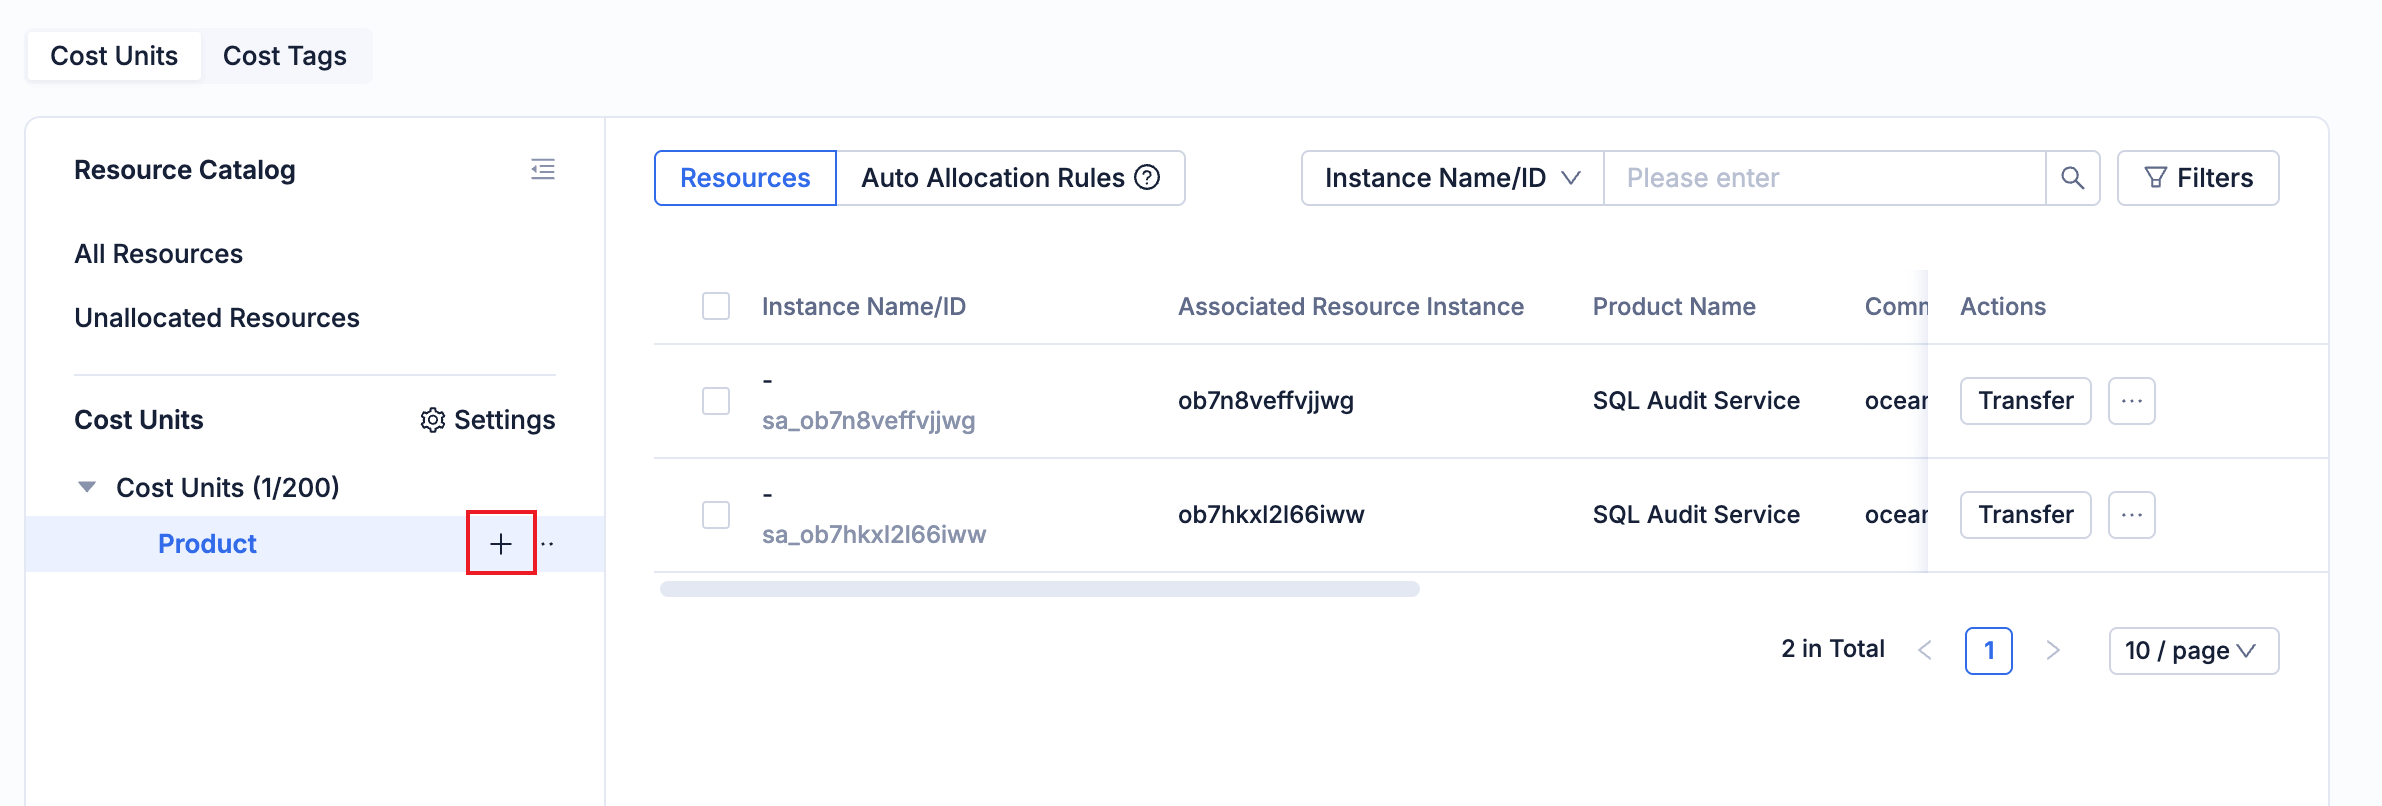
On the Cost Units tab, hover over the target cost unit and click the + button next to it to add a new cost unit (a child unit of the target cost unit).
In the dialog box that appears, enter the name and click OK.
After the cost unit is created, you can view it in the catalog tree.
Edit a cost unit
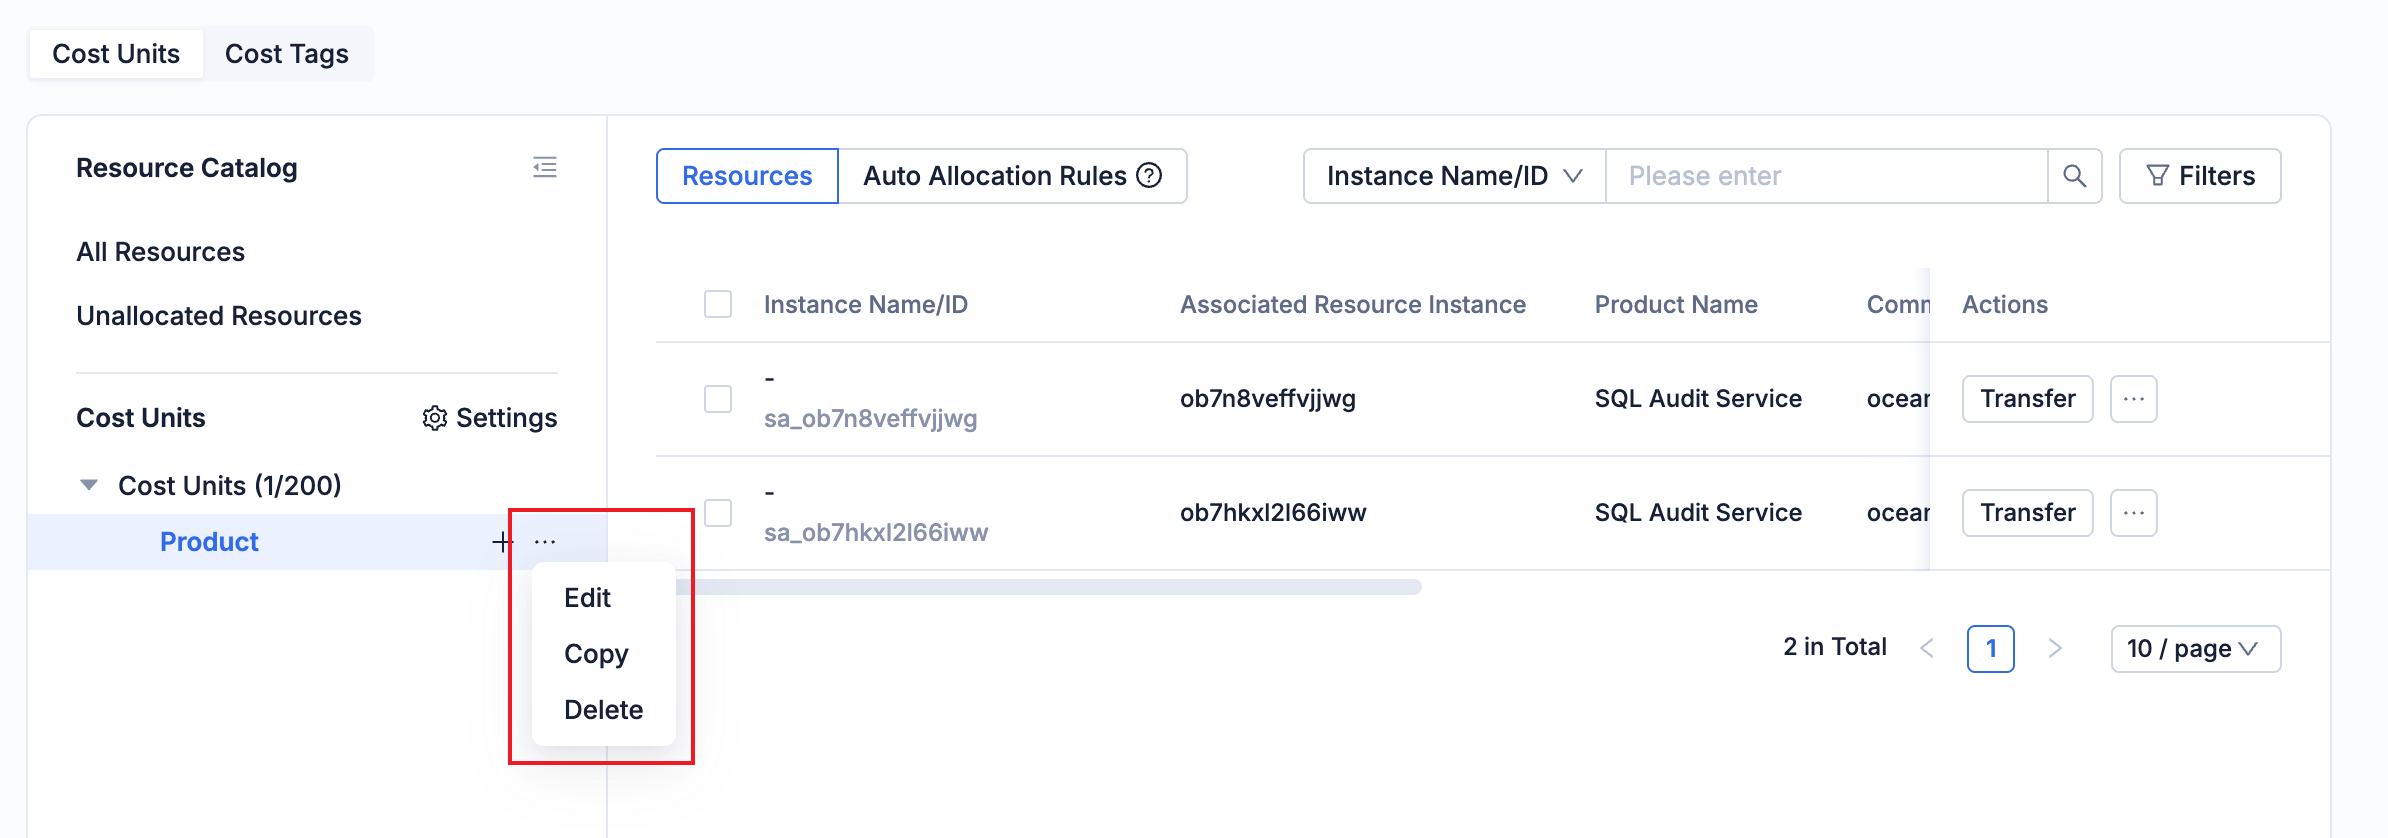
On the Cost Units tab, click Edit in the ··· menu next to the target cost unit to edit the cost unit.
In the dialog box that appears, enter the new name and click OK.
After the cost unit is edited, you can view it in the catalog tree.
Copy a cost unit
On the Cost Units tab, click Copy in the ··· menu next to the target cost unit to copy the cost unit. A new cost unit is created at the same level as the original one.
In the dialog box that appears, enter the name and click OK.
After the cost unit is copied, you can view it in the catalog tree.
Delete a cost unit
Notice
Once a cost unit is deleted, it cannot be restored. Proceed with caution.
On the Cost Units tab, click Delete in the ··· menu next to the target cost unit to delete the cost unit.
In the dialog box that appears, click Delete.
Configure automatic allocation rules
Note
- When a resource matches multiple automatic allocation rules, the rules are executed in the order of the cost unit catalog tree. Once a rule takes effect, the subsequent rules will no longer take effect.
- Manual allocation logic takes precedence over automatic allocation logic.
On the Cost Units tab, click the name of the target cost unit.
Click Auto Allocation Rules.
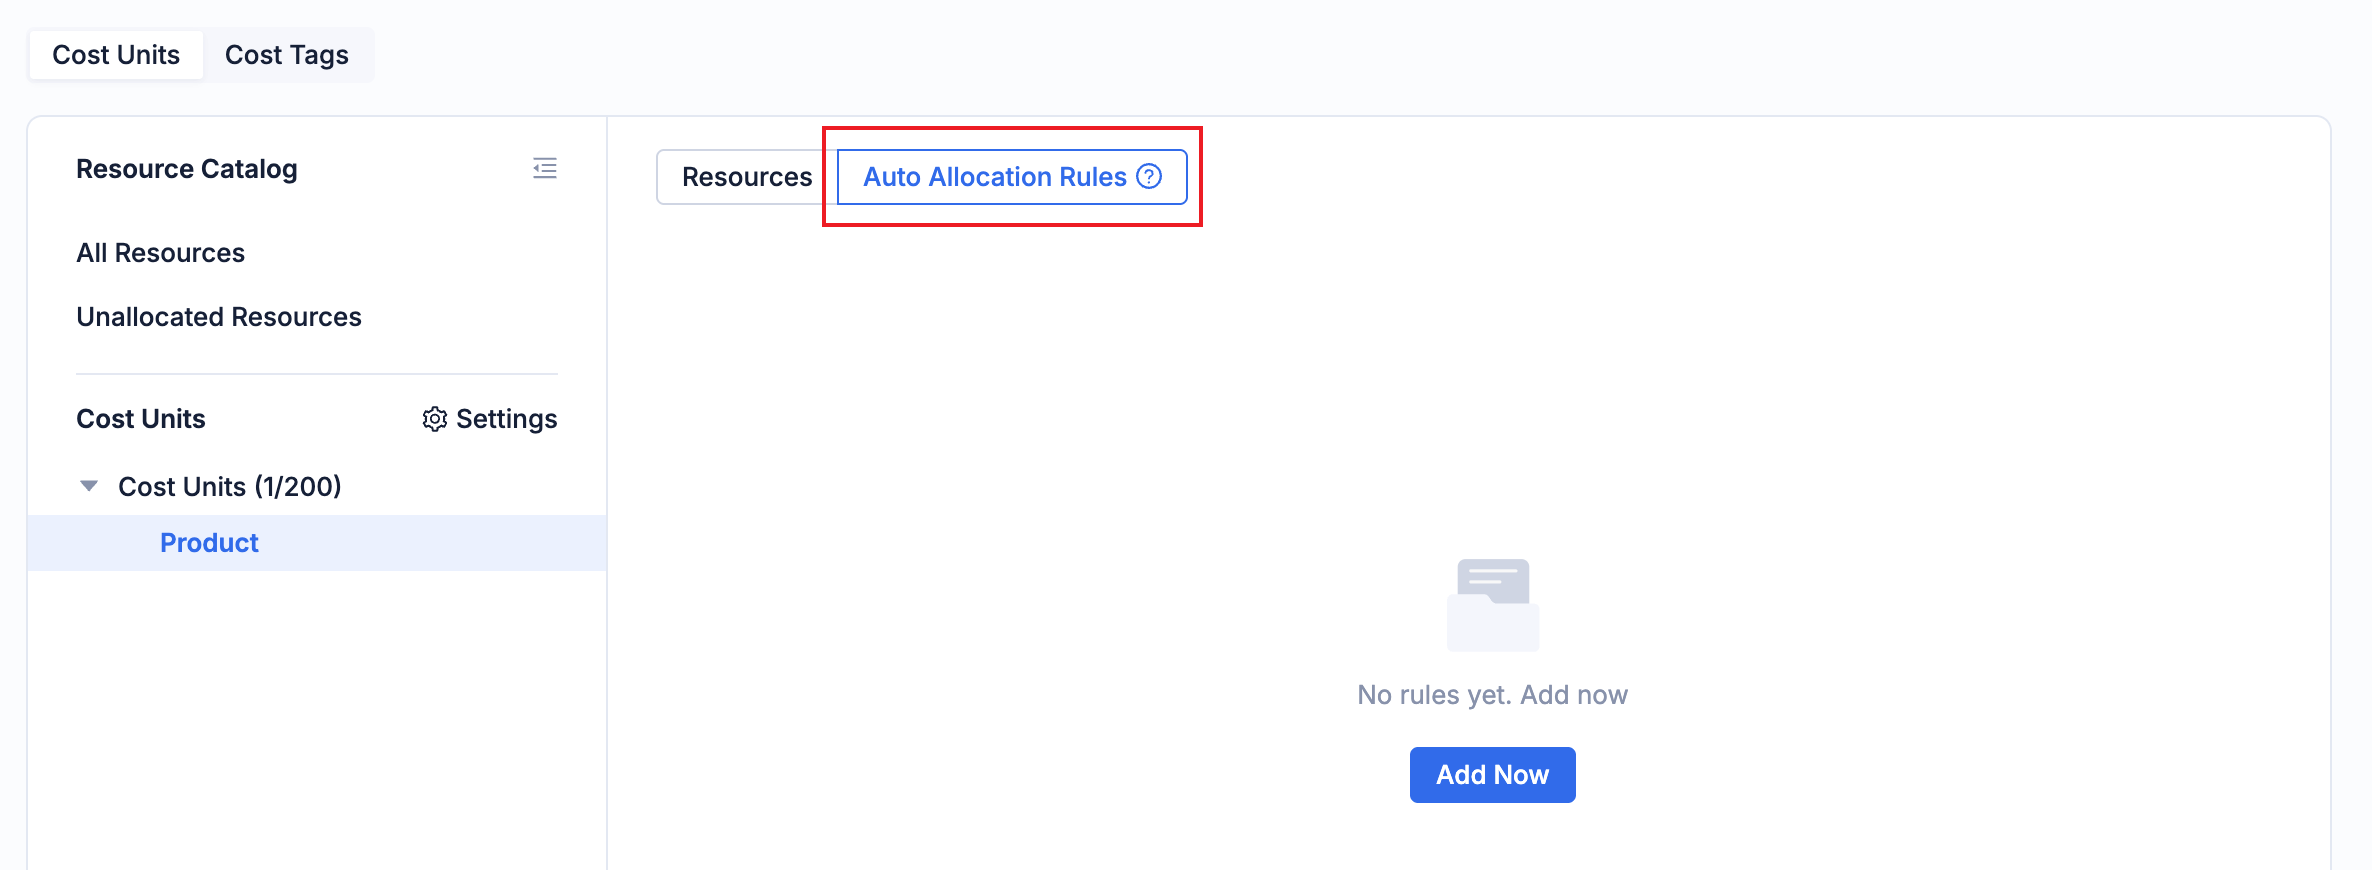
On the Auto Allocation Rules tab, click Add Now.
In the dialog box that appears, specify the rules. You can configure the rules based on tags, products, cloud vendors, instance IDs, and so on.
Click OK.
After the rule is created, you can click Edit Rules or Clear Rules in the upper-right corner to modify the rules.
Configure common cost allocation rules
On the Cost Units tab, click the settings icon in the upper-right corner of the catalog tree.
On the cost unit settings page, you can view the list of cost allocation rules that are configured.
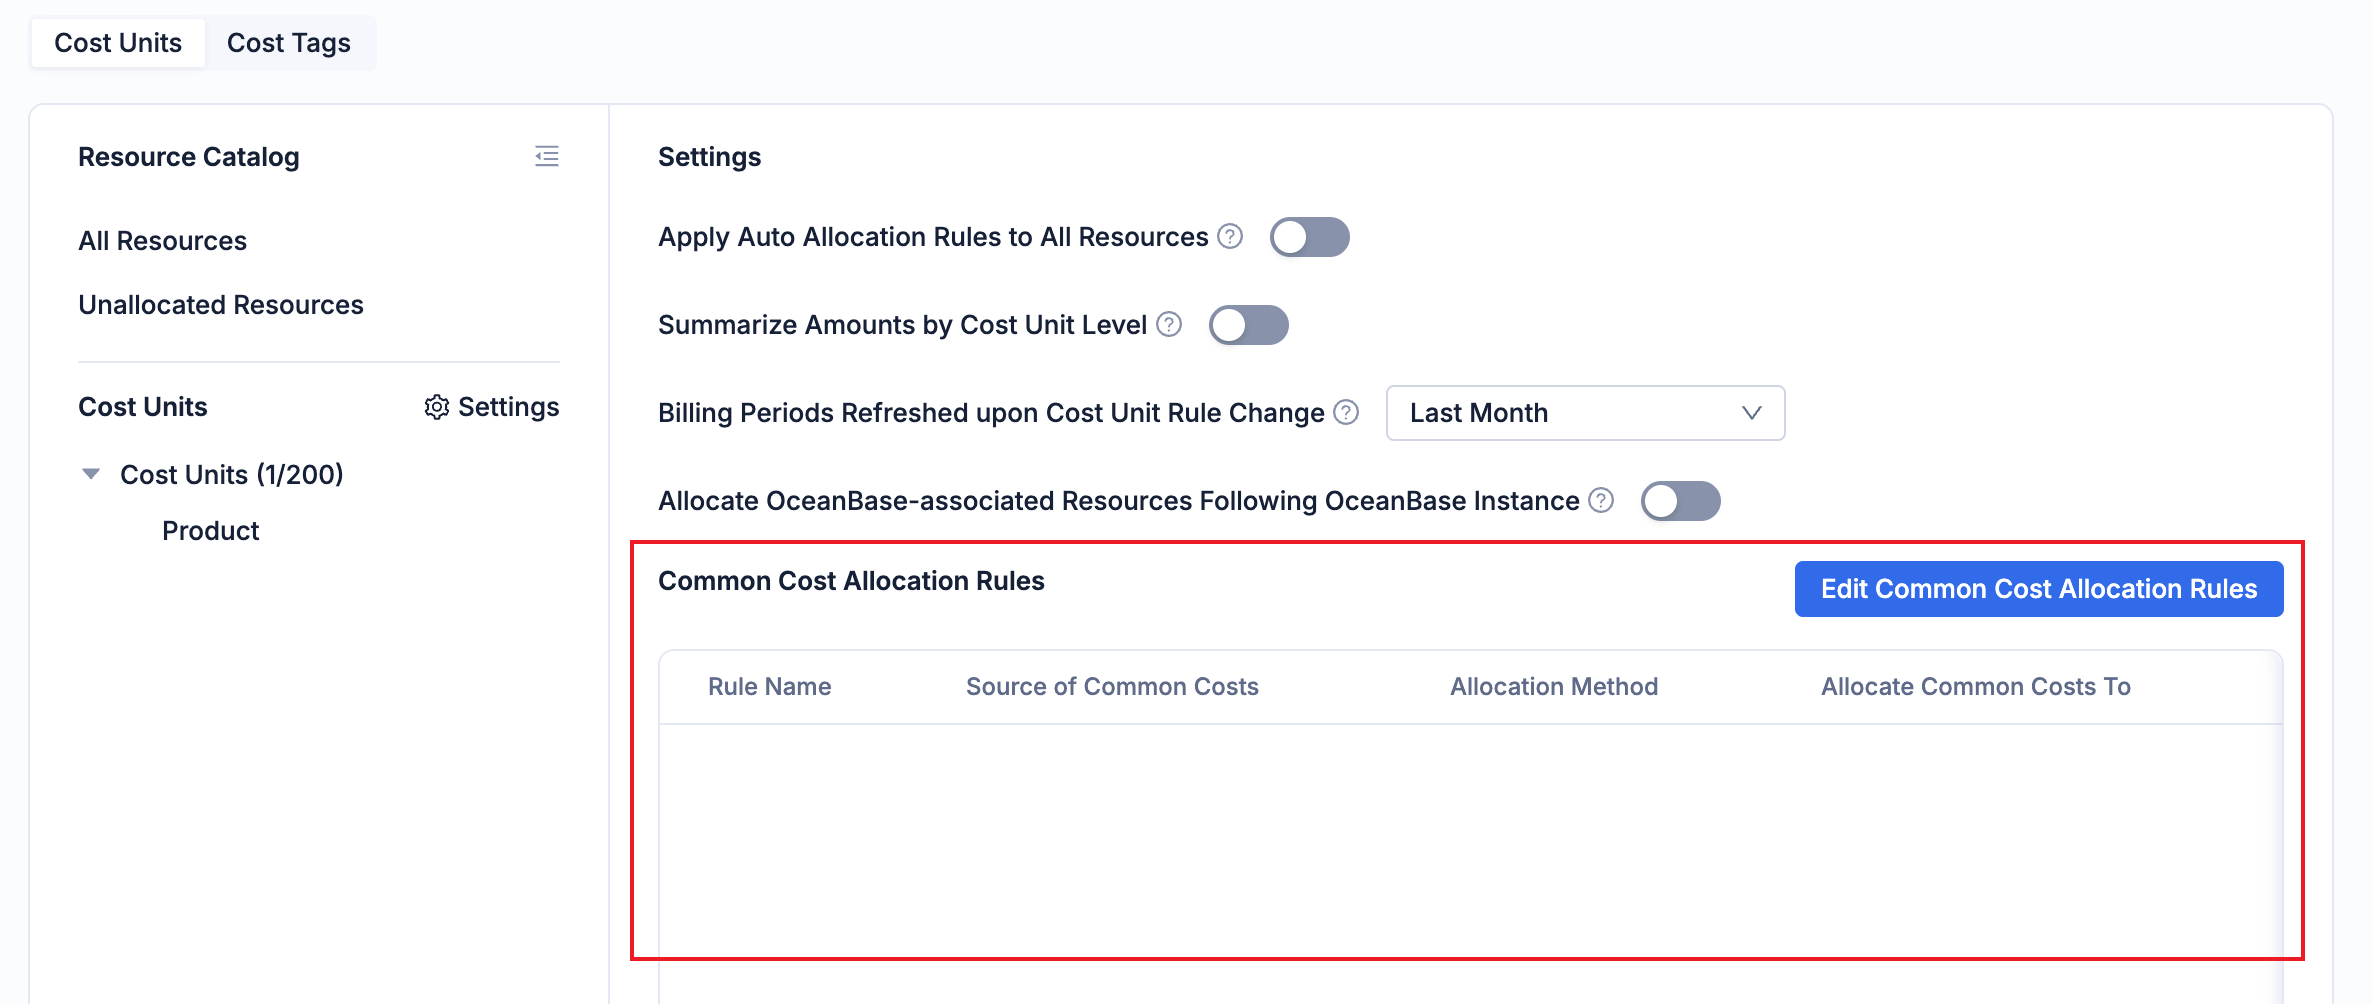
Click Edit Common Cost Allocation Rules.
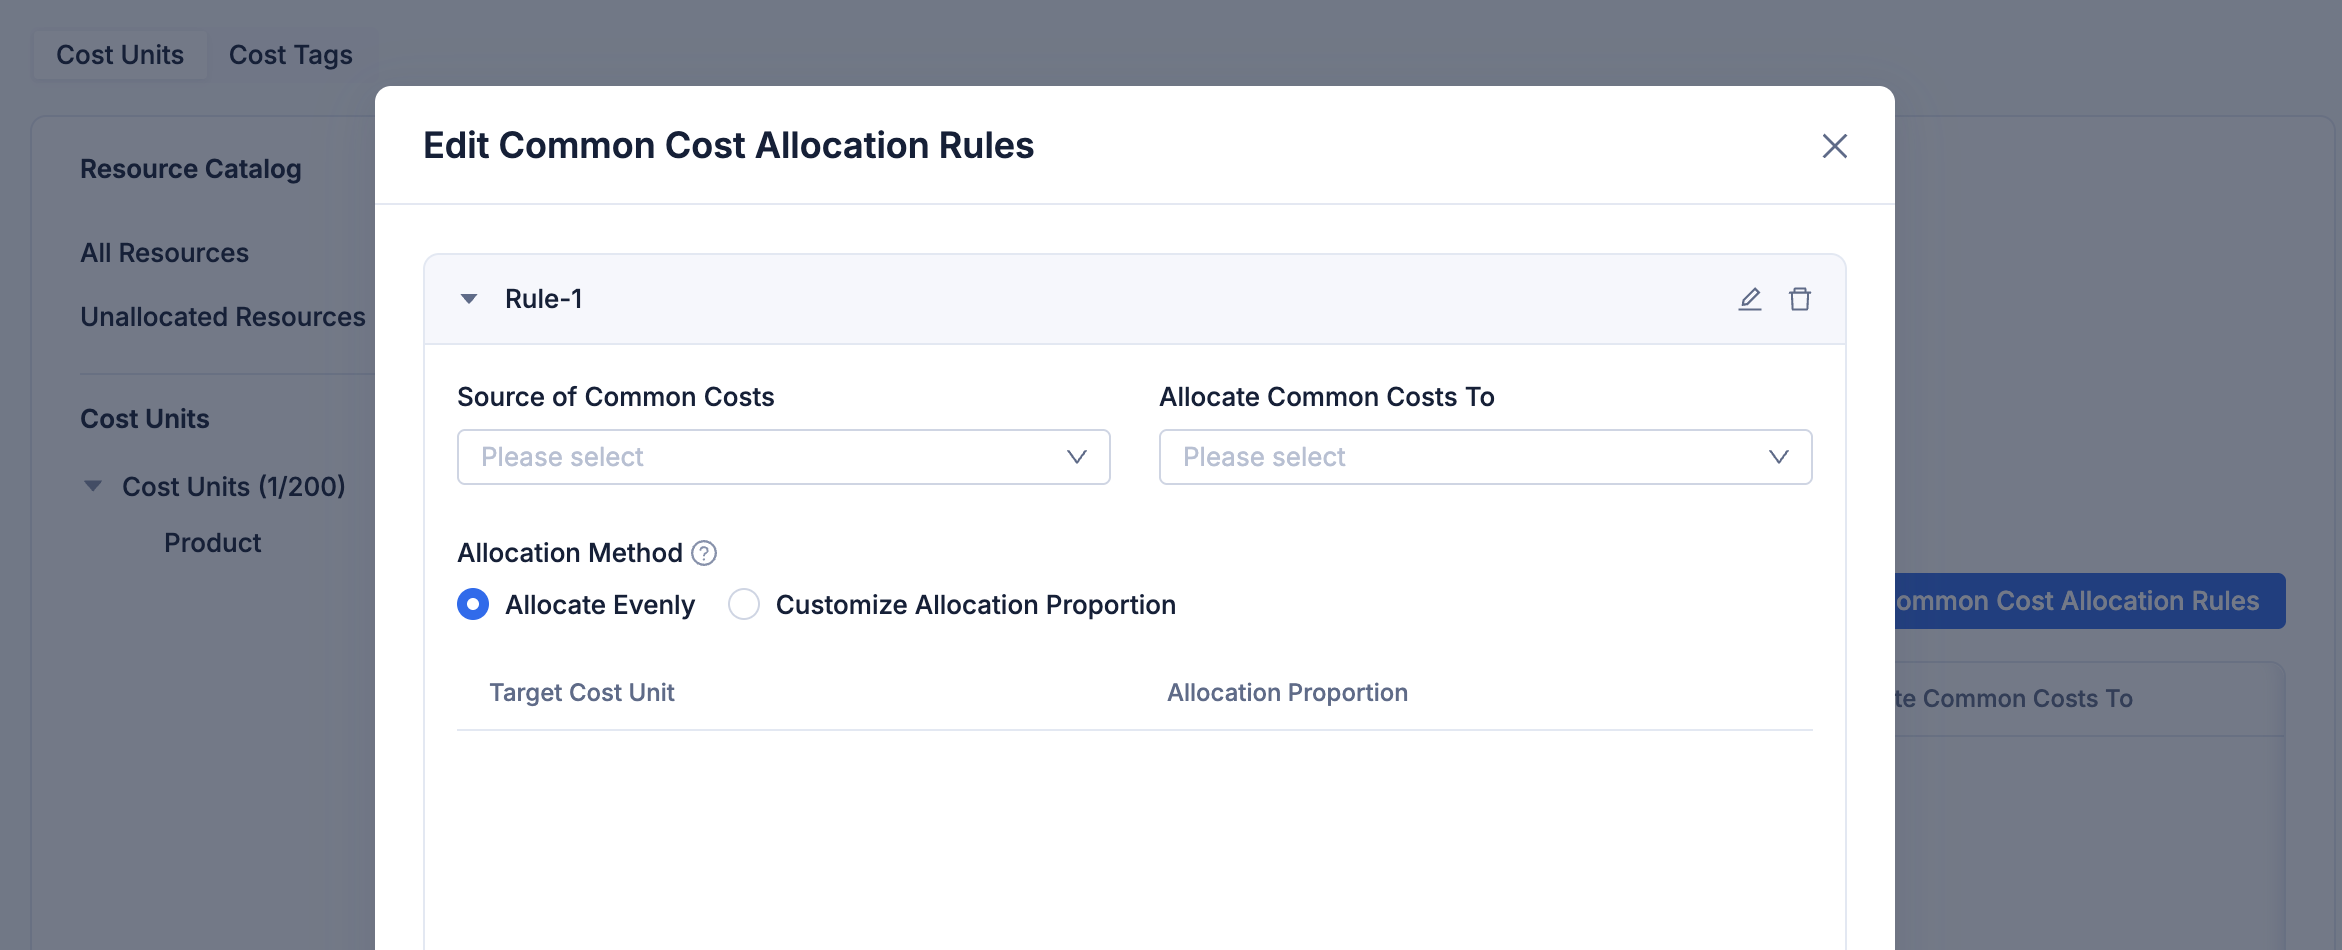
In the edit cost allocation rules dialog box, click Add Rule.
Enter the following configurations and click OK.
ConfigurationDescriptionSource of Common Costs Select the source cost units whose costs are to be allocated. You can select Unallocated, which indicates all unallocated resources. Allocate Common Costs To Select the target cost units to allocate costs to. Allocation Method - Allocate Evenly: Allocate the costs evenly to each cost unit.
- Customize Allocation Proportion: Allocate the costs to each cost unit based on the custom proportion that you specify.
After you add a rule, you can view the rule in the list.
View cost tags
On the Cost Units tab, you can click Cost Tags to view the information of the cost tags that are configured.
Set cost tags
On the Cost Tags tab, click Set Cost Tags in the upper-right corner.
In the Set Cost Tags dialog box, you can select the tags configured in the organization as cost tags. For more information of how to configure organization tags, see Manage tags.
Remove cost tags
On the Cost Tags tab, click Remove next to the target tag.
In the Remove Cost Tag dialog box, click OK.