


This topic introduces the background information, usage restrictions, configuration and modification methods, and common questions for migration object matching rules. It also provides a scenario example for database-to-database migration.
Background information
When you create a data migration task, you need to specify specific migration objects. Migration provides three methods for you to choose from: specifying objects, importing objects, and matching rules. The matching rules method supports you to specify or modify the objects to be migrated by writing wildcard rules, and supports configuring object mapping of the source and target sides. Through simple and efficient string matching, you can effectively reduce the configuration difficulty when you have many objects to migrate. At the same time, newly added tables that conform to the matching rules can be automatically synchronized to the target through incremental DDL. For more information on incremental DDL, see Supported DDL statements and limitations for synchronization.
Database-to-database wildcard rules
The wildcard rules supported by the Migrations and their requirements are as follows.
Note
The asterisk (*) in the table below indicates a wildcard rule.
Database-to-database synchronization does not support database and table aggregation scenarios.
Category |
Supported wildcard rules |
Example |
Description |
|---|---|---|---|
| Database and table migration | *.* | kd_test*.person* | Migrate all tables starting with person from all databases starting with kd_test on the source to the target, keeping database and table names unchanged. |
| Database and table migration | *.<source_table> | kd_test*.person | Migrate the person table from all databases starting with kd_test on the source to the target, keeping database and table names unchanged. |
| Database and table migration | <source_database>.* | kd_test.person* | Migrate all tables starting with person from the database named kd_test on the source side to the target side, keeping database and table names unchanged. |
| Database and table migration | <source_database>.<source_table> | kd_test.person | Migrate the table named person from the database named kd_test on the source side to the target side, keeping database and table names unchanged. |
| Database and table renaming | <source_database>.<source_table>=<target_database>.<target_table> | kd_test.person=kd_test_new.person_new | Migrate the table named person from the database named kd_test on the source side to the target side, and rename the database kd_test to kd_test_new and the table person to person_new. |
| Database and table renaming | <source_database>.*=<target_database>.* | kd_test.person*=kd_test_new.person* | Migrate all tables starting with person from the database named kd_test on the source side to the target side, and rename the database kd_test to kd_test_new, keeping table names unchanged. |
| Database and table renaming | *.<source_table>=*.<target_table> | kd_test*.person=kd_test*.person_new | Migrate the table named person from all databases starting with kd_test on the source side to the target side, and rename the table person to person_new, keeping database names unchanged. |
| Database and table aggregation | <source_database>.*=<target_database>.<target_table> | kd_test.person*=kd_test.person_all | Aggregate all tables starting with person from the database named kd_test on the source side into the table person_all in the database kd_test on the target side. |
| Database and table aggregation | *.<source_table>=<target_database>.<target_table> | kd_test*.person=kd_test_all.person | Aggregate the table named person from all databases starting with kd_test on the source side into the table person in the database kd_test_all on the target side. |
| Database and table aggregation | *.*=<target_database>.<target_table> | kd_test*.person*=kd_test_all.person_all | Aggregate all tables starting with person from all databases starting with kd_test on the source into the table person_all in the database kd_test_all on the target. |
| Database and table aggregation | *.*=<target_database>.* | kd_test*.person*=kd_test_all.person* | Aggregate all tables starting with person from all databases starting with kd_test on the source into the database kd_test_all on the target, keeping table names unchanged. |
| Database and table aggregation | *.*=*.<target_table> | kd_test*.person*=kd_test*.person_all | Aggregate all tables starting with person from all databases starting with kd_test on the source side into the table person_all in databases starting with kd_test on the target side, keeping database names unchanged. |
Wildcard rule requirements are as follows:
The target database name and table name are not allowed to be wildcard rules at the same time. For example,
kd_test*.person*=kd_test*.person*.If both the source and target database are wildcard rules, the database-level expressions must be exactly the same, indicating database migration.
If both the source and target table are wildcard rules, the table-level expressions must be exactly the same, indicating table migration.
If the target database is a wildcard rule, the source database must be a wildcard rule.
If the target table is a wildcard rule, the source table must be a wildcard rule.
Wildcard rules for mapping databases to message queues
Wildcard rules for mapping databases to message queues are supported. The following table describes the wildcard rules and their requirements.
Note
The asterisk (*) in the table indicates a wildcard rule.
Supported wildcard rule |
Example |
Description |
|---|---|---|
| *.*= |
*.*=topic | Maps multiple tables in multiple databases to one topic |
| *. |
*.b=topic | Maps table b in multiple databases to one topic |
| a.*=topic | Maps multiple tables in database a to one topic | |
| a.b=topic | Maps table b in database a to one |
Usage restrictions
The Migrations allows inputting multiple rules, but each rule cannot span lines and there should be no spaces before or after.
Migration object rules cannot be empty, while exclusion object rules can be empty.
The Migrations does not support DDL changes during structure migration and full migration.
When you select migration objects through matching rules, the Migrations does not support table names containing special characters (including line breaks, spaces, and .|"'`()=;/&*?[][!]).
The Migrations does not support mapping different tables from the same database on the source side to different databases on the target side through multiple matching rules. For example,
a.a* = b.a* & a.b* = c.b*.The Migrations currently does not support the
CREATE DATABASEDDL statement. If the newly created database name is within the matching rules of data migration, you need to manually create the database on the target side to continue data synchronization for the new database.
Considerations
After you complete the configuration of migration object rules and exclusion object rules, if the source table name is in the difference set of migration object rules and exclusion object rules, the relevant objects can be selected.
Note
The difference set refers to a new set that contains all elements that exist in the first set but not in the second set for given two sets.
After you enable DDL synchronization, when you use a DDL statement to create a new table or modify a table schema on the source, if the table name or table schema name is in the difference set of migration object rules and exclusion object rules, the DDL statement can be synchronized by Migration Services to the target in real-time.
For database and table aggregation scenarios:
We recommend that you use matching rules to map the relationship between the source and target sides.
We recommend that you create table structures on the target side by yourself. If you use data migration to create, skip the failed objects in the structure migration step.
If you check DDL Synchronization in database or table aggregation, there may be a risk of accidental deletion. For example, multiple databases or tables from the source side are aggregated into one database or table on the target side. In this case, deleting a database or table on the source side may cause the aggregated database or table on the target side to be deleted.
When you create a data migration task, please select Ignore for Processing strategy when target table object has records.
If you have a renaming mapping for your table, the renaming mapping takes precedence. For example, if rules
a.b[0-3]anda.b[3-5]=a.cexist at the same time, tablea.b3is renamed toa.c.When you execute the
RENAME TABLEDDL statement, if the renamed table object is not in the original matching rules or exclusion rules, it may cause unexpected synchronization issues. Proceed with caution.
Configure matching rules for a database-to-database migration
Create a new data migration task and configure it to the Select Migration Objects step.
For more information, see creating a data migration task of the corresponding type in the Data migration module.
In the Select Migration Objects section, select Match by Rule.
You can select migration objects through two entries: Specify Objects and Match by Rule. This article only introduces how to configure matching rules.
In the Synchronization Objects area, check <>Match by Rule.
In the Select Migration Scope area, enter Migration Object Rules and Exclusion Object Rules (optional). For more information on supported matching rules, see Wildcard rules.
If you need to view the matching results, please click Preview after verification. The wildcard migration object rules and exclusion object rules that you entered will be applied to both tables and views. Matching Results includes final objects, added objects, and reduced objects.
ObjectDescriptionFinal Objects The migration objects that match the configured matching rules. Added Objects The migration objects that are added compared to the previous matching result. Reduced Objects The migration objects that are reduced compared to the previous matching result. After you select migration objects based on matching rules, you can configure filter conditions and partitioning columns.
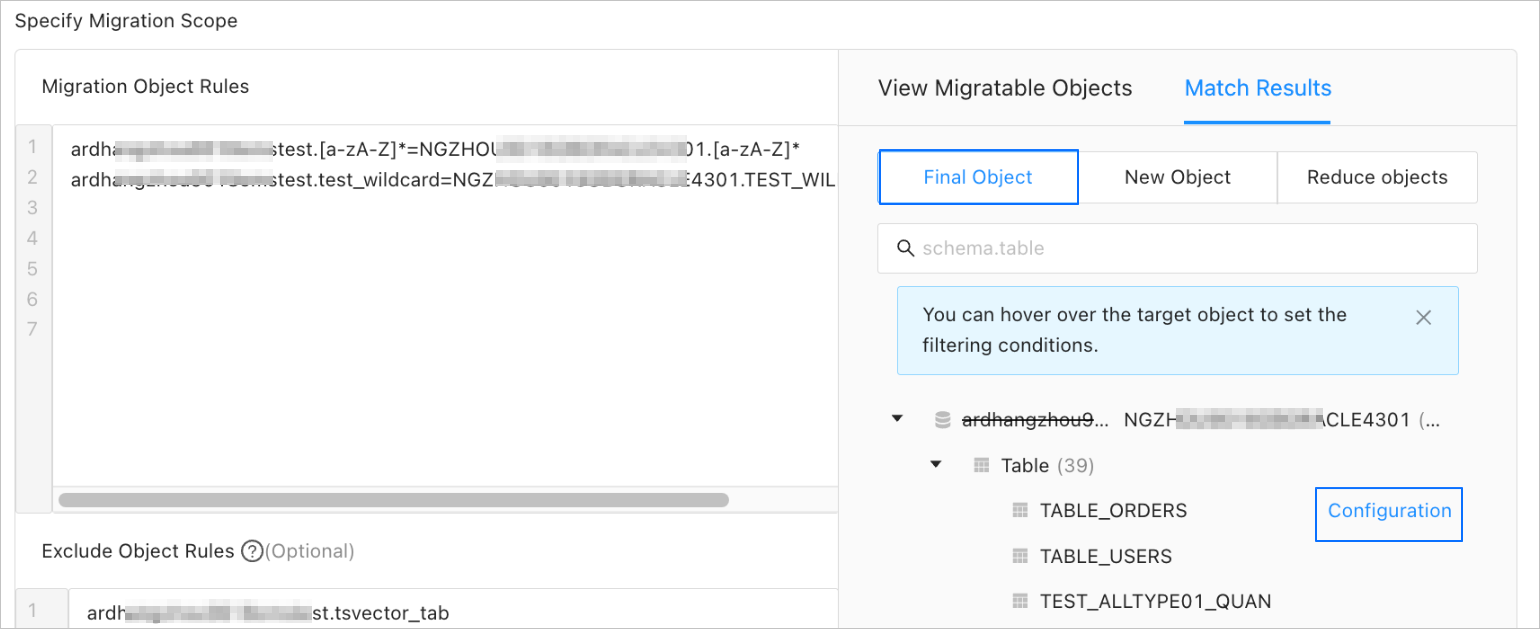
In the Matching Results > Final Objects panel, hover the pointer over the target object.
Click the Settings icon that appears.
In the Settings dialog box, enter the
WHEREclause in a standard SQL statement to configure row filtering. After you configure row filtering, click Validate Syntax. For more information, see SQL filtering.After the syntax is checked, click OK. You can also view the column information about the migration object in the View Column section.
Complete the remaining steps based on the prompts.
Scenario examples
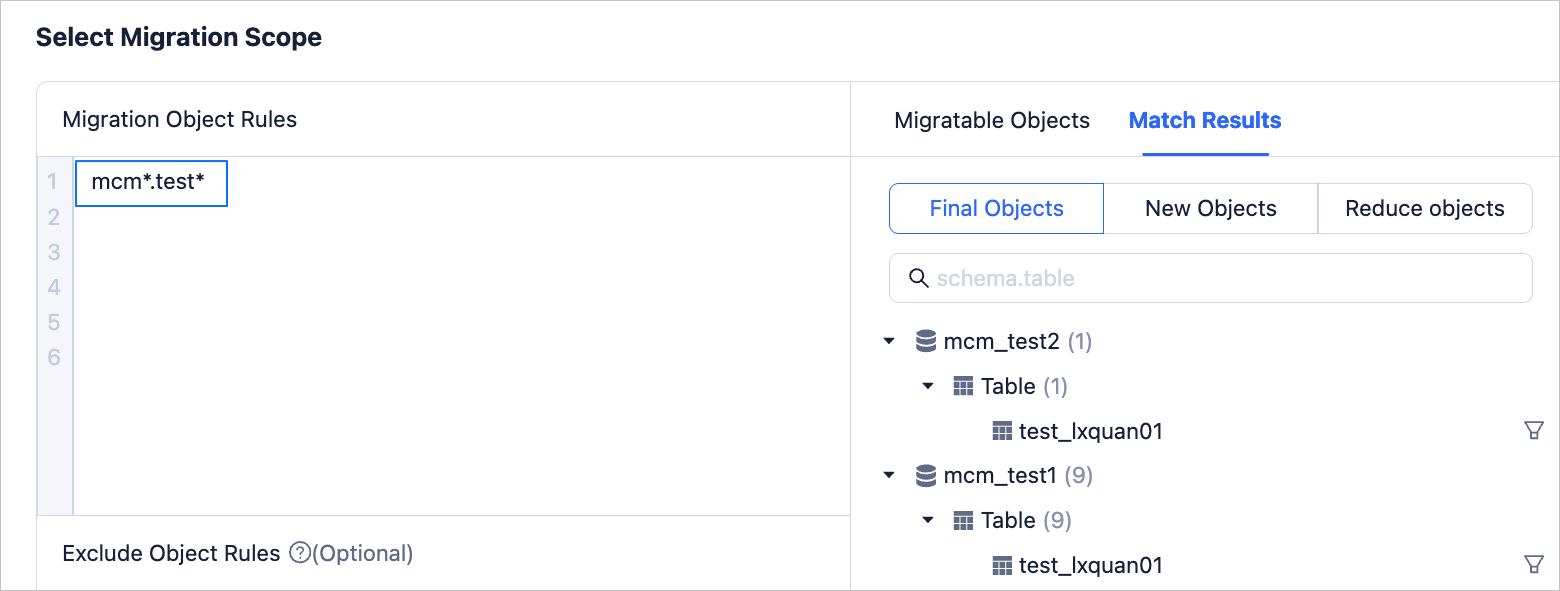
Database and table migration
Migrate all tables starting with test from all databases starting with mcm on the source side to the target side, keeping database and table names unchanged. The configuration of matching rules is as follows.
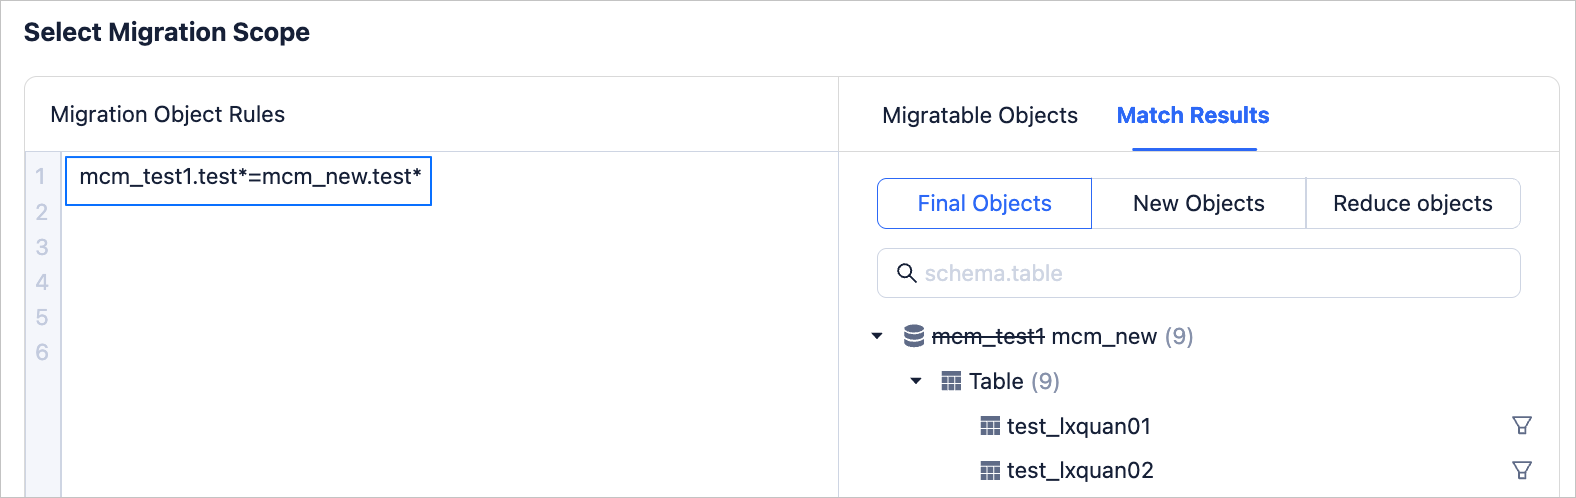
Database and table renaming
Migrate all tables starting with test from the database named mcm_test1 on the source side to the target side, and rename the database mcm_test1 to mcm_new, keeping table names unchanged. The configuration of matching rules is as follows.
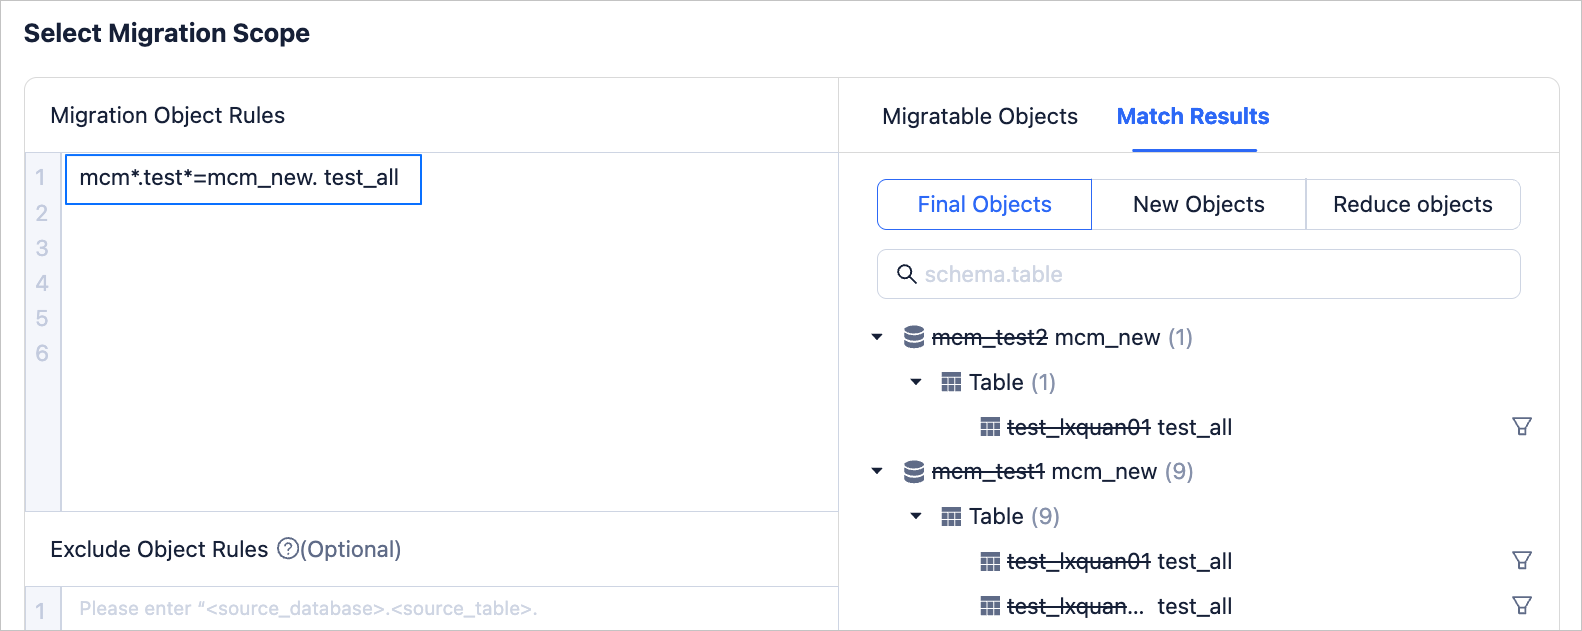
Database and table aggregation
Aggregate all tables starting with test from all databases starting with mcm on the source side into the table test_all in the database mcm_new on the target side. The configuration of matching rules is as follows.
Configure exclusion object rules
Set not to synchronize tables starting with test and ending with 9 from the database named mcm_test1 on the source side. The configuration of matching rules is as follows.
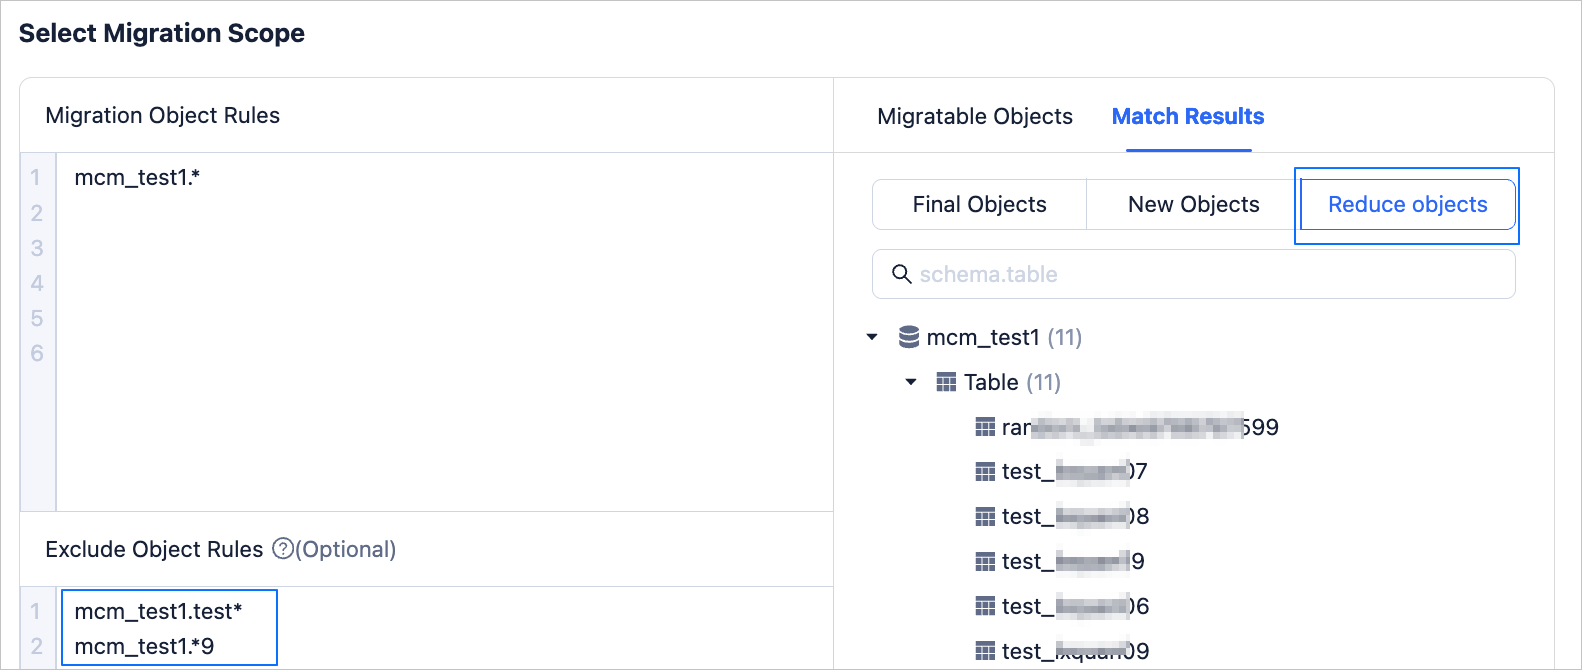
Configure exclusion object rules
All tables starting with test and ending with 9 in the database named mcm_test1 on the source side are excluded from synchronization. The configuration of matching rules is as follows.
Configure matching rules for a database-to-Kafka migration
If you want to migrate data from OceanBase Database to Kafka, you can configure matching rules to select the data to be migrated.
Configure the data migration task to the Select Type & Objects step.
For more information, see the Data Migration module of the Create a data migration task topic.
In the Select Migration Objects section, select Match by Rule.
Enter Object Migration Rules and Object Exclusion Rules (optional). For more information on supported matching rules, see Wildcard rules.
When you migrate data from OceanBase Database to Kafka, you can configure a one-to-one or many-to-one mapping. However, you cannot use a space in a rule. If the Schema Migration migration type is selected, you can specify an existing topic name or create a new topic name. If the Schema Migration migration type is not selected, you can specify only an existing topic name.
Click Verify.
If you need to view the matching results, click Preview Objects to preview them after verification. Matching Results includes final objects, added objects, and reduced objects.
After you select the migration objects based on matching rules, you can configure filter conditions and partitioning columns.
In the Matching Results > Final Objects panel, hover the pointer over the target object.
Click the Settings icon that appears.
In the Settings dialog box, perform the following operations.
When you migrate objects from OceanBase Database, enter the
WHEREclause in a standard SQL statement in the Row Filters section to configure row filtering. After you configure row filtering, click Validate Syntax. For more information, see SQL filtering.Select the target partitioning column from the Sharding Columns drop-down list. You can select multiple fields as partitioning columns. The parameter is optional.
When you select a partitioning column, if you do not have special circumstances, the primary key is sufficient. If the primary key does not achieve balanced load, select a field that has a unique identifier and balanced load as the partitioning column. This helps avoid potential performance issues. The main functions of a partitioning column are as follows:
Load balancing: If the destination can perform concurrent write operations, the partitioning column distinguishes the specific thread that sends messages based on the partitioning column.
Ordering: To ensure message ordering, OMS makes sure that the messages received by users are ordered when the values of the partitioning column are the same. This ordering is the change sequence (DML sequence) of a column.
In the Select Columns section, select a column to migrate. For more information, see column filtering.
Click OK.
Modify a migration object matching rule
Overview
The following table describes scenarios where you can modify a migration object matching rule.
| Data Migration Task Step | Data Migration Task State | Step State |
| / | Not Started | / |
| Full Migration | Running | Running |
| Failed | Failed | |
| Paid Off | Stopped | |
| Incremental Synchronization | Running | Running |
| Running | Monitoring | |
| Failed | Failed | |
| Paid Off | Stopped |
Procedure
In the View Objects dialog box, click Modify Rules.
Log in to the OceanBase Cloud console.
In the left-side navigation pane, select Data Services > Migrations.
On the Migrate Data page, click the name of the target data migration task to go to its details page.
In the upper-right corner of the page, click View Objects.
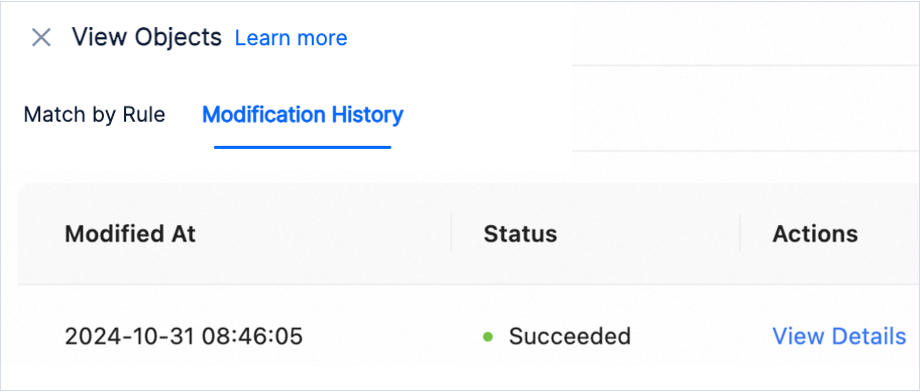
In the Migration Objects and Modification History sections, you can view the migration objects and modified records.
In the View Objects dialog box, click Modify Rules.
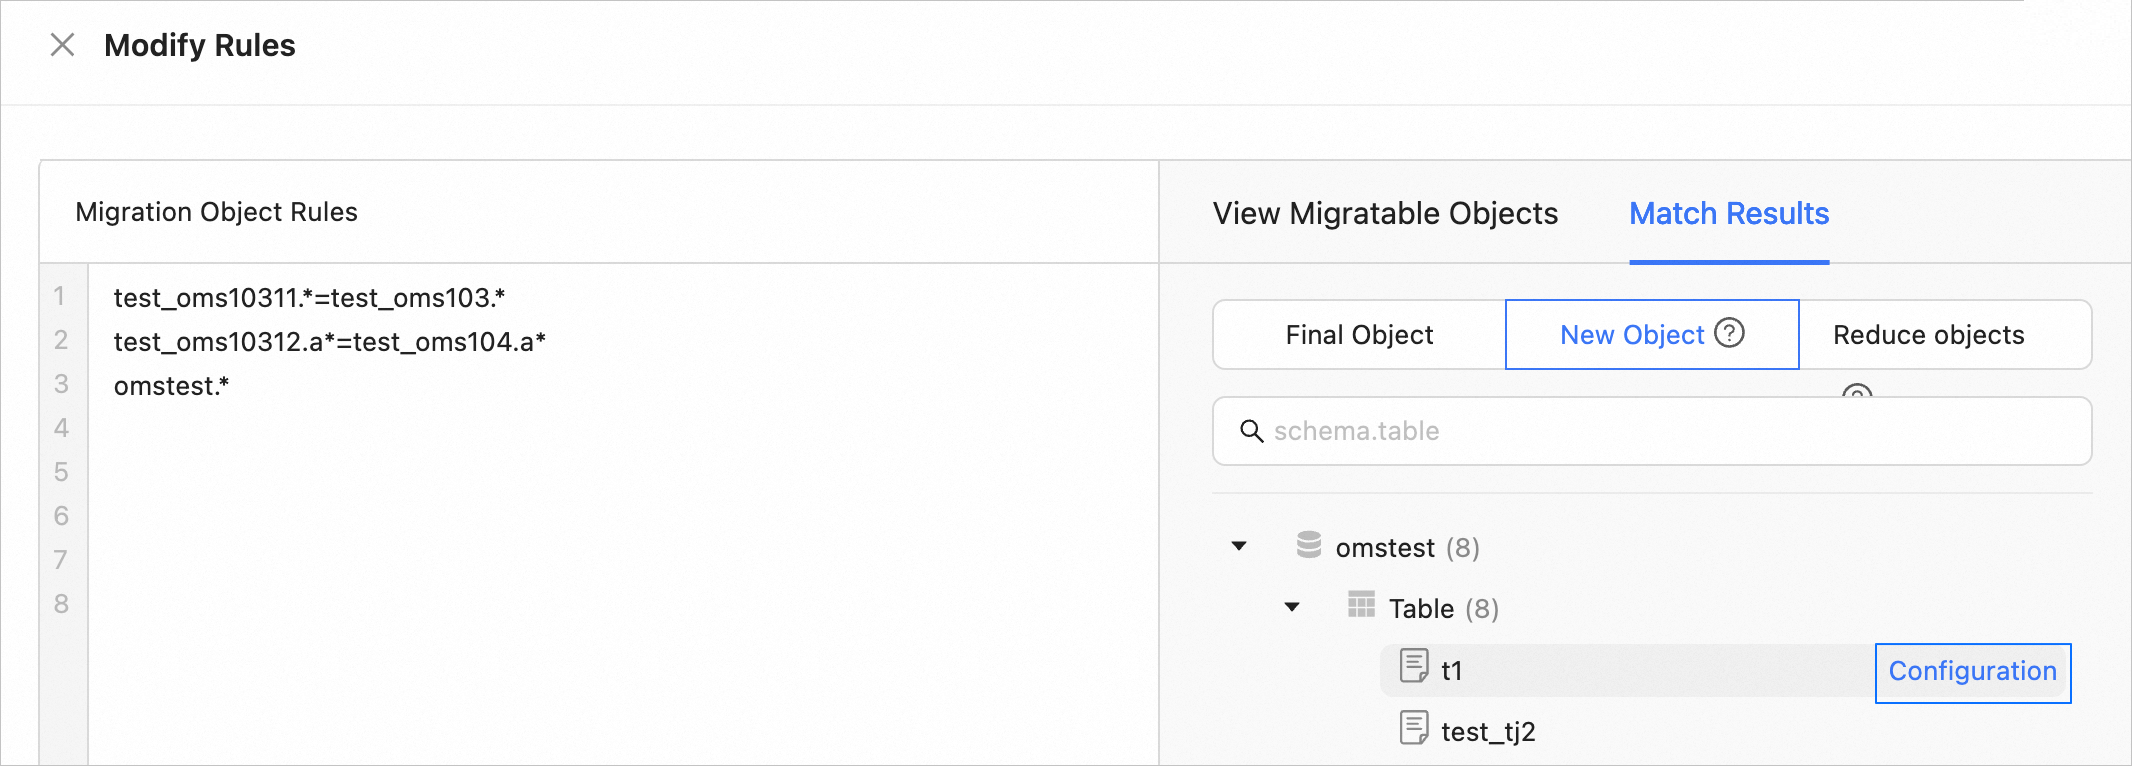
In the Modify Rules dialog box, add or remove migration objects based on the new matching rule.
Click Verify. If you need to view the matching results, click Preview Objects after verification.
You can hover the pointer over an added object, and click the Settings icon that appears to configure filter conditions for this object.
Click Submit.
If the new rules contain added migration objects, you must reconfigure the migration type and perform a precheck.
When you migrate data from OceanBase Database to Kafka, you can configure a one-to-one or many-to-one mapping. However, you cannot use a space in a rule. If the Schema Migration migration type is selected, you can specify an existing topic name or create a new topic name. If the Schema Migration migration type is not selected, you can specify only an existing topic name.
If the new rules contain removed migration objects, you can view the specific removed objects on the page.
After the precheck succeeds or the removed objects are error-free, click Submit.
FAQ
Insufficient permissions
Please pay attention to the permission settings of the source user. If the permissions granted to the user are insufficient, some objects may not be displayed by the data migration frontend, which will prevent you from correctly configuring matching rules. Therefore, you need to add objects without granted permissions to the Exclusion Object Rules to avoid data migration task interruption due to the inability to find target objects.
DML filtering not supported
In the case of not enabling DDL synchronization, the Migrations allows selecting objects through matching rules. During the incremental synchronization process, if a newly created table meets the matching rules, related DDL statements will be ignored, but the data migration will continue to synchronize DML statements. This will cause inability to write to target objects and lead to data migration task interruption. Therefore, you need to create a new table on the target side or add the table to the component's blocklist.