


This topic provides a step-by-step guide on connecting to an OceanBase Cloud database using Azure Private Link.
Prerequisites
- You have an active Azure account and an Azure subscription. You have completed the subscription to the OceanBase Cloud offering from Azure Marketplace, and ensure that a valid virtual network and subnet are available under your Azure subscription.
- You have an active OceanBase Cloud account, and have created an instance and a tenant. For more information, refer to Create an instance and Create a tenant. In this topic, an Oracle-compatible tenant is used.
- Make sure your client's IP address has been added to the allowlist of your tenant. For detailed instructions, refer to Set allowlist groups.
Procedure
Step 1: Create your endpoint service
Log in to the OceanBase Cloud console and click Networking in the left-side navigation pane.
On the Private Connectivity tab, click Create Private Connection.
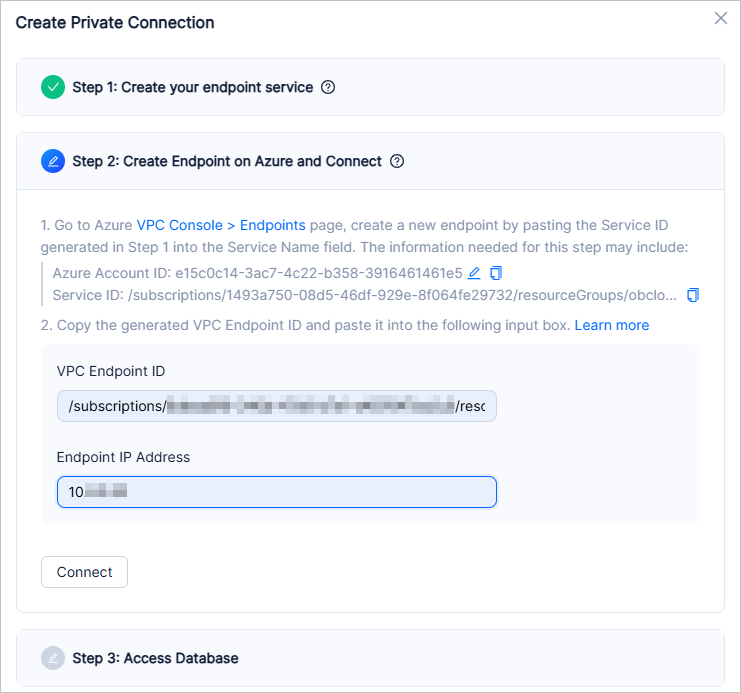
In Step 1: Create your endpoint service, select Azure as the cloud service provider, and select the target instance and tenant.
Open Azure console and click Subsriptions under Navigate.
On the Subscriptions page, view the name of the target subscription.
Return to the OceanBase Cloud console and enter the name of the target subscription in the Azure Account ID field in Step 1.
Step 2: Create Endpoint on Azure and Connect
Create a private endpoint on the Azure console. This process takes about 10 minutes.
Log in to the Azure console.
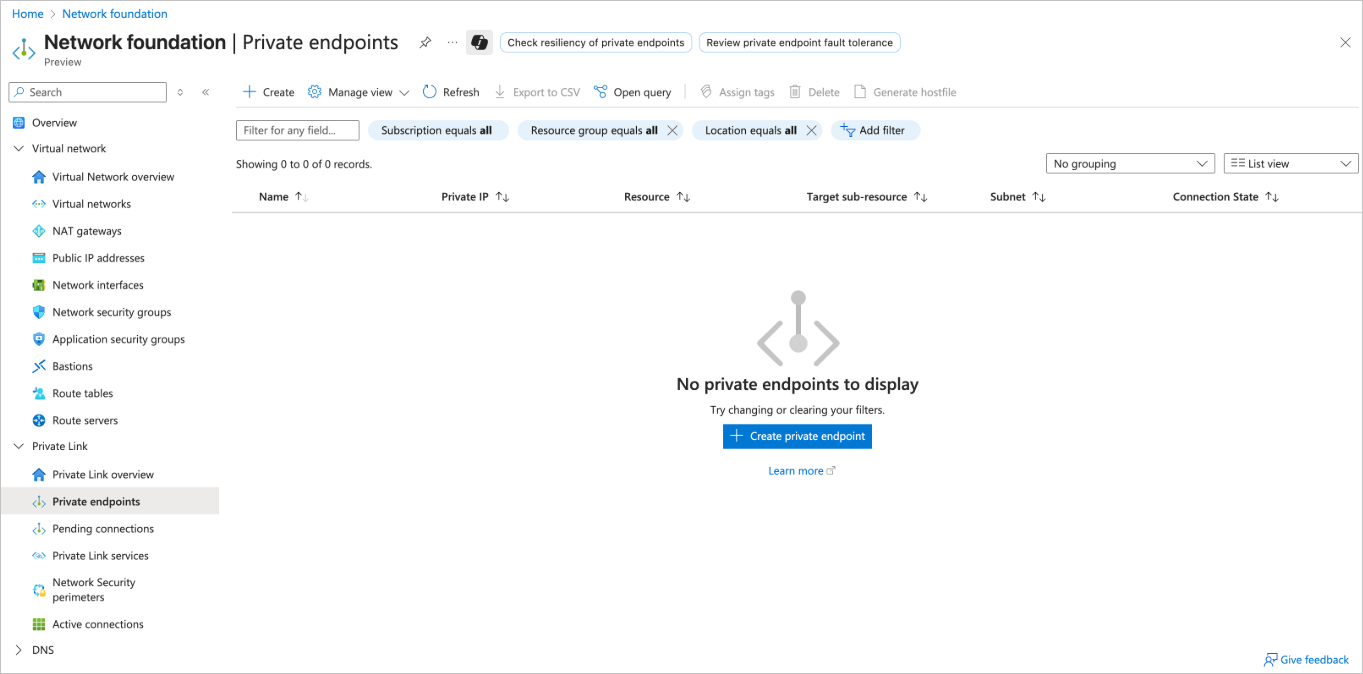
Access Network foundation > Private Link > Private endpoints.
Click Create.

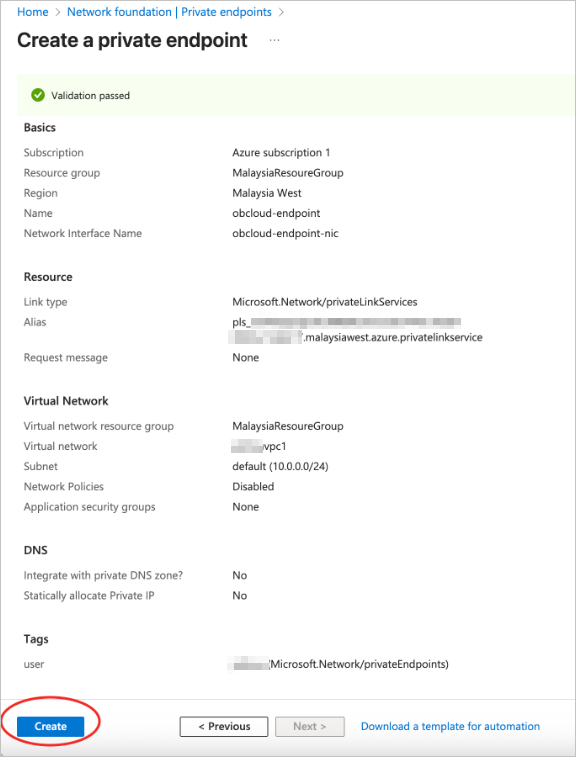
On the Create a private endpoint page, configure the following parameters:
Basic
ParameterDescriptionSubscription Select the subscription. Resource group Select the resource group. Name Enter the name of the private endpoint. Network Interface Name Automatically generated based on the name. Region Select the region. 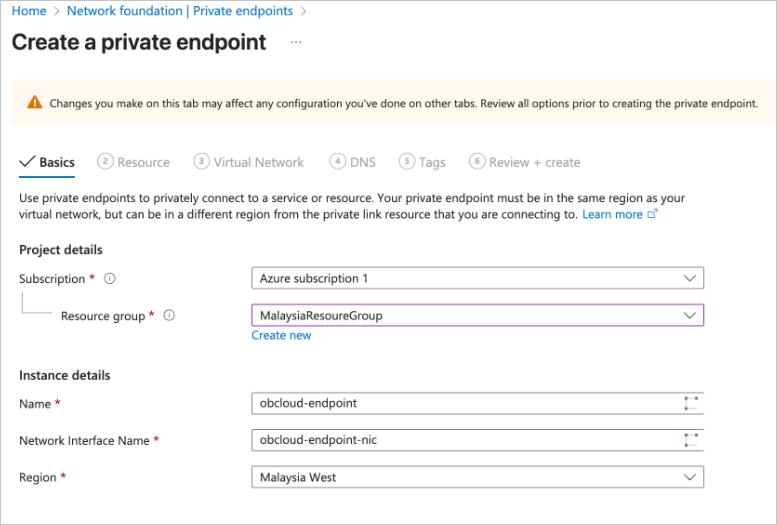
Resource
ParameterDescriptionConnection method Select Connect to an Azure resource by resource ID or alias. Resource ID or alias Enter the Service ID provided in Step 2 of the OceanBase Cloud console. 
Virtual Network
ParameterDescriptionVirtual network Select the virtual network to connect with. Subnet Select the subnet of the target virtual network. 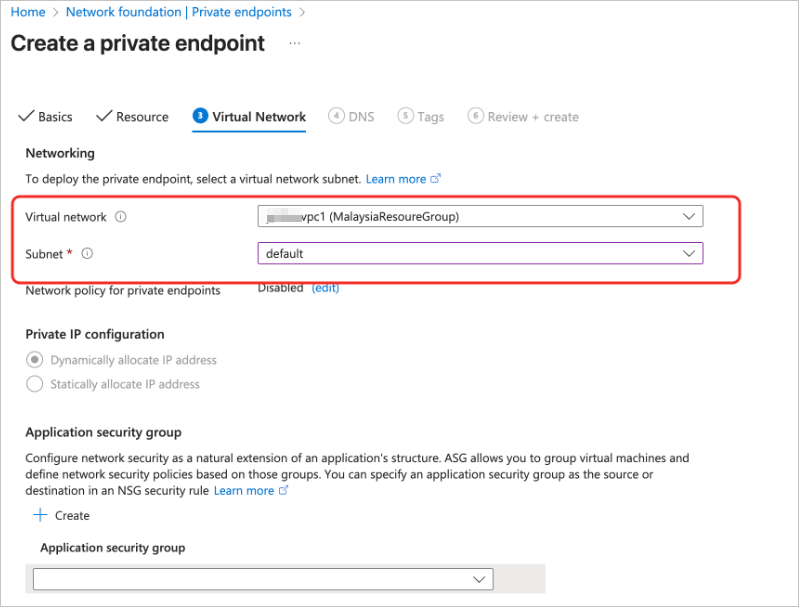
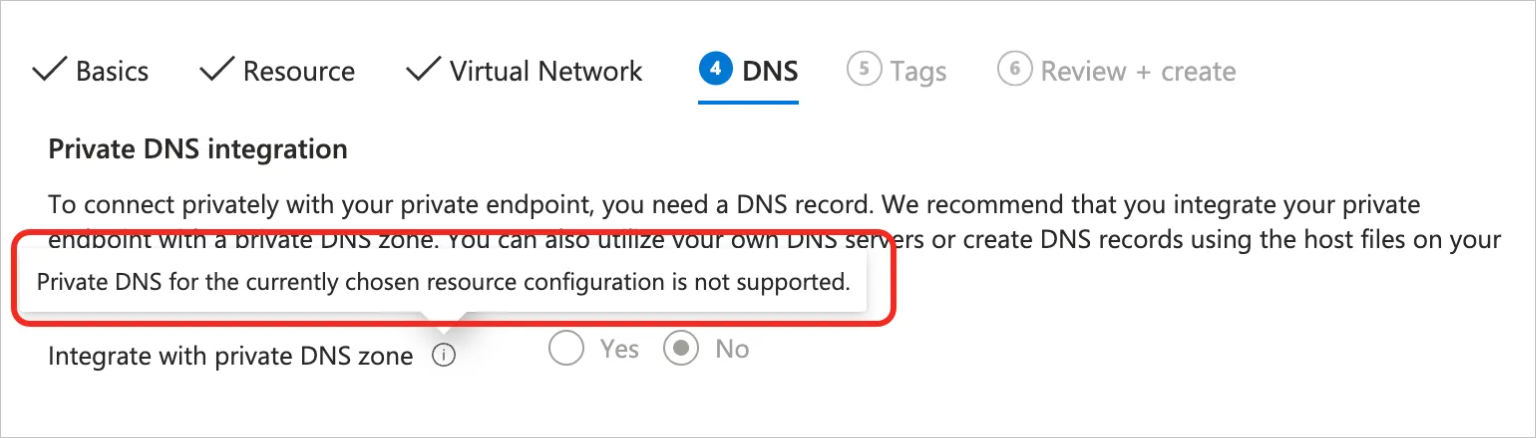
DNS
Azure private endpoint does not support DNS integration in the current mode.
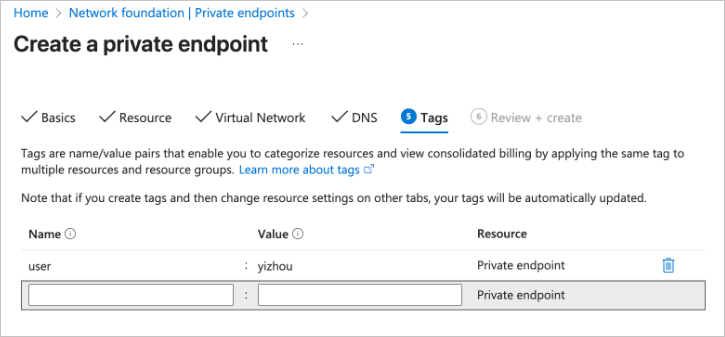
Tags
Configure tags as needed.
Click Create on the review page.
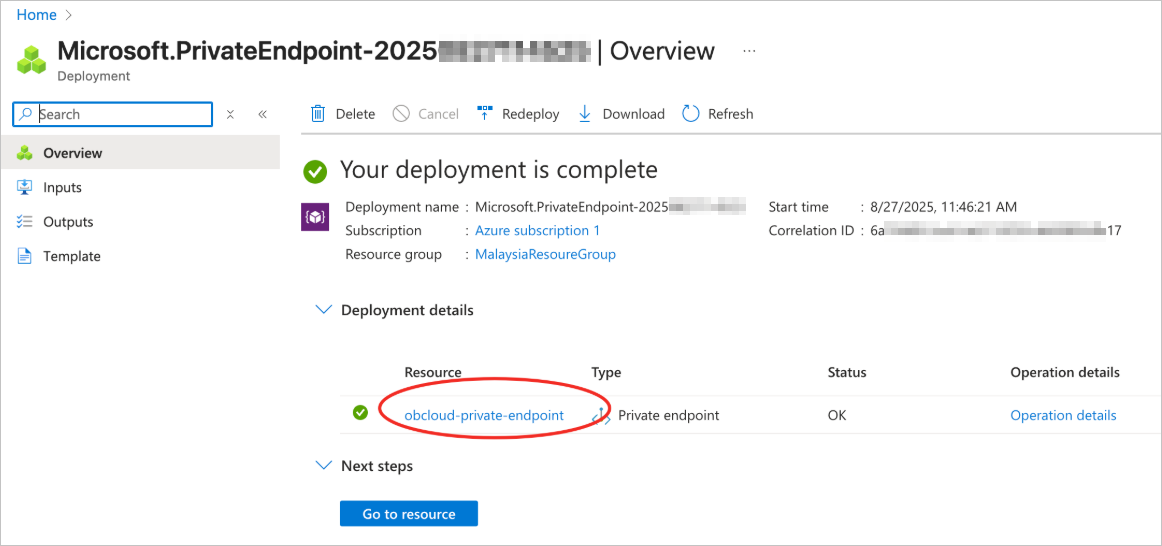
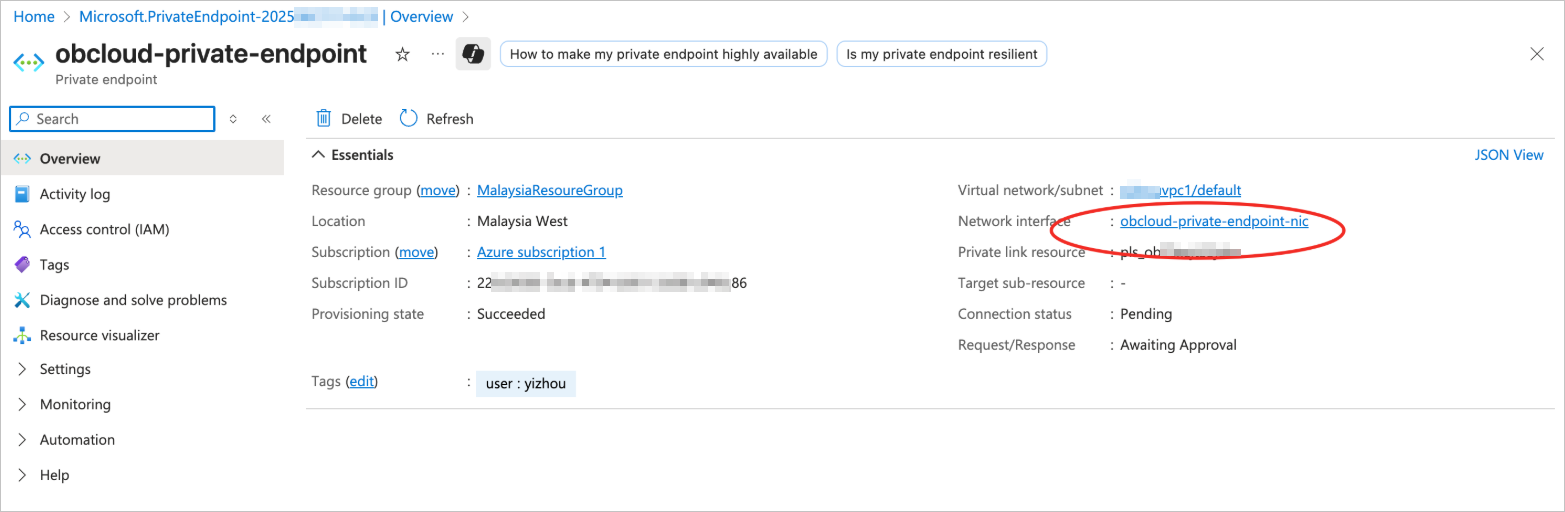
Wait on the private endpoint details page until the status turns to Ok. Click the resource name to go to the resource details page.
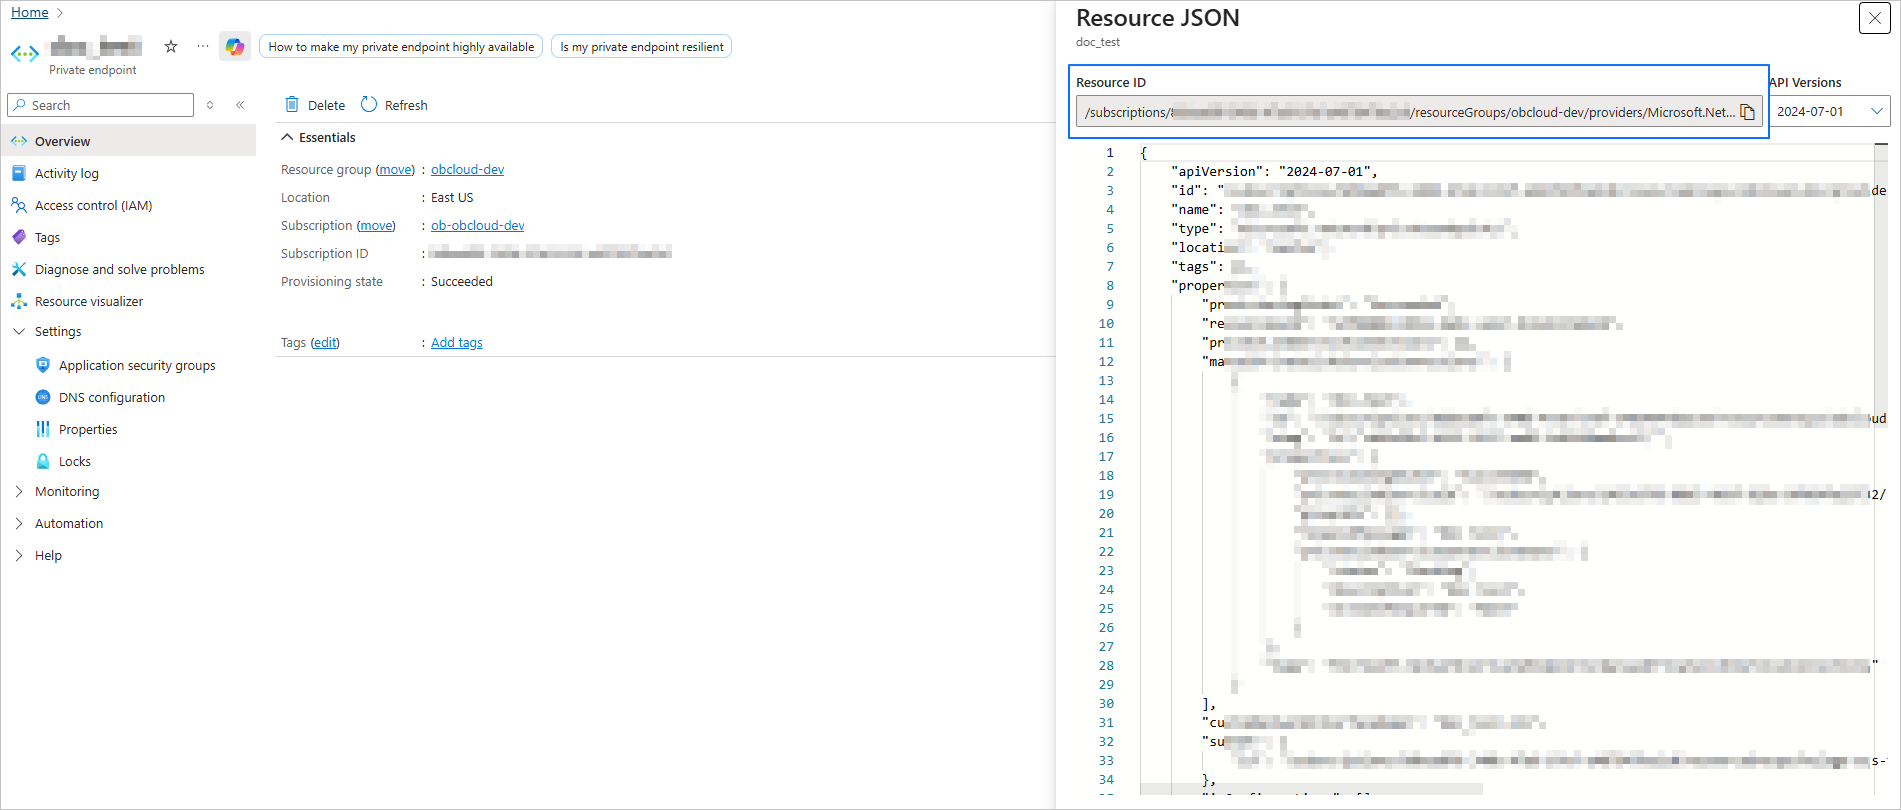
Obtain the endpoint configuration information.
Click the JSON View button in the upper-right corner of the details page.
Copy the Resource ID from the opened Resource JSON window.
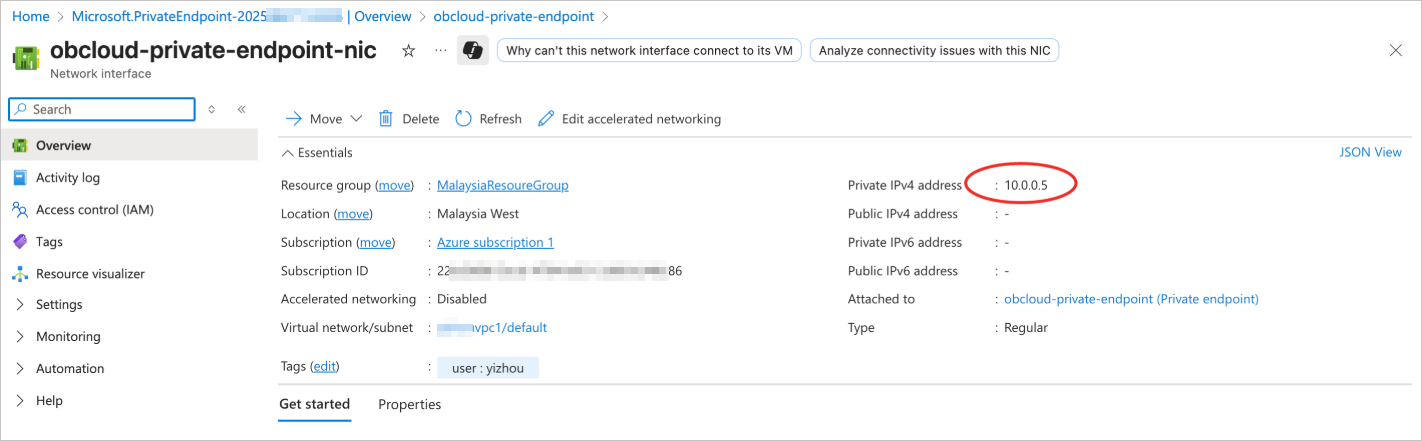
Click the network interface to go to the network card details page.
Check the Private IPv4 address, which is used to access the OceanBase Cloud database instance.
In the OceanBase Cloud console, enter the endpoint ID and endpoint IP address.
- Endpoint ID: the Resource ID obtained in step 7-2.
- Endpoint IP Address: the Private IPv4 address obtained in step 7-4.
Step 3: Access Database
After the Private Link is configured, you can access the database on the Step 3: Access Database page by selecting the access information and generating a connection string.
Verify access to the database through the following command:
obclient -h<host> -P<port> -u<username>@<tenantId> -p
The parameters are specified as follows:
- host: The IP address of the private endpoint.
- port: The access port of the database, which is 1521 by default.
- username: The database user account for connection.
- tenantId: The tenant ID. You can check and copy it from the tenant list and the tenant details page.
For example:
obclient -h10.0.0.5 -P1521 -utest@t70zh******** -p