


This topic describes how to obtain the webhook URLs of chatbots for DingTalk, Lark, and Telegram groups.
DingTalk bot
To obtain the webhook URL of a DingTalk bot, perform the following steps:
Note
For more information about how to use a DingTalk chatbot, refer to Webhook robots.
Log in to the DingTalk client and enter the target DingTalk group.
Choose Group Settings > Bot > Add Robot.
In the dialog box that appears, click Custom.

On the robot details page, click Add.
On the page that appears, specify the parameters.
ParameterNoteChatbot name The name of the chatbot displayed in the group. Add to Group By default, the current group is specified. Security Settings The current version supports security settings only by specifying custom keywords. Note
We recommend that you add
OceanBase,OB,OBCloud, andtestas keywords to receive OceanBase Cloud alerts.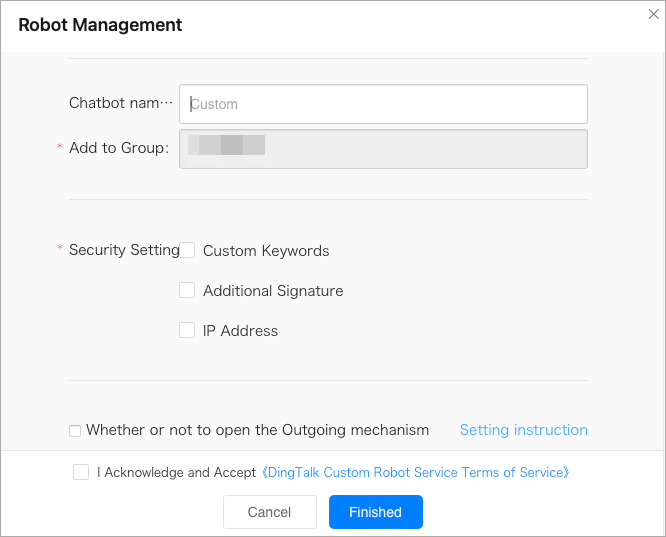
Select I Acknowledge and Accept DingTalk Custom Robot Service Terms of Service after carefully reading the clauses, and then click Finished.
In the Add Robot dialog box, copy the webhook URL of the chatbot.
Note
We recommend that you keep the webhook URL confidential and do not disclose it to public websites such as GitLab and blogs. Otherwise, you may receive malicious spam messages.

Lark bot
To obtain the webhook URL of a Lark bot, perform the following steps:
Note
For more information about how to use a Lark chatbot, see Add a robot to a group.
Log in to the Lark client and enter the target chat group.
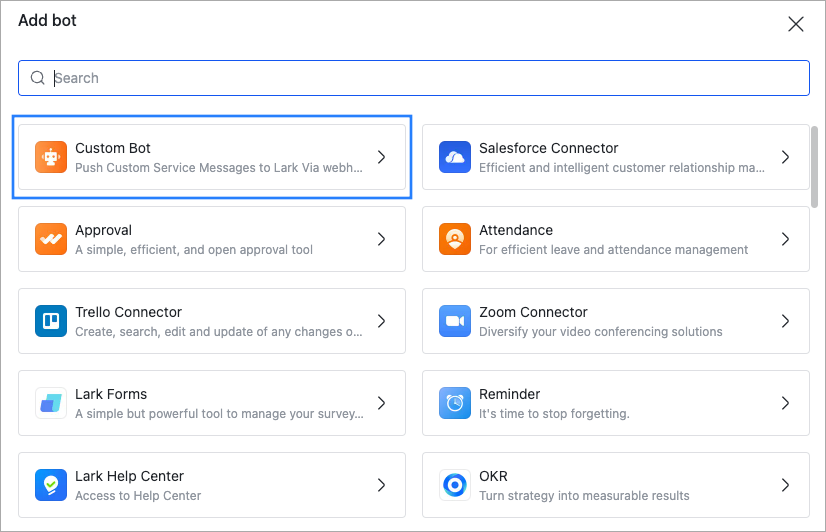
In the upper-right corner of the group chat window, choose More > Settings. In the dialog box that appears, choose Bots > Add bot.

In the dialog box that appears, click Custom Bot.
Specify the avatar, name, and description of the custom chatbot, and click Add.
On the chatbot details page, you can obtain the Webhook URL and configure security settings.
Note
We recommend that you keep the Webhook URL confidential and do not disclose it to public websites such as GitLab and blogs. Otherwise, you may receive malicious spam messages.
ParameterNoteWebhook URL You can copy the Webhook URL of the chatbot. Security settings The current version supports security settings only by specifying custom keywords. Note
We recommend that you add
OceanBaseandOBas keywords to receive OceanBase Cloud alerts.Settings Set the chatbot management permissions. 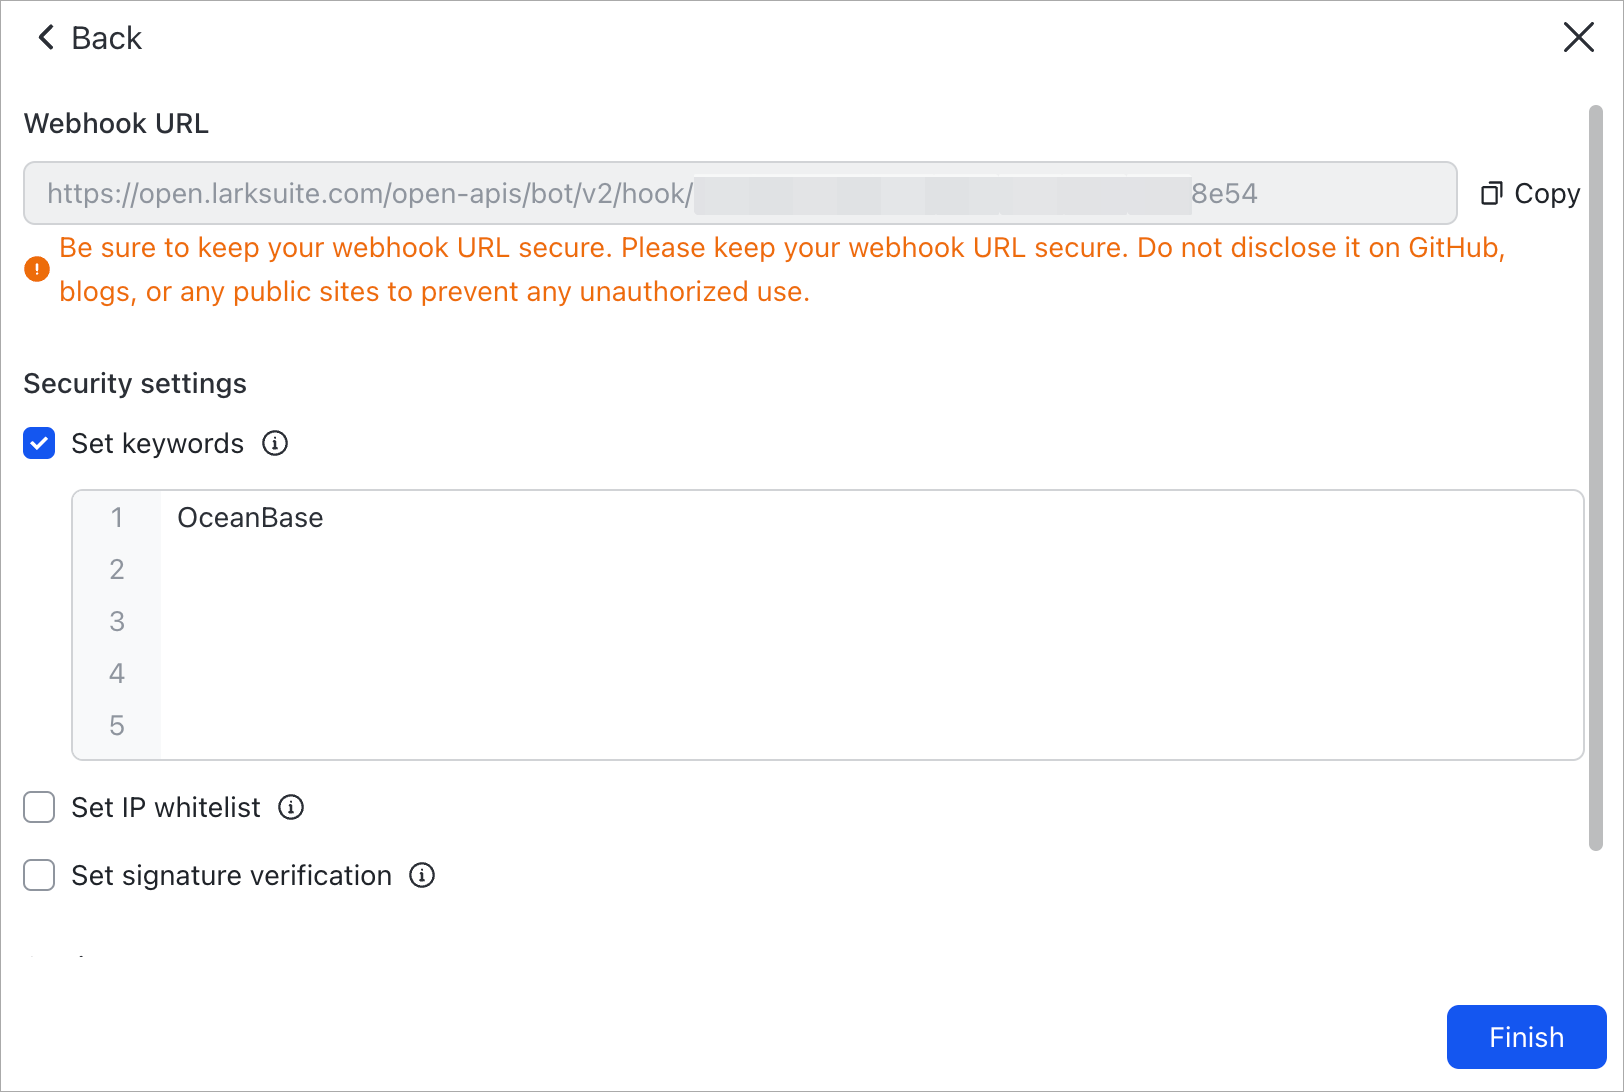
Telegram bot
To obtain the webhook URL of a Telegram bot, perform the following steps:
Create a Telegram alert bot.
In the Telegram search bar, search for @BotFather and open a chat with it.

Enter
/newbotto create a new bot, then follow the prompts to enter the bot's display name and username.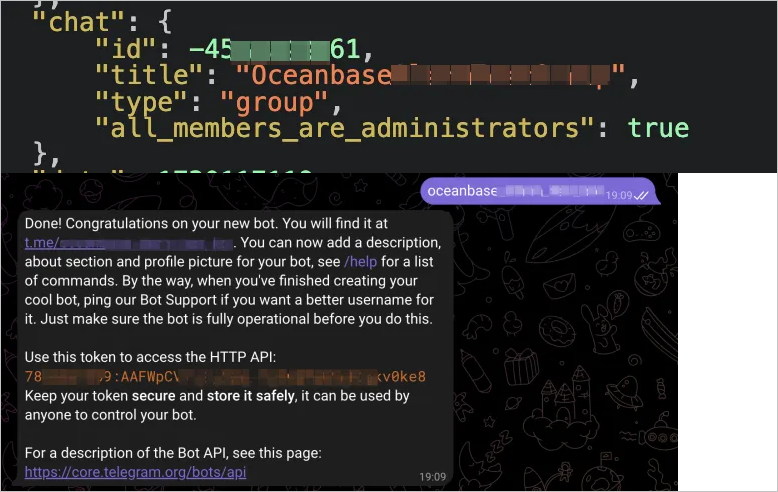
Save the bot's username and the API token displayed in orange after the bot is created.
Obtain the chat ID.
After creating the group chat, add the bot to the group by using its username.
Since Telegram does not allow you to retrieve the group chat ID directly through the client, you will need to use a specific request via a browser for security reasons.
After adding the bot to the group, enter the following URL in your browser’s address bar to view the latest information received by the bot:
Use this URL format:
https://api.telegram.org/bot<token>/getUpdates, replacing<token>with the API token obtained when creating the bot.Example URL:
https://api.telegram.org/bot123456:ABC-DEF1234ghIkl-zyx57W2v1********/getUpdates.Note
If the group only includes the group owner and the bot, you may not receive any information. We recommend having at least three members in the group, or you can adjust the group's administrator settings to ensure the bot receives updates.
In the JSON response, search for the "chat" field to locate the chat ID.
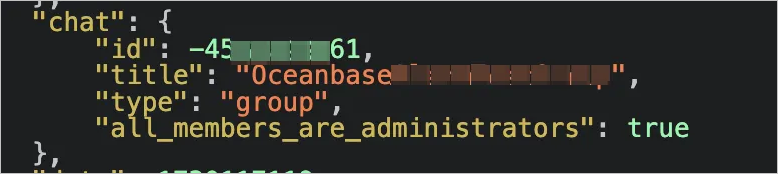
As shown above, the "id" field contains the required chat ID.
Note
If the group chat undergoes changes, such as being upgraded to a supergroup, the chat ID may change. Ensure you retrieve the latest chat ID when needed.
Construct the webhook URL.
Use the following URL format, replacing
<token>with the bot’s API token and<chat id>with the group chat ID.https://api.telegram.org/bot<token>/sendMessage?chat_id=<chat id>Example:
https://api.telegram.org/bot123456:ABC-DEF1234ghIkl-zyx57W2v1********/sendMessage?chat_id=-45********