


Introduction
Informatica provides a range of data integration products to help enterprises do large-scale data warehouse integration, big data integration, cloud integration, real-time data integration, data quality management, data governance, and data exchange.
Informatica offers a series of data management products and solutions, including ETL, data quality, data governance, data privacy, and protection tools, as well as solutions for specific industries.
This document introduces Informatica Cloud, a set of cloud-based data integration and data management solutions provided by Informatica. Informatica Cloud enables users to connect and integrate heterogeneous data sources in a cloud environment, including both on-premises and cloud-based data sources to do data analysis, data insights, and business decision-making.
Prerequisites
Before you start using Informatica Cloud, you need to do some pre-configurations to do smooth data connection and synchronization.
Log in to Informatica Cloud and configure the Agent according to the official documentation.
Note
- If you are using an OceanBase version prior to V4.2.4, we recommend that you manage the Agent manually and install MySQL ODBC 8.0.32 or higher.
- Using Informatica Cloud is subject to Informatica's billing rules and may incur corresponding charges. Please visit its official website or view the relevant documentation to confirm and accept its billing standards before proceeding. If you disagree, please do not proceed with the operation.
Add the IP of Informatica Cloud Agent to your OceanBase Cloud whitelist.
(Optional) Enable CDC. If you need to use CDC, enable the Binlog service for your OceanBase Cloud instance.
Example usage
This section uses OceanBase as a source and synchronizes data to a target Snowflake via Informatica Cloud.
From
Data Integration -> New Asset, selectCopy data to an existing target. You can also choose other types of tasks likeReplicate a MySQL table or view incrementally to an existing targetbased on your needs.Select MySQL type to add a connection. The connection information can be obtained from the OceanBase Cloud console
Instance -> Tenant -> Connect -> Get Connection String. ClickTestto make sure that the connection is successful.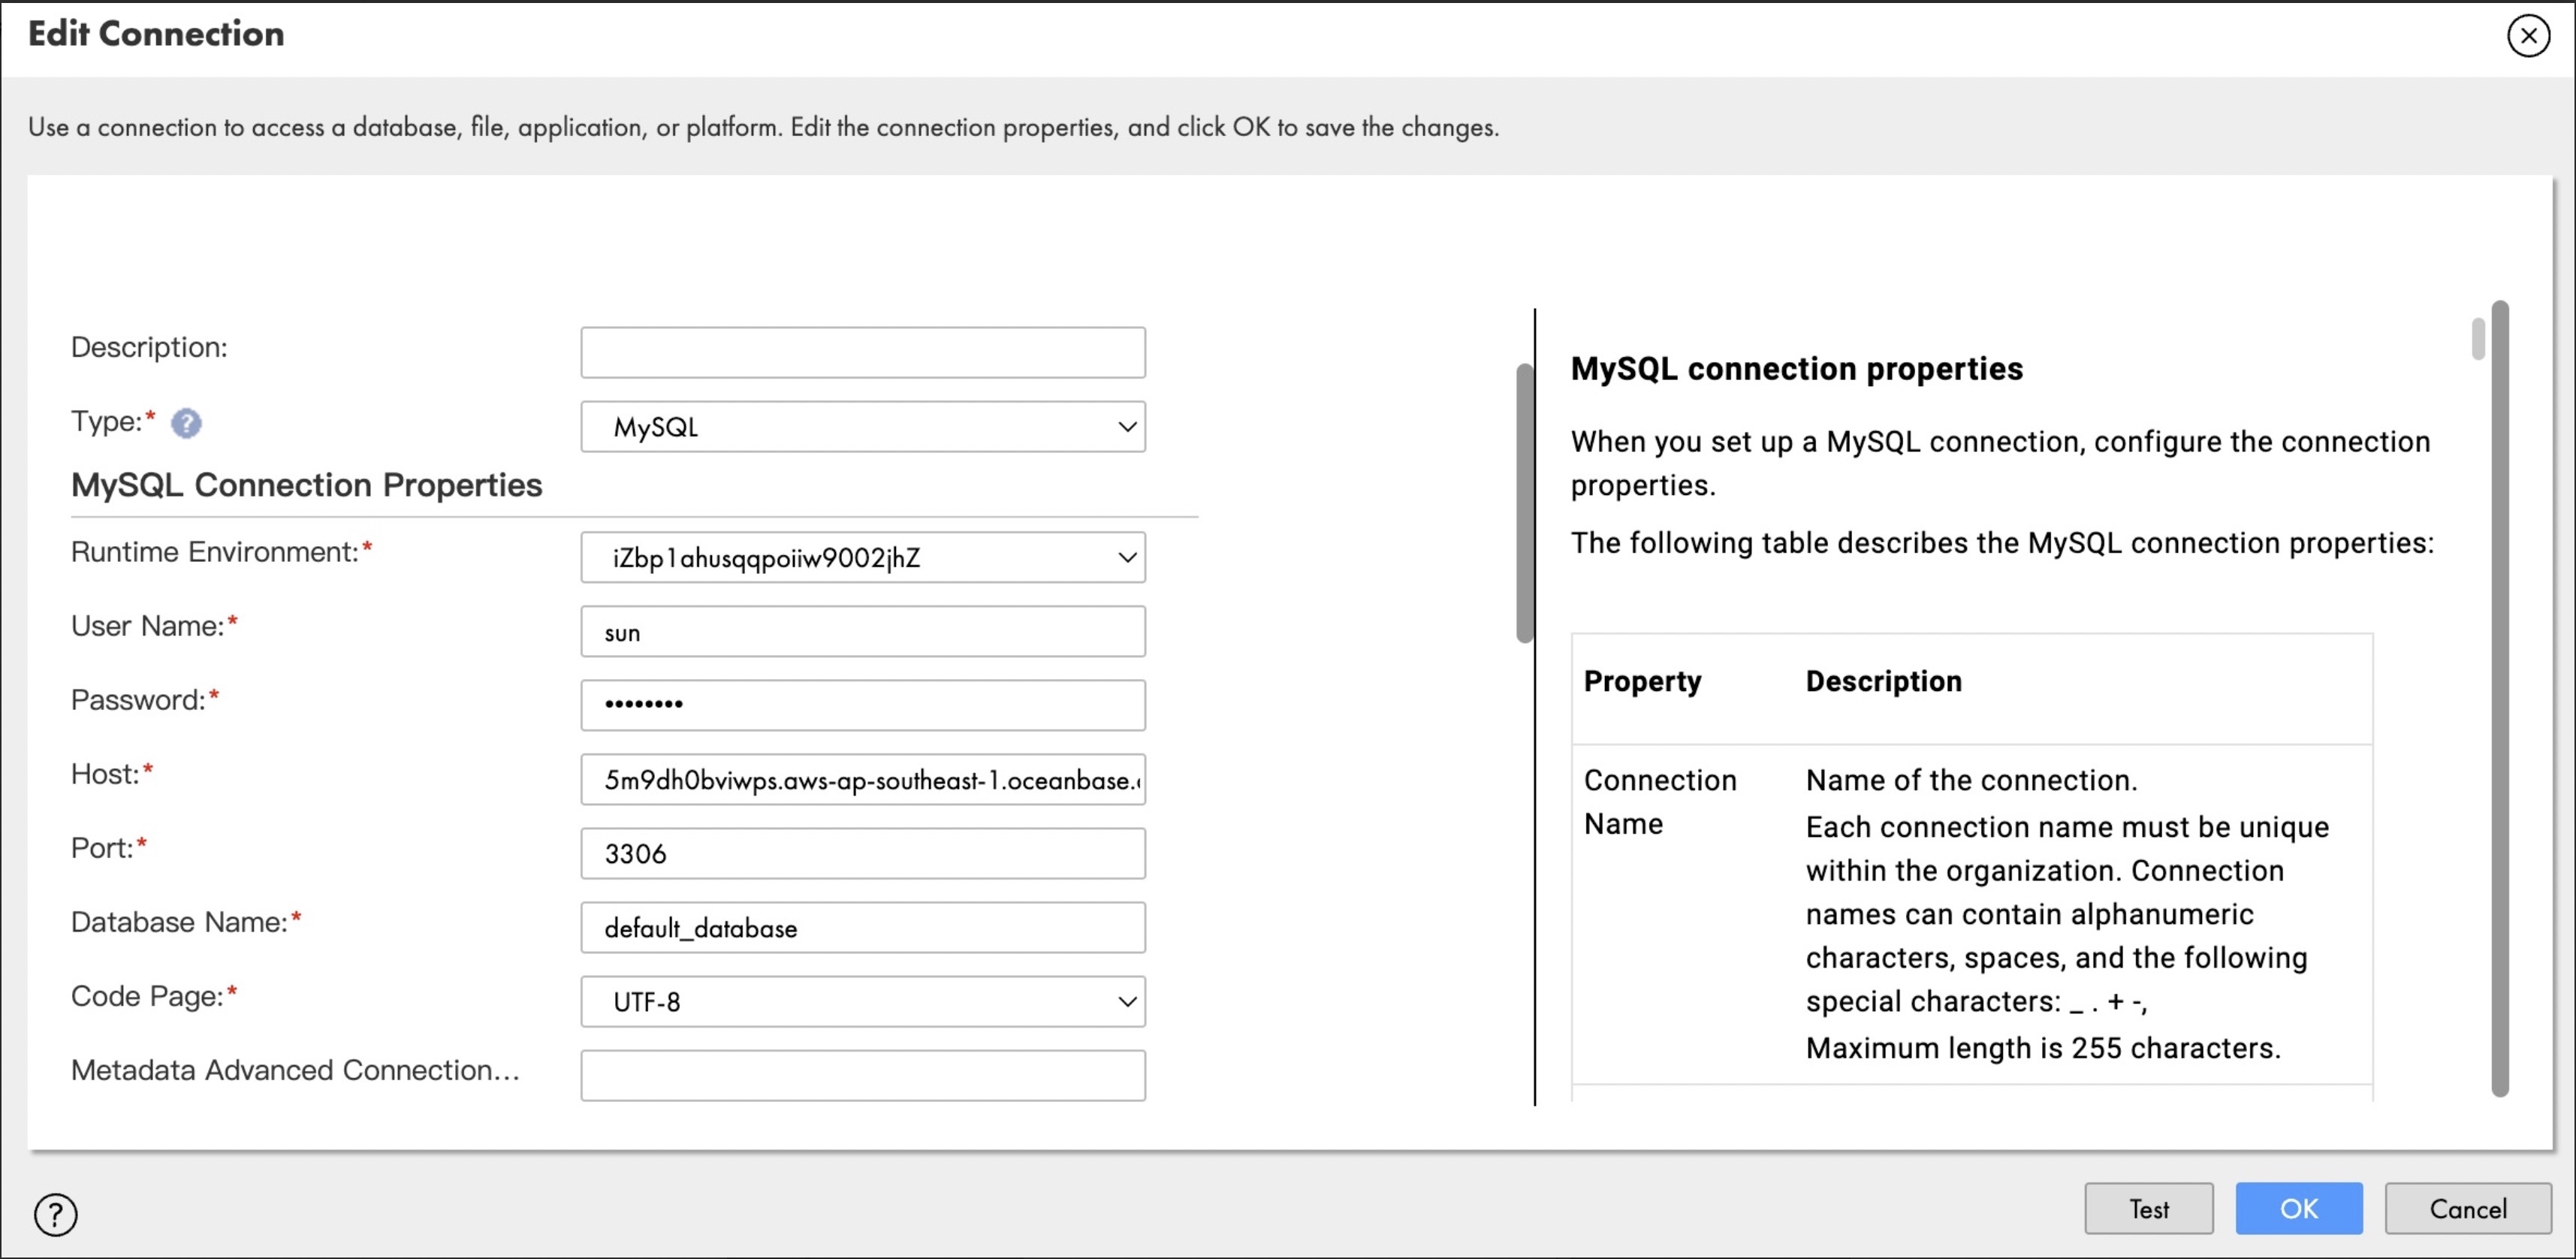
After you connect to your OceanBase instance, select the database and tables to be synchronized in the next step and click
OKto proceed.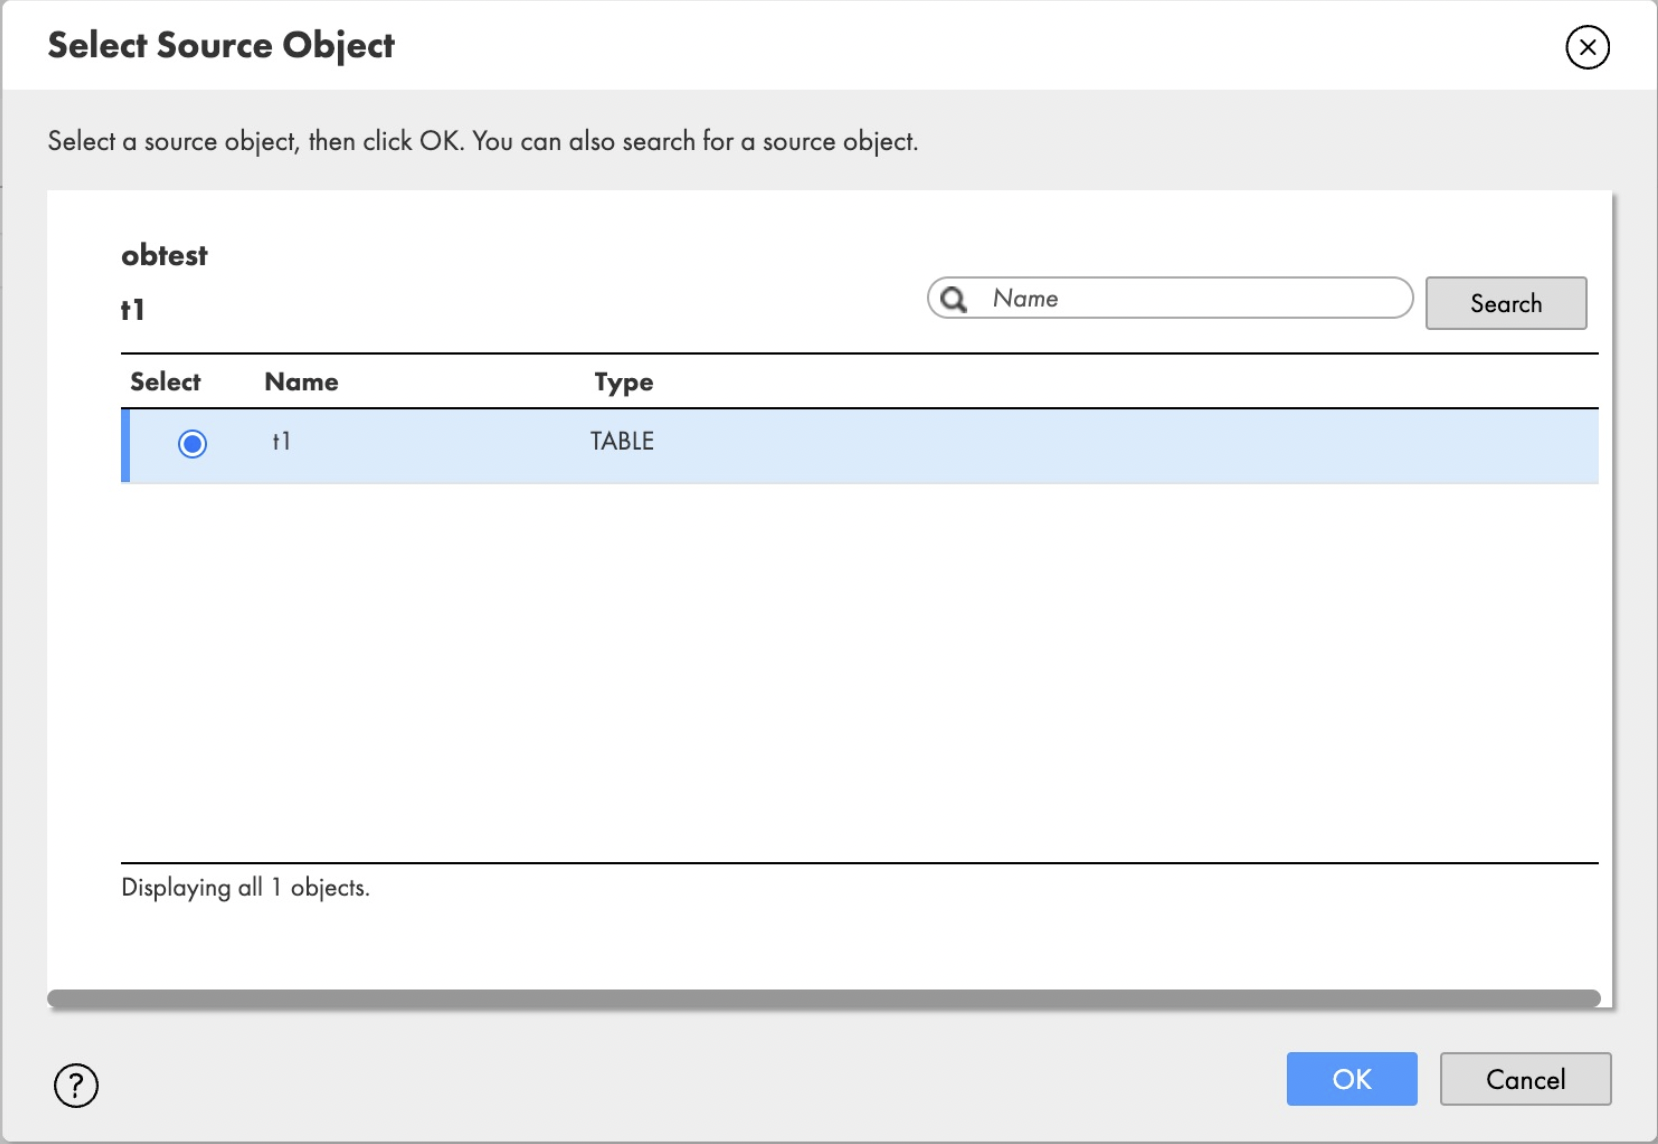
In the new connection information, select
Snowflake Data Cloudand enter the Snowflake connection details. ClickTestto make sure that the connection is successful.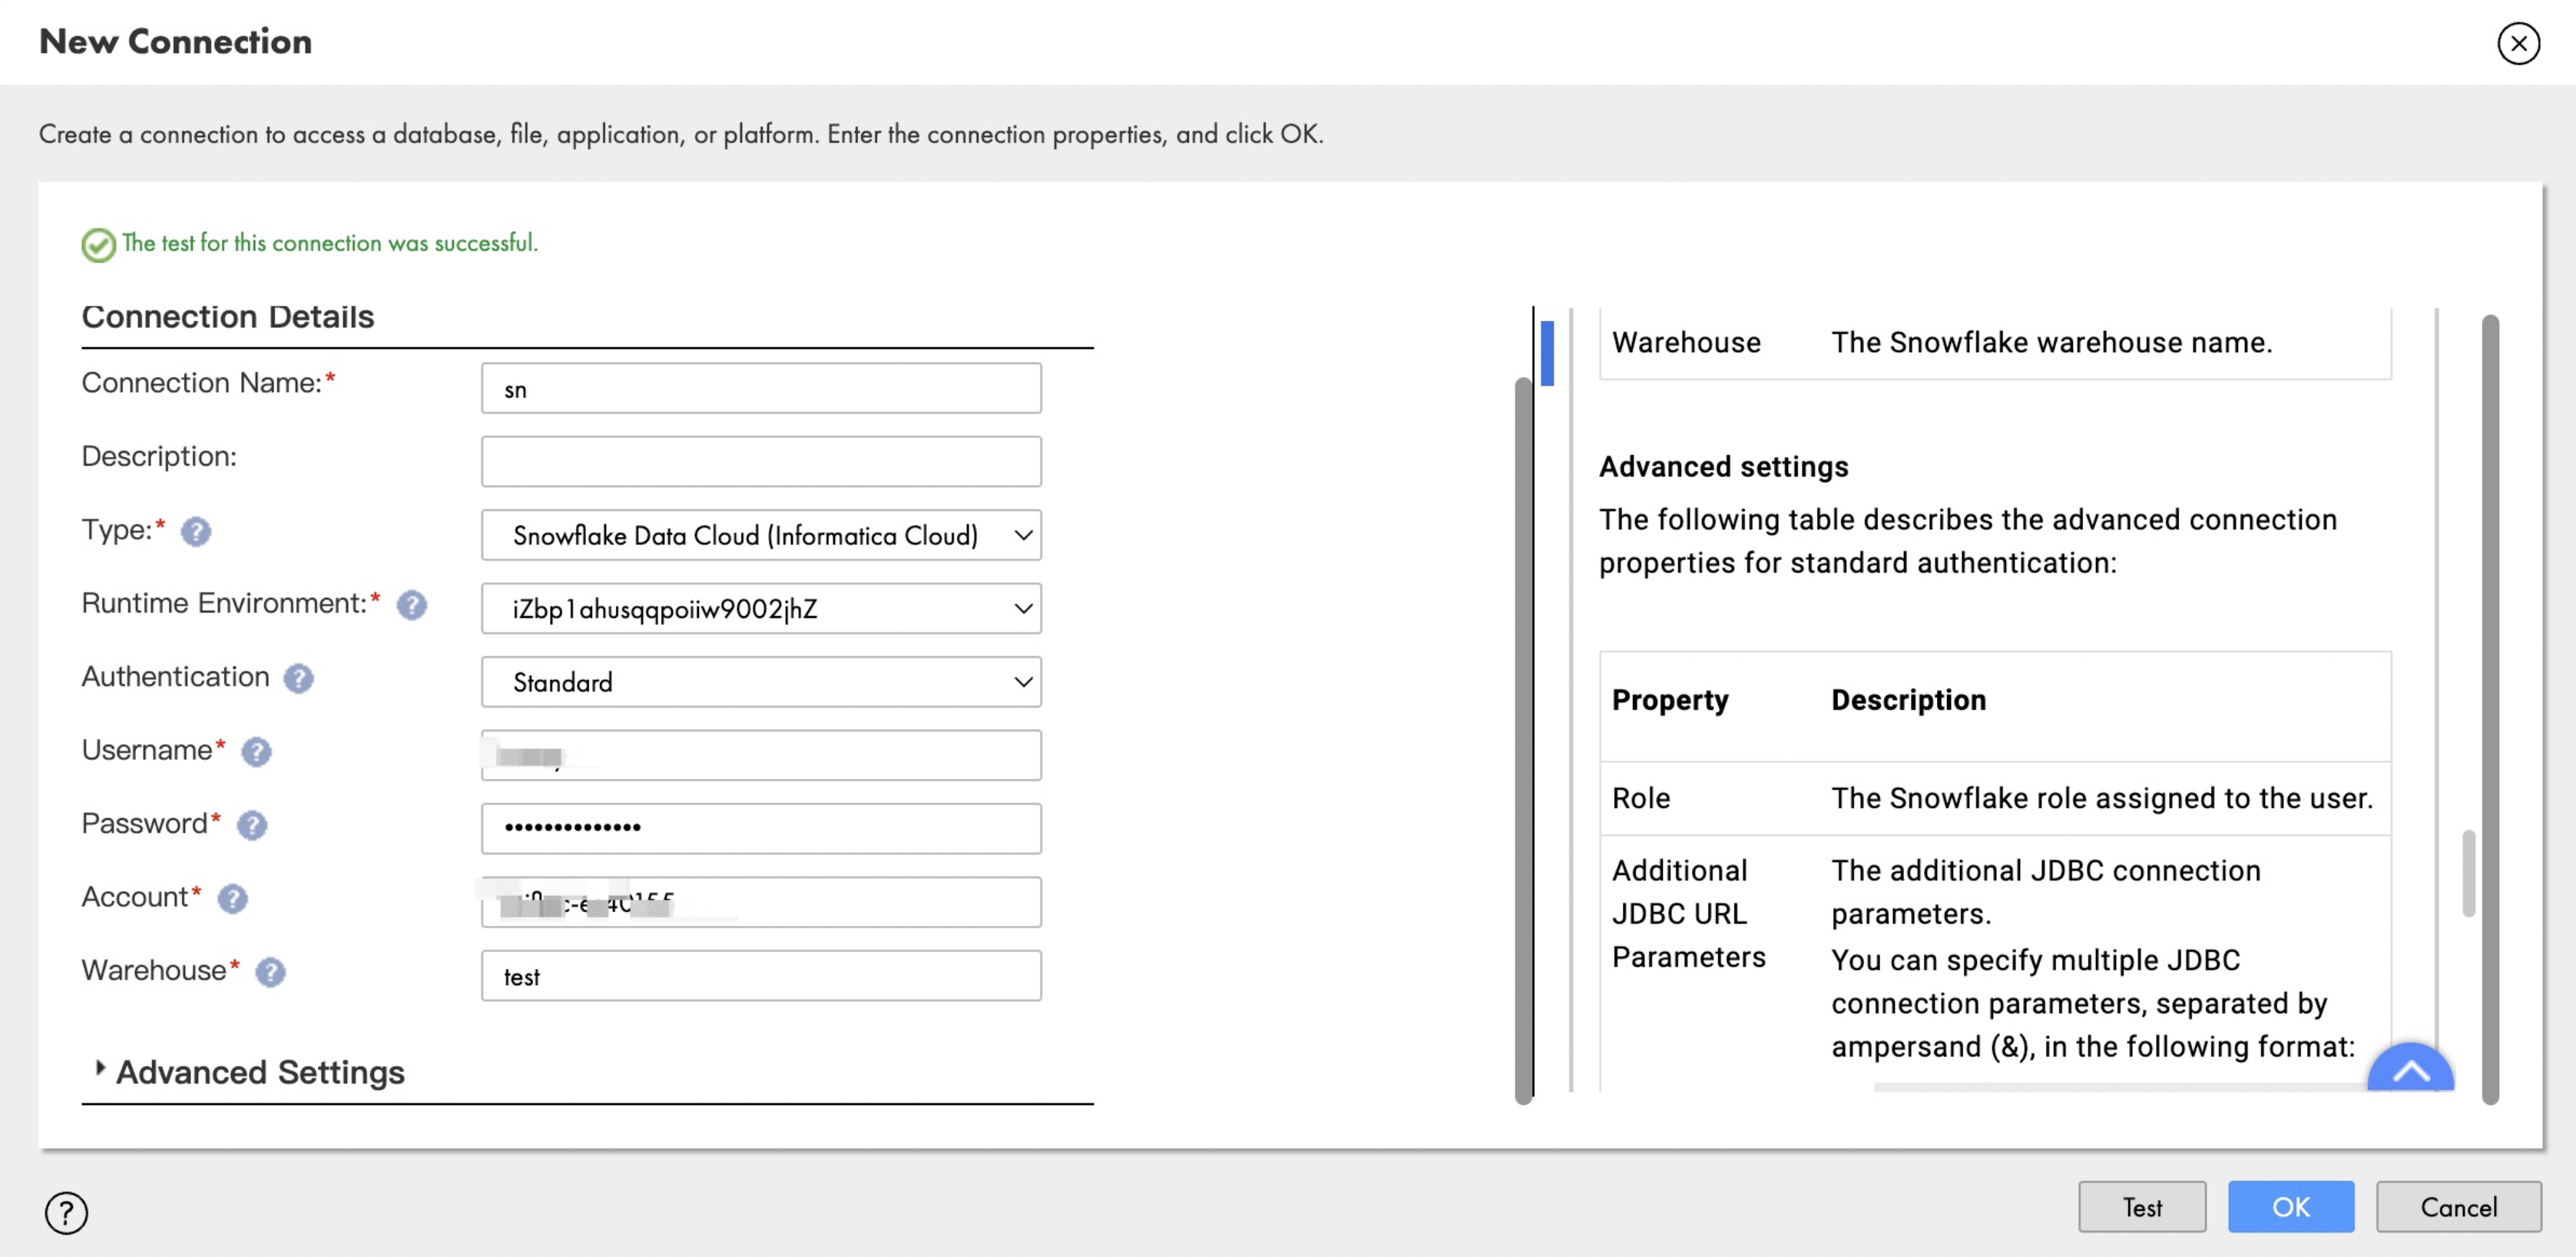
Configure the Mapping, i.e., the field mapping relationship between the source and target.

After you confirm that all information is correctly filled in, click
Nextto run the synchronization task and check the logs to make sure that the synchronization is normal.