


This topic introduces how to connect to OceanBase Cloud in Superset and import data to Superset for presentation.
Prerequisites
- You have configured and run Superset on your local machine. For details, refer to Superset Quick Start.
- You have registered an OceanBase Cloud account, and have created an instance and a MySQL-compatible tenant. For details, refer to Create an instance and Create a tenant.
- You have prepared an available dataset for testing. The dataset used in this topic is from Kaggle.
Procedure
Step 1: Obtain an OceanBase Cloud connection string
Log in to the OceanBase Cloud console. On the Instances page, expand the target instance and click Create under the target tenant.
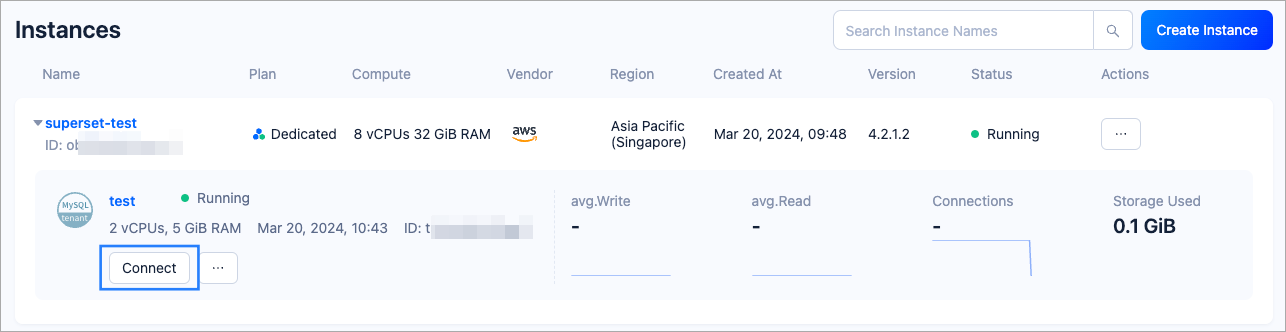
In the pop-up window, click Connect with Public IP.
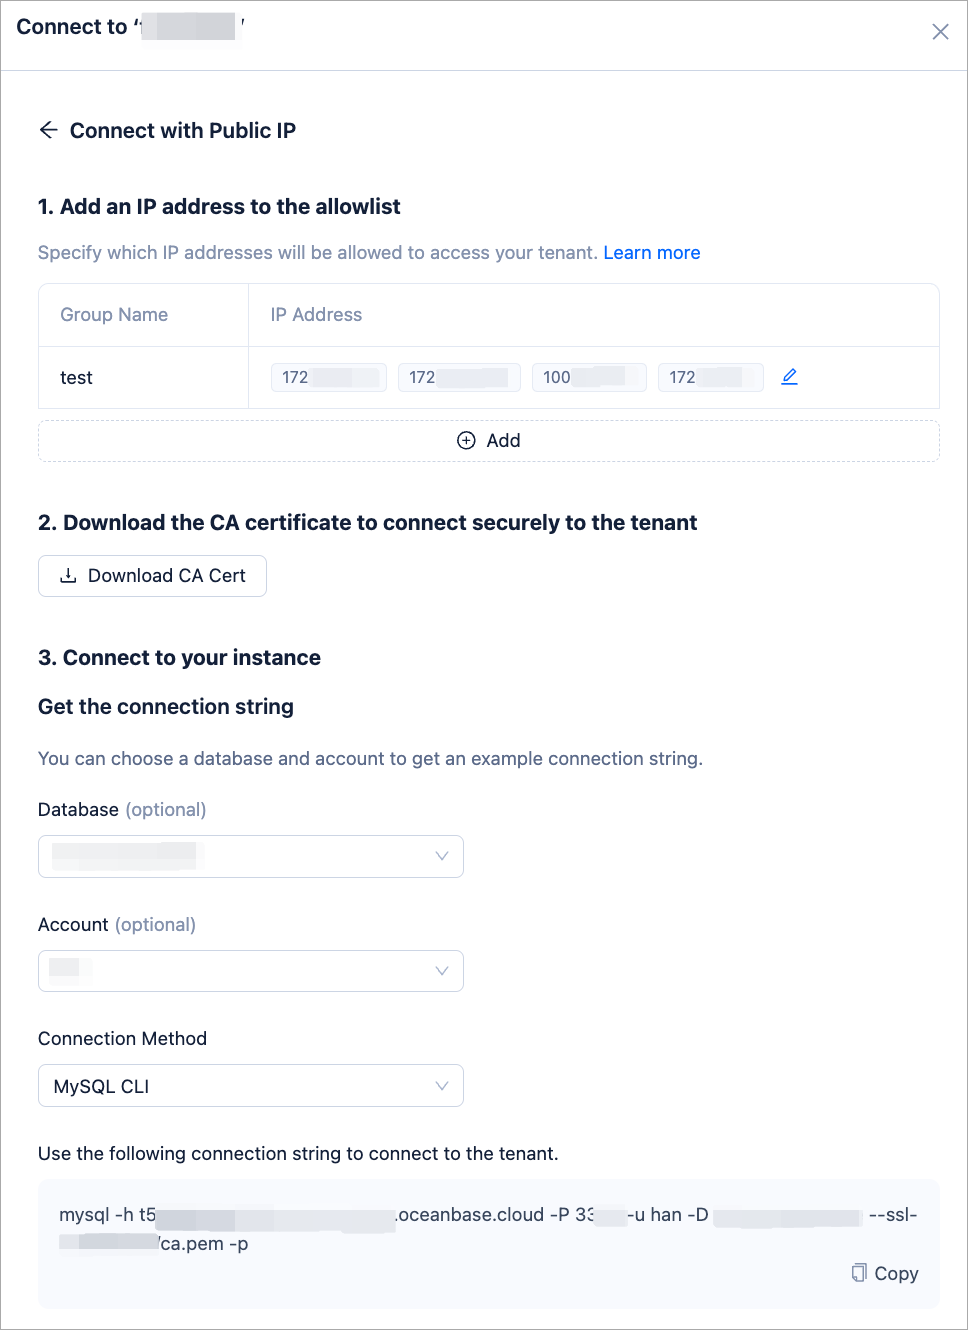
In the Connect with Public IP window, complete the following settings to generate the connection string:
Under 1. Add an IP address to the allowlist, click Add to add your exit IP address(es) used for the connection to the allowlist.
(Optional) Under 2. Download the CA certificate to connect securely to the tenant, download the CA certificate and complete the verification.
Under 3. Connect to your instance, click the drop-down list for Database and Account to create a database and an account for the connection. Select MySQL CLI as the connection method.
Notice
Please keep your password in a secure place after creating your account.
Step 2: Connect to OceanBase Cloud in on the Superset console
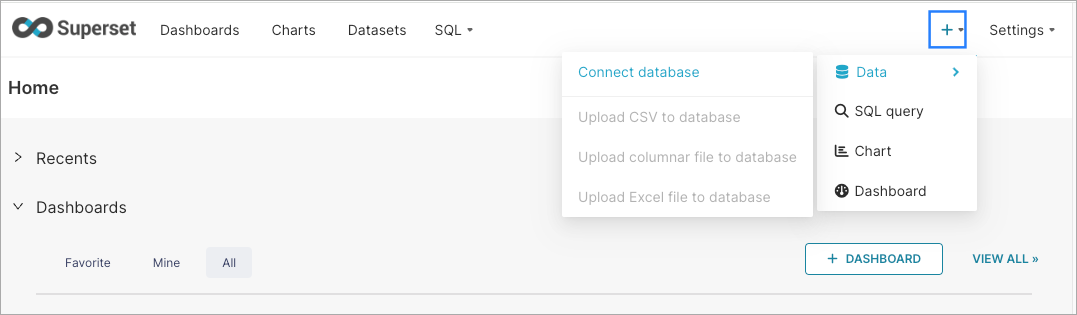
Navigate to the Superset console that is running, and select + > Data > Connect database in the upper right corner of the page.
In the pop-up window, complete the following settings:
Under the step Select a database to connect, select MySQL.
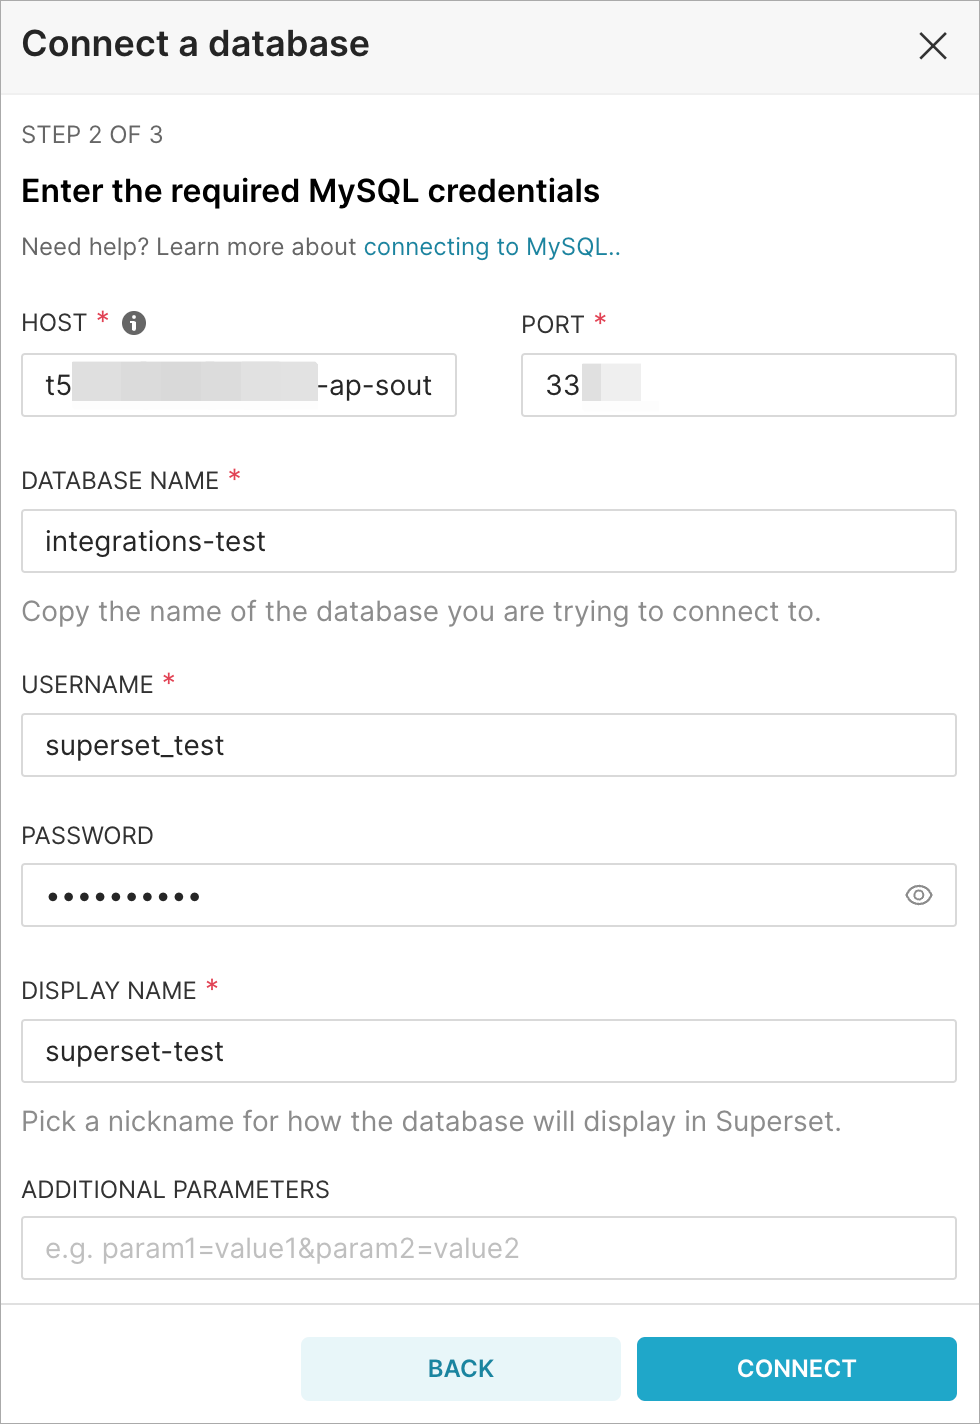
Under the step Enter the required MySQL credentials, complete the following fields according to the connection string generated on the OceanBase Cloud console. For DISPLAY NAME, you can customize according to your needs.
- HOST: Taken from the
-hparameter in the connection string, which is the hostname of OceanBase Cloud database. - PORT: Taken from the
-Pparameter in the connection string, which is the OceanBase Cloud database connection port. - DATABASE NAME: Taken from the
-Dparameter in the connection string, which is the name of the database to be accessed. - USERNAME: Taken from the
-uparameter in the connection string, which is the account name. - PASSWORD: Taken from the
-pparameter in the connection string, which is the account password.
- HOST: Taken from the
Click CONNECT, and then click FINISH.
Step 3: Import data on the OceanBase Cloud console and create a table
Navigate back to the OceanBase Cloud console, close the public IP connection pop-up window to return to the Instances page. Under the target tenant, select ... > Load Data.

In the pop-up window, upload the dataset you have prepared. You can choose to upload from your local machine or from the cloud.

In the Account and Password fields, enter the account and password you just created in Step 1: Obtain an OceanBase Cloud connection string. Then click Preview.
In the Load data - Preview window, for the field Database, select the database you created in Step 1: Obtain an OceanBase Cloud connection string. For the field Table, enter a preferred table name to create the table.

Preview the schema under Table Schema Preview. Click Import to continue.
Step 4: Create a dataset on the Superset console
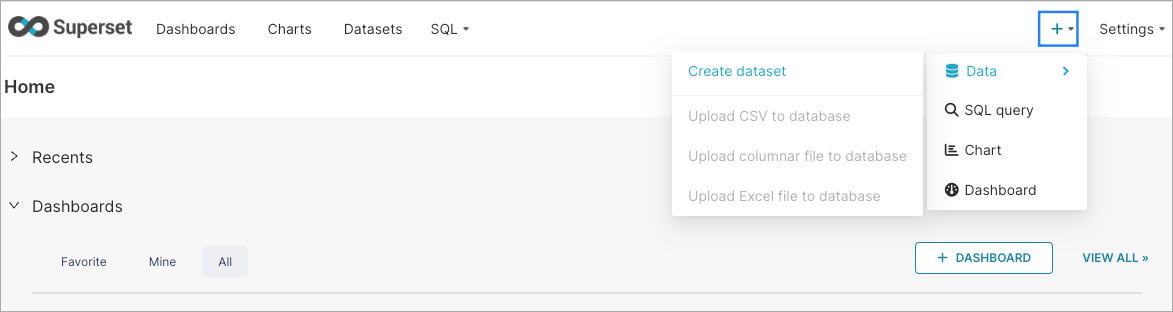
Navigate back to the Superset console, and select + > Data > Create dataset in the upper right corner of the page.
Complete the following settings on the New dataset page:
ConfigurationDescriptionDATABASE Select the database name provided for the DISPLAY NAME field in Step 2: Connect to OceanBase Cloud in on the Superset console. SCHEMA Select the database you created in Step 1: Obtain an OceanBase Cloud connection string. TABLE Select the table you created in Step 3: Import data on the OceanBase Cloud console and create a table. 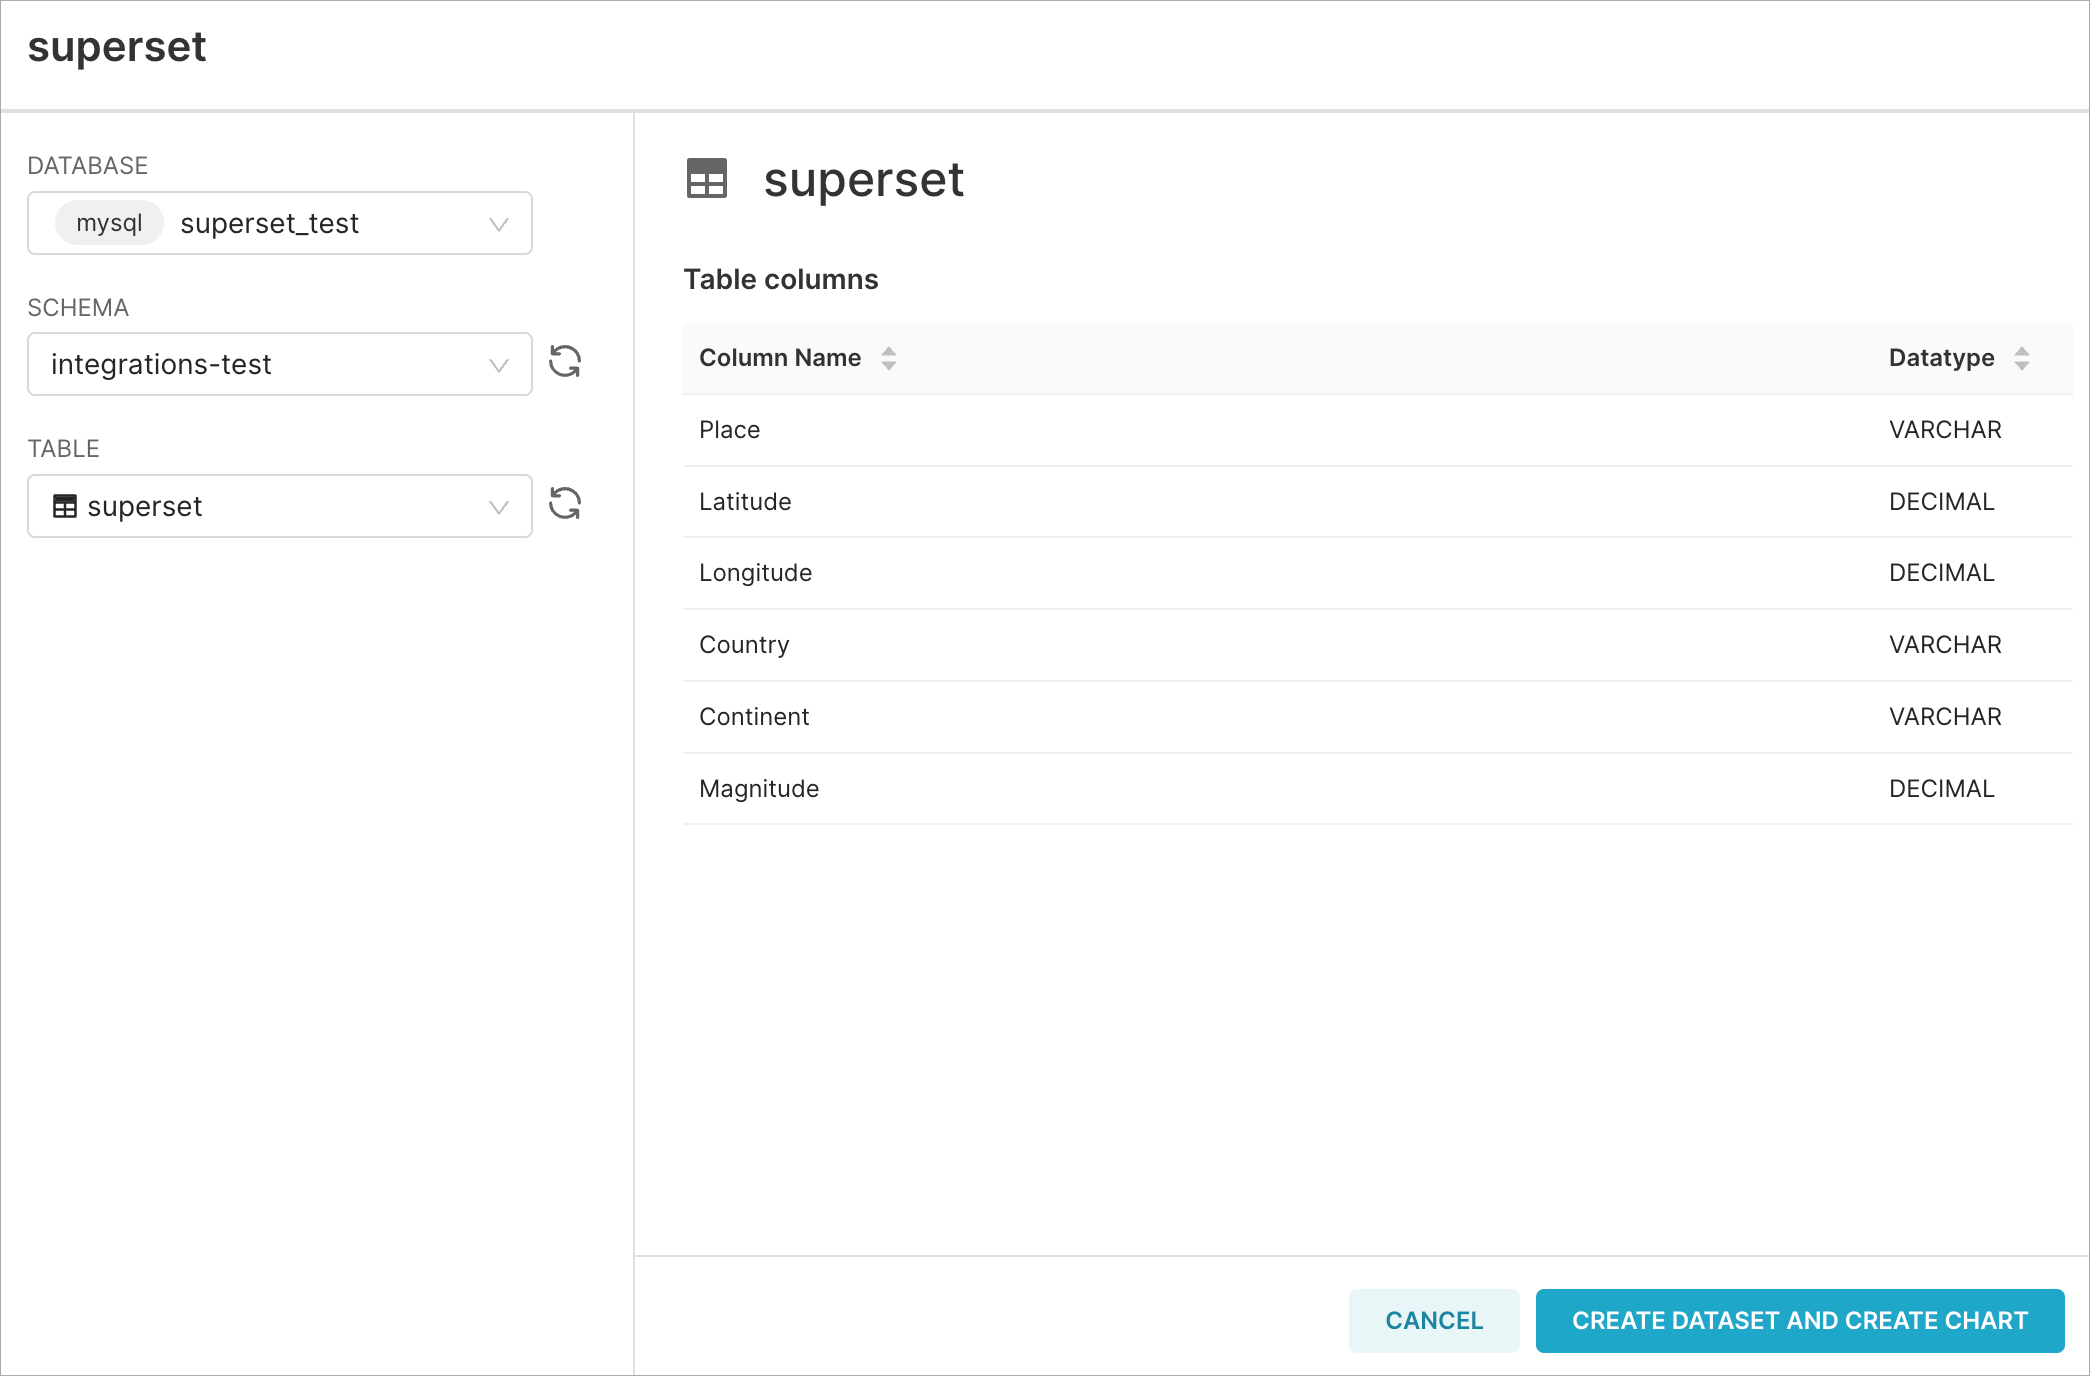
Click CREATE DATASET AND CREATE CHART to create the dataset.
What's next
After creating the dataset, you can choose a chart type according to your preference and click CREATE NEW CHART to set up the chart. For more information on setting up the charts, refer to Superset documentation.