


Navicat is a universal database client tool that supports common relational databases, non-relational databases, distributed databases, and more.
This topic will use the OceanBase Cloud MySQL-compatible tenant as an example to demonstrate how to connect to OceanBase Cloud databases using Navicat.
Prerequisites
You have downloaded and installed Navicat Premium.
You have registered an OceanBase Cloud account, and have created an instance and a tenant. For details, refer to Create an instance and Create a tenant. This topic uses a MySQL-compatible tenant as an example.
Note
The Navicat macOS client currently does not support connecting to Oracle-compatible tenants in OceanBase Cloud.
Procedure
Step 1: Obtain an OceanBase Cloud connection string
Log in to the OceanBase Cloud console. On the Instances page, expand the target instance and click Create under the target tenant.
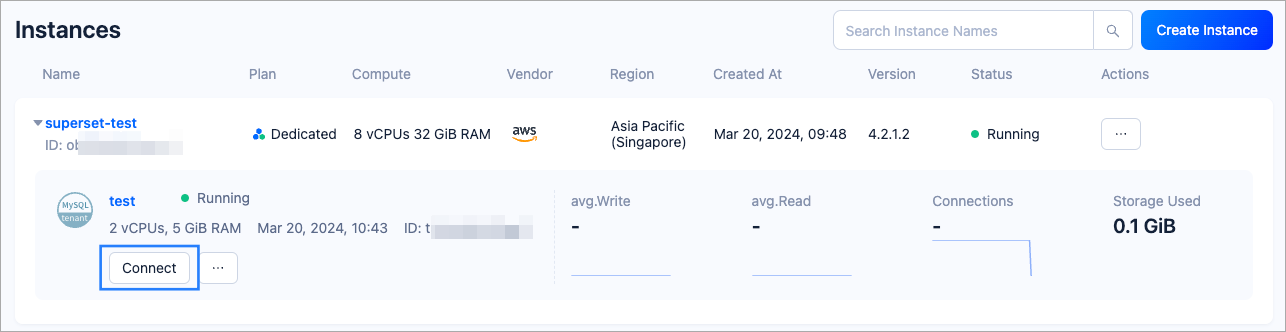
In the pop-up window, click Connect with Public IP.
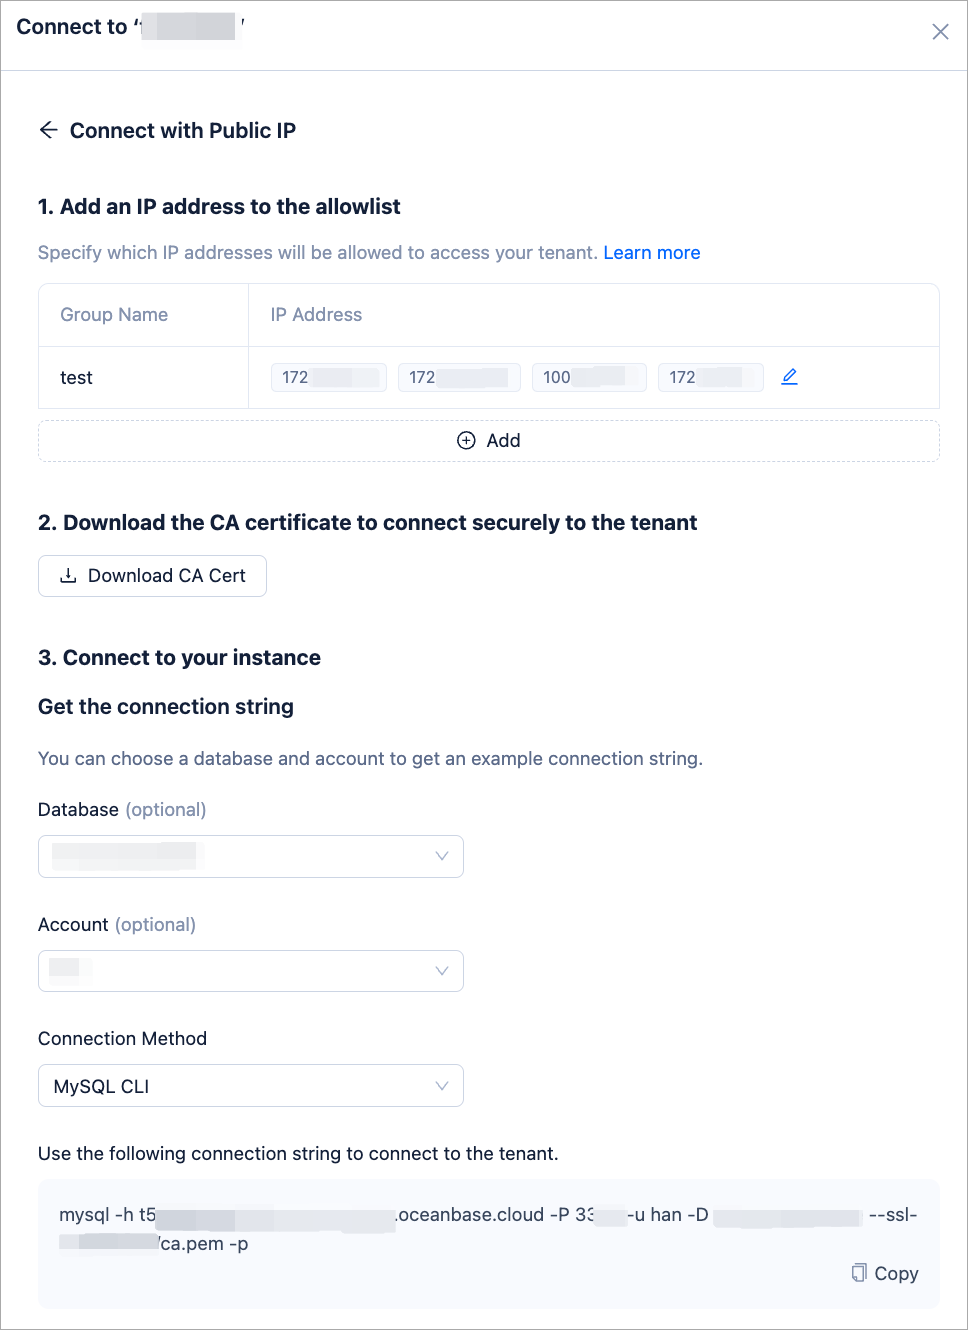
In the Connect with Public IP window, complete the following settings to generate the connection string:
Under 1. Add an IP address to the allowlist, click Add to add your exit IP address(es) used for the connection to the allowlist.
(Optional) Under 2. Download the CA certificate to connect securely to the tenant, download the CA certificate and complete the verification.
Under 3. Connect to your instance, click the drop-down list for Database and Account to create a database and an account for the connection. Select MySQL CLI as the connection method.
Notice
Please keep your password in a secure place after creating your account.
Step 2: Connect to OceanBase Cloud in Navicat
Note
The operation interface of different Navicat versions may vary. This topic provides guidance on connecting to databases using Navicat Premium 16.3.7. For operations in other versions, refer to the product documentation of the corresponding Navicat version.
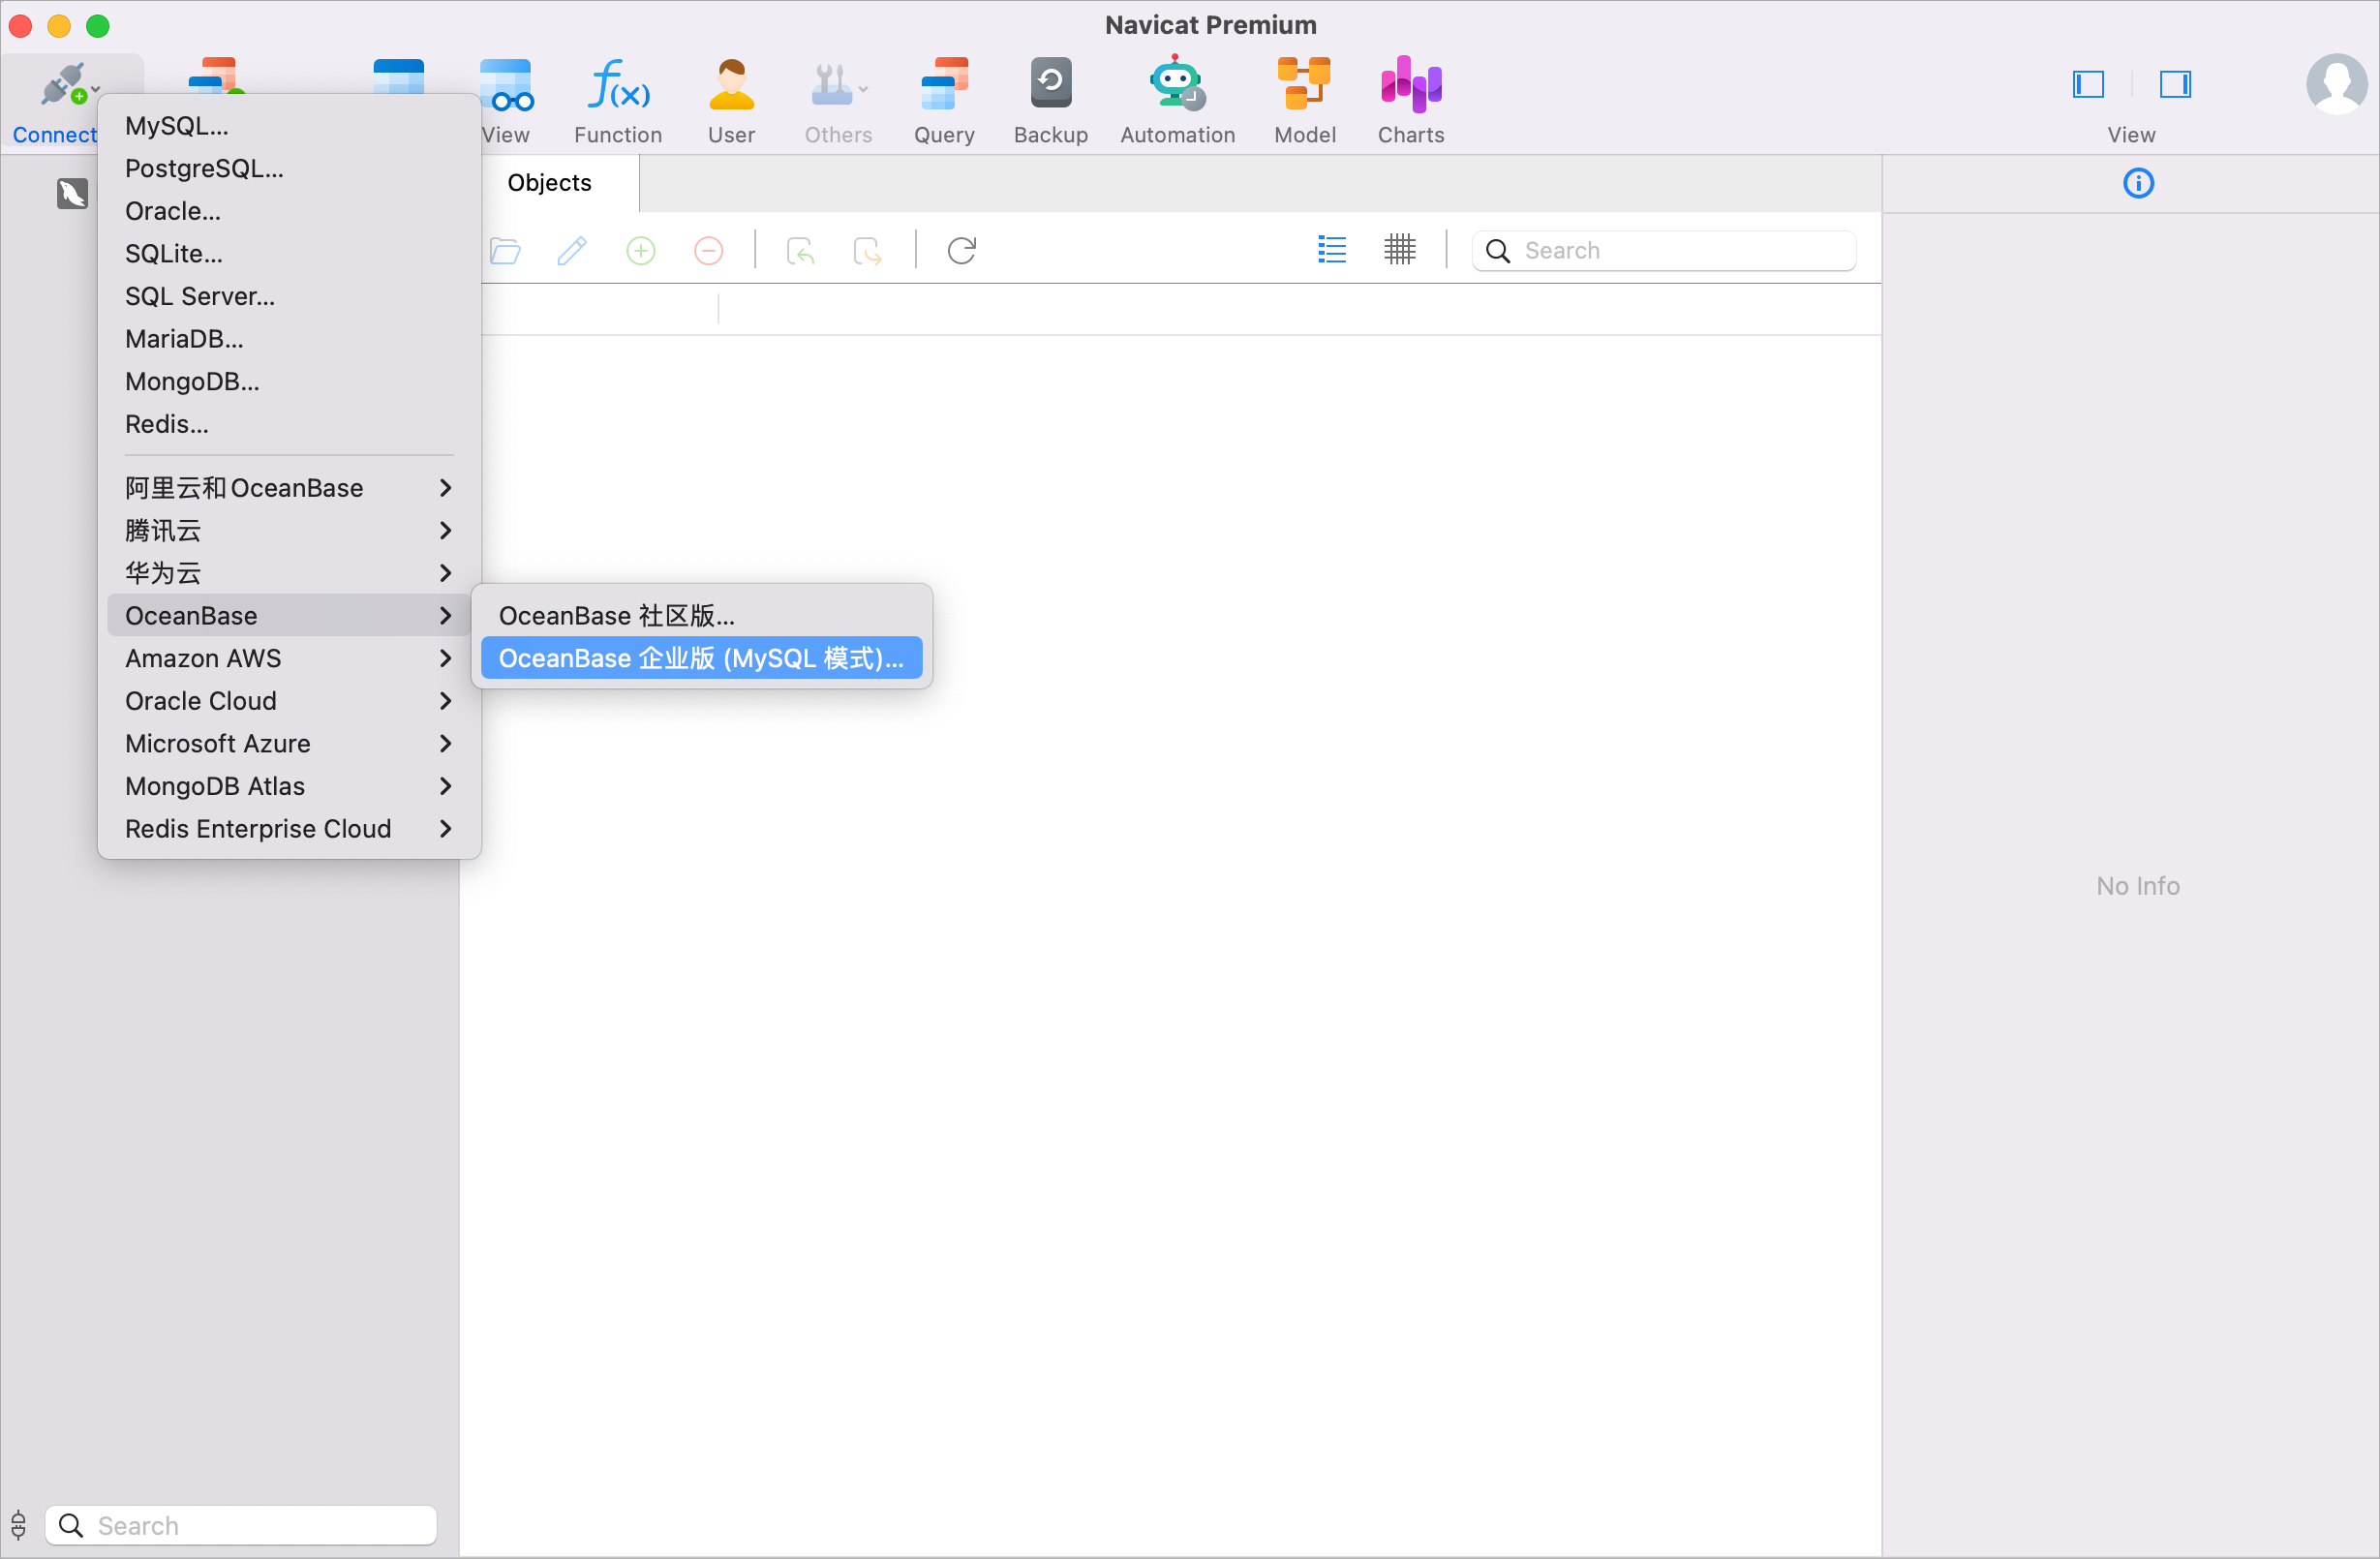
Open Navicat Premium, and in the upper-left corner of the application, select Connection > OceanBase > OceanBase Enterprise Edition (MySQL Compatible Mode) to open the New Connection window.
In the New Connection window, complete the following configuration based on Step 1: Obtain an OceanBase Cloud connection string:
FieldDescriptionConnection Name Enter a connection name of your choice. Host Taken from the -hparameter in the connection string, which is the hostname of OceanBase Cloud database, for example,t5******.aws-ap-southeast-1.oceanbase.cloud.Port Taken from the -Pparameter in the connection string, which is the OceanBase Cloud database connection port.Username Taken from the -uparameter in the connection string, which is the account name, for example,test.Password Taken from the -pparameter in the connection string, which is the account password.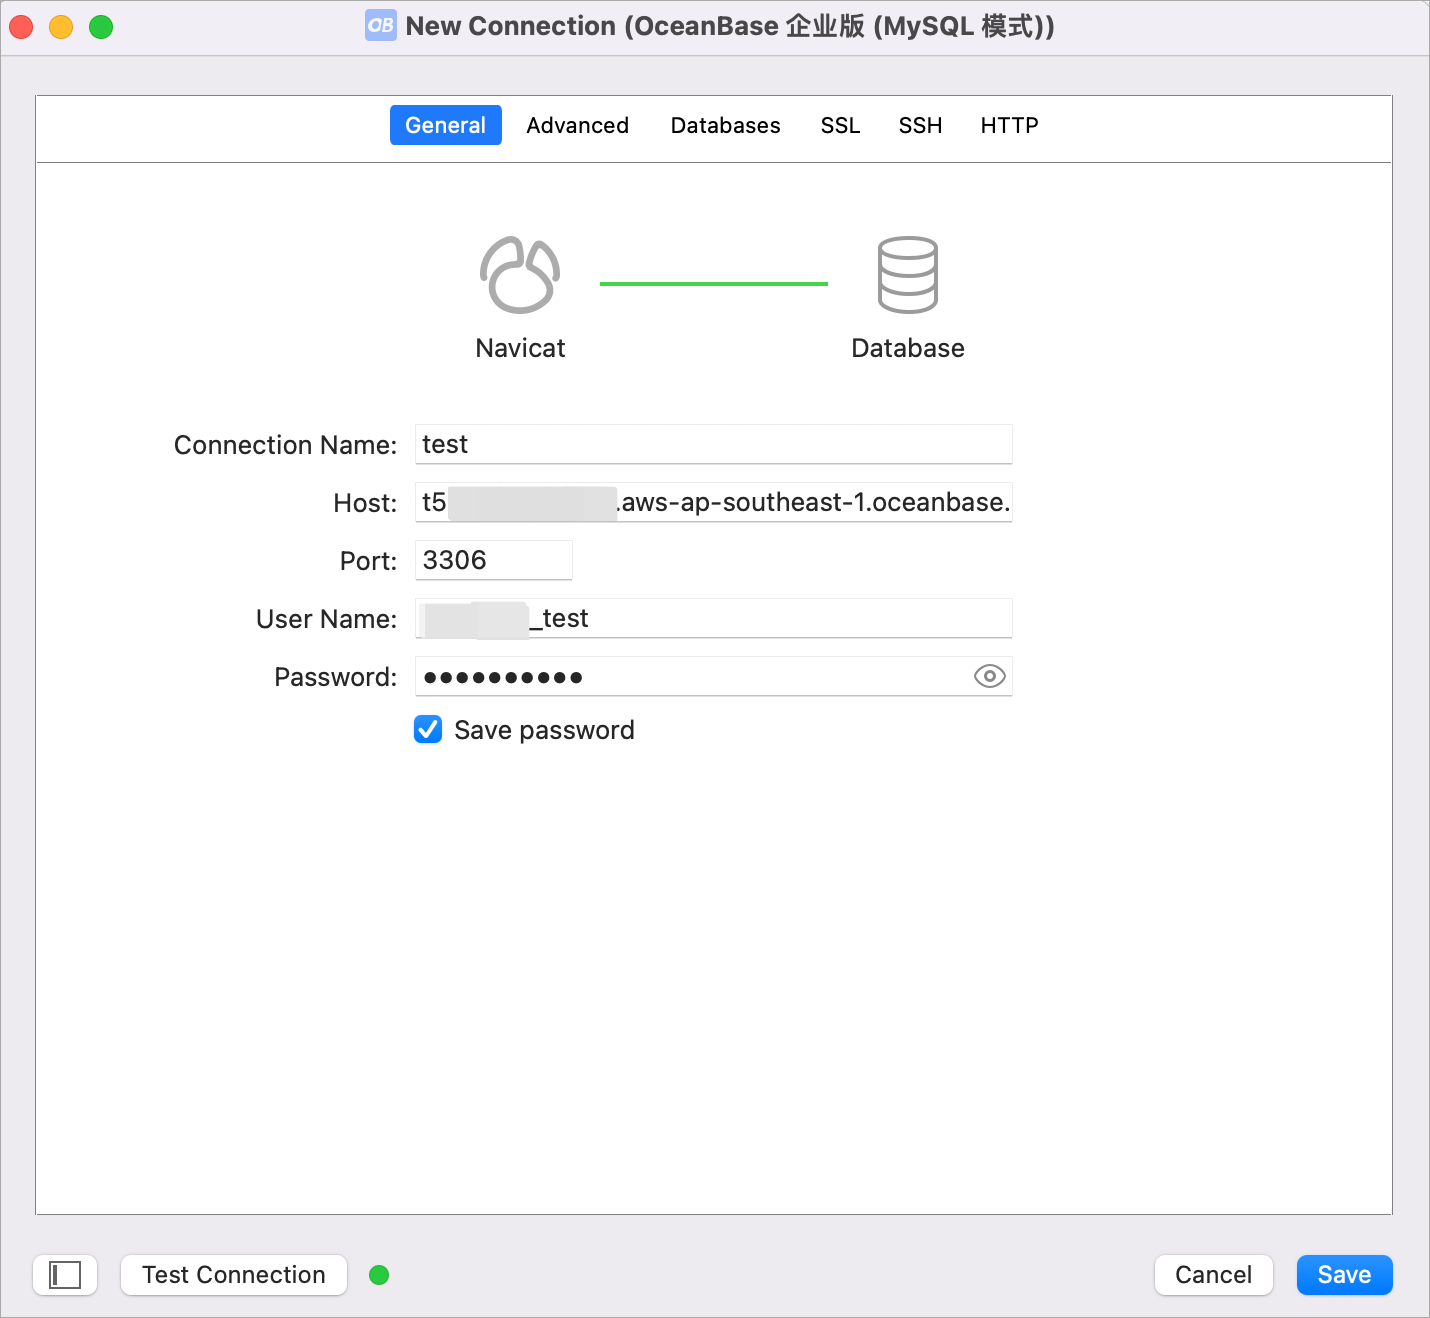
Click Test Connection. When the pop-up window displays Connected, it means the connection is successful. Close the pop-up at this time.
Click Save to connect to the OceanBase Cloud database.
In the left sidebar of the window, double-click the database name. If it expands as shown below, it means you have successfully connected to the OceanBase Cloud database.

What's next
After successfully connecting to the database, you can start using Navicat. For detailed instructions on using Navicat, refer to the Navicat Documentation.