


This topic describes some basic operations for using Client ODC.
Create a data source
Example: Create a data source in ODC for an OceanBase database in MySQL mode.
Parameter |
Example value |
|---|---|
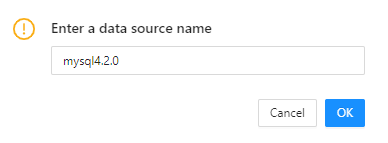
| Data Source Name | mysql4.2.0 |
| Host IP Address | xxx.x.x.x |
| Port | 8080 |
| Database Username | odc |
| Database Password | ****** |
| Sys Tenant Account | test |
| Sys Tenant Password | ****** |
Obtain the connection information or connection string of the data source instance. A connection string is in the format of mysql -h host name -P port number -u database username@tenant name # cluster name -D default database -p 'database password'.
In the left-side navigation pane, choose + > Create Data Source next to Data Sources.
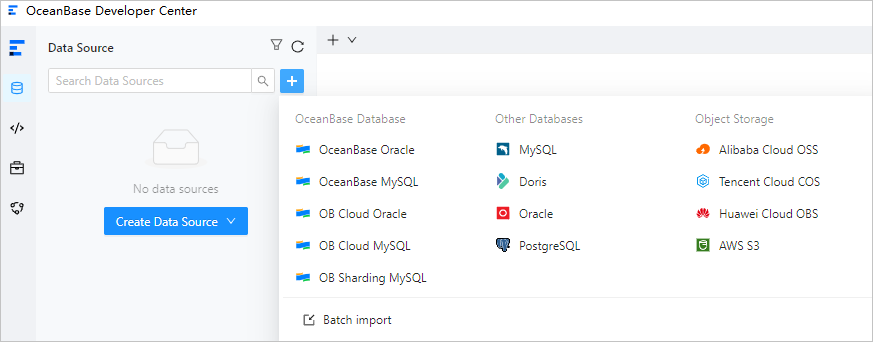
In the Create Data Source panel that appears, specify the following information.
Note
If you already have the connection string of an OceanBase database, you can directly obtain the required information from the connection string or enter the required information by using the intelligent parsing tool provided on the tab.
 ParameterDescription
Data Source Type OceanBase is selected by default. Intelligent Parsing You can paste a connection string to the field. ODC automatically identifies the string and fills in the corresponding value. Endpoint - Host IP: the IP address of the server where the target database is located.
- Port: the port number of the server where the target database is located.
- Cluster: the name of the cluster where the target database is located. This parameter is not required for logical databases.
- Tenant: the name of the tenant in which the target database is located. This parameter is not required for logical databases.
Note
You can obtain the host name and port number from the details page of the tenant in which the target database is located, such as a tenant created on Alibaba Cloud or in OceanBase Cloud Platform (OCP).Default port number: 8989.
Database Account - Account: the username of an account created in the tenant. In MySQL mode, this account must have the privilege to access the default database.
- Password: the password of the account created in the tenant. You can click Test Connection next to the password field to test whether you can connect to the target database.
Note
- An error will be returned if the configurations such as the username, password, and network settings are invalid.
- You can only connect to a database in the current tenant. Otherwise, a test failure error will be returned.
- Before saving the settings, you can click Test Connection to test the database connection. If the database username and password are correct, Connection succeeded is displayed. If you use ODC V4.0.0 and later, you can save the connection without setting the database account and password.
Environment The type of the environment. Valid values: Development, Test, and Production. Advanced Settings - sys Tenant Account: If you select Query Tenant Views with sys Tenant Account, you must specify Account and Password. When the database is a physical database, you can specify an account that has the permission to query the sys tenant views and the password. This field is automatically populated when
sysis specified as the tenant in Endpoint.- Account: the username of an account that has the permission to query views in the sys tenant.
- Password: the password of the account.
- SSL: Choose whether to enable SSL link encryption to ensure secure data transmission between clients and servers.
Before you enable SSL in ODC, make sure that SSL is enabled for the OBServer nodes. If you connect to the OBServer nodes by using ODP, make sure that SSL is enabled for ODP. For more information about how to enable SSL for an OBServer node, see Transmission encryption of OBServer nodes and SSL link encryption. - Startup Script: You can configure a connection session by using an SQL statement. For example, you can execute the
set session ob_query_timeout=60000000statement to configure a connection session. - Driver: You can configure driver attributes to connect to OceanBase Database and implement specified features.
Note
- To use the import/export feature in ODC V2.3.0 and later, you must configure the root@sys account in Advanced Settings when you create a connection.
- When you use the import/export feature to query views in ODC V2.4.1 and later, the root@sys account is not a must. Specifically, if you do not configure the root@sys account, some objects such as stored procedures and functions cannot be exported from ODC. If you configure the root@sys account, you can query views in the sys tenant to obtain the optimal data routing strategy, thereby increasing the export speed.
- The account username and password of the sys tenant are the account username and password of a user in a cluster tenant. Do not specify the account username in the "@sys#cluster" format. For example, the
rootaccount can be used. - By default, the
REQUIRE NONEoption is specified when you create a user. TheREQUIRE NONEoption specifies that no encryption method is used. In this case, if you select Enable SSL, an SSL connection is created. Otherwise, a regular connection is created. - If the
REQUIRE SSLoption is specified when you create the user, you must select Enable SSL to create an SSL connection. Otherwise, the connection fails.
If the user is created by specifying theREQUIRE SSLoption, you do not need to upload the certificates, but you must select Enable SSL. Otherwise, the connection fails. We recommend that you upload the following certificates for identity verification:- CA certificate for the client to verify the identity of the server.
- Client key and client certificate for the server to verify the identity of the client.
- If the user is created by specifying the
REQUIRE X509option, you must select Enable SSL and upload the CA certificate, client key, and client certificate. The client and the server verify the identity of each other. If you do not select Enable SSL or upload the CA certificate, you cannot create the connection.
Note
For more information about how to configure a data source, see Data source management.
Click OK in the lower-right corner of the panel. In the dialog box that appears, enter a connection name.
Edit and execute SQL statements
Example: In the SQL window, create a table in the database of the target project.
Parameter |
Example value |
|---|---|
| Data Source | mysql4.2.0 |
| The name of the database. | odc_test |
| The name of the table. | employee |
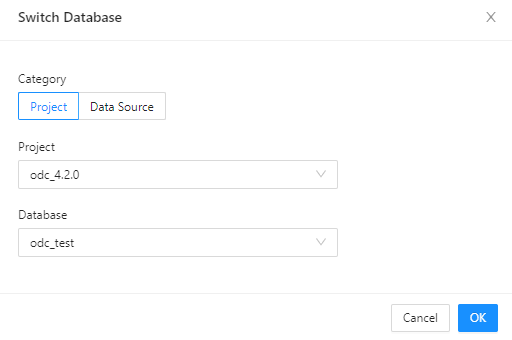
In the SQL window, click Select a database to select the project database.

In the Switch Database dialog box, select the target database to which the project belongs.
In the SQL window, edit the following SQL statements to create a table named
employee.
CREATE TABLE odc_test.employee (
emp_no int(120) COMMENT 'Employee ID' NOT NULL,
birthday date COMMENT 'Birthday' NULL,
name varchar(120) COMMENT 'Employee name' NULL,
CONSTRAINT cons_employee_empno PRIMARY KEY (emp_no)) DEFAULT CHARSET = utf8mb4 COLLATE = utf8mb4_general_ci;
After the SQL statements are edited, click Run F8 in the toolbar to run all SQL statements in the current SQL window.
FeatureDescriptionRun F8 Runs all SQL statements in the current window. Run the current statement F9 Runs all the selected SQL statements or the SQL statement in the line where the pointer is located. Abort Aborts the statement that is being executed. 
On the Results tab, view the execution records and logs.
