


This topic describes how to submit a batch database change ticket in OceanBase Developer Center (ODC) to change or update the schemas or data of multiple databases in different environments of the same project.
Background information
In practice, you need to deploy your business in multiple environments and regions. Here are some typical scenarios:
The lifecycle of a business system spans different phases from development to testing and launch. Therefore, you need to separately build development, testing, prerelease, and production environments for the business system.
For purposes of nearby business access and disaster recovery, you need to deploy the production environment of a business system on multiple nodes across regions. For example, you can deploy the environment in Hangzhou, Shanghai, and Beijing, with each of the center responsible for part or all of the services.
To ensure consistency of database object schemas in different environments, you must make sure that the initial schema configurations in the environments are the same and that subsequent schema changes are performed in the environments in a unified manner. In this case, a standard process management mechanism is required to avoid risks.
The batch database change feature aims to reduce potential risks in schema changes in multiple environments and allow you to easily ensure database schema consistency in different environments.
ODC allows you to perform SQL-based changes for multiple databases in different environments of the same project in serial or parallel mode.
Serial mode: Changes are performed on multiple databases in the specified order. Feedback is reported each time after the change process on a database is completed. This is similar to the scenario where R&D changes are made in the testing environment first, then the prerelease environment, and finally the production environment.
Parallel mode: Database changes can be performed in batches in combination with the serial mode.
The example in this topic describes how to create a batch database change task in ODC to create a table named employee in the odc_test and user_ro databases.
Note
The data used in this topic are examples. You can replace them with actual data as needed.
Considerations
The databases must belong to the same project.
The number of databases ranges from 2 to 100.
The databases cannot be duplicate.
A batch database change task cannot be aborted when any of its change processes are running. In other words, such a task cannot be aborted if it is automatically executed. If manually executed, however, it can be aborted only when waiting for the next batch of change processes to start.
Create a batch database change task
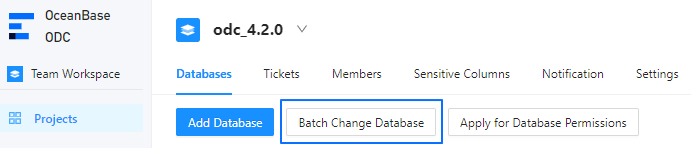
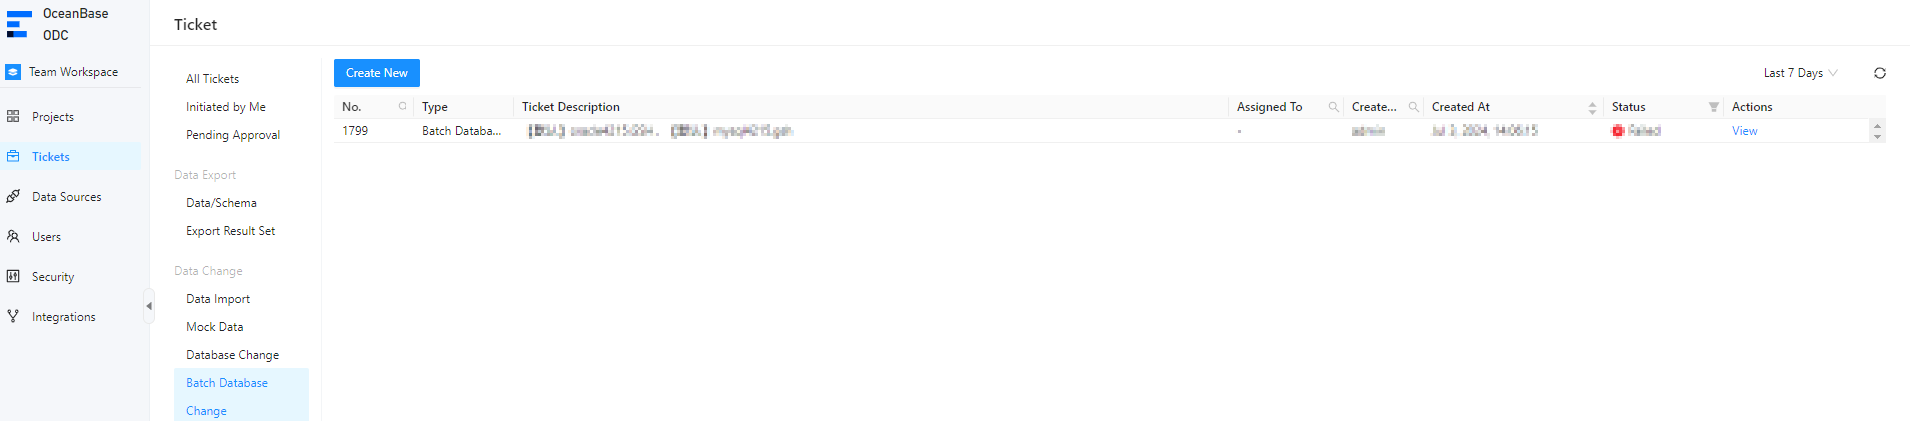
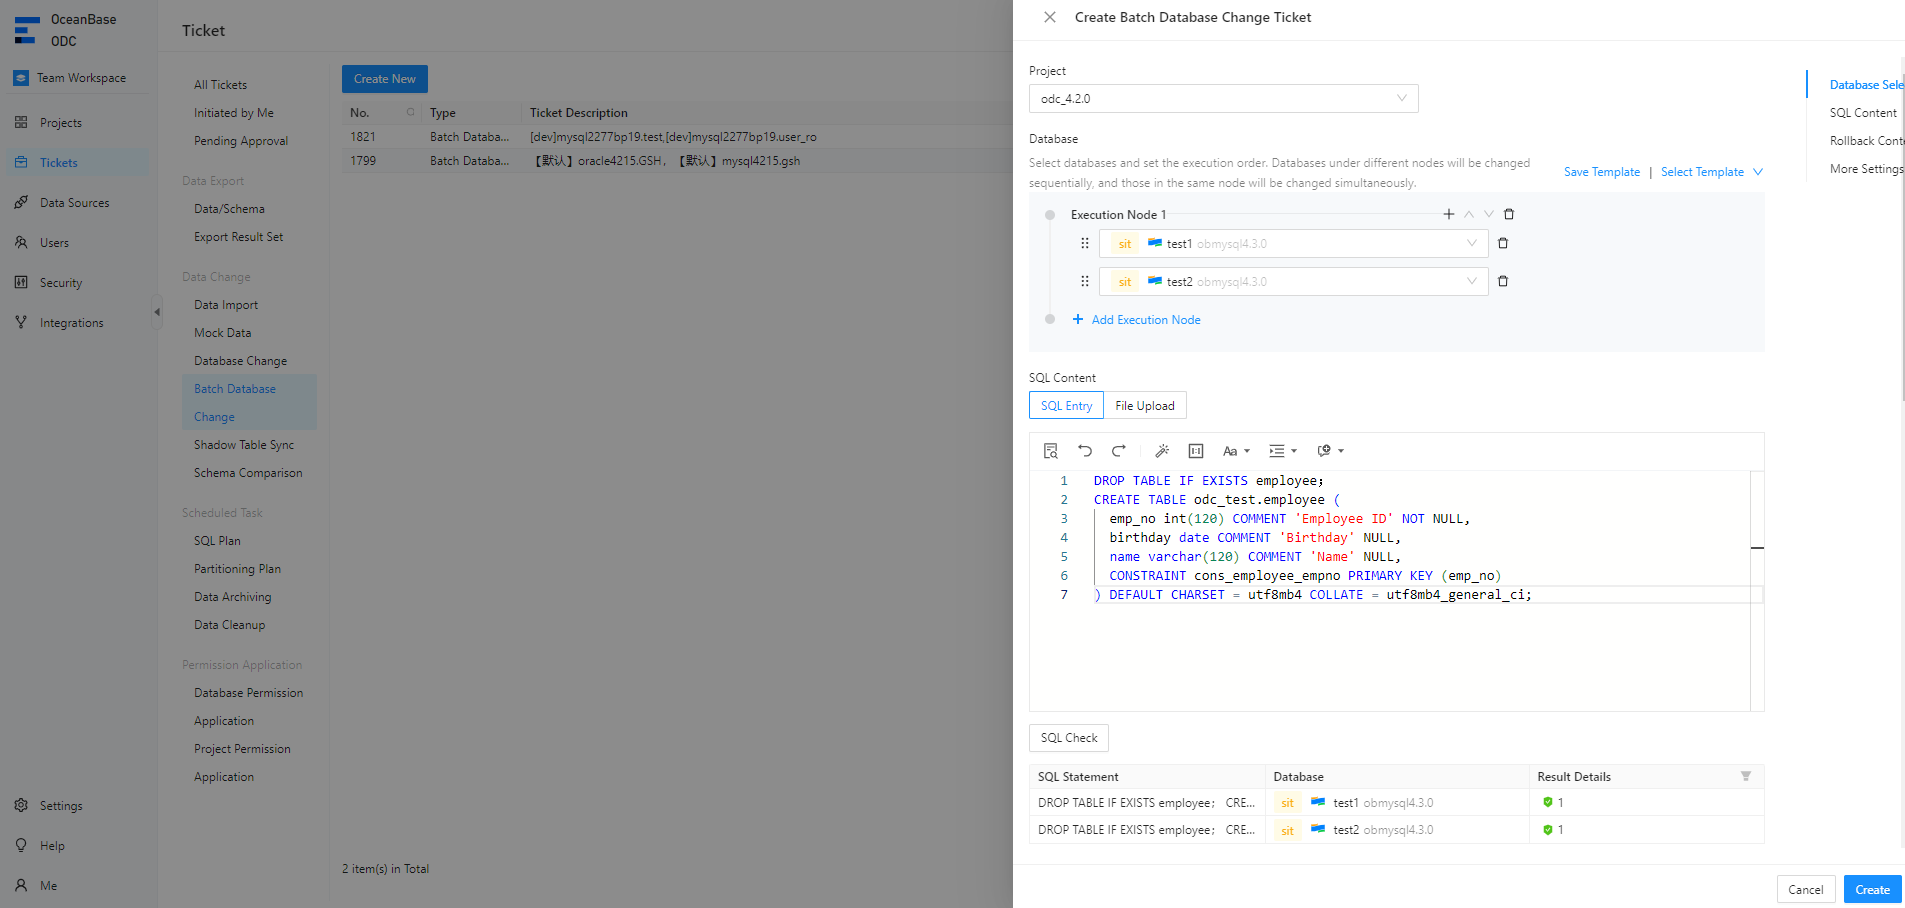
On the Projects or Tickets tab, click Batch Database Change.
a. Create a batch database change task on the Projects tab.
b. Create a batch database change task on the Tickets tab.
In the Create Batch Database Change Ticket panel, configure the following parameters.
 ParameterDescription
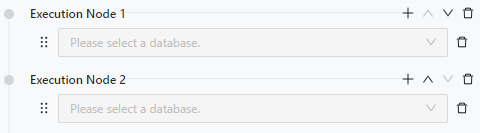
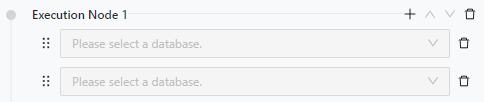
Project The project for which the batch database change task is to be created. Database - Select the databases to be changed and specify the change execution order. Changes are executed in order for databases on different nodes and concurrently for databases on the same node.
- You can save the database configurations as a template for future reuse.
SQL Content Select SQL Entry or Upload File. - SQL Entry: This is the default way to specify SQL content. You can directly write the SQL script in the editing area.
Note
- The maximum size of the SQL statements that can be entered in the SQL window is limited to 500,000 characters. If the SQL script to be executed has more than 500,000 characters, you can directly upload the script file.
- You can click IN Value Conversion to convert the batch copied data into the
in('A','B')format. - Column values are separated with line breaks.
- Row values are separated with spaces or tabs.
- Upload File: Click the file pool to go to the file explorer and select the file to be imported. You can also directly drag the file to the file pool to upload it.
Note
- You can upload up to 500 files. The total file size cannot exceed 256 MB.
- By default, files are sorted by the order in which they were uploaded. You can drag and drop them to change the order. Tasks are executed in the file order.
- Only SQL files suffixed with
.sqlare supported.
SQL Check Click this icon to check the syntax of the SQL statement. Rollback Plan Specify Rollback Plan. You can write an SQL script or upload a file to specify the rollback plan. For more information, see the description of SQL Content. Note
You can select Generate Backup Rollback Plan so that backup rollback SQL statements will be automatically generated for
UPDATEandDELETEstatements.- For OceanBase Database in MySQL mode or native MySQL, a rollback SQL statement can be generated only for an
UPDATEorDELETEstatement executed on a table with a primary or unique key. - A backup rollback SQL statement can be generated only when a database change statement affects no more than 100,000 rows and the batch database change task affects no more than 1 million rows.
SQL Execution Settings - Delimiter: Specify the delimiter between fields. Commas (
,), semicolons (;), and colons (:) are supported. - Query Result Limit: Specify the number of data rows in the query result. Value range: 1 to 1,000,000.
- Execution Timeout: Specify the timeout period for statement execution, in hours. The default value is 48 hours. The maximum value is 480 hours.
- SQL Execution Error Handling Method: You can select Stop Execution or Ignore Error and Continue.
Task Settings You can select Auto Execution or Manual Execution. Description You can enter a description of no more than 200 characters in the text box. This parameter is optional. Click Create.
After the task is generated, you can click Batch Database Change on the Tickets tab to view the task information.

View a batch database change task
Task information
In the batch database change task list on the Tickets tab, click View in the Actions column.
In the task details panel, click the Task Information tab to view the database, type, risk level, SQL content, and other information of the task.
Note
You can click Download Backup Rollback Plan to download the rollback plan file automatically generated by ODC for
UPDATEandDELETEstatements.
Task process
In the task details panel, click the Task Process tab and view information such as the task initiation status, approval status, execution status, and execution result.
Execution result
In the task details panel, click the Execution Records tab to view the execution success and failure records.
Click View in the Actions column to view the task information, execution result, rollback ticket, and task logs.