


This topic describes how to set up a bidirectional synchronization task using OceanBase Migration Service (OMS), taking a bidirectional synchronization task from a MySQL database to the MySQL compatible mode of OceanBase Database as an example.
Background information
What is bidirectional synchronization
Bidirectional synchronization allows you to configure forward and reverse migration tasks for the same data source during incremental data synchronization, enabling data to be synchronized between the source and the target. The system prevents data that has been synchronized in one direction from being synchronized again in the opposite direction.
Note
Bidirectional synchronization does not mean that business operations can be performed simultaneously on both ends. If the same data (with the same primary key or unique key) is written to both ends, you must define a data conflict resolution strategy (override or ignore) in the configuration of the bidirectional synchronization task. We recommend that you avoid writing the same data to both ends at the same time.
Supported migration types for bidirectional synchronization
OMS supports bidirectional data synchronization between a MySQL database and the MySQL compatible mode of OceanBase Database, an Oracle database and the Oracle compatible mode of OceanBase Database, and between two OceanBase databases. For more information, see the corresponding data migration documentation.
Create a project to migrate data from a MySQL database to a MySQL tenant of OceanBase Database
Create a project to migrate data from a MySQL tenant of OceanBase Database to a MySQL database
Create a project to migrate data from an Oracle database to an Oracle tenant of OceanBase Database
Create a project to migrate data from an Oracle tenant of OceanBase Database to an Oracle database
Migrate data between OceanBase databases
Authorization statements for a MySQL data source
When you perform bidirectional synchronization between a MySQL database and the MySQL compatible mode of OceanBase Database, grant the CREATE DATABASE and CREATE TABLE privileges to the database account under the MySQL data source of the current task. OMS needs to create a transaction database and a transaction table to prevent circular replication in the bidirectional synchronization. Otherwise, the bidirectional synchronization task may fail.
Grant the global database creation privilege
GRANT CREATE ON *.* TO '<user_name>';Allow the user to create tables in the
omsdatabaseGRANT CREATE ON oms.* TO '<user_name>';
Create a schema and grant privileges for an Oracle data source
When you perform bidirectional synchronization between an Oracle database and the Oracle compatible mode of OceanBase Database, create a schema named OMS in the Oracle data source of the current task, and grant the CREATE TABLE privilege on the OMS schema to the database account in the data source. Otherwise, the bidirectional synchronization task may fail.
Create an OMS user
CREATE USER OMS IDENTIFIED BY <YOUR_PASSWORD> DEFAULT TABLESPACE <specified_tablespace>; // YOUR_PASSWORD is the actual user password.
ALTER USER OMS QUOTA unlimited ON <tablesapce_specified_in_previous_step>;
ALTER USER <data_source_username> QUOTA unlimited ON <tablesapce_specified_in_previous_step>;
Grant privileges
GRANT CREATE ANY TABLE TO <YOUR_USERNAME>;
GRANT INSERT ANY TABLE TO <YOUR_USERNAME>;
GRANT UPDATE ANY TABLE TO <YOUR_USERNAME>;
GRANT DELETE ANY TABLE TO <YOUR_USERNAME>;
GRANT SELECT ANY TABLE TO <YOUR_USERNAME>;
Considerations
A bidirectional synchronization task is configured by setting forward and reverse tasks.
Type |
Description |
|---|---|
| Forward task |
|
| Reverse task |
|
| Other considerations |
|
Data conflict scenarios
To ensure data consistency in bidirectional synchronization, make sure that operations on the same primary key or non-null unique key are performed only on one end of the bidirectional synchronization. If both ends are updated simultaneously, data conflicts may occur. The main scenarios include:
Unique key conflicts during INSERT operations
If the business performed nearly simultaneous INSERT operations on the same unique key on both ends, the data INSERT operation will fail at the target due to the uniqueness constraint when syncing to the target. You can configure the task to decide whether to ignore conflicting data or overwrite the target data.
Unique key conflicts during UPDATE operations
If the data to be updated already exists at the target, the source data will overwrite the target data.
If the data to be updated does not exist at the target, the data update will fail.
If the data to be updated causes a primary key or unique key conflict at the target after the update, the data update will fail.
Data conflicts during DELETE operations
If the record to be deleted does not exist, the DELETE operation will fail.
Procedure
Configure a forward migration task
Configure the data migration tack to the Select Migration Type step. Select Bidirectional Synchronization for Synchronization Topology.
For more information, see the data migration task topic of the corresponding type.
In the Migration Options section, select the migration type of the current data migration task.
When the synchronization topology is set to Bidirectional Synchronization, the supported migration types include Schema Migration, Full Migration, and Incremental Synchronization.
Migration typeDescriptionSchema Migration After the schema migration task is started, OMS migrates the data object definitions (such as tables, indexes, constraints, comments, and views) from the source to the target database and automatically filters out temporary tables. Full Migration After the full migration task is started, OMS migrates the existing data in the source database to the corresponding tables in the target database. Incremental Synchronization After the incremental synchronization task is started, OMS synchronizes the data that has changed in the source database (such as new data, modified data, and deleted data) to the corresponding tables in the target database. Incremental Synchronization includes DML synchronization and DDL synchronization, and you can customize the configurations as needed. For more information, see Customize DDL/DML. Note
- In the bidirectional synchronization scenario, you cannot unselect the
DML Synchronizationoption. - In the bidirectional synchronization scenario, only DDL synchronization of forward task is to be configured.
- In the bidirectional synchronization scenario, you cannot unselect the
Click Next. In the Select Migration Objects step, select the migration objects of the current data migration task.
You can select migration objects through Specify Objects and Match by Rule. This topic describes the procedure of selecting migration objects through Specify Objects. For more information about how to configure matching rules, see database-to-database wildcard rules in Configure matching rules for migration or synchronization objects.
Notice
The presence of the "$$" characters in the name of a database or table affects the creation of a data migration task.
If you have selected DDL Synchronization in the Select Migration Type step, we recommend that you select migration objects through matching rules to ensure that all new objects that meet the migration object rules are synchronized. If you select migration objects through the Specify Objects method, only the objects that you have selected will be synchronized.
In the Select Migration Objects step, select Specify Objects.
In the Source Object(s) list, select the objects that you want to migrate. You can select one or more tables or views from one or more databases as the migration objects.
Click > to add the objects to the Target Object(s) list.
OMS allows you to import objects through text and allows you to rename, set row filtering, select partitions and columns, and remove one or more migration objects from the target objects.
Note
If you select migration objects through the Match by Rule method, the renaming capability is overridden by the matching rule syntax, and you can set only filtering conditions. For more information, see Configure matching rules.
OperationStepsImport objects - In the Target Object(s) list, click Import Objects in the upper-right corner.
- In the dialog box that appears, click OK.
Notice:
Importing objects will overwrite the previous object selection. Proceed with caution. - In the Import Migration Objects dialog box, import the objects that you want to migrate.
You can rename tables and views by importing CSV files and set row filtering conditions. For more information, see Download and import settings of migration objects. - Click Validate.
- Click OK after it passes the validation.
Rename objects OMS allows you to rename migration objects. For more information, see Rename databases and tables. Configure settings OMS allows you to set row filtering, select partitions and columns, and set row filtering. - In the right-side list of the selection area, hover the pointer over the target object.
- Click Settings.
- In the Settings dialog box, you can perform the following operations.
-
In the Row Filters field, enter the WHERE clause of a standard SQL statement to configure row filters. For more information, see Filter data by using an SQL condition.
- In the Partition drop-down list, select the specified partition data that you want to obtain during full migration. After you select a partition, click OK.
- In the Select Columns section, select the columns that you want to migrate. For more information, see Column filtering.
Remove one or all objects OMS allows you to remove one or more objects temporarily selected in the target object list during data mapping. - To remove one migration object
In the Target Object(s) list, hover the pointer over the target object and click Remove to remove the migration object. - To remove all migration objects
In the Target Object(s) list, click Remove All in the upper-right corner. In the dialog box that appears, click OK to remove all migration objects.
Click Next. In the Migration Options step, configure the parameters.
Schema Migration
The following parameters are displayed only if you have selected Bidirectional Synchronization > Schema Migration in the Select Migration Type step.
ParameterDescriptionAutomatically Enter Next Stage upon Completion If you select schema migration and any other migration type, you can specify whether to automatically proceed to the next stage after schema migration is completed. The default value is Yes. You can also view and modify this value on the Schema Migration tab of the data migration task details page. Normal Index Migration Method The migration method for non-unique key indexes associated with the migrated table objects. The options are Do Not Migrate, Migrate with Schema, and Post-Full-Migration. The last option is displayed only when full migration is selected. Full Migration
The following parameters are displayed only if you have selected Bidirectional Synchronization > Full Migration in the Select Migration Type step.
ParameterDescriptionFull Migration Rate Limit You can choose whether to limit the full migration rate as needed. If you choose to limit it, you must specify the RPS and BPS. The RPS specifies the maximum rows of data migrated to the target database per second during full migration, and the BPS specifies the maximum amount of data in bytes migrated to the target database per second during full migration. Note
The RPS and BPS values set here are only for throttling, and the actual performance of full migration is limited by factors such as the configurations of the source and target databases and instance specifications.
Full Migration Resource Configuration You can select Small, Medium, or Large for the default read concurrency, write concurrency, and memory, or you can customize the resource configuration for full migration. The resource configuration of the Full-Import component can limit the resource consumption during full migration. Notice
When you customize the configuration, the minimum value is 1, and only integers are supported.
Handle Non-empty Tables in Target Database Valid values: Ignore and Stop Migration. - If you select Ignore, when the data to be inserted conflicts with the existing data of a target table, OMS retains the existing data and records the conflict data.
Notice
If you select Ignore, data is pulled in IN mode for full verification. In this case, the scenario where the target table contains more data than the source table cannot be verified, and the verification efficiency will be decreased.
- If you select Stop Migration and a target table contains data, an error is returned during full migration, indicating that the migration is not allowed. In this case, you must clear the data in the target table before you can continue with the migration.
Notice
After an error is returned, if you click Resume in the dialog box, OMS ignores this error and continues to migrate data. Proceed with caution.
- If you select Ignore, when the data to be inserted conflicts with the existing data of a target table, OMS retains the existing data and records the conflict data.
Incremental Synchronization
The following parameters are displayed only if you have selected Bidirectional Synchronization > Incremental Synchronization in the Select Migration Type step.
ParameterDescriptionIncremental Synchronization Rate Limit You can choose whether to limit the incremental synchronization rate as needed. If you choose to limit it, you must specify the RPS and BPS. The RPS specifies the maximum rows of data synchronized to the target database per second during incremental synchronization, and the BPS specifies the maximum amount of data in bytes synchronized to the target database per second during incremental synchronization. Note
The RPS and BPS values set here are only for throttling, and the actual performance of incremental synchronization is limited by factors such as the configurations of the source and target databases and instance specifications.
Incremental Log Pull Resource Configuration You can select Small, Medium, or Large for the default memory, or you can customize the resource configuration for incremental log pull. The resource configuration of the Store component can limit the resource consumption during log pull in incremental synchronization. Notice
When you customize the configuration, the minimum value is 1, and only integers are supported.
Incremental Data Write Resource Configuration You can select Small, Medium, or Large for the default write concurrency and memory, or you can customize the resource configuration for incremental data write. The resource configuration of the Incr-Sync component can limit the resource consumption during data write in incremental synchronization. Notice
When you customize the configuration, the minimum value is 1, and only integers are supported.
Incremental Record Retention Duration The duration that incremental parsed files are cached in OMS. A longer retention duration results in more disk space occupied by the Store component. Incremental Synchronization Start Timestamp - If you have selected Full Migration as the migration type, this parameter is not displayed.
- If you have selected Incremental Synchronization but not Full Migration, specify a point in time after which the data is to be synchronized. The default value is the current system time. For more information, see Set an incremental synchronization timestamp.
Adapt to Online DDL Tool If you enable this feature, the database uses an online DDL tool to perform online schema changes, and data migration filters out temporary table objects to improve the stability of the data migration task. For more information, see Online DDL tools. Note
Currently, this feature is supported only in scenarios where the source database is a MySQL database and Alibaba Cloud DMS, gh-ost, or pt-osc is used to perform online schema changes.
Data Conflict Handling Strategy The options are Ignore Errors and Keep Original Data on Target and Ignore Conflicts and Overwrite Target Data with Source Data. For more information, see the descriptions in the Data conflict scenarios section. Advanced Options
The following parameters are displayed only if the MySQL compatible mode of the target OceanBase database is V4.3.0 or later, and you have selected Schema Migration or Incremental Synchronization > DDL synchronization in the Select Migration Type step.
The storage type of the target table object can be Default, Row Storage, Column Storage, or Hybrid Row-Column Storage. The setting determines the storage type of the target table object during schema migration or incremental synchronization. For more information, see default_table_store_format.
Note
The value Default means that other parameters are automatically set based on the parameter configurations of the target database. Table objects in schema migration and new table objects created by incremental DDL statements are written to corresponding schemas based on the specified storage type.
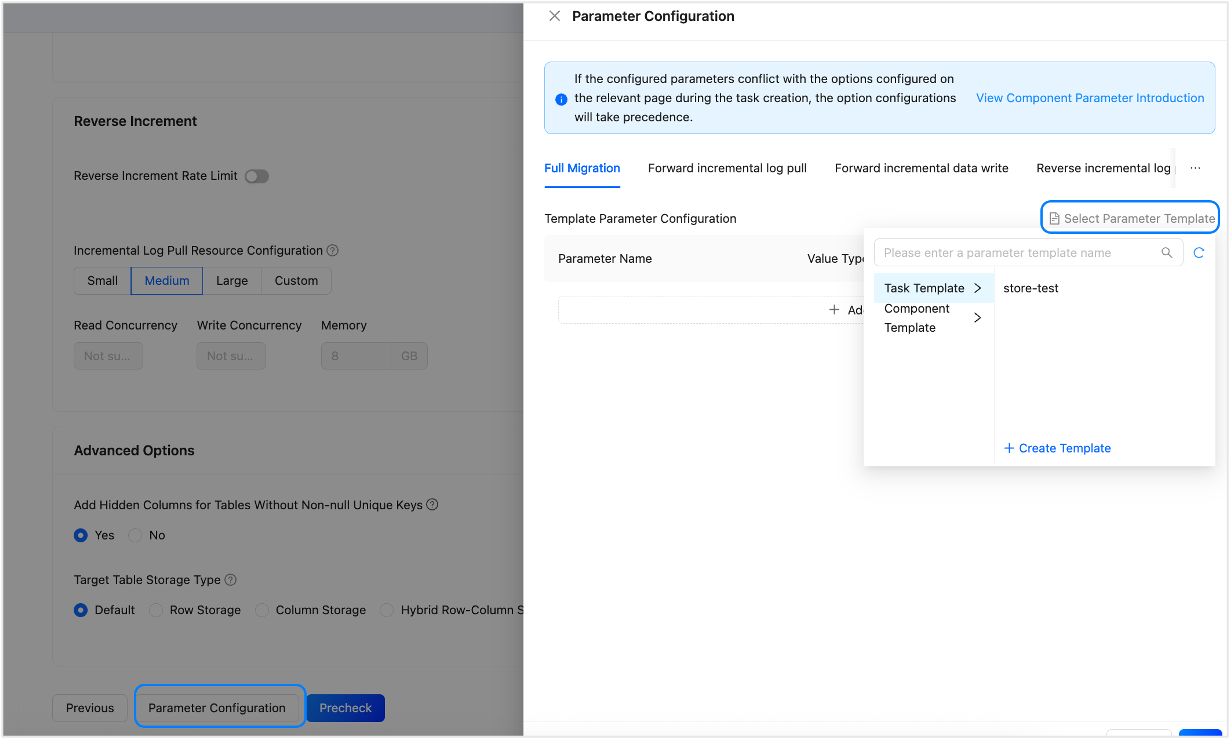
If the parameters on the page cannot meet your needs, you can click Parameter Configuration at the bottom of the page to configure more specific parameters. If you have configured a task template or component template, you can also reference it here.
Click Pre-check to perform a precheck on the forward migration task.
In the Precheck step, OMS checks whether the read and write permissions of the database user and the network connection of the database meet the requirements. You can start a data migration task only after all precheck tasks are passed. If an error is reported during the precheck:
You can troubleshoot and fix the issue, and then perform the precheck again until it succeeds.
You can also click Skip in the action column of the failed precheck item, which will prompt you to confirm whether you want to skip this item. Click OK in the dialog box to confirm.
After the precheck succeeds, click Start Task to start the forward task.
Configure a reverse migration task
On the Migration Tasks page, click Configuration next to the reverse task after the forward task reaches the incremental synchronization phase and the task status is Running.
On the Configure Reverse Migration page, specify the name of the reverse migration task. The default name is the name of the forward task with the suffix "-reverse".
We recommend that you use a combination of Chinese characters, numbers, and English letters. The name must not contain spaces and must be less than 64 characters in length.
On the Confirm Migration Configuration step, confirm and modify the configurations.
ParameterDescriptionSource and Target The default values are displayed based on the type of the forward migration task. The values cannot be modified. Incremental Synchronization Select DML Synchronization as needed, including insert,update, anddelete.Migratable Objects Click View to view the migratable objects selected in the forward migration task for reverse migration. Migration Options The configurations of the reverse migration task are the same as those of the incremental synchronization in the forward migration task. You can modify the configurations as needed. Click Next. The system performs a precheck on the reverse migration task.
After the precheck succeeds, click Start Task to start the reverse migration task.