


A tenant is a container for various database objects and resources (such as CPU, memory, and I/O). You can create tenants in a cluster as needed.
You can create tenants in one of the following two ways:
Create a tenant on the Tenant Overview page.
Create a tenant on the Tenant Management page of the specified cluster.
This topic describes how to create a tenant on the Tenant Management page of the specified cluster.
Prerequisites
The cluster where you want to create the tenant is the running primary cluster.
The logged-on user has the permission to manage the cluster, for example, the user is the system administrator or OceanBase Cloud Platform (OCP) tenant administrator.
(Optional) You have created a parameter template by referring to Manage tenant parameter templates.
When you need to create multiple tenants with the same parameter configuration, you can use a parameter template to avoid repeatedly configuring the same parameters.
Procedure
Log on to the OCP console.
In the left-side navigation pane, click Clusters .
In the Clusters list, find the target cluster and click its name.
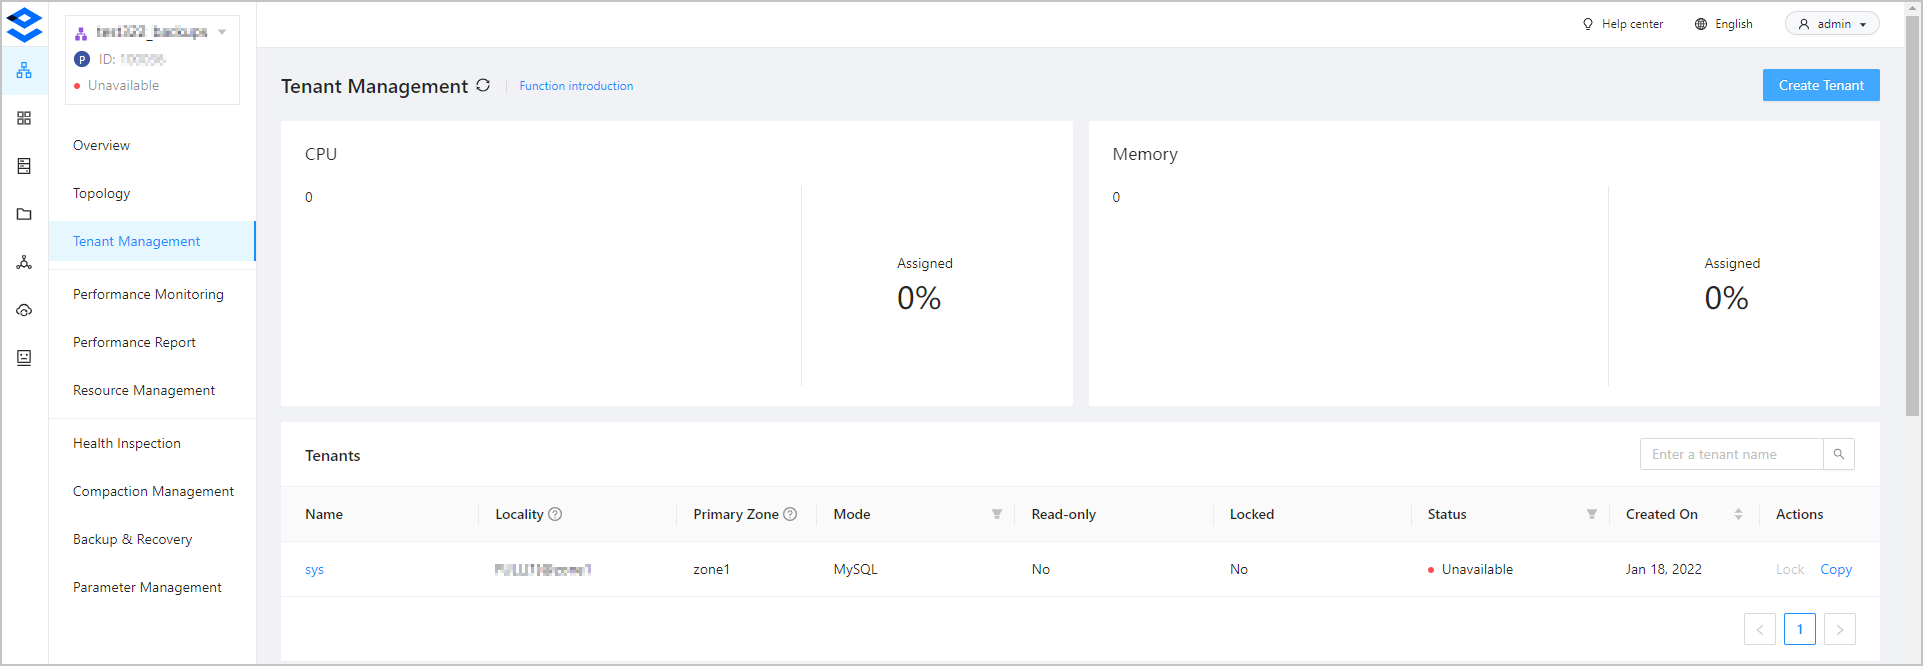
In the left-side navigation pane of the page that appears, click Tenant Management .
In the upper-right corner of the page that appears, click Create Tenant .
Specify the Basic Information .
The default cluster is the current cluster.
Fill in the Tenant Name . The tenant name must be 2 to 64 characters in length and can contain letters, digits, and underscores (_).
Fill in the Zone Information .
By default, the system displays configurable zones based on the zone information of the selected cluster. If you do not need to create a replica in a zone, click the Delete icon to delete the zone. The zone information fields that need to be configured and their descriptions are listed in the following table.
FieldDescriptionReplica Type The type of the replica. Valid values: * Full-featured Replica * Read-only Replica * Log Replica Select multiple full-featured replicas to ensure that they are in the majority. Unit Specification OCP has a set of built-in unit specifications. You can select the specification that you need from the list of unit specifications or click Add Specification at the bottom of the list to add a custom specification. For more information, see OCP resource unit specifications . Units The number of units in the zone. The number of resource units cannot exceed the number of OBServers in the zone. Zone Priority Rankings The priorities of the zones. This priority order affects the priority order of the primary zone of the SYS tenant. The left-side list shows all zones in the cluster. You can select one or more zones from the list box on the left to add them to the list box on the right. By default, the priority of the zone selected first is higher than that of the zone selected later, and the zones selected at one time have the same priority. After you move the zones to the list box on the right, you can also drag them upward or downward to adjust their priority order. The upper zone takes priority over the lower zone. Specify fields in Basic Settings . The required fields and their descriptions are listed in the following table.
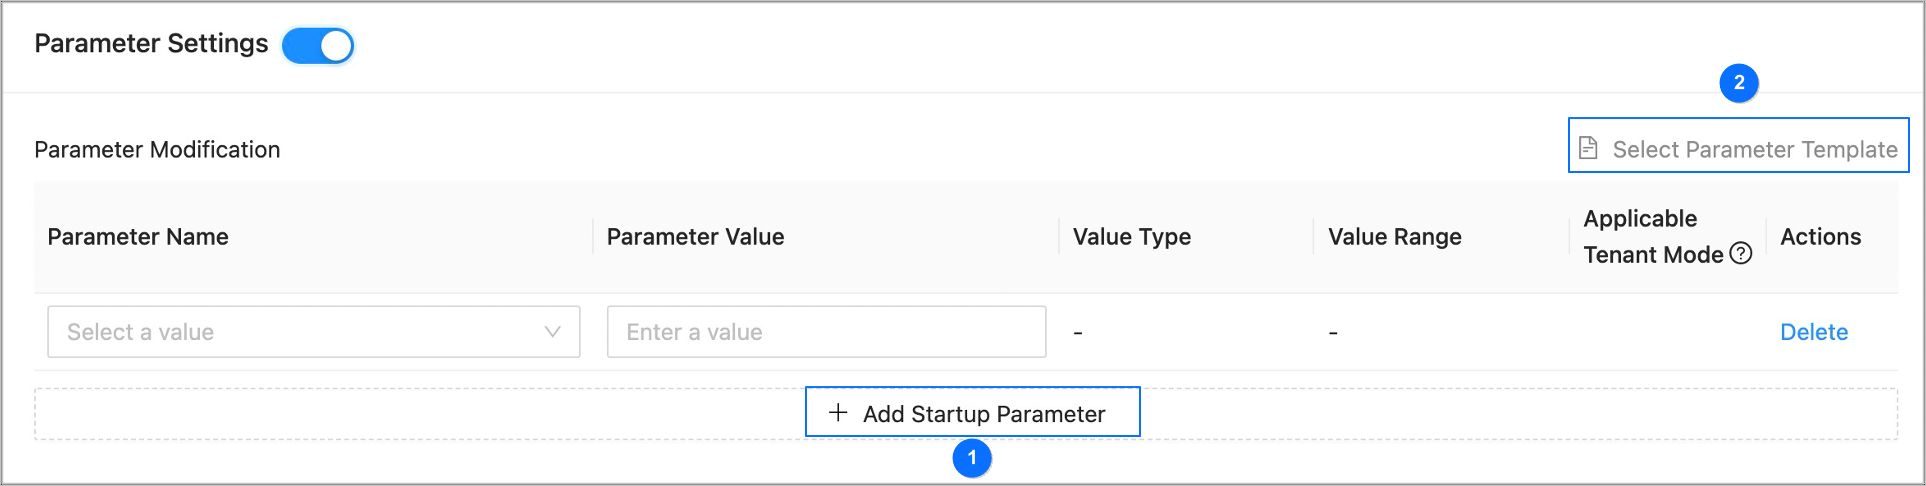
FieldDescriptionAdministrator Password The password of the tenant administrator account, which can be randomly generated. The administrator account is root in MySQL mode. The administrator account is SYS in Oracle mode. The password must be 8 to 32 characters in length, and contain at least two uppercase letters, two lowercase letters, two digits, and two special characters. The supported special characters are ~ ! @ # % ^ & * _ - + = ` | ( ) { } [ ] : ; ' , . ? / Tenant Mode MySQL and Oracle tenant modes are supported. Note that the Oracle mode is supported only for OceanBase V2.1 and later. Character Set and Encoding In MySQL mode, the supported character sets are UTF8MB4, Binary, GBK, and GB18030. Default value: UTF8MB4. In Oracle mode, the supported character sets are UTF8MB4, GBK, and GB18030. Default value: UTF8MB4. Remarks This field is optional, and allows you to add additional information. IP Address Whitelist The list of clients that are allowed to access this tenant. The default value is % , indicating that all client connections are allowed. When you configure the whitelist, you must add the IP addresses of the OCP server and the OBProxy server to it. Otherwise, you cannot manage the tenant from OCP. Configure the whitelist in the following formats: * IP address example: 10.10.10.10, 10.10.10.11. * Subnet mask example: 10.10.10.0/24. * Fuzzy match example: 10.10.10.% or 10.10.10.. * Mixed format example: 10.10.10.10, 10.10.10.11, 10.10.10.%, 10.10.10., 10.10.10.0/24. Turn on the Parameter Configurations switch and configure the tenant parameters.
You can add startup parameters one by one and set values as shown in section ① of the following figure.
You can also move the pointer over Select Parameter Template as shown in section ② of the following figure, and select a parameter template. The system will automatically populate parameters in this section by using the template.
If you are creating a tenant in MySQL mode by using a parameter template that contains parameters that are valid only in Oracle mode, you must manually delete those parameters.
Click Submit .
In the dialog box that appears, click View Task to view the task progress.
When the task status is Completed , you can check the status of the new tenant in the Tenants list on the Tenant Management page. The new tenant is successfully created if its status is Running .