


OceanBase Migration Service (OMS) provides the data migration feature to help you migrate data from other data sources to OceanBase Database online in real time. OMS also provides the following features: data verification, synchronization link switching, and migration task clearing.
The OMS server needs to be connected to both the source instance and the destination instance. To start a data migration task, configure the source and destination databases and select the tables to be migrated.
To create and manage a data migration task, perform the following steps:
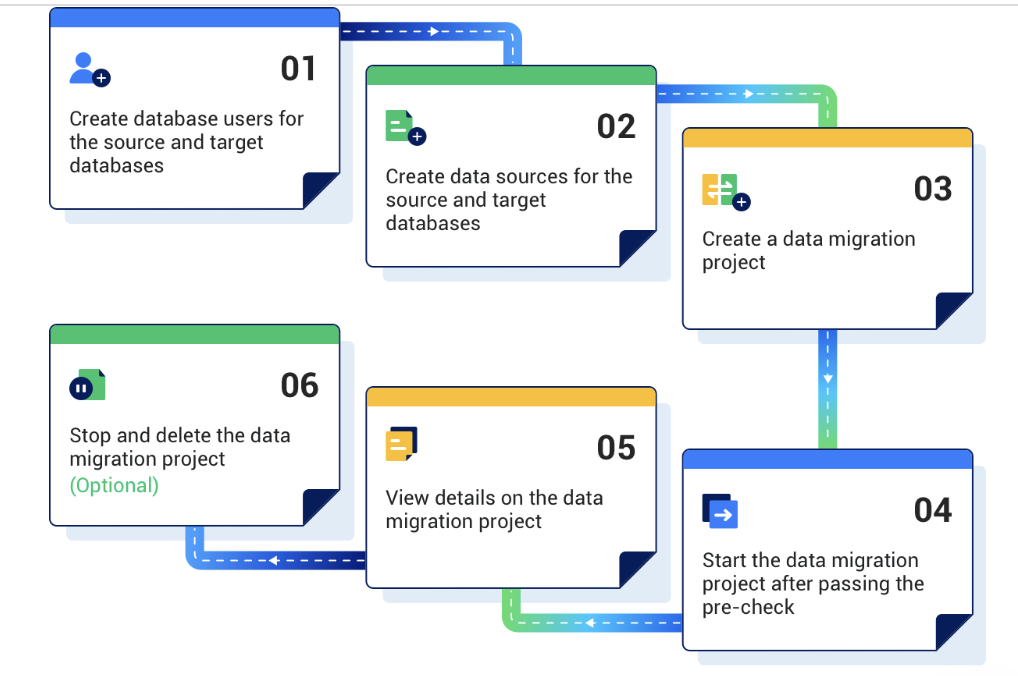
Prepare for data migration.
Before you migrate data by using OMS, create a user in the source or destination database and authorize the user. For more information, see Create and authorize a database user.
Add a data source.
In the OMS console, add the source and destination databases as data sources. For more information, see Create a data source.
Create a data migration task.
Specify the source database, destination database, migration type, and tables to be migrated in the migration task. For more information, see data migration pipeline documents.
After your data migration task passes the pre-check, start your task.
View the status of the data migration task.
On the migration task monitoring page, you can view the link details and monitor the migration task status in real time. For more information, see View details of a data migration task.
(Optional) Stop and release the data migration task.
After the data migration task is completed and data no longer needs to be synchronized from the source database to the destination database, you can clear the current data migration task. For more information, see Delete a data migration task.