OceanBase Developer Center (ODC) allows you to visually create a materialized view. This topic describes how to create a materialized view in the ODC console.
Background information
A materialized view is different from a regular view because it stores the data of query results. In other words, when you create a materialized view, the database executes the associated SQL query and stores the result set on the disk. It improves query performance and simplifies complex query logic by precomputing and storing the query result of the view. Materialized views are often used for rapid report generation and data analysis scenarios. Real-time calculation is reduced.
The example below shows how to create a materialized view named test_1 in the ODC console. It combines the id and name fields from the employee table and the alias field from the order table.
Note
All data used in this example is for reference only. You can replace the data as needed.
Prerequisites
The user has the privilege to create materialized views.
Note
If the user does not have database privileges, the user can apply for the required query/export/change privileges in the Apply for database privileges section of a Ticket.
Procedure
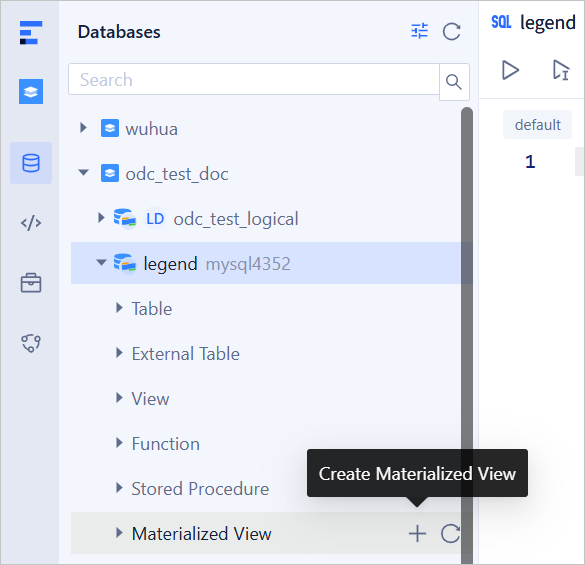
Log in to the SQL console, expand the details of the target database in database list on the left, and click the + sign on the right side of the materialized views to create a new materialized view.
Specify the following basic information.
ParameterDescriptionMaterialized View Name Specify a name for this materialized view. Storage Mode Select row store or column store. Refresh Method Select the refresh method for the materialized view from the following options: - Quick refresh: Only synchronize the incremental changes to the base table since the last refresh.
- Force refresh: The database automatically determines whether the conditions for a quick refresh are met. If so, a quick refresh is executed; otherwise, it degrades to a full refresh.
- Full refresh: Delete all existing data in the materialized view, re-execute the defining query, and load the latest data in full from the base table.
- No need to refresh: No data update will be performed.
Refresh Parallelism (Optional) Used to control the default parallelism of materialized view refresh operations. By setting its value appropriately, you can significantly improve the refresh efficiency and optimize the database performance. Auto Refresh You can set to enable automatic refresh immediately or at a specified time. Query Rewrite When it is enabled, the system will automatically rewrite queries to use existing materialized views when querying the base table. Real Time When it is enabled, real-time data will be obtained. 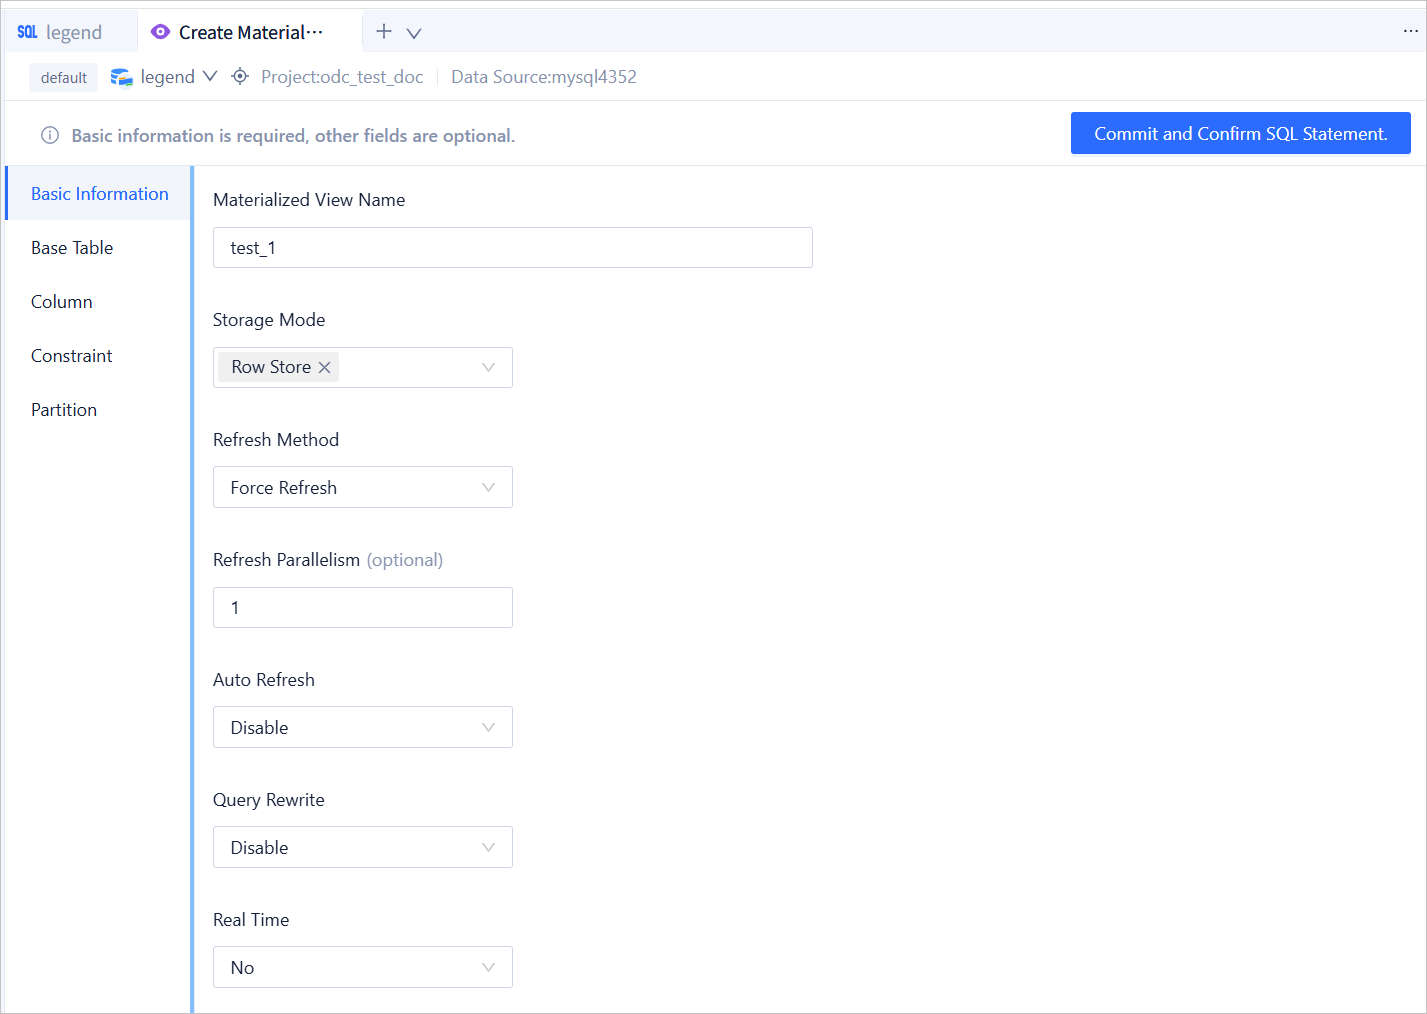
Configure data information.
Select base tables.
ParameterDescriptionSet alias You can set an alias for the selected base table. This is an optional operation. To set an alias, click <Alias> next to the table name and enter an alias in the text box. Set relationship When two or more tables are selected in the table operations section, you can select the relationship between tables from the drop-down list. The default value is none, and you do not need to set the relationship for the last table. To set the relationship, click the drop-down list icon  next to the alias, and select JOIN, INNER JOIN, LEFT JOIN, RIGHT JOIN, CROSS JOIN, FULL JOIN, UNION, UNION ALL, INTERSECT, MINUS, LEFT OUTER JOIN, RIGHT OUTER JOIN, or FULL OUTER JOIN from the drop-down list.
Change order You can directly drag the selected base tables in the table operations section to change the order. The relationship for the last table changed will be cleared. Delete a base table You can click the Delete icon next to each table in the table operations section to delete the table. The relationship for the last table changed will be cleared. 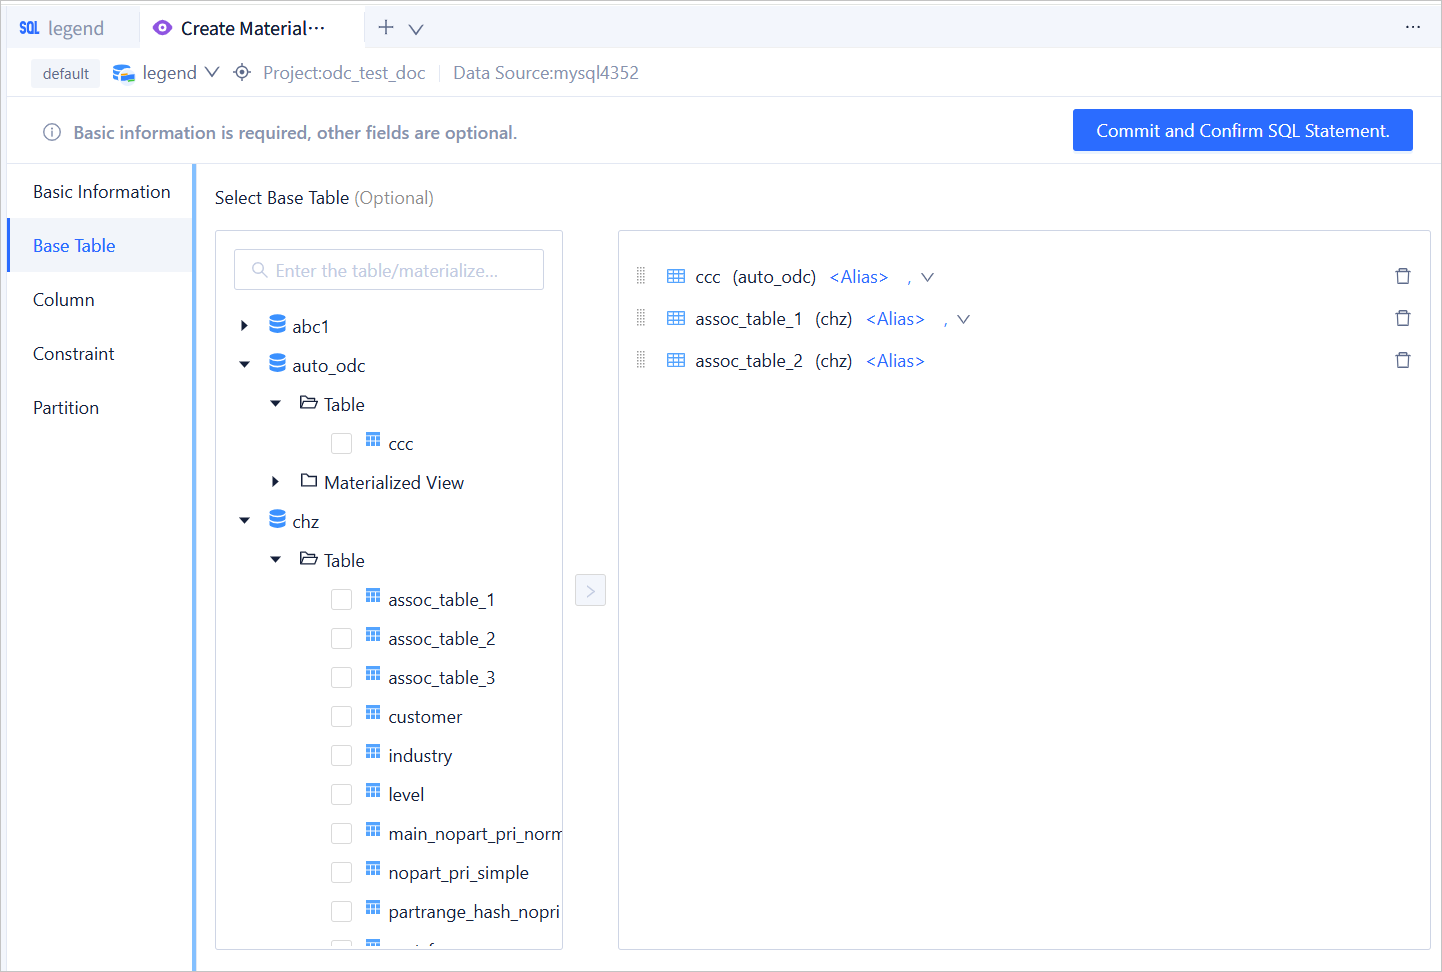
Select columns.
ParameterDescriptionSet alias You can set an alias for the selected column. This is an optional operation. To set an alias, click <Alias> next to the column name and enter an alias in the text box. Change order You can directly drag the selected columns in the column operations section to change the order. Delete a column You can click the Delete icon next to each column in the column operations section to delete the column. Add a custom column You can click +Custom in the upper-right corner of the column operations section to add a column. You need to specify the column name and alias for the new column. 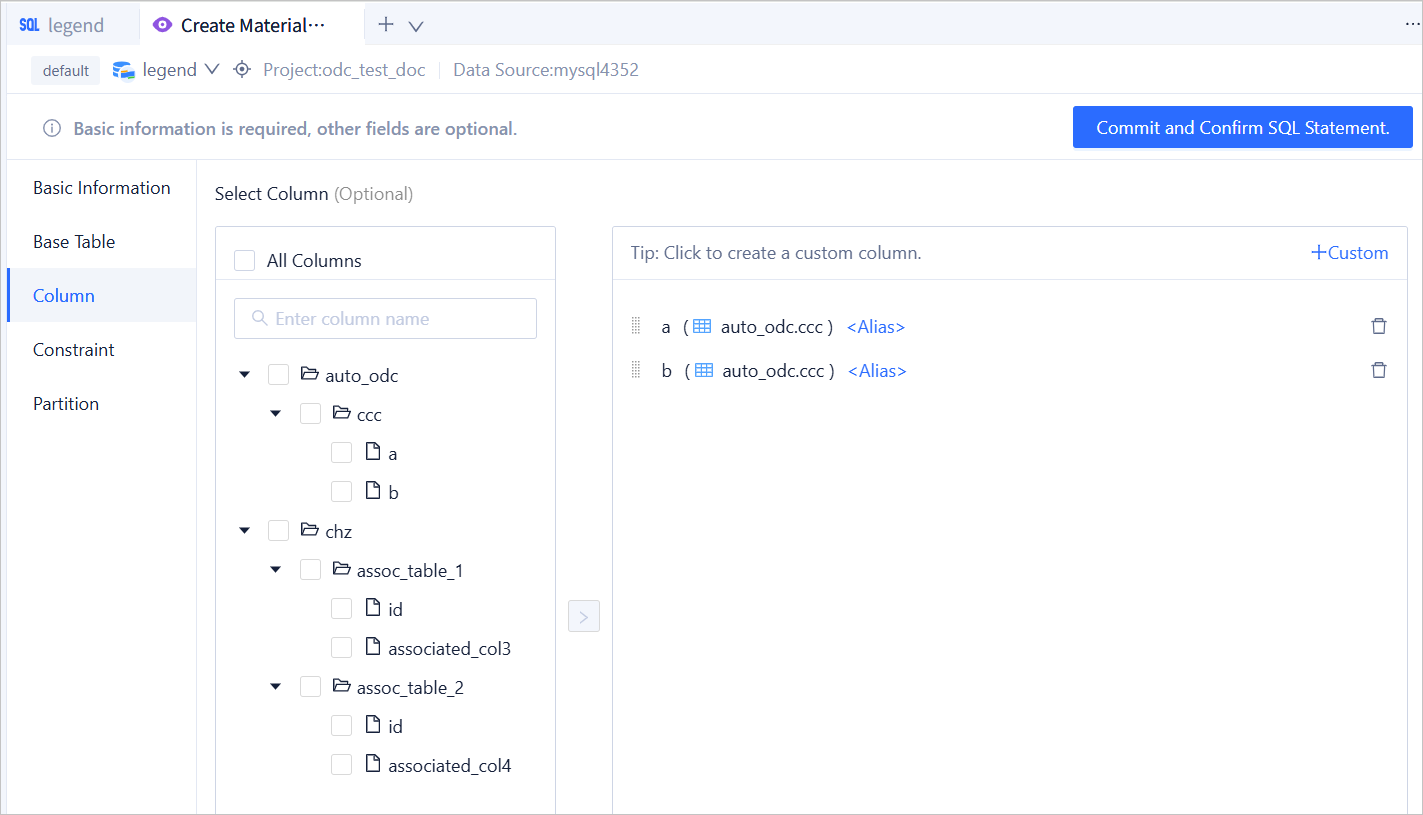
Specify constraints.
ParameterDescriptionAdd constraints Click the + in the upper-left corner of the constraints tab. Add primary key constraints and select the target column in Column. Delete constraints After selecting constraints, click the delete button in the upper-left corner. 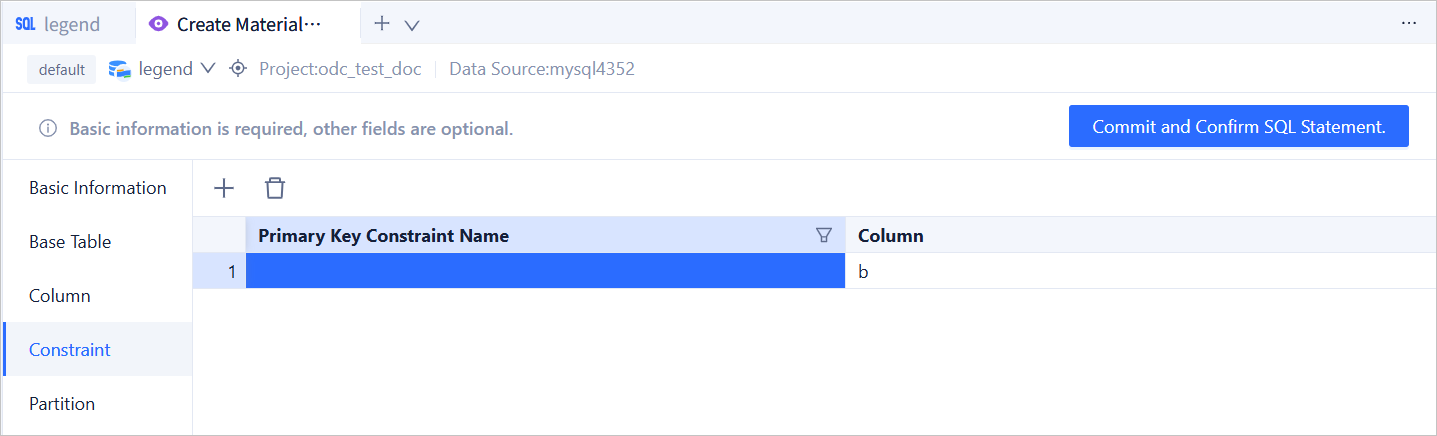
Configure partitioning.
ParameterDescriptionSet partitioning rules Set partitioning rules. The default is None (no partitioning). Range, Range Columns, List, List Column, Hash, and Key methods are supported. After selecting the method, fill in the corresponding method configuration as needed. 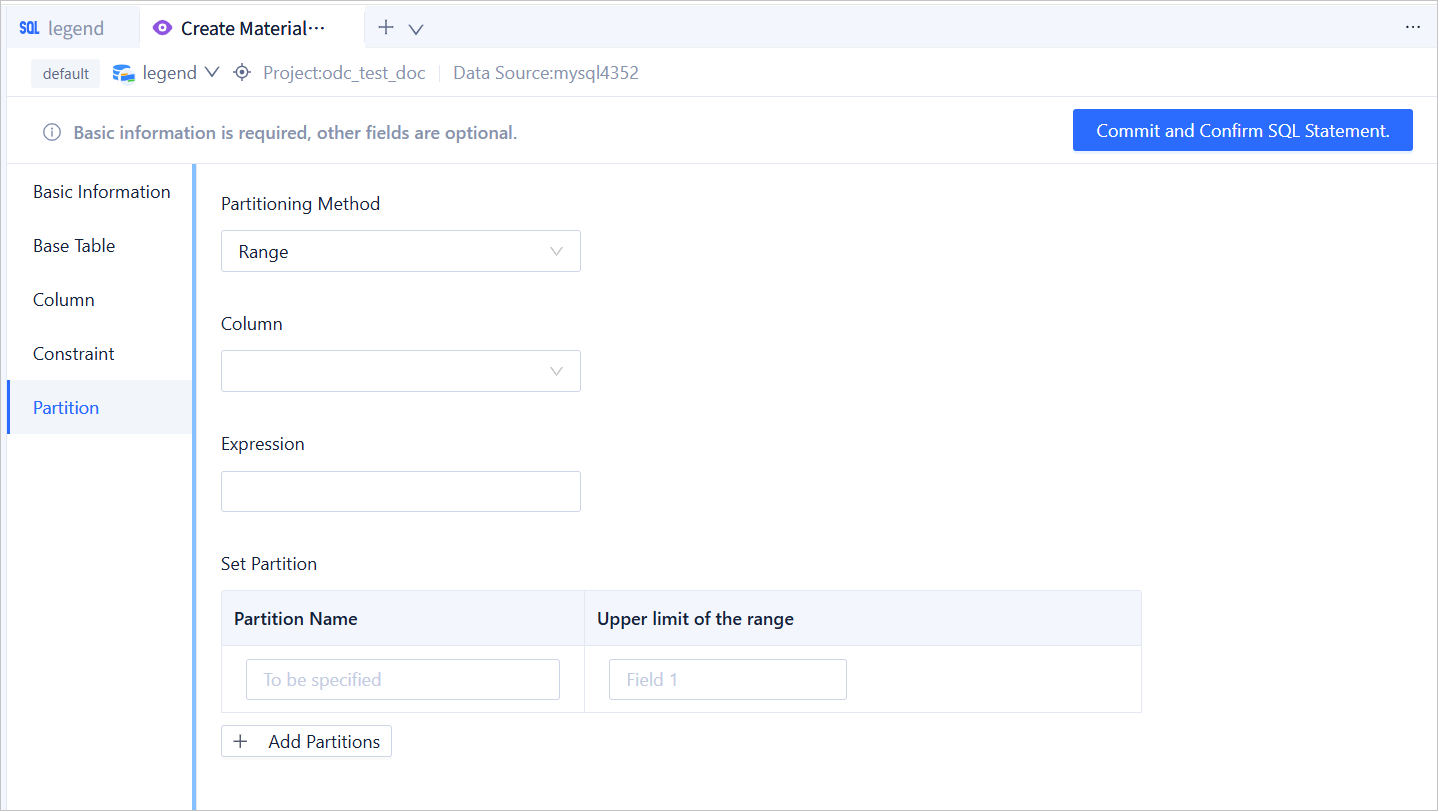
Confirm the SQL statement.
After you specify all the preceding parameters, click Commit and Confirm SQL Statement on the page to go to the statement editing page.
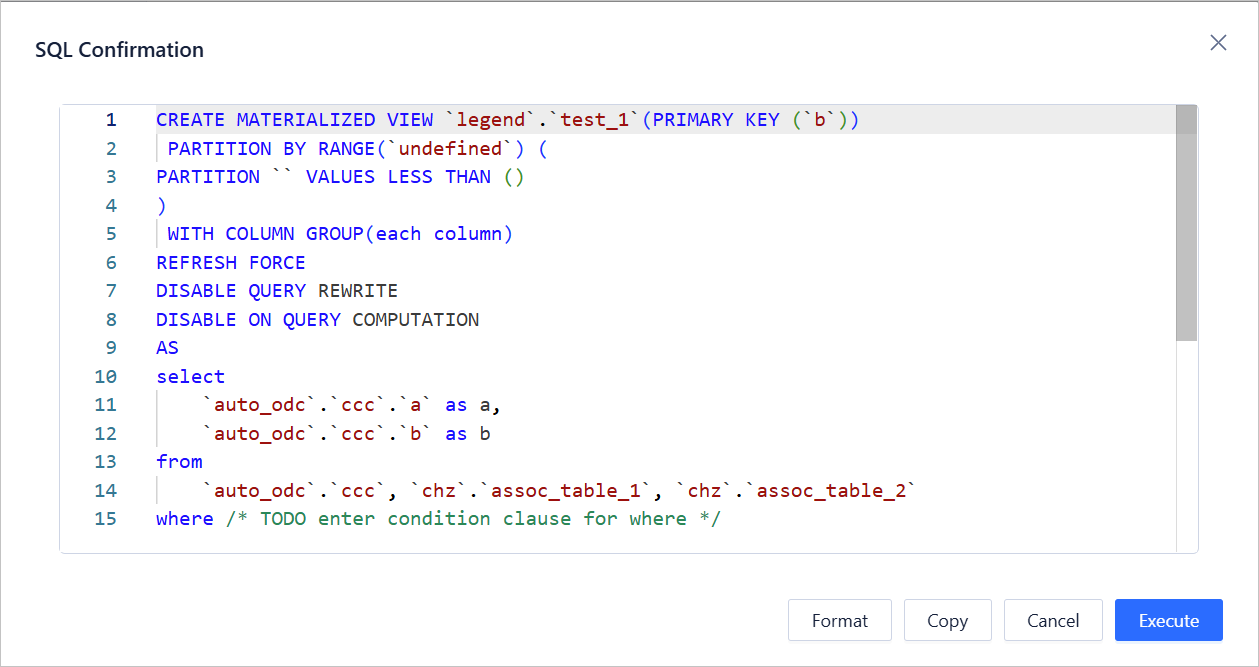
On the statement editing page, the corresponding view definition statement is generated based on the specified parameters. If the statement contains definitions of more than two tables, you need to complete the statement based on the relationships between the tables and the logical conditions. After you complete the view creation statement, click the Execute button in the upper-right corner of the page to complete the view creation.
Complete the materialized view creation
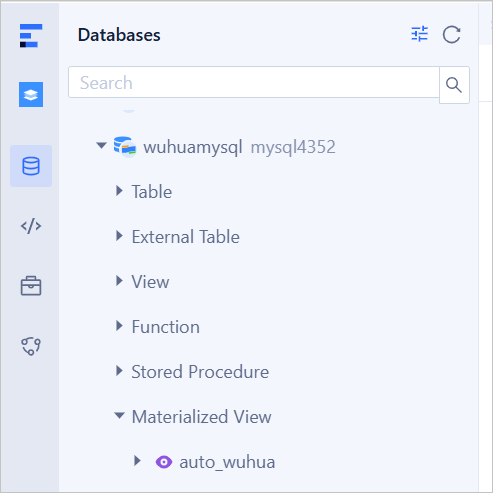
After the materialized view is created, you can view the corresponding materialized view under the database.