


This topic describes how to apply a partitioning plan in OceanBase Developer Center (ODC) for automatic partition management, including partition creation and deletion.
Background information
The partitioning plan feature is an extension of RANGE partitioning. ODC can automatically manage RANGE-partitioned tables based on the specified partitioning strategies, and you do not need to manually create partitions. This facilitates maintenance of the RANGE-partitioned tables.
RANGE partitioning: RANGE partitioning is the most commonly used partitioning method. It is often used when you want to query tables with dates. In RANGE partitioning, the database maps rows to partitions based on ranges of partitioning key values. For more information, see Set partitioning rules and Partitioning types.
Partitioning plan: When you insert data into a RANGE-partitioned table, if the inserted data exceeds the upper bound of the current range, the operation fails and an error is returned.
Creation strategy: Table data is divided into corresponding partitions based on the specified time interval and data range. Two partition creation methods are supported:
Sequential Increment: A method for creating partitioning strategies, applicable only to time, numeric, and character field types.
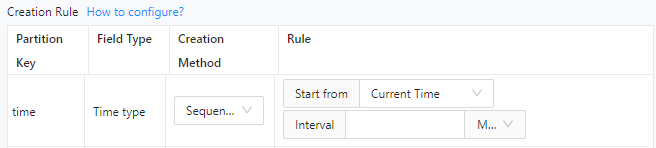
Custom: You can define a custom SQL expression for partitioning for any field type.

Deletion strategy: Based on the specified number of partitions allowed, the latest partitions are retained and redundant partitions are deleted.
Partitioning plan execution process

- Set a partition creation strategy and a partition deletion strategy for a table.
- Set a strategy execution cycle.
- Execute the partitioning plan.
Considerations
Only OceanBase MySQL compatible mode and OceanBase Oracle compatible mode data sources are supported.
Only RANGE-partitioned tables are supported.
When the upper bound of the last partition in a RANGE-partitioned table reaches the value specified by
MAXVALUE, no partition can be created. In this case, you cannot create a partitioning strategy via the ODC partitioning plan task.By default, a partitioning plan is executed on the hour.
If a database already has a partitioning plan, the new partitioning plan will overwrite the existing one once it is approved.
Creating partitions for a table within a table group can fail or break the load balancing status. Proceed with caution when you decide to configure a partition creation strategy for such a table.
Creating partitions for a table within a table group can invalidate the table group, because tables in the same table group must have the same number of partitions.
Deleting partitions from a table that contains a global index will invalidate the global index. Proceed with caution. Choosing to rebuild the global index may cause business issues due to the time-consuming process or online issues resulting from rebuilding failures.
The option of rebuilding global indexes is provided only in Oracle compatible mode. In MySQL compatible mode, global indexes will be rebuilt by default.
Create a partitioning plan
Example: Create a partition for the order table in the odc_data database of the mysql4253 data source at a time interval of 1 month.
| Parameter | Example value | |Project name | odc_test | |Data source | mysql4253 | |Database name |test_data| |Database name |order| |Table name |order |
In the SQL window, edit the SQL statements to create the
ordertable.
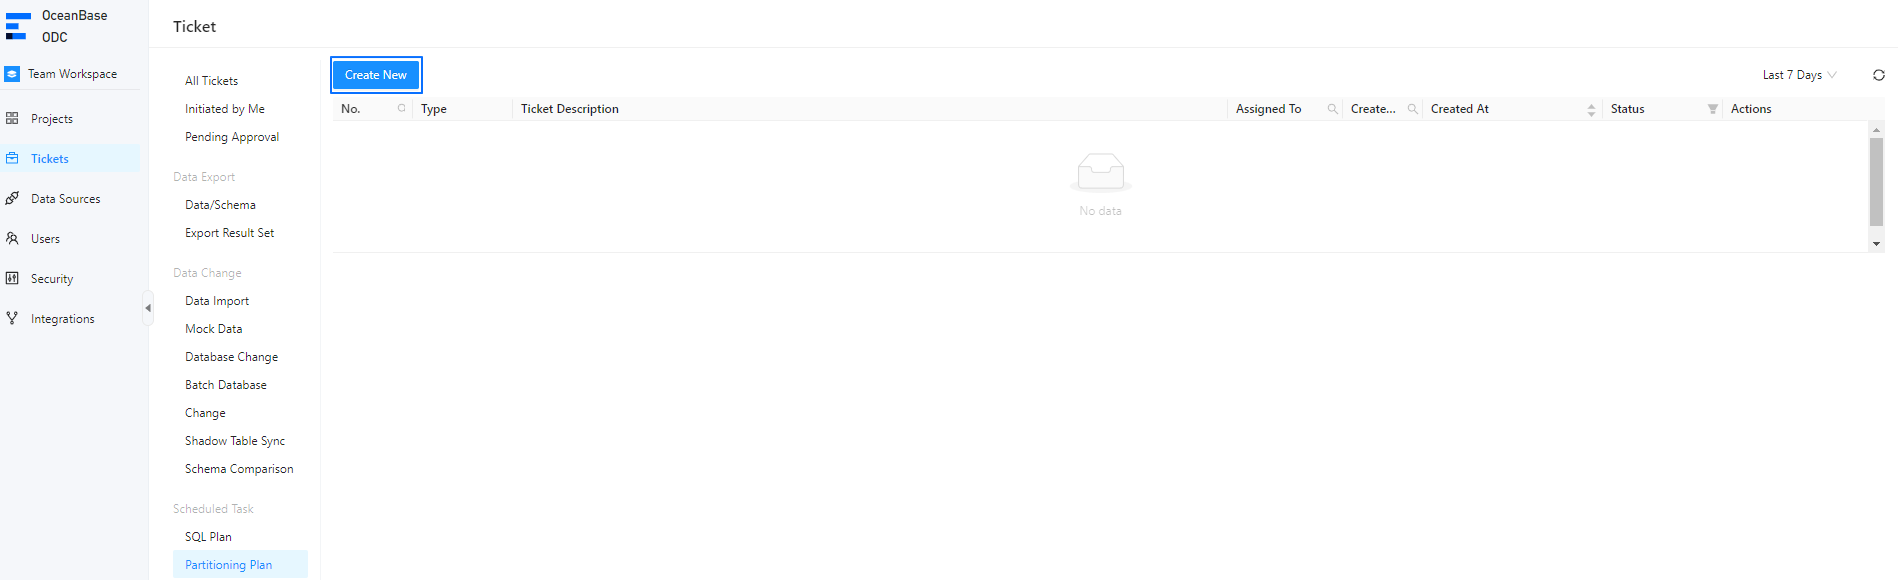
CREATE TABLE `order` (
`time` date NOT NULL,
 `parti_key` int(11),
 `name` varchar(120) DEFAULT NULL
) partition by range columns(time, parti_key)
(partition p2023_01 values less than ('2023-01-01', 20230101),
partition p2023_02 values less than ('2023-02-01', 20230201))
Click Partitioning Plan > Create Ticket in the Ticket tab of the SQL window.
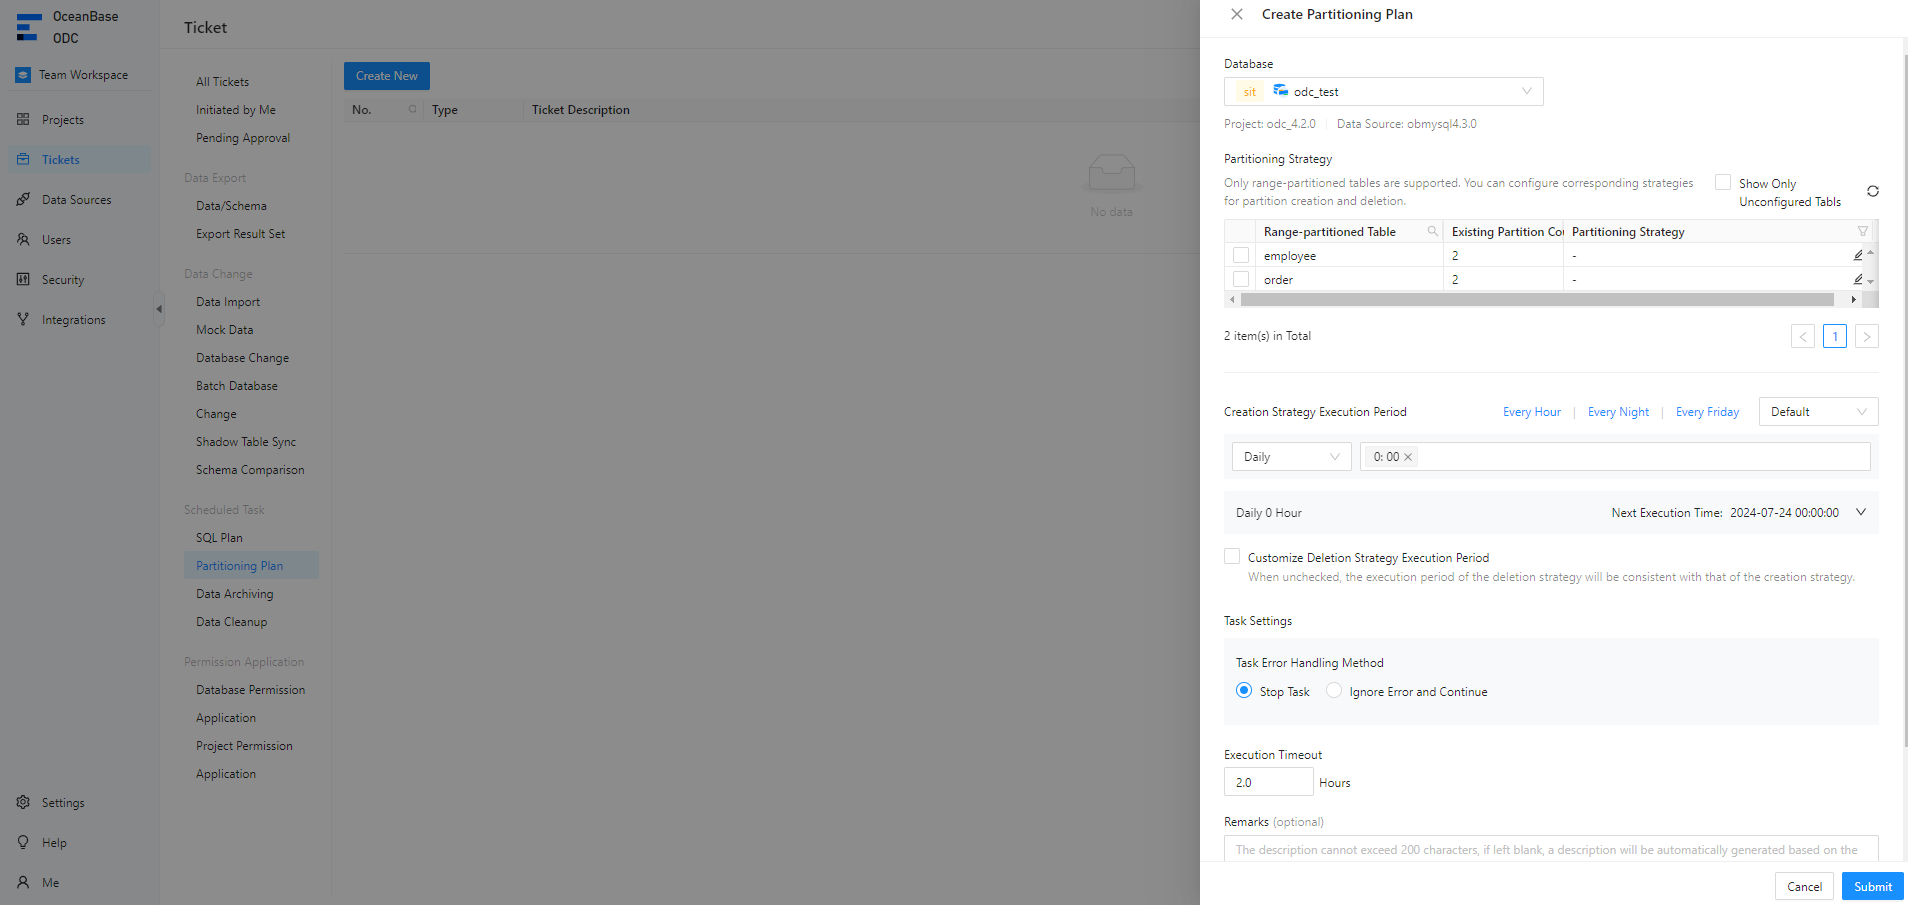
Specify the following information in the Create Partitioning Plan panel.
 ParameterDescription
Database Select the database for which the partitioning plan is created. Partitioning Strategy Select the target RANGE-partitioned table in the specified database and click  to set partitioning strategies. For more information, see Set partitioning strategies and Examples.
Note
- You can select the Show Only Unconfigured Tabls option next to Partitioning Strategy to display only tables with no partitioning strategies.
- You can also select multiple RANGE-partitioned tables and configure partitioning strategies for them at a time.
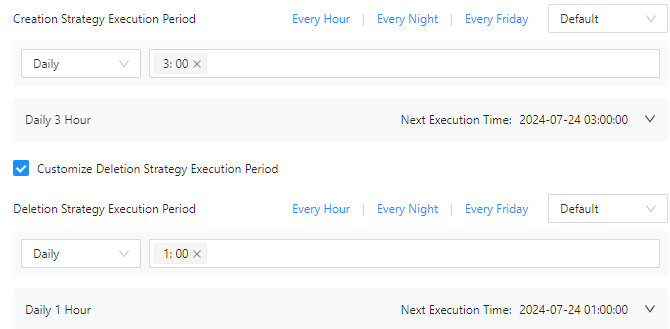
Strategy Execution Cycles - Creation Strategy Execution Period: Set an execution cycle for all partition creation strategies, for example, at 2:00 a.m. every day.
- Customize Deletion Strategy Execution Period: Select this option and set an execution cycle for all partition deletion strategies. If you do not select this option, the partition deletion strategies will be scheduled together with partition creation strategies.
Task Settings Select a method for handling task errors. Valid values: - Stop Task: This is the default option. When you select this option, the task is aborted if an error occurs when you run the script.
- Ignore Error and Continue: When you select this option, the system skips the statement where an error occurs and continues to execute other statements in the script.
Execution Timeout Value The default value is 2 hours. Remarks The business background of the project, such as the change purpose and expected goal. After you specify the preceding information, click Submit in the lower-right corner of the panel.
After the task is generated, you are redirected to the Task Center panel. You can view the task approval status and task information here.

View a partitioning plan task
Task information
- In the partitioning plan task list on the Tickets tab, click View in the Actions column of a partitioning plan task.
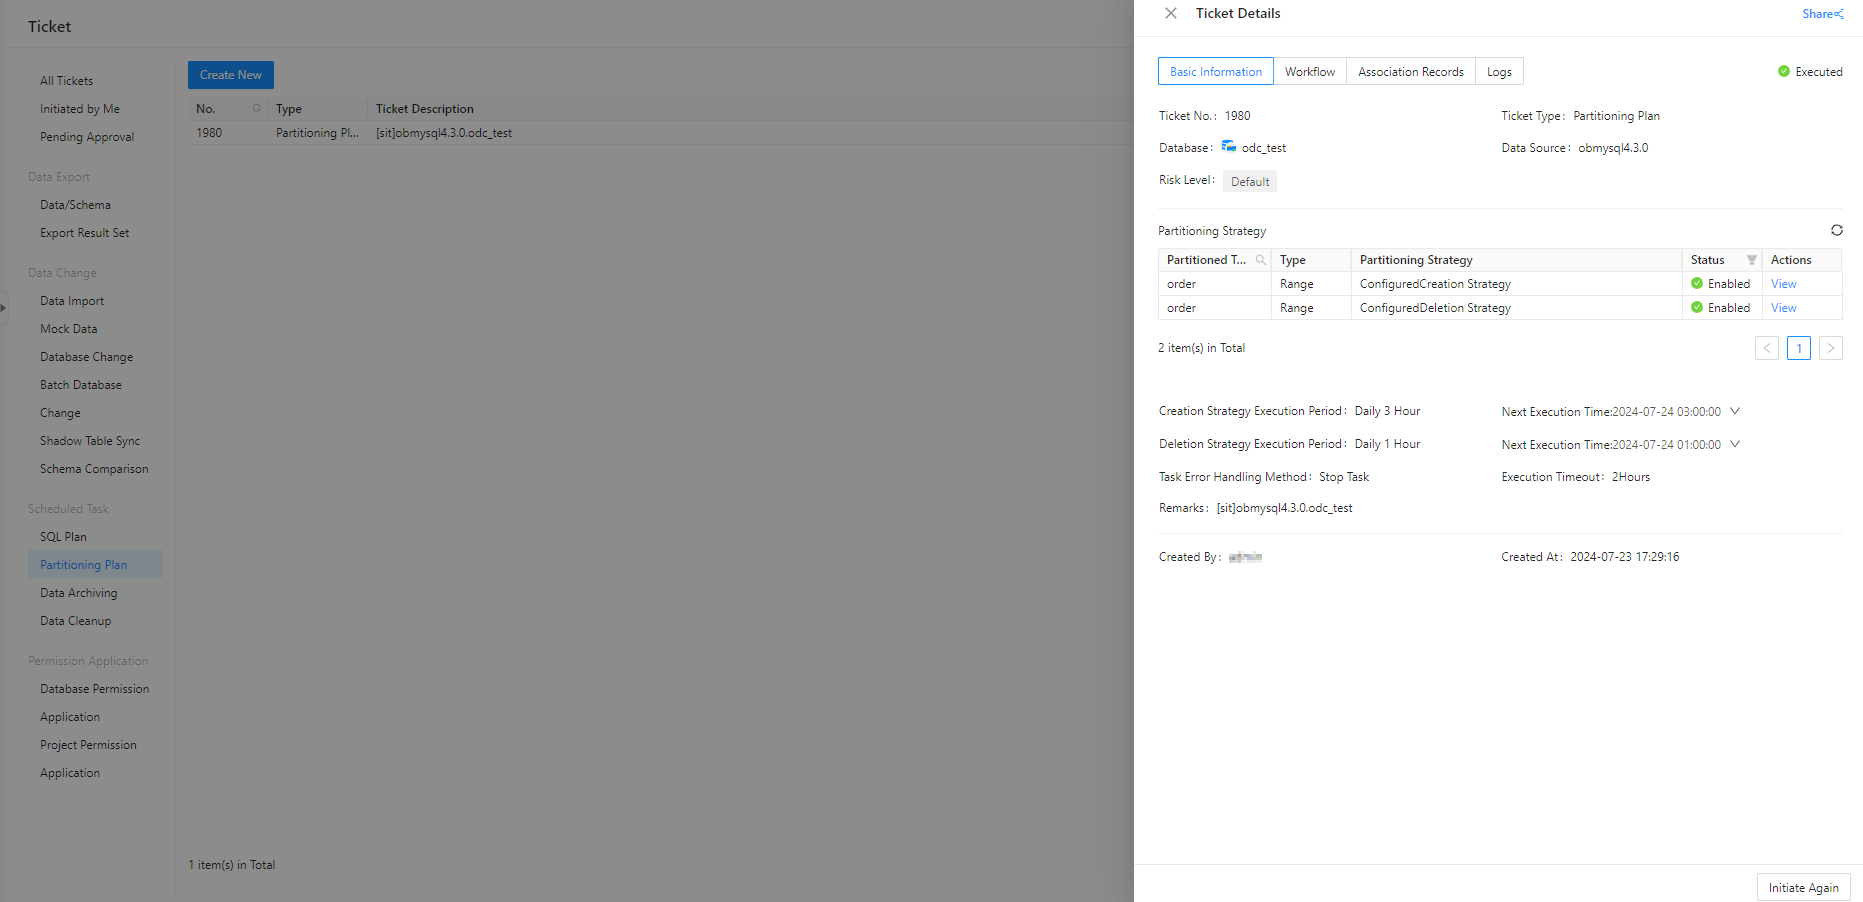
- In the Task Details panel, click the Basic Information tab and view the basic task information and task settings.
Item |
Description |
|---|---|
| Basic task information | The status, ID, type, data source, risk level, remarks, creator, and creation time of the task are displayed. |
| Task settings | You can view the partitioning strategies of the RANGE-partitioned table selected when you created the partitioning plan task. |
- In the Task Details panel, click Initiate Again in the lower-right corner to initiate the task again.
Workflow
- In the Ticket Details panel, click the Workflow tab and view the initiation status, approval status, execution status, and execution result of the task.
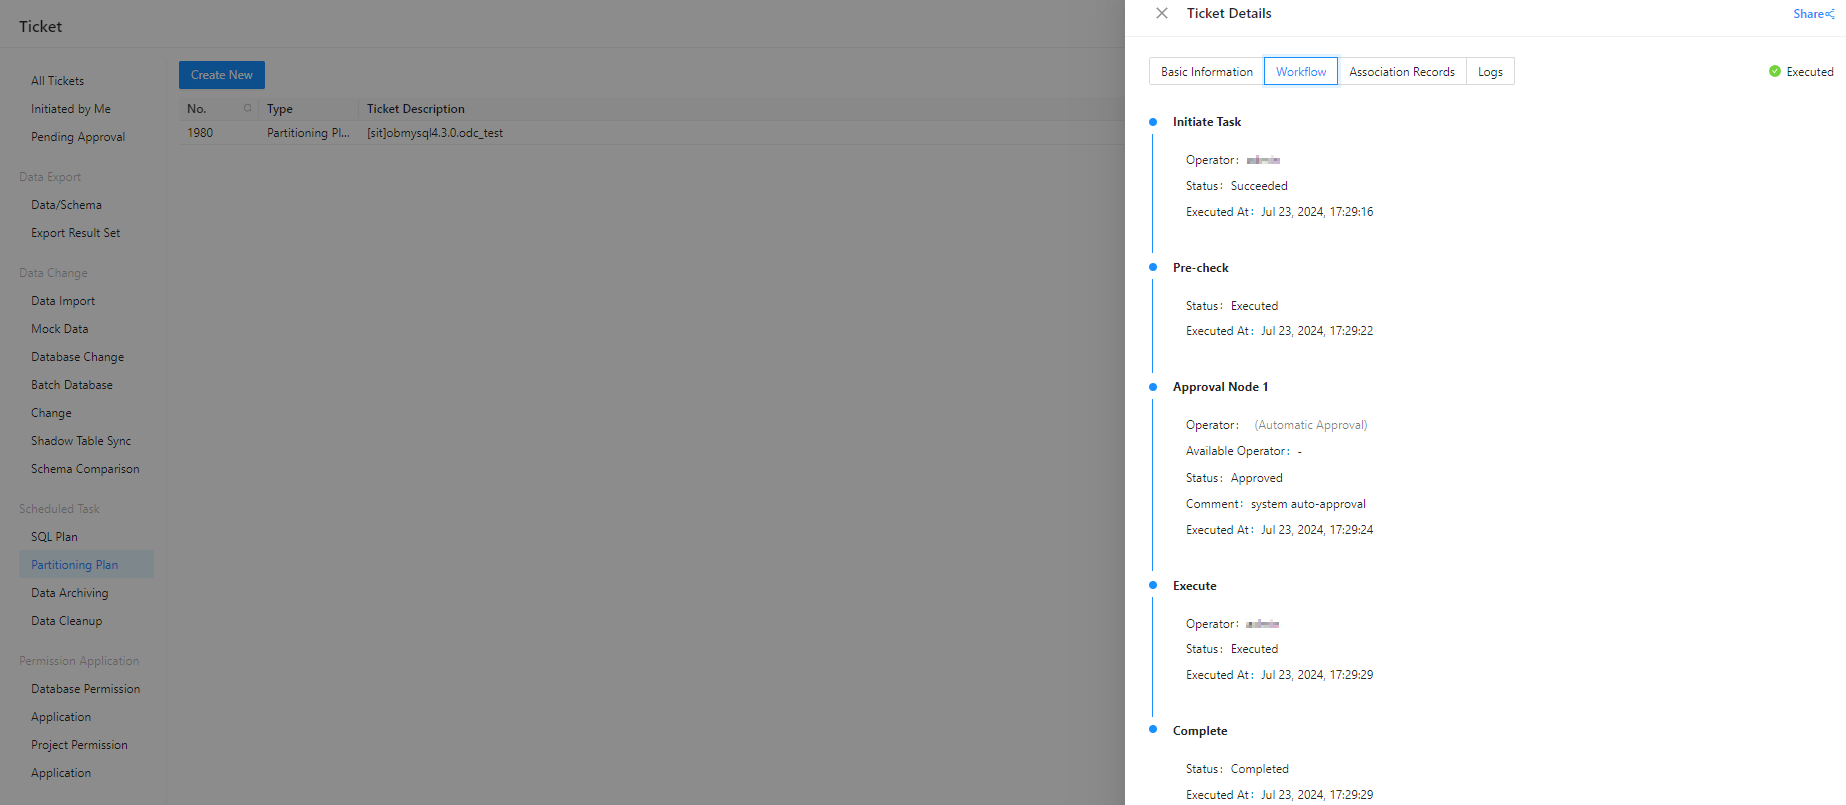
- You can click Initiate Again in the lower-right corner of the panel to initiate the task again.
Association records
- In the Ticket Details panel, click the Association Records tab and view the Ticket No., Database, Created At, Task Status, and View of the task.

- You can click Initiate Again in the lower-right corner of the panel to initiate the task again.
Task logs
In the Task Details panel, click the Logs tab to view all logs and alert logs of the task.
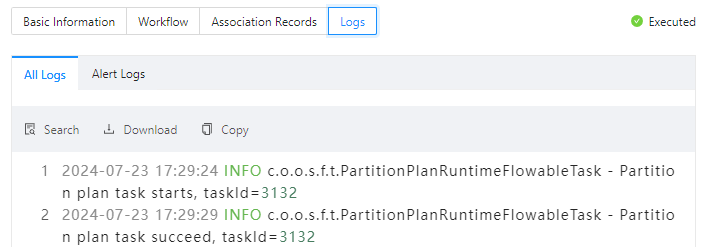 TabDescription
All Logs Displays the complete information of all task logs, including INFO, ERROR, and WARN logs. You can click Search, Download, or Copy to search for, download, or copy all logs. Alert Logs Displays the ERROR and WARN logs of the task. When a task fails, you can view the error messages in the alert logs. You can click Search, Download, or Copy to search for, download, or copy alert logs. Click Initiate Again in the lower-right corner of the panel to initiate the task again.