


OceanBase Cloud Platform (OCP) allows you to perform alert management. To be specific, you can manage alert events, view alert notification records, block alerts, and filter logs.
Alert event management: When an exception occurs in a cluster, you may receive a large number of alert notifications. In this case, if you want to view specific alert notifications and perform statistical analysis on specific alert notifications, you can manage alert events as needed.
Alert notification records: You can view alert notification records within 90 days. Alert notifications that are generated more than 90 days ago are automatically archived.
Alert blocking: A bug that causes exception alerts may require a long time to be fixed. To prevent frequent interruptions by these alerts, you can go to the Alert Blocking tab to block these alerts for a specific period of time.
Log filtering: OceanBase Database is a distributed database service. It provides three types of logs, including election logs, RootService logs, and OBServer logs. Log-based alerts of OceanBase Database are not triggered by alert rules. Instead, OceanBase Database monitors the three types of logs on OBServer nodes and triggers alerts when ERROR logs are detected. The physical machine environment and the system environment on OBServer nodes widely vary. As a result, ERROR logs may be misreported. In this case, you can configure rules on the OceanBase Log Filtering tab to filter out these logs.
View alert events
Log on to the OCP console.
In the left-side navigation pane, choose System Management > Alerts.
Click the Alert Events tab.
You can specify query conditions to filter alerts.
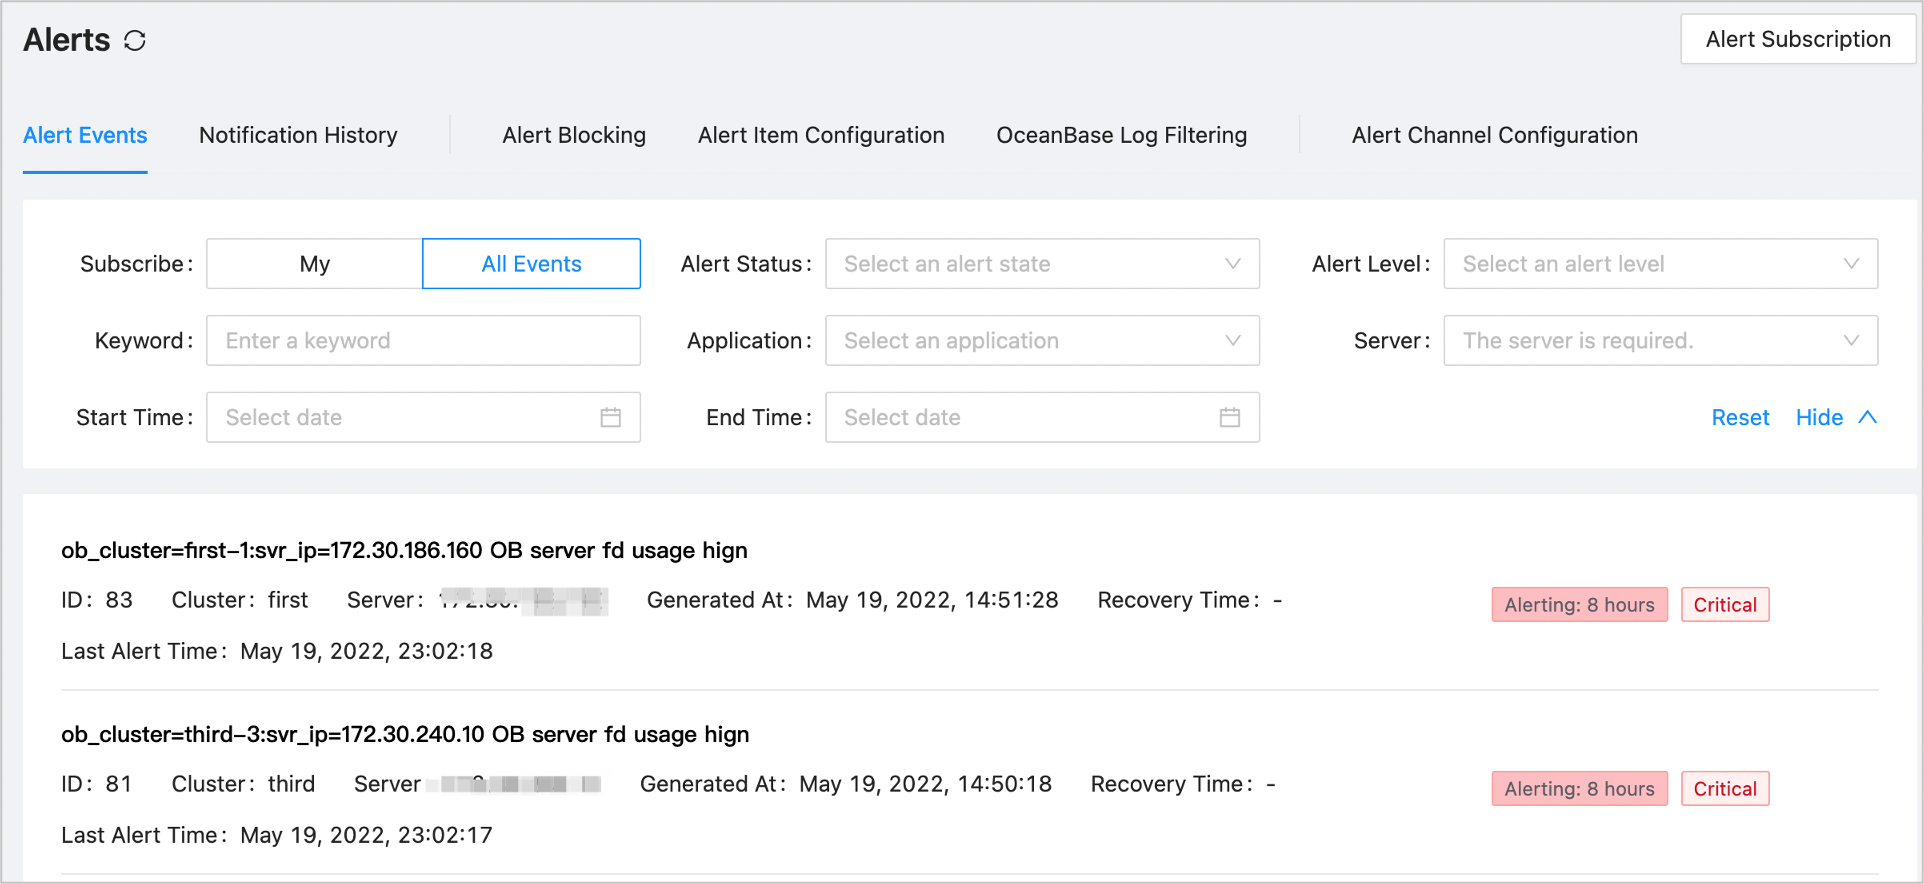
All alert events that match the criteria will be returned in the alert event list.
Click an alert event in the alert event list to go to its Details page.
You can view the information and notification history related to the alert on the Details page.

On the alert event details page, click View Alert Items in the upper-right corner.
You can view the alert rule of the alert event.
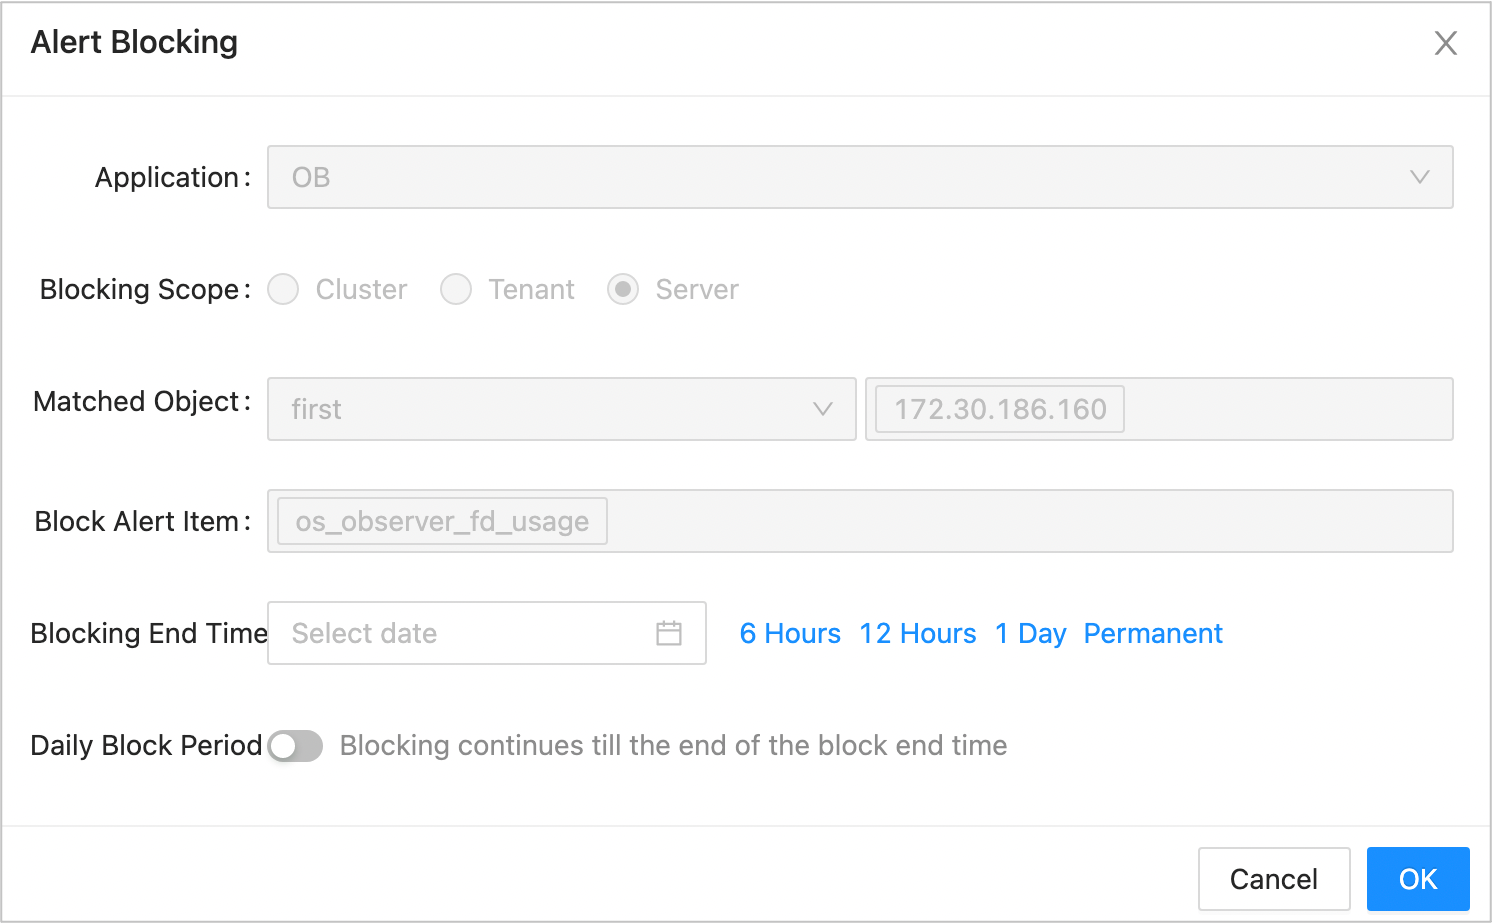
To block an alert event, click Alert Blocking in the upper-right corner on the details page of the alert event.
In the dialog box that appears, set Blocking End Time and Daily Block Period for blocking the alert event and click OK.
The alert will not be reported before the specified end time.
View alert notification records
Log on to the OCP console.
In the left-side navigation pane, choose System Management > Alerts.
Click Notification History to go to the corresponding tab.
Expand the search box, specify the search criteria and click Search.
For example, to query the notifications of Critical alerts on all OCP servers, you can set the search criteria as indicated in the following figure.
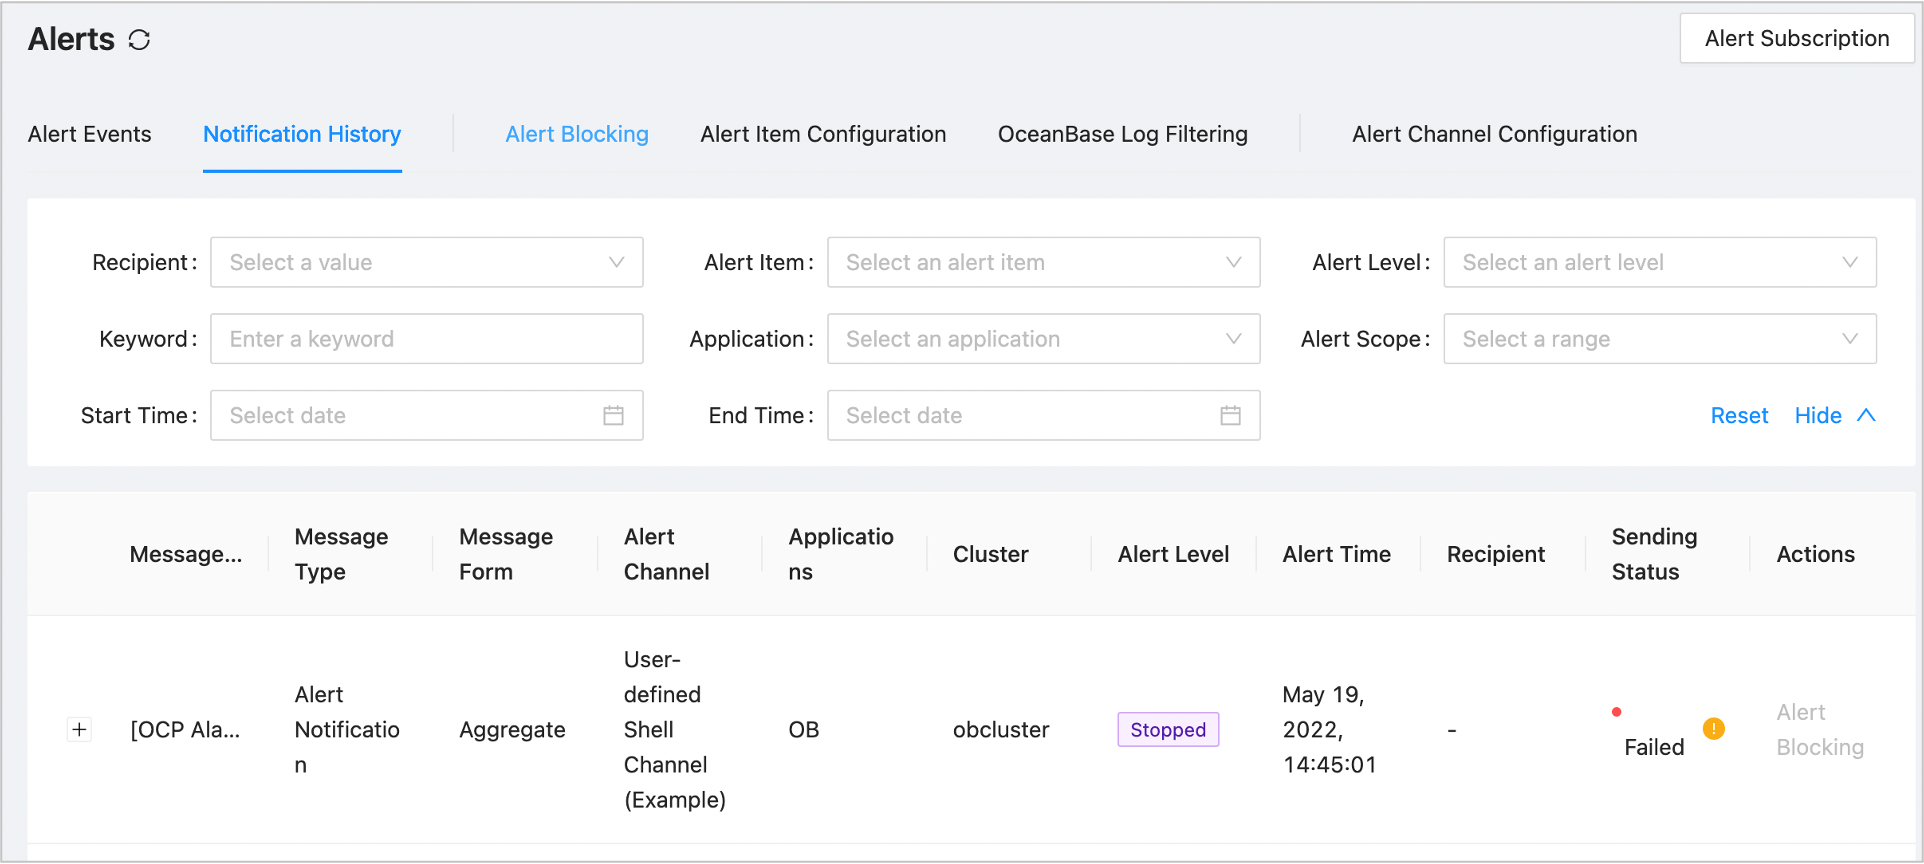
The system returns all the historical alert notifications that match the criteria in the list under the search section.
(Optional) To block an alert, click Block Alert in the Actions column of the target alert.
In the Alert Blocking dialog box, specify the Blocking End Time and Daily Block Period and click OK. This way, the alert is not reported until the end time.
Note
The alert blocking action is available only when Message Form is Single Alert.
Block alerts
You can quickly block alerts on the Alert Event or Notification History tab. However, this method allows you to block only reported alerts by a specified blocking time, which is not flexible.
This section describes how to create a blocking condition. It is a more flexible method that allows you to block alerts before they are generated. After a blocking condition is created, the system starts to block alerts based on the condition. If the blocking condition does not take effect immediately, wait for another 30 seconds.
When you run an O&M task on an OceanBase cluster, alerts are automatically blocked.
Log on to the OCP console.
In the left-side navigation pane, choose System Management > Alerts.
On the Alert Blocking tab, click Create Blocking Condition.
Configure the blocking condition in the Create Blocking Condition dialog box.
FieldDescriptionApplication The alert source. Valid values: OB, OBProxy, Backup and Recovery, OCP, OMS, and ODP. Cluster/Application Different fields are displayed based on the source you selected. - When the source is OceanBase, you must select the cluster to block in the Cluster drop-down list.
- When the source is Application, you must select the application to block in the Application drop-down list. If the selected application is OBProxy, you must also select the OBProxy cluster to block.
Blocking Scope The blocking scope. Valid values: Cluster, Tenant, and Server. Matched Object The object for which alerts are to be blocked. - If you select Cluster for Blocking Scope, you must select the cluster whose alerts are to be blocked.
- If you select Tenant for Blocking Scope, you must select the tenant whose alerts are to be blocked.
- If you select Server for Blocking Scope, servers are displayed, and you must select the servers whose alerts are to be blocked.
Alert Item Select one or more alert items to be blocked. Blocking End Time Specify the end time for the blocking condition. The blocked alerts will not be reported before the end time expires. Daily Block Period You can toggle on the Daily Block Period switch, and specify the start time and end time. The system blocks the alerts during the specified period every day. 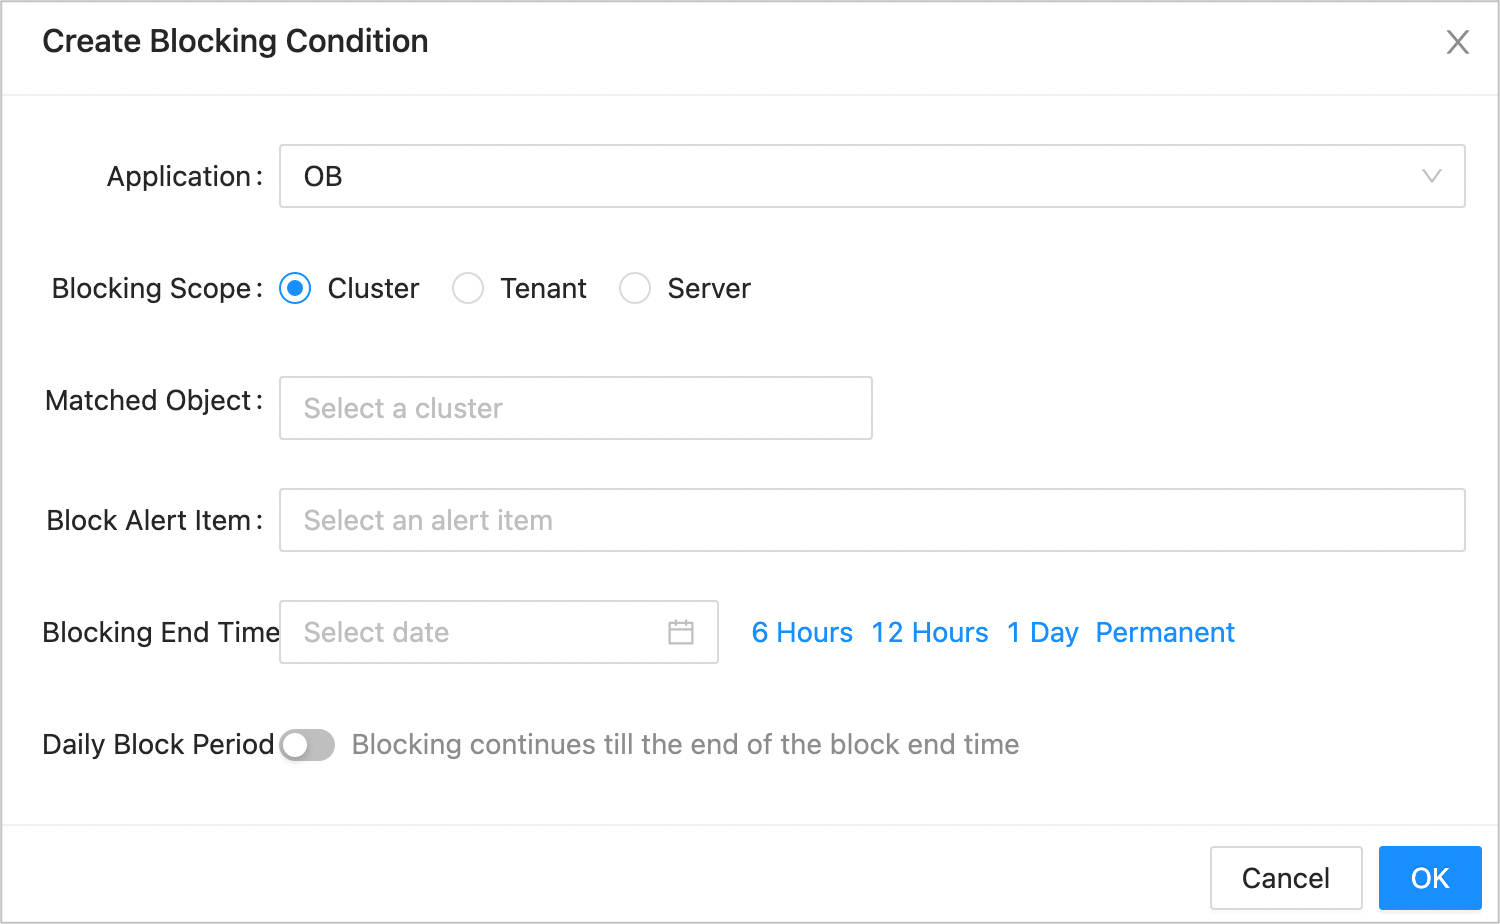
Filter logs
You can add keywords in OCP to filter OceanBase Database logs so that logs with the keywords will be ignored without triggering alerts.
Note
Log-based alerts of OceanBase Database are not triggered by alert rules. Instead, OceanBase Database monitors logs on OBServer nodes and triggers alerts when ERROR logs are detected. However, some ERROR logs do not indicate a real problem. In this case, you can add keywords so that ERROR logs with the keywords will be ignored without triggering alerts.
Log on to the OCP console.
In the left-side navigation pane, choose System Management > Alerts.
On the OceanBase Log Filtering tab, click Add Filtering Keyword.
The Add Filtering Keyword dialog box appears.
Configure the filtering conditions as needed.
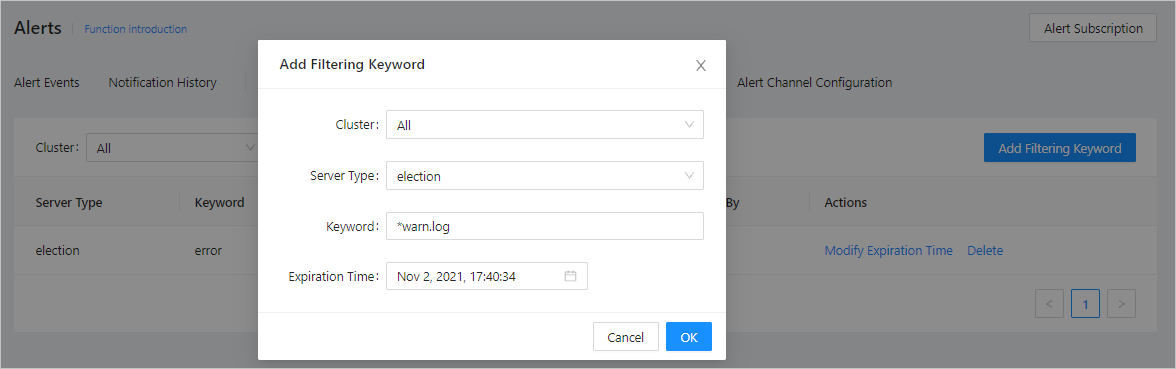
You can use a regular expression as a keyword. Logs that match the keyword will not trigger an alert.
Click OK.
To extend the valid period of a filtering keyword, find the keyword on the OceanBase Log Filtering tab and click Modify Expiration Time to update the expiration time of the keyword.