


Background
The graphic user interface (GUI) varies with the OCP version. This topic takes OCP V2.5.0 as an example. For other OCP versions, see User Guide of the corresponding version.
Procedure
Log on to the OCP console as the admin user. The Cluster Overview page appears by default.
In the left-side navigation pane, click Tenant .
In the upper-right corner of the Tenant Overview page, click Create Tenant .

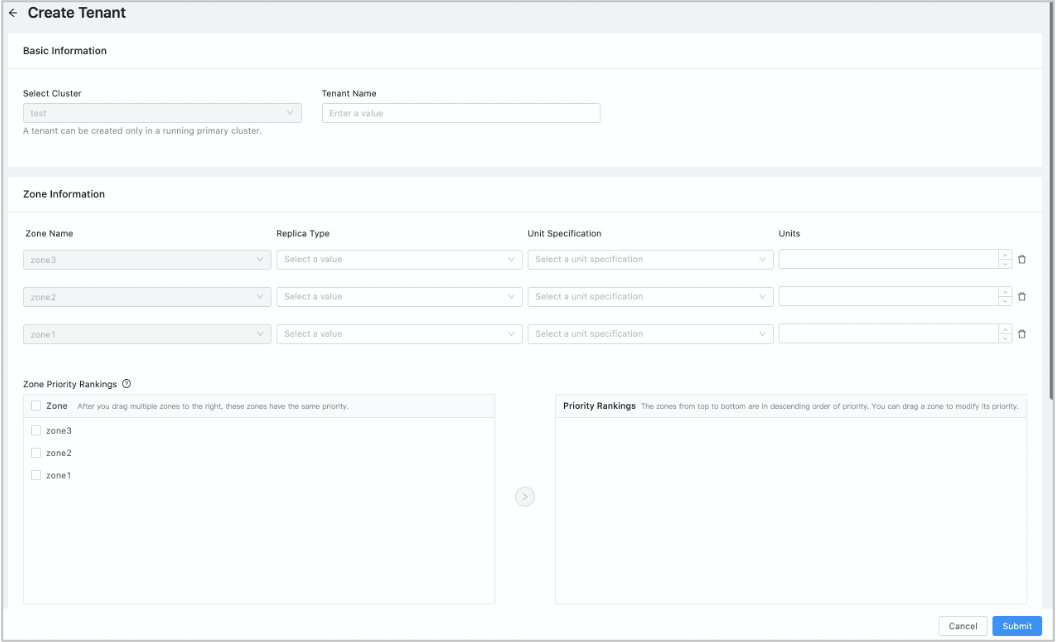
On the Create Tenant page, configure the basic information of the cluster.
Select the OceanBase cluster that you have created.
Enter the tenant name .
The tenant name must be 2 to 32 characters in length and can contain letters, digits, and underscores (_).
Enter the zone information.
Set the replica type, unit specification, and number of units for Zone1, Zone2, and Zone3.
After you select a cluster, a list of available zones is displayed based on the zone information of the selected cluster. You can click the delete icon to delete the zones that do not need replica distribution.

Set Zone Priority Rankings .
To set the same priority for multiple zones, select these zones at one time and add them to the right-sight area.
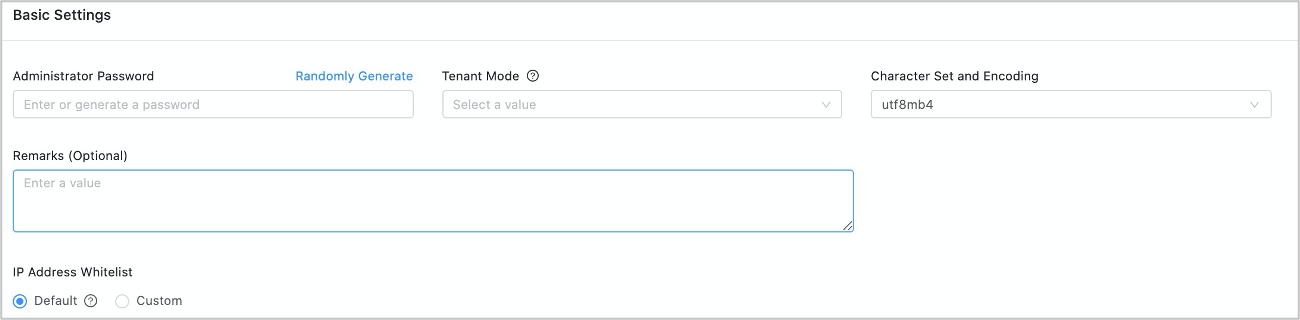
Set parameters in the Basic Settings.
Set Administrator Password . The password can be generated randomly.
In MySQL mode, the administrator account is "root".
In Oracle mode, the administrator account is "SYS". The password must be 8 to 32 characters in length and can contain at least two digits, two uppercase letters, two lowercase letters, and two special characters. The supported special characters are: _+@#$%.
Set Tenant Mode .
The Oracle and MySQL tenant modes are supported.
Set Character Set and Encoding .
In MySQL mode, the supported character sets are UTF8MB4, Binary, GBK, and GB18030. Default value: UTF8MB4.
In Oracle mode, the supported character sets are UTF8MB4, GBK, and GB18030. Default value: UTF8MB4.
Set Remarks (optional) .
Set IP Address Whitelist .
You can specify a list of clients that are allowed to log on to this tenant here. Default value: %, indicating that all clients are allowed.
When you configure the whitelist, you must add the IP addresses of the OCP server and the OBProxy server to it. Otherwise, you cannot manage the tenant from OCP.
Default configuration: All IP addresses are allowed.
Custom configuration: You can set an IP address whitelist to allow access from IP addresses in the whitelist.
Configure the whitelist in the following formats:
IP address example: 10.10.10.10, 10.10.10.11
Subnet/mask example: 10.10.10.0/24
Fuzzy match example: 10.10.10. % or 10.10.10. _
Mixed format example: 10.10.10.10,10.10.10.11,10.10.10. %,10.10.10. _,10.10.10.0/24
Click Submit .