


This topic describes how to deploy OceanBase Cloud Platform (OCP) Community Edition. You can deploy OCP by using the command-line interface (CLI) tool or a browser.
Note
- Only OCP V3.3.0-BP1 and later can be deployed by using a browser.
- Pages in the browser can be displayed only in English.
Deploy OCP by using the CLI tool
Prerequisites
The OCP Docker container has been installed on the central control server. For more information about how to install a Docker container, see Install Docker.
You have decompressed the
ocp-4.0.0-ce.tar.gzsoftware package to a directory on the central control server. For more information, see Prepare for installation. The package contains the following files:ocp_installer.sh: the OCP installation script.ocp.tar.gz: the OCP image file.ocp-installer.tar.gz: the OCP installer image file.config.yaml: the OCP configuration file.
You have modified the OCP configuration file based on your actual deployment environment. For more information, see Modify the configuration file.
Procedure
Log on to the central control server as the root user and go to the directory where the
ocp_installer.shfile is located.Optional. Call the
ocp_installer.shfile to view the OCP deployment method.#./ocp_installer.sh help Usage: ./ocp_installer.sh COMMAND -c config_file -i installer_image_file [-o ocp_image_file] [-k ssh_key_file] [-v] [-h] Description: OCP installer Commands: install install OCP uninstall delete OCP and metadb(if configured) upgrade upgrade OCP replace replace OCP container, used for upgrade to the bp version, or just restart Options: -c required, path to config file -i installer image file -o ocp image file -k ssh_key_file -v show verbose messages -h show this help mesagesRun the following command to deploy OCP:
# Use password for Secure Shell (SSH) authentication.
./ocp_installer.sh install -c config.yaml -i ./ocp-installer.tar.gz -o ./ocp.tar.gz
# Use key for SSH authentication.
./ocp_installer.sh install -c config.yaml -k /root/.ssh/id_rsa -i ./ocp-installer.tar.gz -o ./ocp.tar.gz
Deploy OCP by using a browser
Prerequisites
The OCP Docker container has been installed on the central control server. For more information about how to install a Docker container, see Install Docker.
You have decompressed the
ocp-4.0.0-ce.tar.gzsoftware package to a directory on the central control server. For more information, see Prepare for installation. The package contains the following files:ocp_installer.sh: the OCP installation script.ocp.tar.gz: the OCP image file.ocp-installer.tar.gz: the OCP installer image file.config.yaml: the OCP configuration file.
Procedure
Log on to the central control server as the root user and go to the directory where the
ocp_installer.shfile is located.Optional. Call the
ocp_installer.shfile to view the OCP deployment method.#./ocp_installer.sh help Usage: ./ocp_installer.sh COMMAND -c config_file -i installer_image_file [-o ocp_image_file] [-k ssh_key_file] [-v] [-h] Description: OCP installer Commands: launch launch installer install install OCP uninstall delete OCP and metadb(if configured) upgrade upgrade OCP replace replace OCP container, used for upgrade to the bp version, or just restart Options: -c required, path to config file -i installer image file -o ocp image file -k ssh_key_file -v show verbose messages -p expose port of installer container -h show this help mesagesRun the following command to start the ocp_installer:
# To use the default parameters, run the following command. In this case, the image file in the current directory, id_rsa file of the current user, and Port 3000 are used.
./ocp_installer.sh launch
# To use custom parameters, run the following command and specify the image file, key file, and port number.
./ocp_installer.sh launch -i ocp-installer.tar.gz -o ocp.tar.gz -k /root/.ssh/id_rsa -p 3000
Use the corresponding IP address and port in the
IP:portformat to access the deployment page in a browser. On the page that appears, click Install.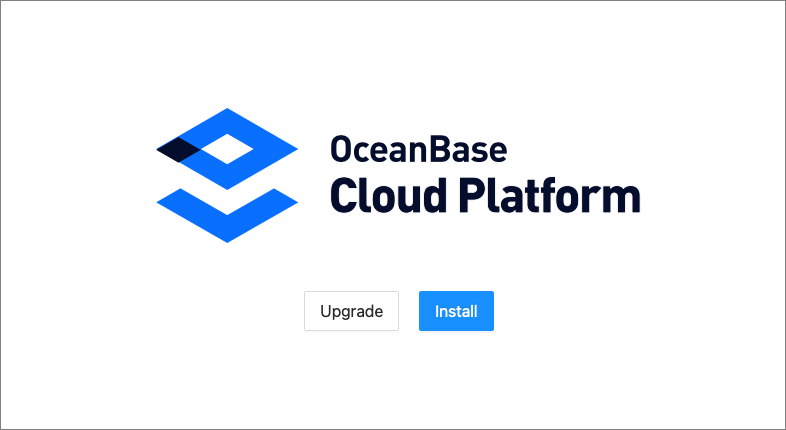
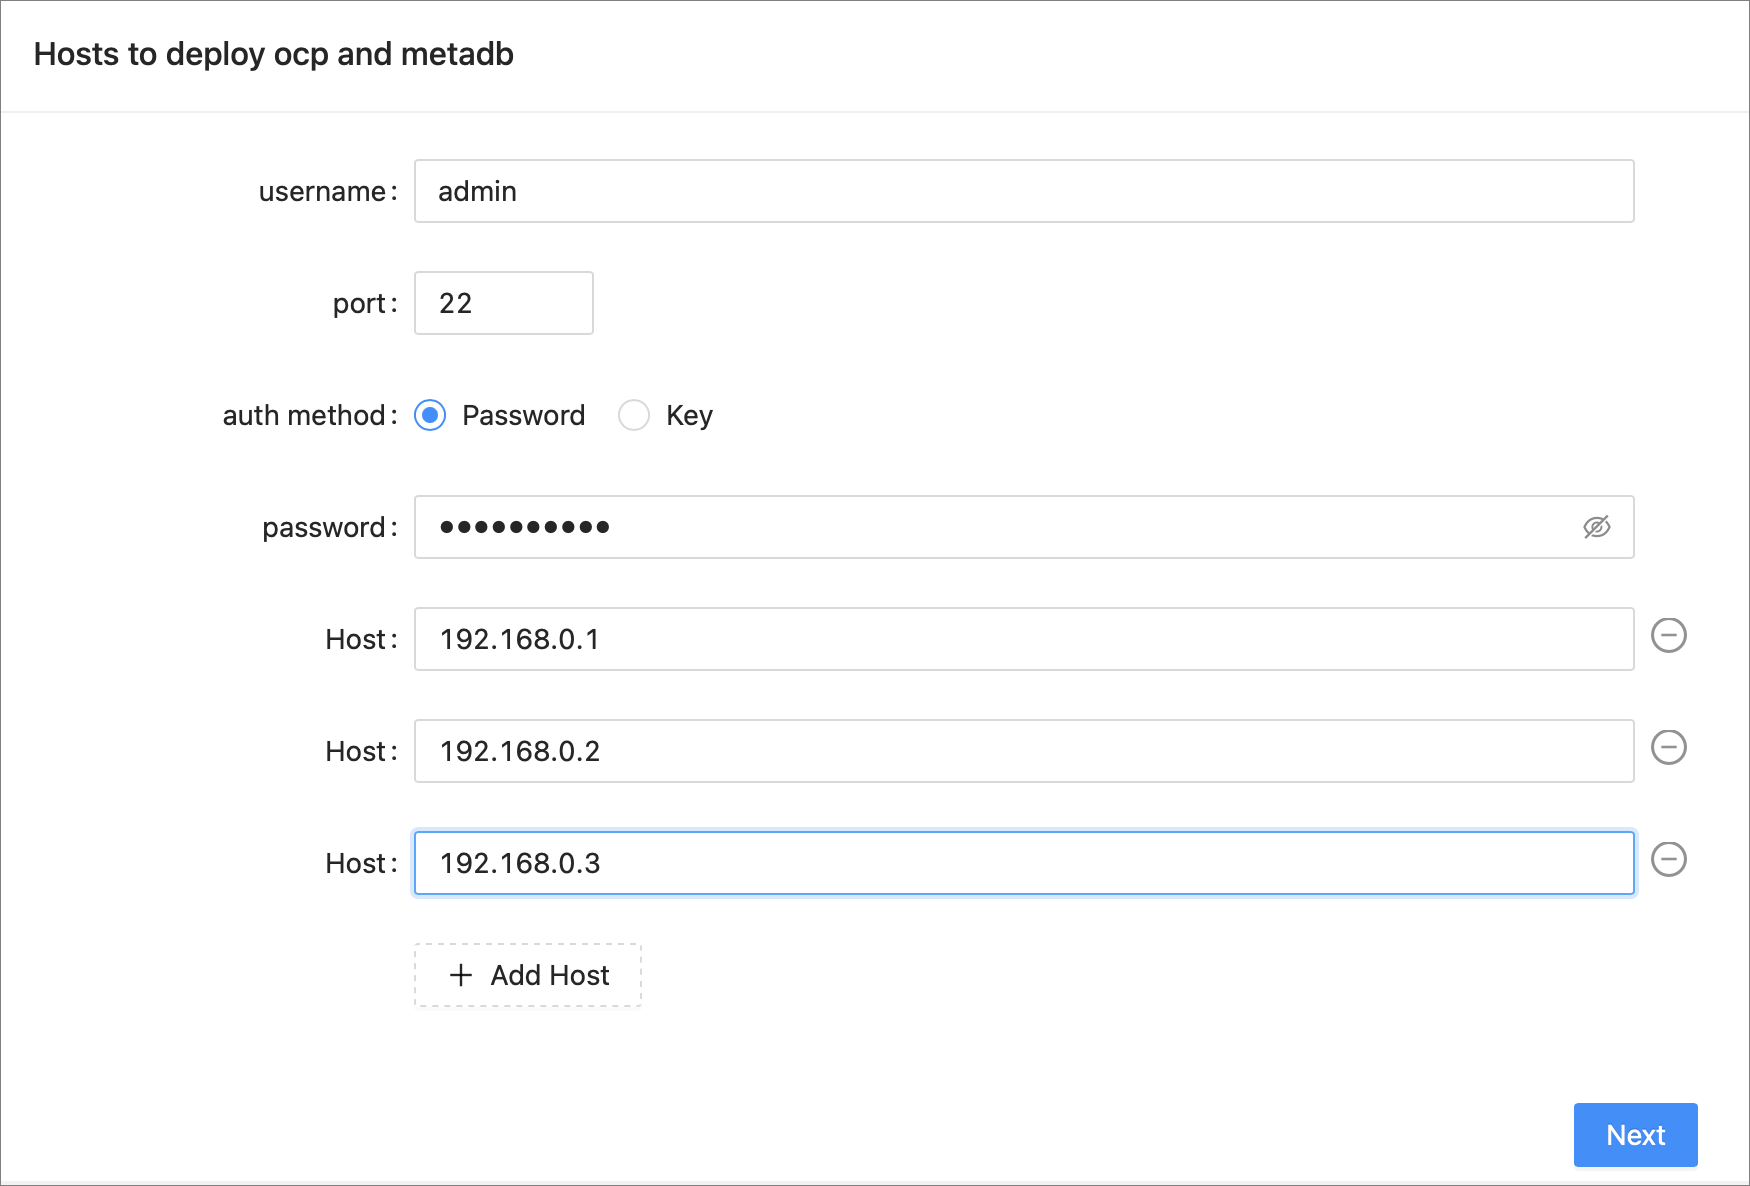
Add the hosts on which you want to deploy OCP, and then click Next. You need to specify the following information: the username and port used to connect to the hosts, the authentication method, and IP addresses of the hosts.
Note
OCP supports SSH authentication based on a password or a private key. To use a private key for the authentication, you must specify the directory of the key file in the container by setting the -k parameter in the ocp_installer.sh file.
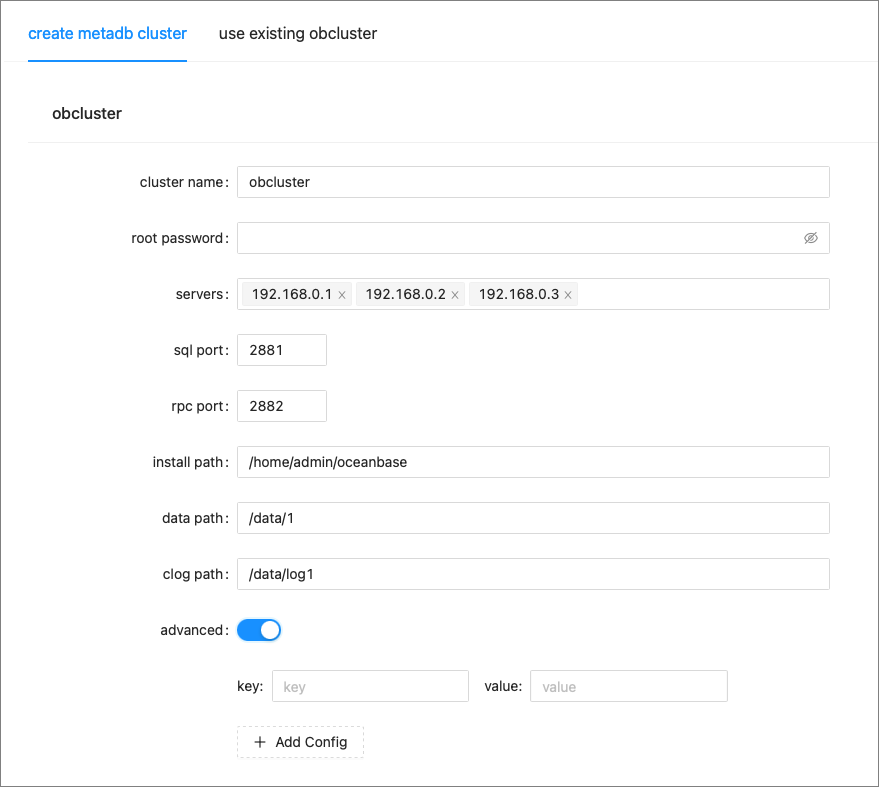
Specify parameters of the MetaDB and click Next. You can create a MetaDB on the create metadb cluster tab, or specify an existing cluster on the use existing obcluster tab.
Create a MetaDB on the create metadb cluster tab
In the obcluster section, specify basic information such as the cluster name, ports, and installation directory. You can enable the advanced settings to specify keys and values of custom parameters.
In the Tenant section, specify the following information: names and resources of tenants, usernames and passwords of users in the tenants, and names of databases in the tenants.
A MetaDB tenant and a monitor tenant are required for OCP deployment.

In the Obproxy section, specify the installation path and ports of OBProxy.
If you have specified a virtual IP address (VIP), you can enable the use vip field. Then, the specified VIP is used for OCP access.

Specify an existing cluster on the use existing obcluster tab
Specify parameters of the cluster and the two tenants.

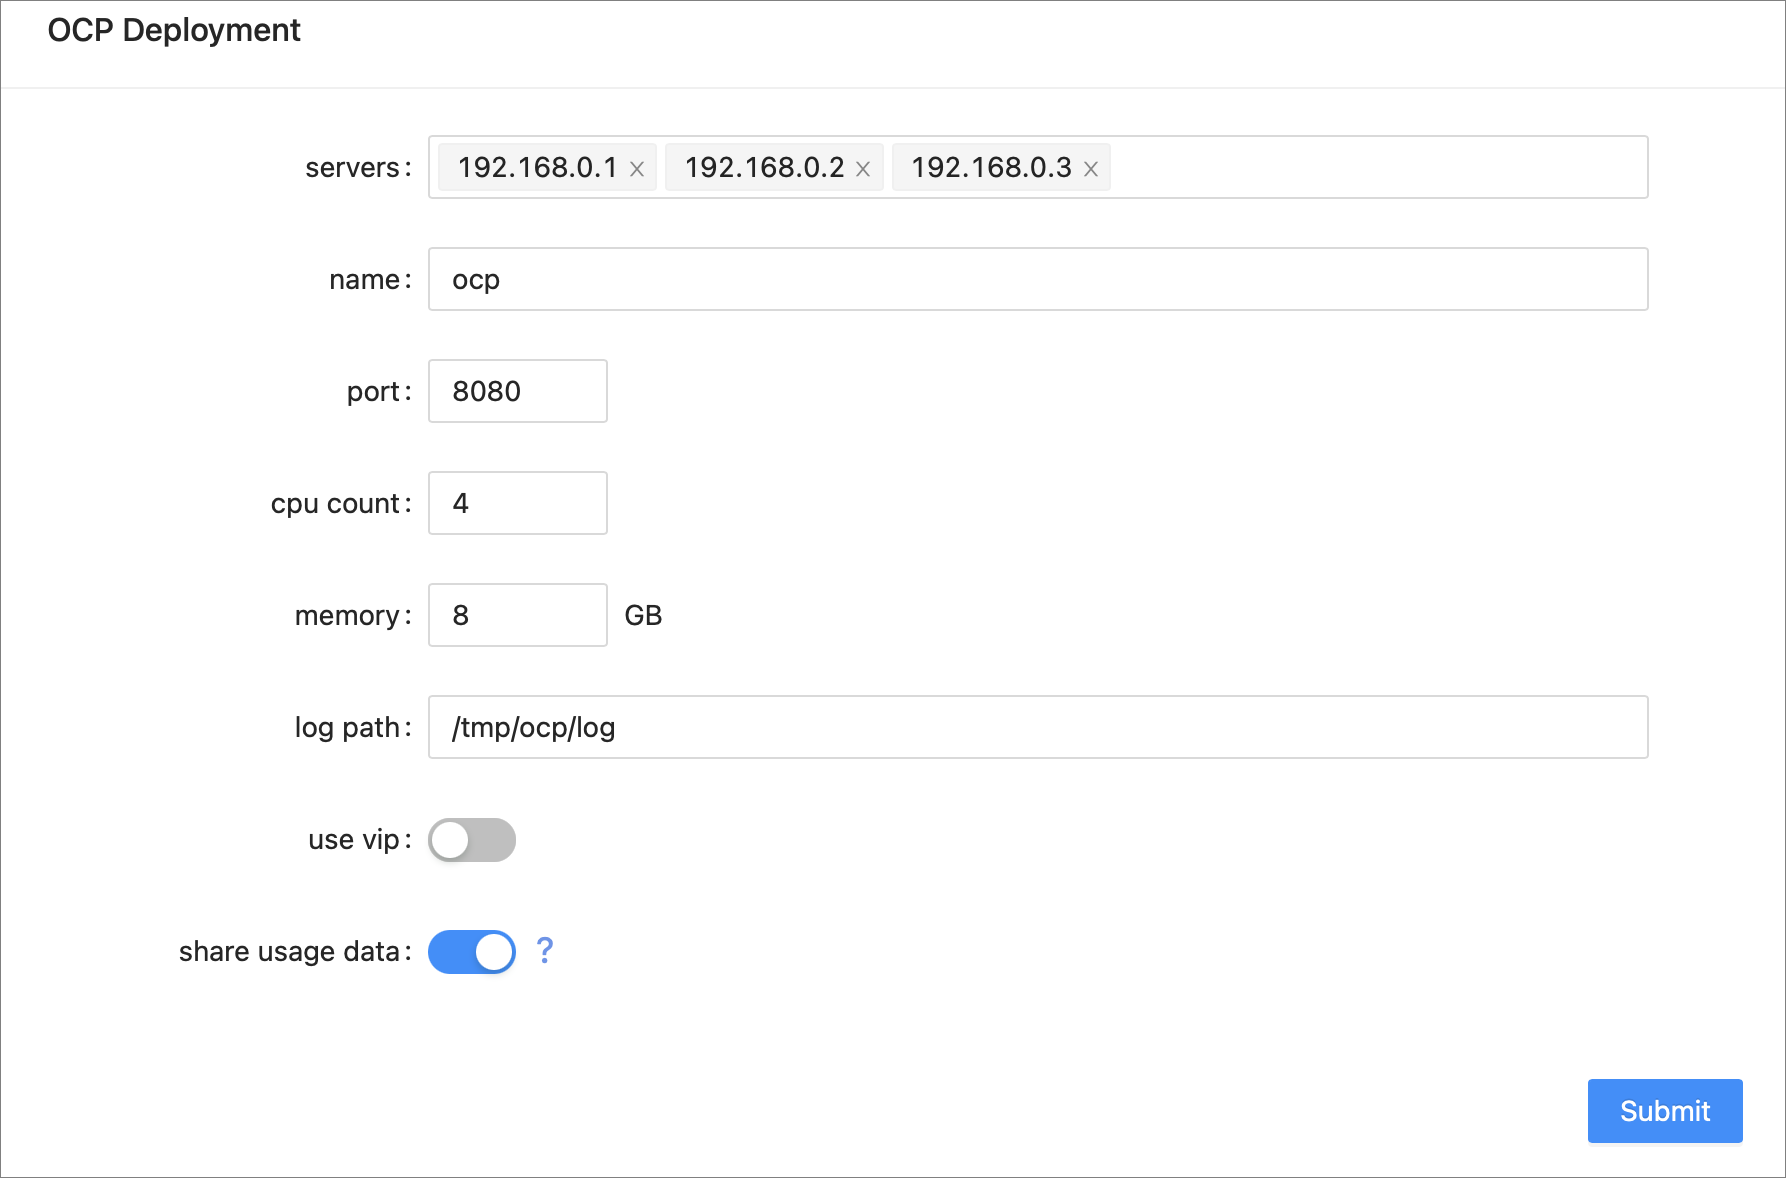
Specify parameters in the OCP Deployment section and click Submit.
Parameters in the OCP Deployment section include the OCP container name, port, resources, and log path. If you have specified a VIP, you can enable the use vip field to use it. This VIP address is used to facilitate access by other components when you deploy the cluster and other services of OCP.
After you click Submit, the Task page appears. You can view task logs on this page. Note that the process of MetaDB initialization takes a while to complete.
After the task is completed, click Finish to exit the installer. Before you exit the installer, make sure that the ocp-installer container on the host is in the installation completed state.

Roll back the task
After the task is submitted, the task information is saved in the ./task directory. To roll back a failed task, you can clean up the deployment environment and re-deploy OCP by using the corresponding config.yamlfile. For more information about how to clean up the deployment environment, see Uninstall OCP.