


You can add zones to a cluster that you manage.
Prerequisites
The logged-on user in the OceanBase Cloud Platform (OCP) console has the permission to update the cluster.
Your OceanBase cluster is managed in the current OCP cluster.
Otherwise, you need to use the current OCP cluster to take over your cluster. For more information, see Take over a cluster.
Procedure
Log on to the OCP console.
The Clusters page automatically appears.
The Cluster Overview page automatically appears.
In the Clusters list on this page, find the target cluster and click its name.
In the upper-right corner on the Overview page, click Create Zone .
In the dialog box that appears, set the zone information.
By default, only one zone is added. You can click Add to add more zones.
Note
The hardware architecture of the hosts in the zone must be the same as that of the cluster.
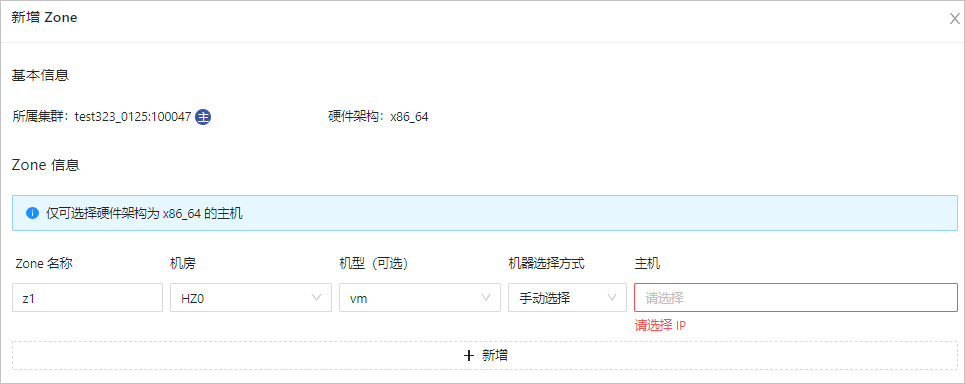
The following table describes the fields required for setting the zone information.
Field |
Description |
|---|---|
| Zone Name | The name of the zone. |
| IDC | The IDC where the zone is located. |
| Host Type | Optional. If you select a host type, the host list is filtered based on the host type. |
| Selection Method | Choose Automatic or Manual . |
| Host | You can select multiple IP addresses. If Selection Method is set to Automatic , you only need to enter the number of hosts, and OCP automatically selects the specified number of hosts from the available hosts. If Selection Method is set to Manual , you need to manually select the IP addresses from the list. |
Click OK .
In the dialog box that appears, you can click View Task to view the creation progress.
You can also choose System Management > Tasks to view the progress of the task.
When the task status is Completed , and the status of the zone is Running in the Zones list on the Overview page, the zone is created.