This topic describes how to connect to the OceanBase Database using Superset and perform data analysis.
Background information
As digital transformation accelerates, businesses are increasingly relying on data analytics across all sectors. Data-driven decision-making significantly enhances competitiveness, making the construction of data warehouses particularly crucial for processing historical data and enabling real-time analysis. OceanBase Database, as a high-performance distributed database, offers robust data storage and query capabilities, making it an ideal choice for offline data analytics and data warehouse construction.
In this context, Apache Superset, a modern data visualization tool, can seamlessly integrate with OceanBase Database to help users achieve efficient data analysis and visualization. With Superset, users can easily connect to OceanBase Database, import datasets, create tables, and generate various charts and interactive dashboards, making the entire data analysis process more efficient and intuitive. This topic explains how to connect Superset to OceanBase Database and demonstrates how to perform practical data analysis and visualization, helping enterprises make intelligent decisions based on their data resources.
Prerequisites
- You have configured and run Superset locally. For more information, see Superset Quick Start.
- You have installed OceanBase Database and created a MySQL-compatible tenant.
- You have prepared a dataset. In this example, the dataset is obtained from Kaggle.
Procedure
Step 1: Obtain the database connection string
Contact the deployment personnel or administrator of OceanBase Database to obtain the corresponding database connection string. For example:
obclient -h$host -P$port -u$user_name -p$password -D$database_name
Parameter description:
$host: the IP address for connecting to OceanBase Database. For connection through OceanBase Database Proxy (ODP), use the IP address of an ODP. For direct connection, use the IP address of an OBServer node.$port: the port for connecting to OceanBase Database. For connection through ODP, the default value is2883, which can be customized when ODP is deployed. For direct connection, the default value is2881, which can be customized when OceanBase Database is deployed.$database_name: the name of the database to be accessed.Notice
The user used to connect to the tenant must have the
CREATE,INSERT,DROP, andSELECTprivileges on the database. For more information about user privileges, see Privilege types in MySQL mode.$user_name: the tenant connection account. For connection through ODP, the format isusername@tenant name#cluster nameorcluster name:tenant name:username. For direct connection, the format isusername@tenant name.$password: the account password.
For more information about connection strings, see Connect to an OceanBase tenant by using OBClient.
Here is an example:
obclient -hxxx.xxx.xxx.xxx -P2881 -utest_user001@mysql001 -p****** -Dtest
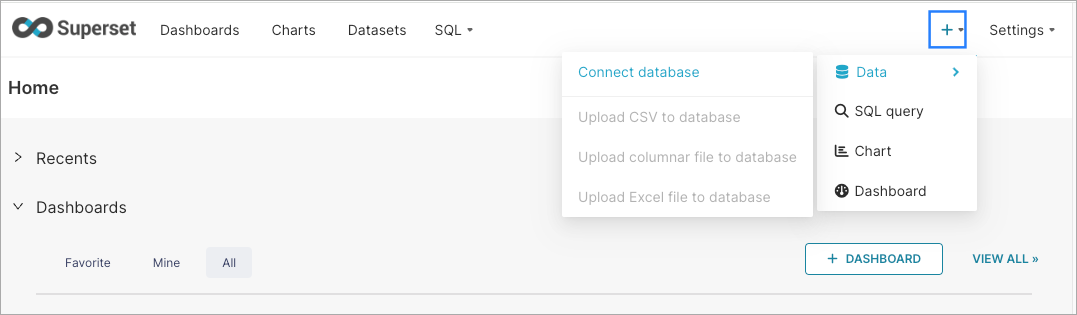
Step 2: Connect to OceanBase Database in the Superset console
In the running Superset console, click + > Data > Connect database in the upper-right corner.
On the page that appears, configure the following settings:
- In the first step Select a database to connect, select the type of OceanBase Database.
- In the second step Enter the required MySQL credentials, enter HOST, PORT, DATABASE NAME, USERNAME, and PASSWORD based on the connection string obtained in Step 1: Obtain the database connection string. You can customize the value of DISPLAY NAME.
Click CONNECT and then click FINISH.
Step 3: Import data and create a table
Log in to OceanBase Database by using the connection string obtained in Step 1: Obtain the database connection string and execute the following statement to create a table:
CREATE TABLE earthquakes ( Place VARCHAR(255), Latitude DECIMAL(10, 6), Longitude DECIMAL(10, 6), Country VARCHAR(100), Continent VARCHAR(100), Magnitude DECIMAL(3, 1) );You can execute the
LOAD DATAstatement to import the dataset to the table. Here is an example:LOAD DATA INFILE '/path/earthquake_dataset.csv' INTO TABLE earthquakes FIELDS TERMINATED BY ',' ENCLOSED BY '"' LINES TERMINATED BY '\n' IGNORE 1 LINES (Place, Latitude, Longitude, Country, Continent, Magnitude);When a large amount of data is to be imported or data conversion is required during import, we recommend that you use OceanBase Loader and Dumper to import the dataset.
After the import is successful, execute the following statement to verify the import:
obclient> SELECT COUNT(*) FROM earthquakes; +----------+ | COUNT(*) | +----------+ | 1264 | +----------+ 1 row in set
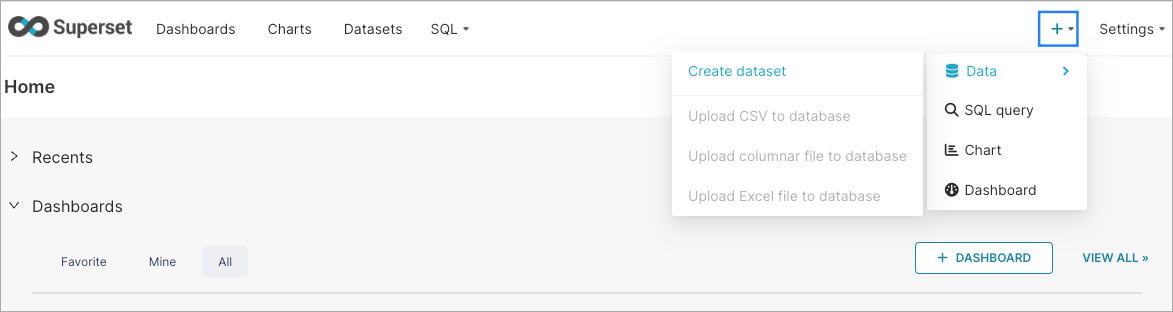
Step 4: Create a dataset in Superset
Go back to the Superset console and click + > Data > Create dataset in the upper-right corner.
On the New dataset page, configure the following parameters:
ParameterDescriptionDATABASE The name of the database defined in DISPLAY NAME in Step 2. SCHEMA The name of the OceanBase Database created in Step 1. TABLE The name of the table created in Step 3. 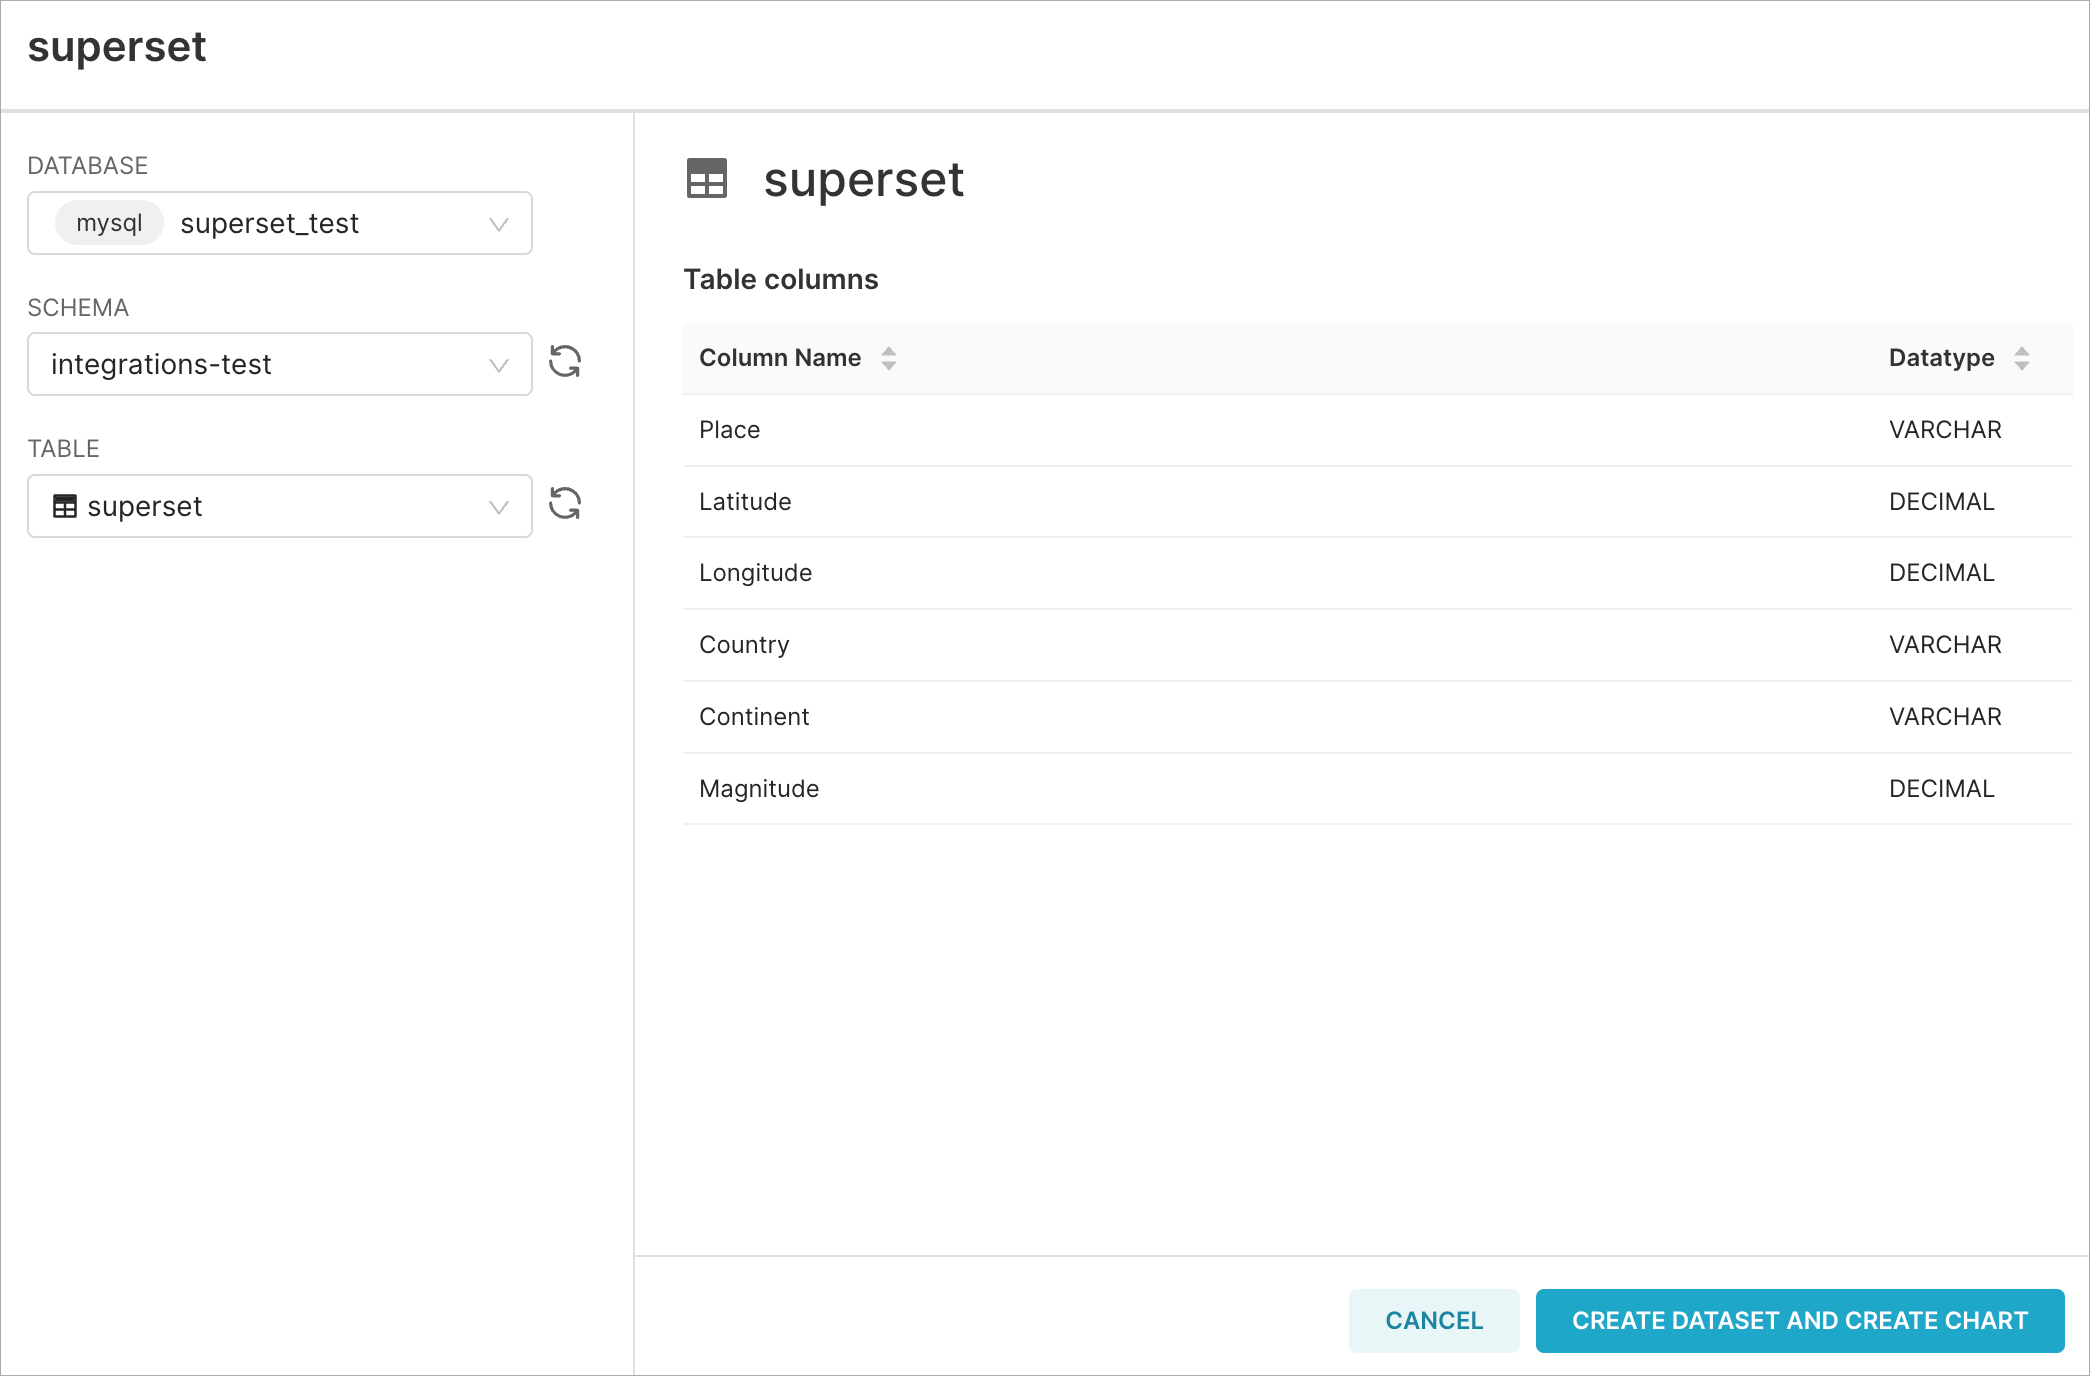
Click CREATE DATASET AND CREATE CHART.
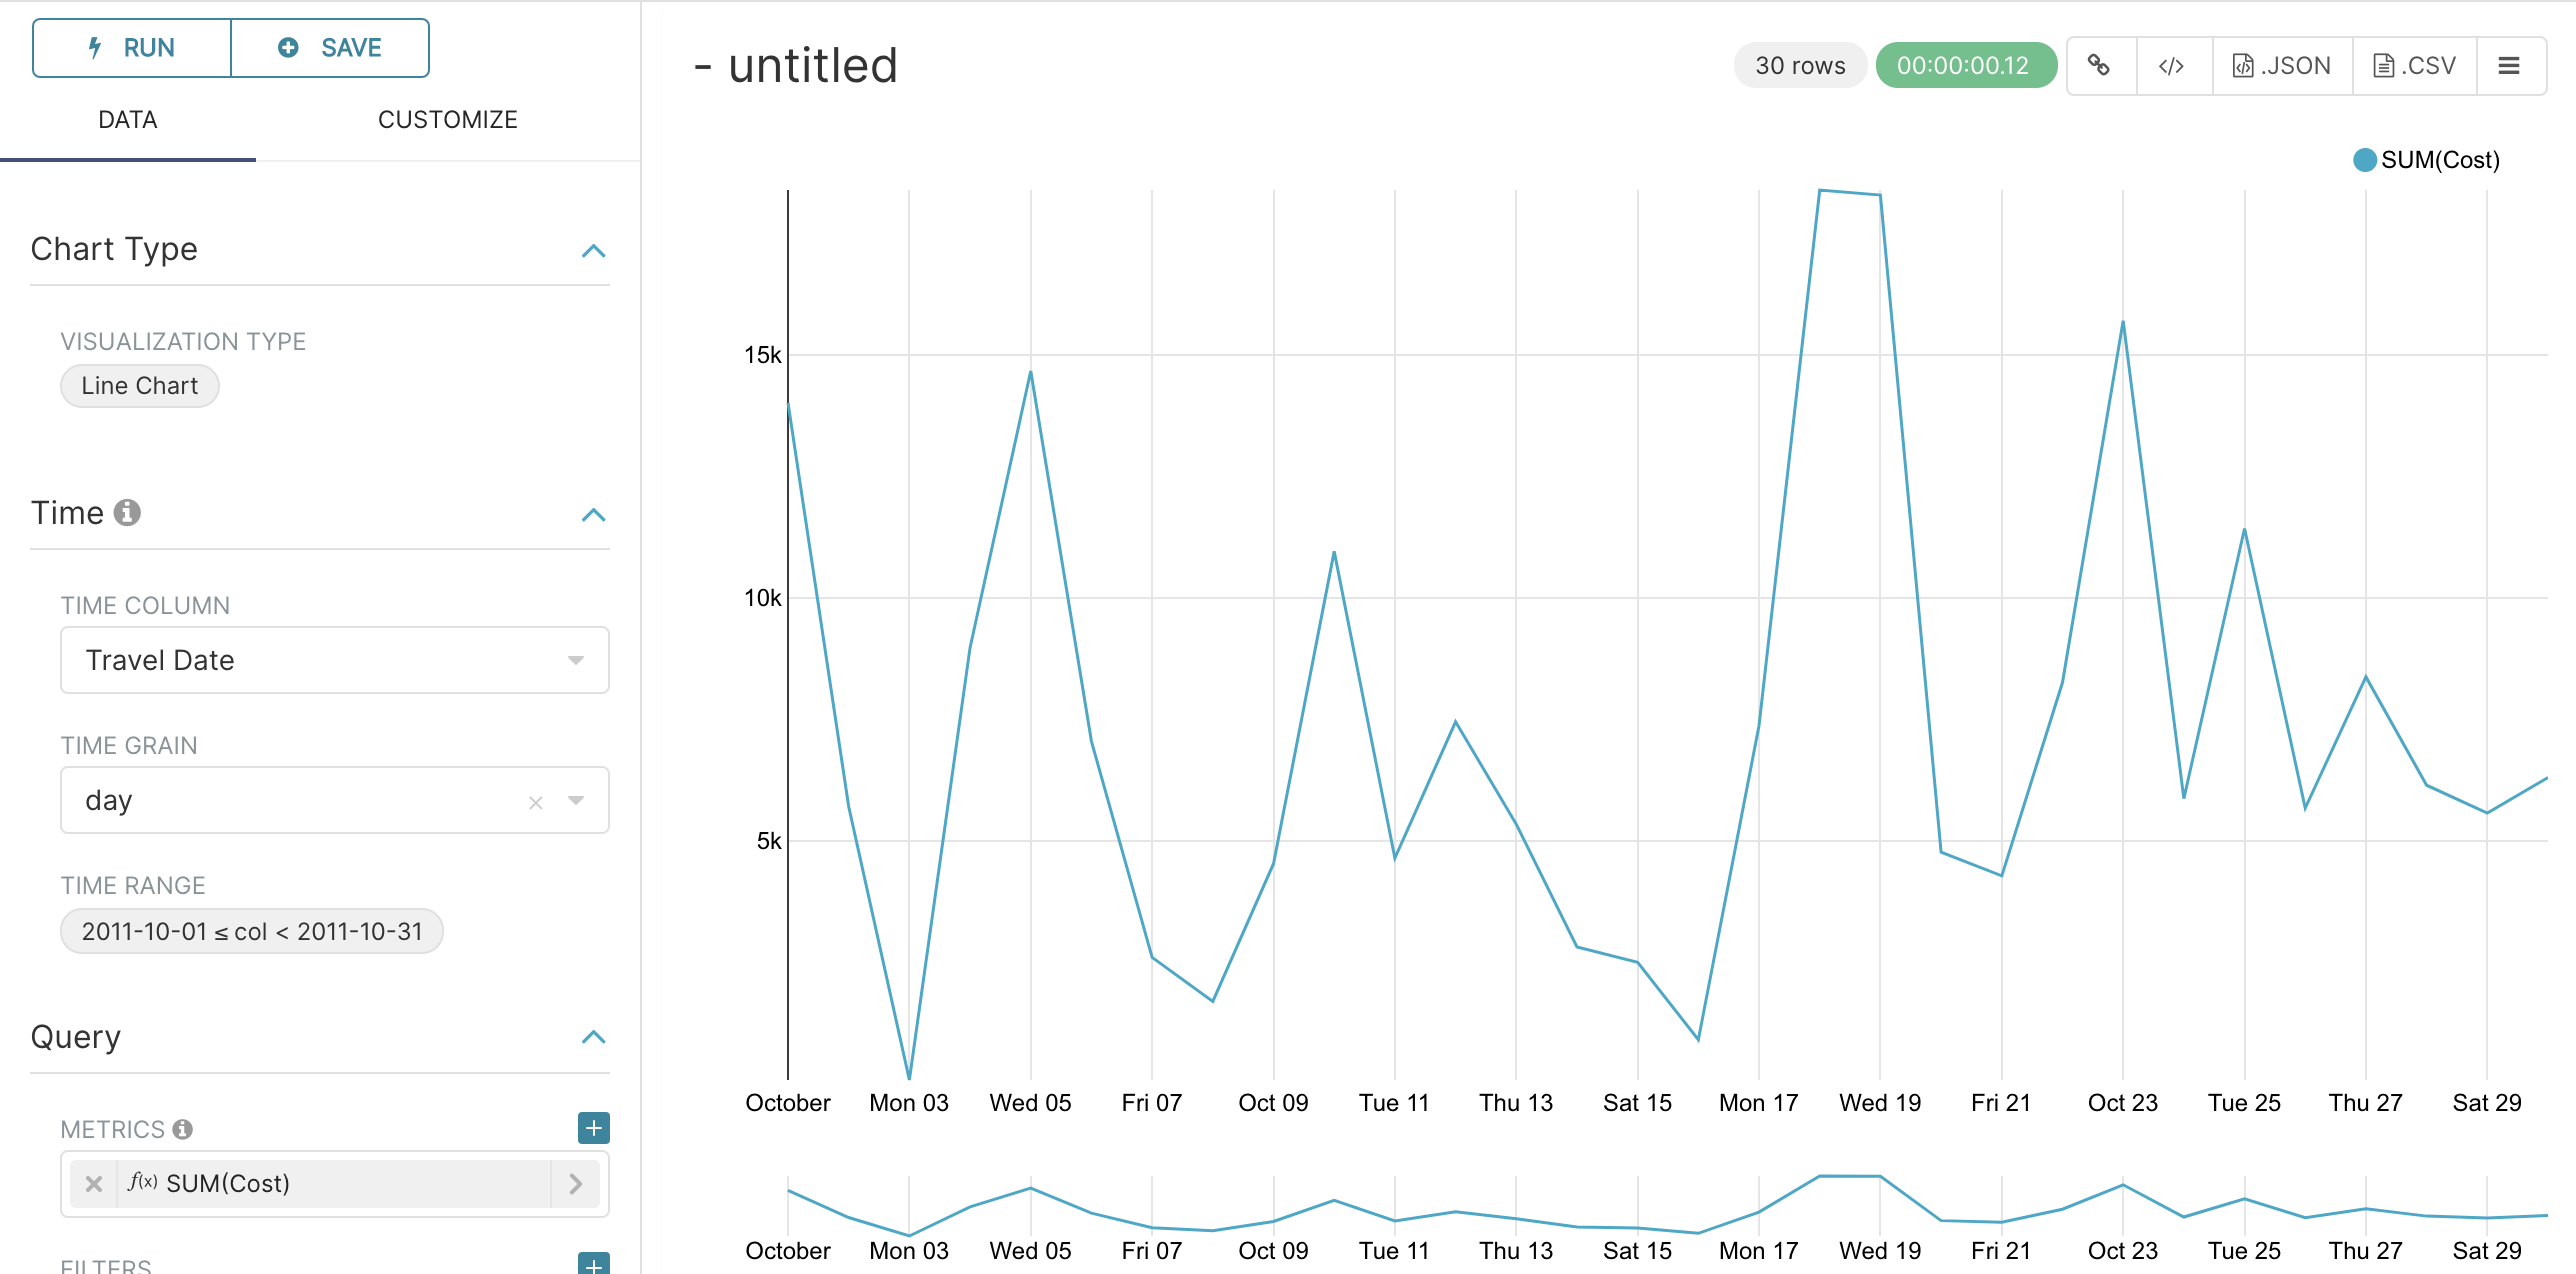
Step 5: Create a chart in Superset
After the dataset is created, you can select a chart type as needed, click CREATE NEW CHART, and configure the chart as needed.

For more information about chart configuration, see Superset official documentation.
Step 6: Build a dashboard in Superset
A single chart may be insufficient to comprehensively present the results of data analysis. Therefore, it is useful to combine multiple related charts into a dashboard.
Click Dashboards in the top menu bar, and then click + Dashboard to create a new dashboard.
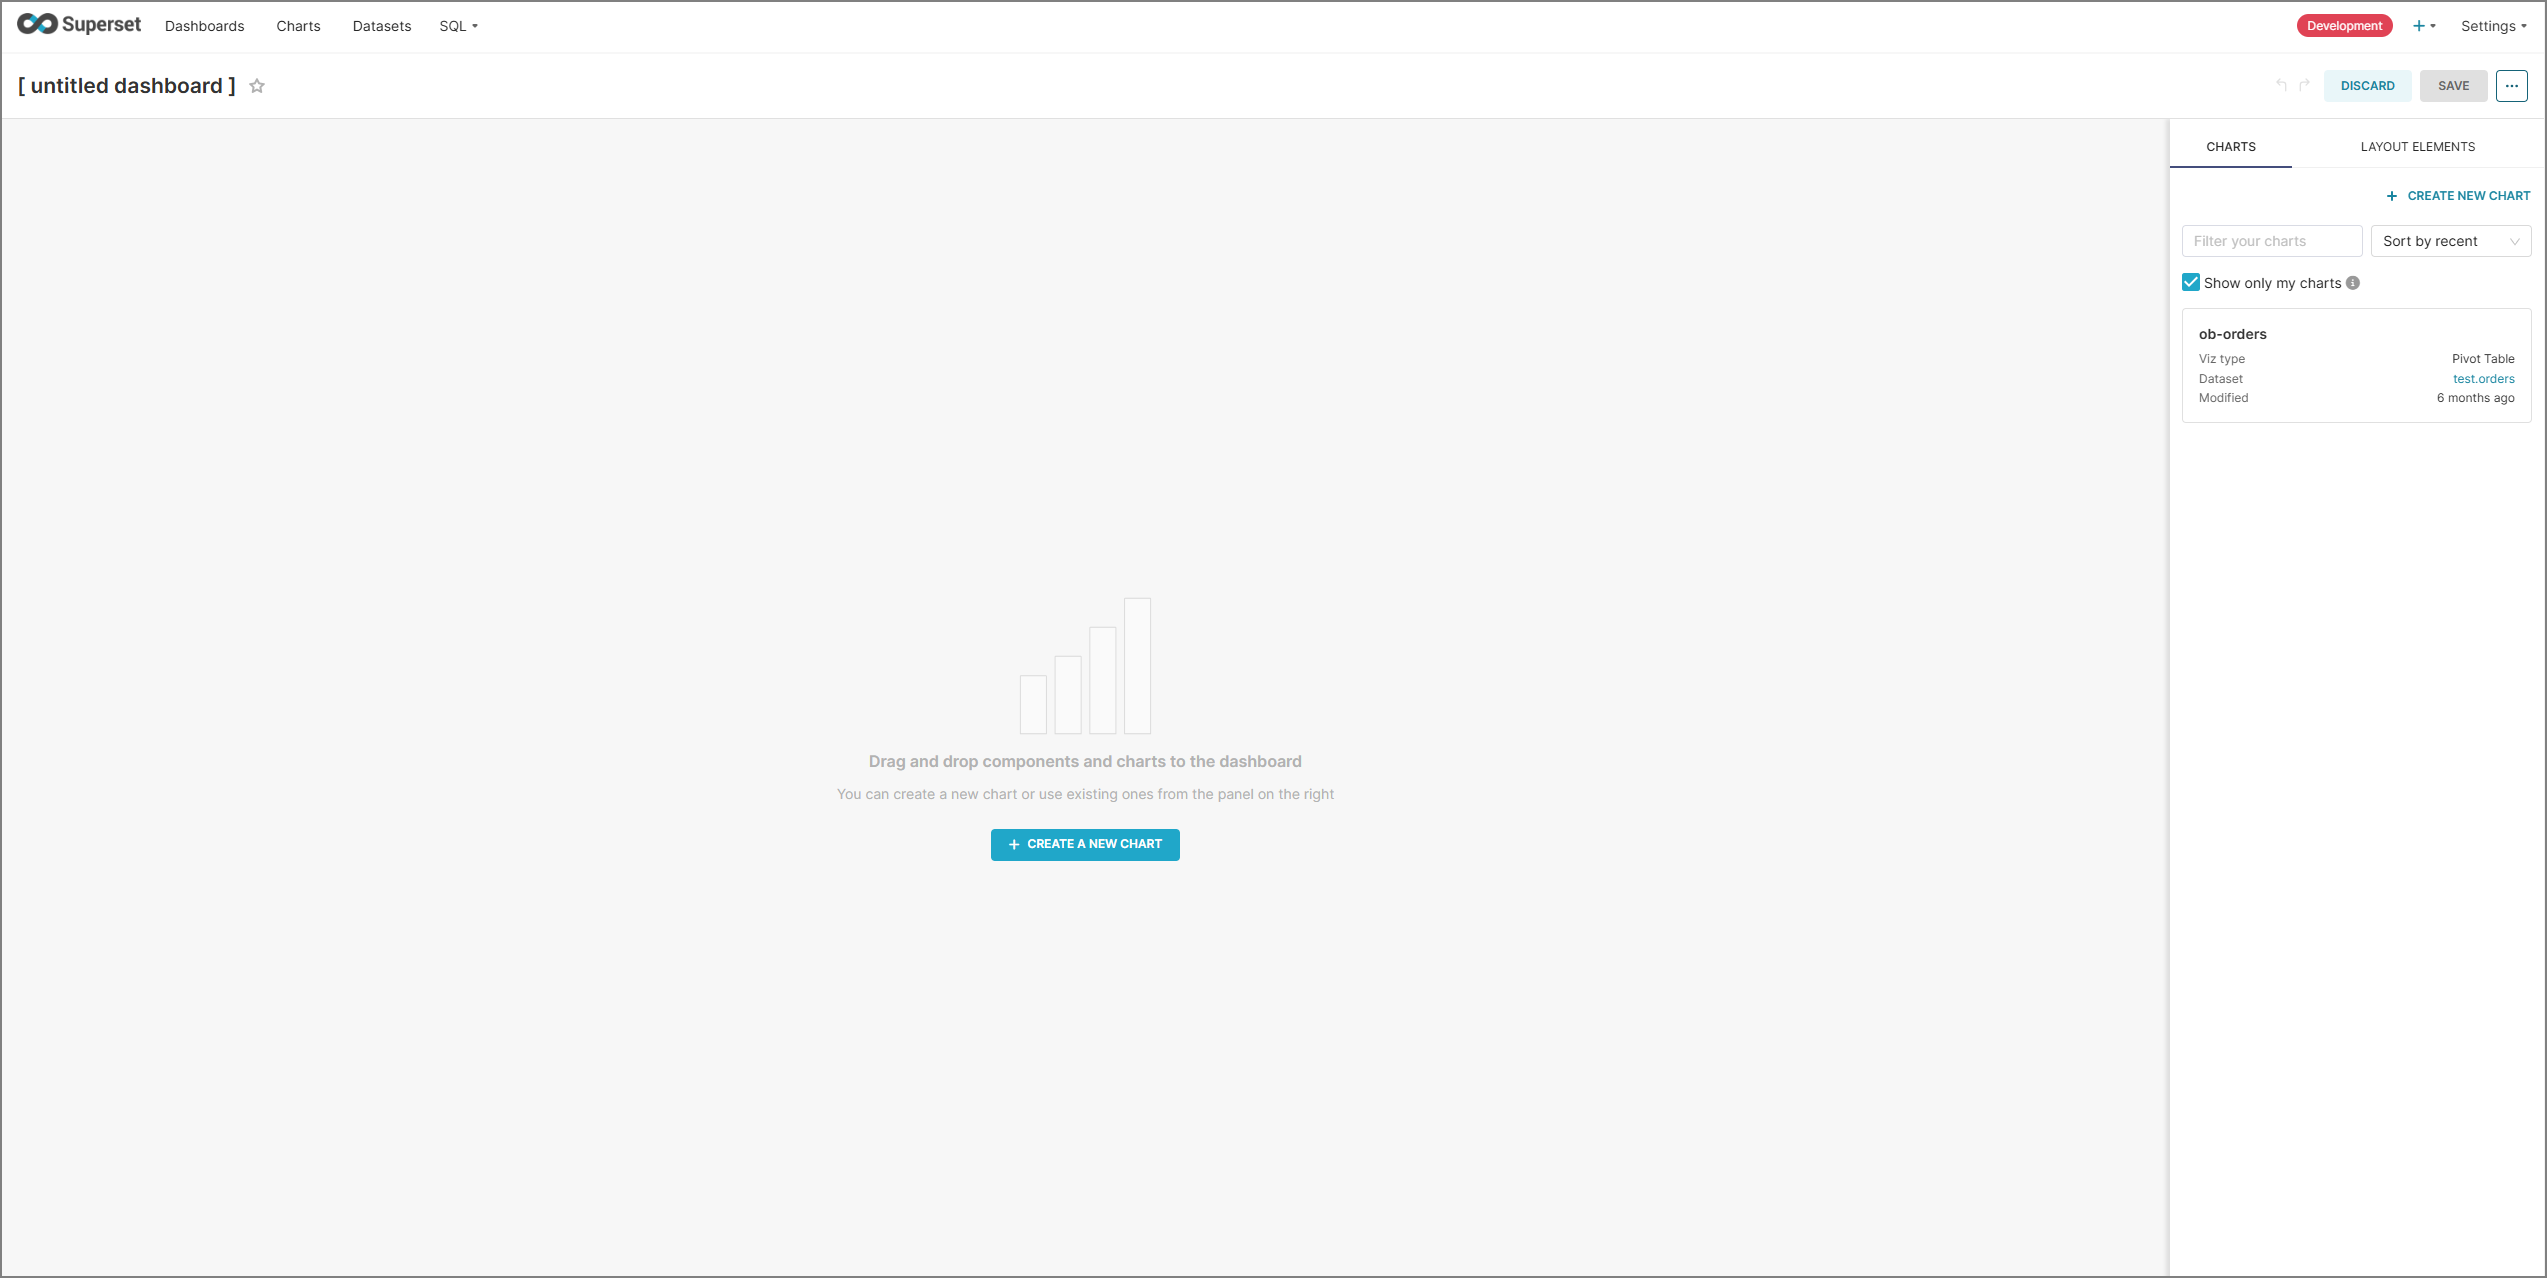
You can click untitled dashboard to name the new dashboard.
Use the drag-and-drop feature to add the created chart to the dashboard.
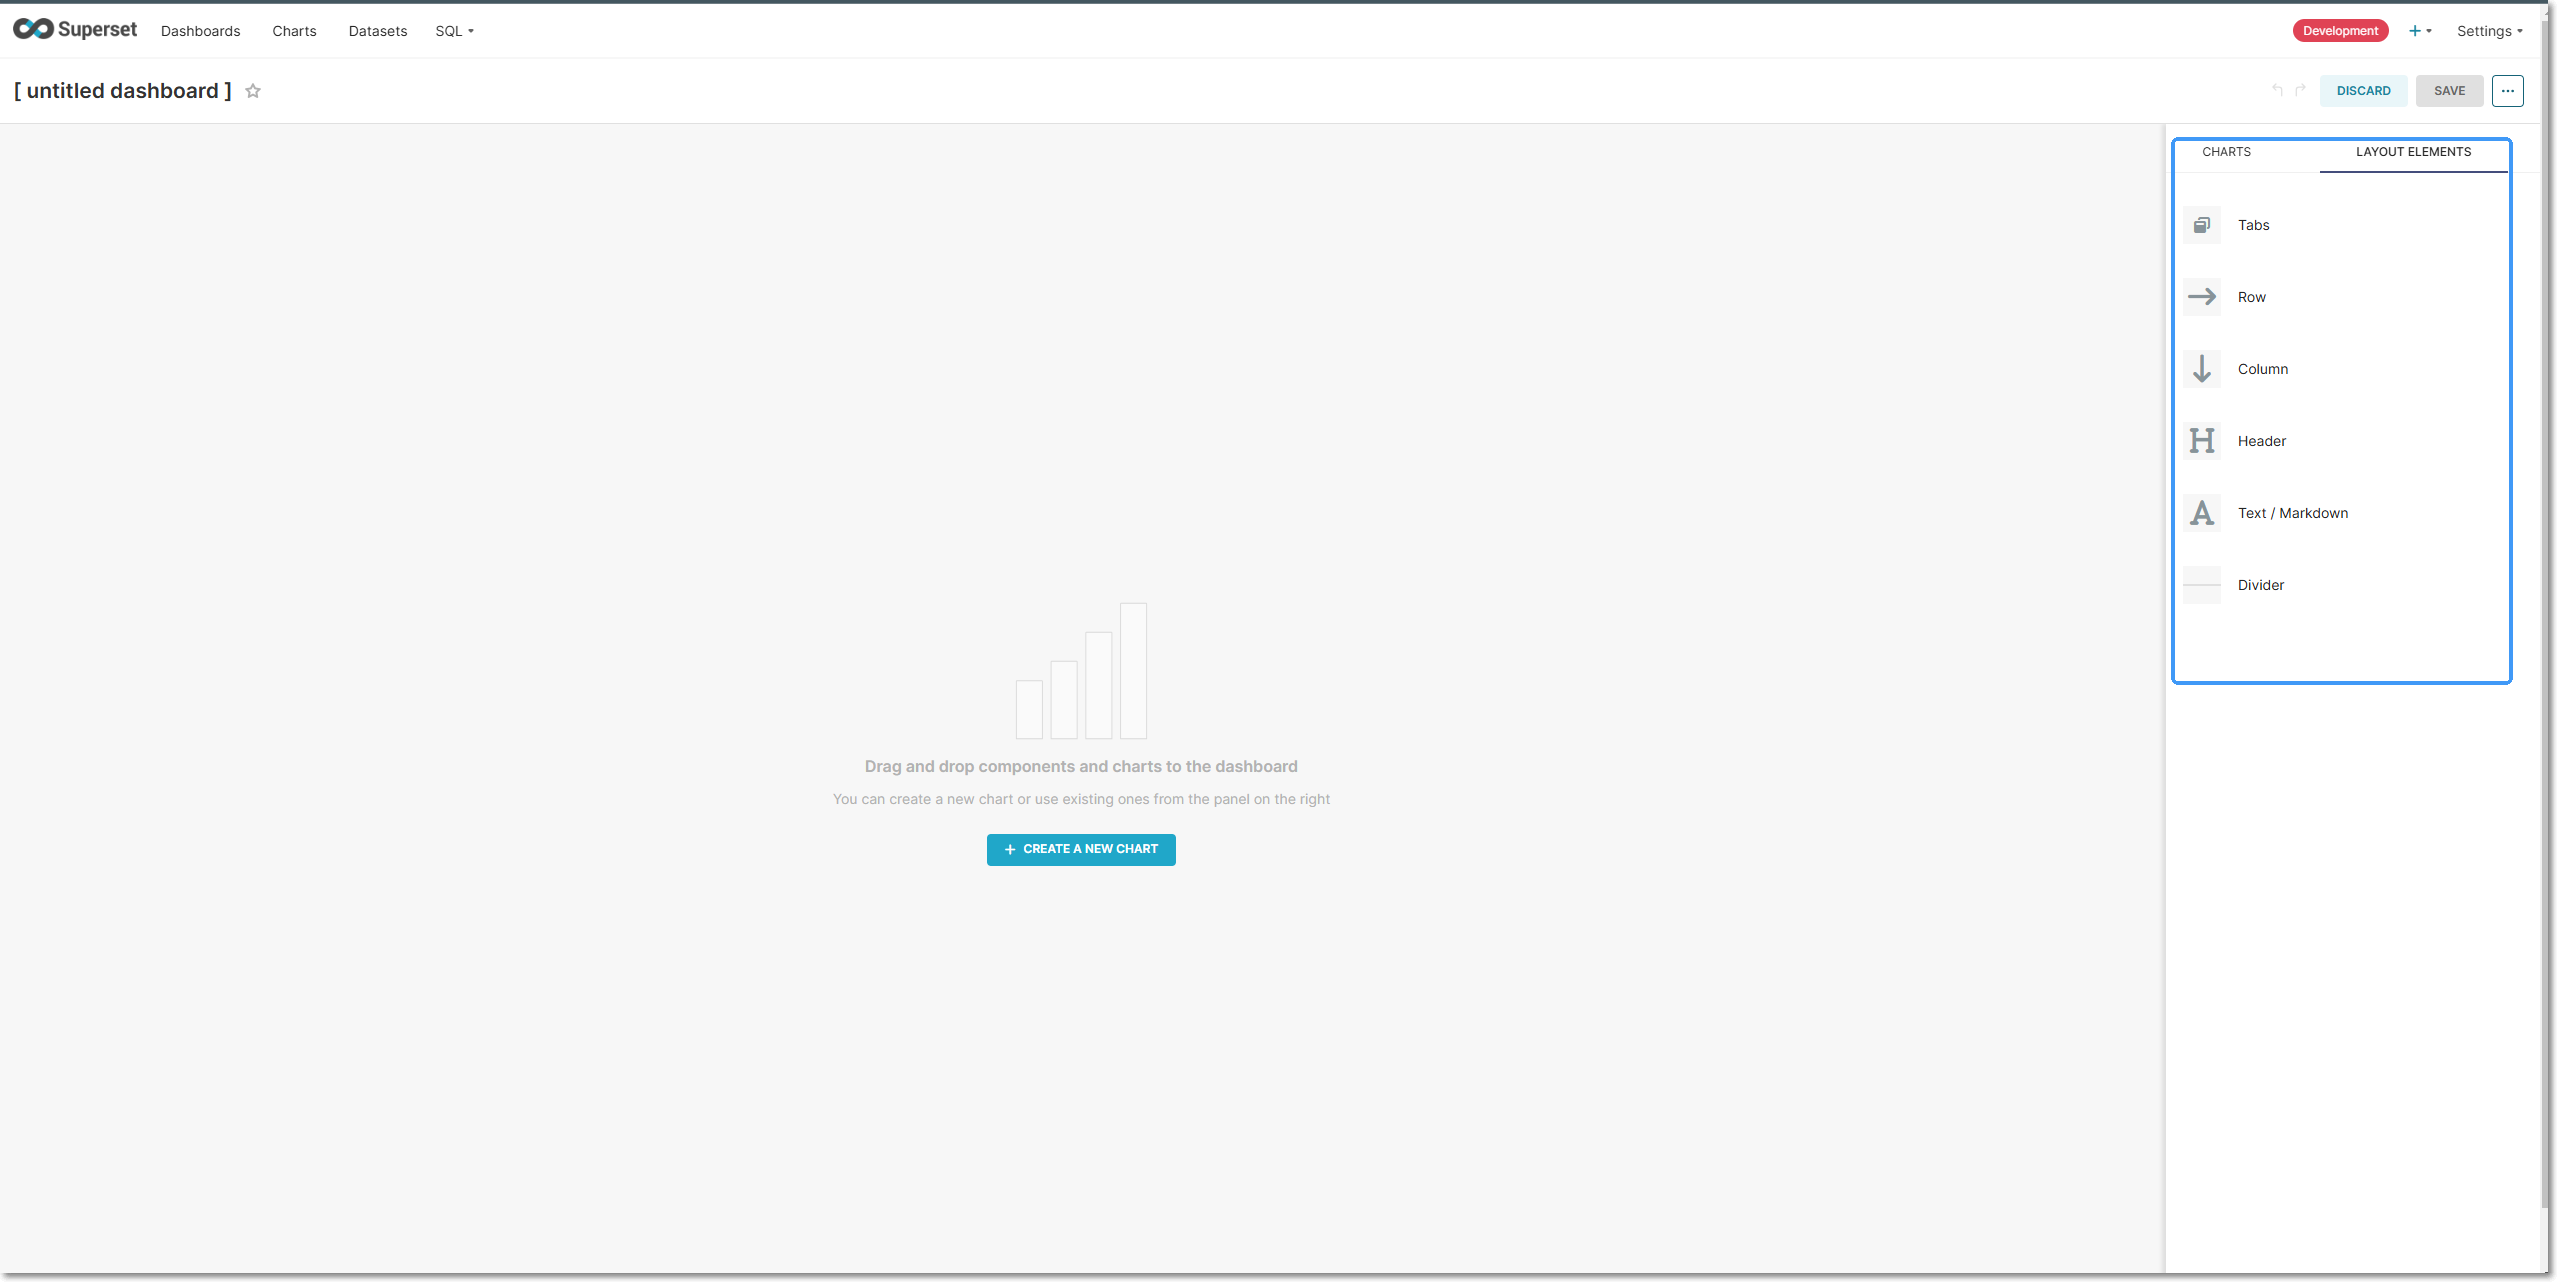
Adjust the positions, sizes, and layout of the charts to make the entire interface look more aesthetically pleasing and harmonious.
You can enhance the interactivity of a dashboard by using features such as filters. These features are usually located in the toolbar above each chart in edit mode (optional).
Click the SAVE button in the upper-right corner to save the configuration.
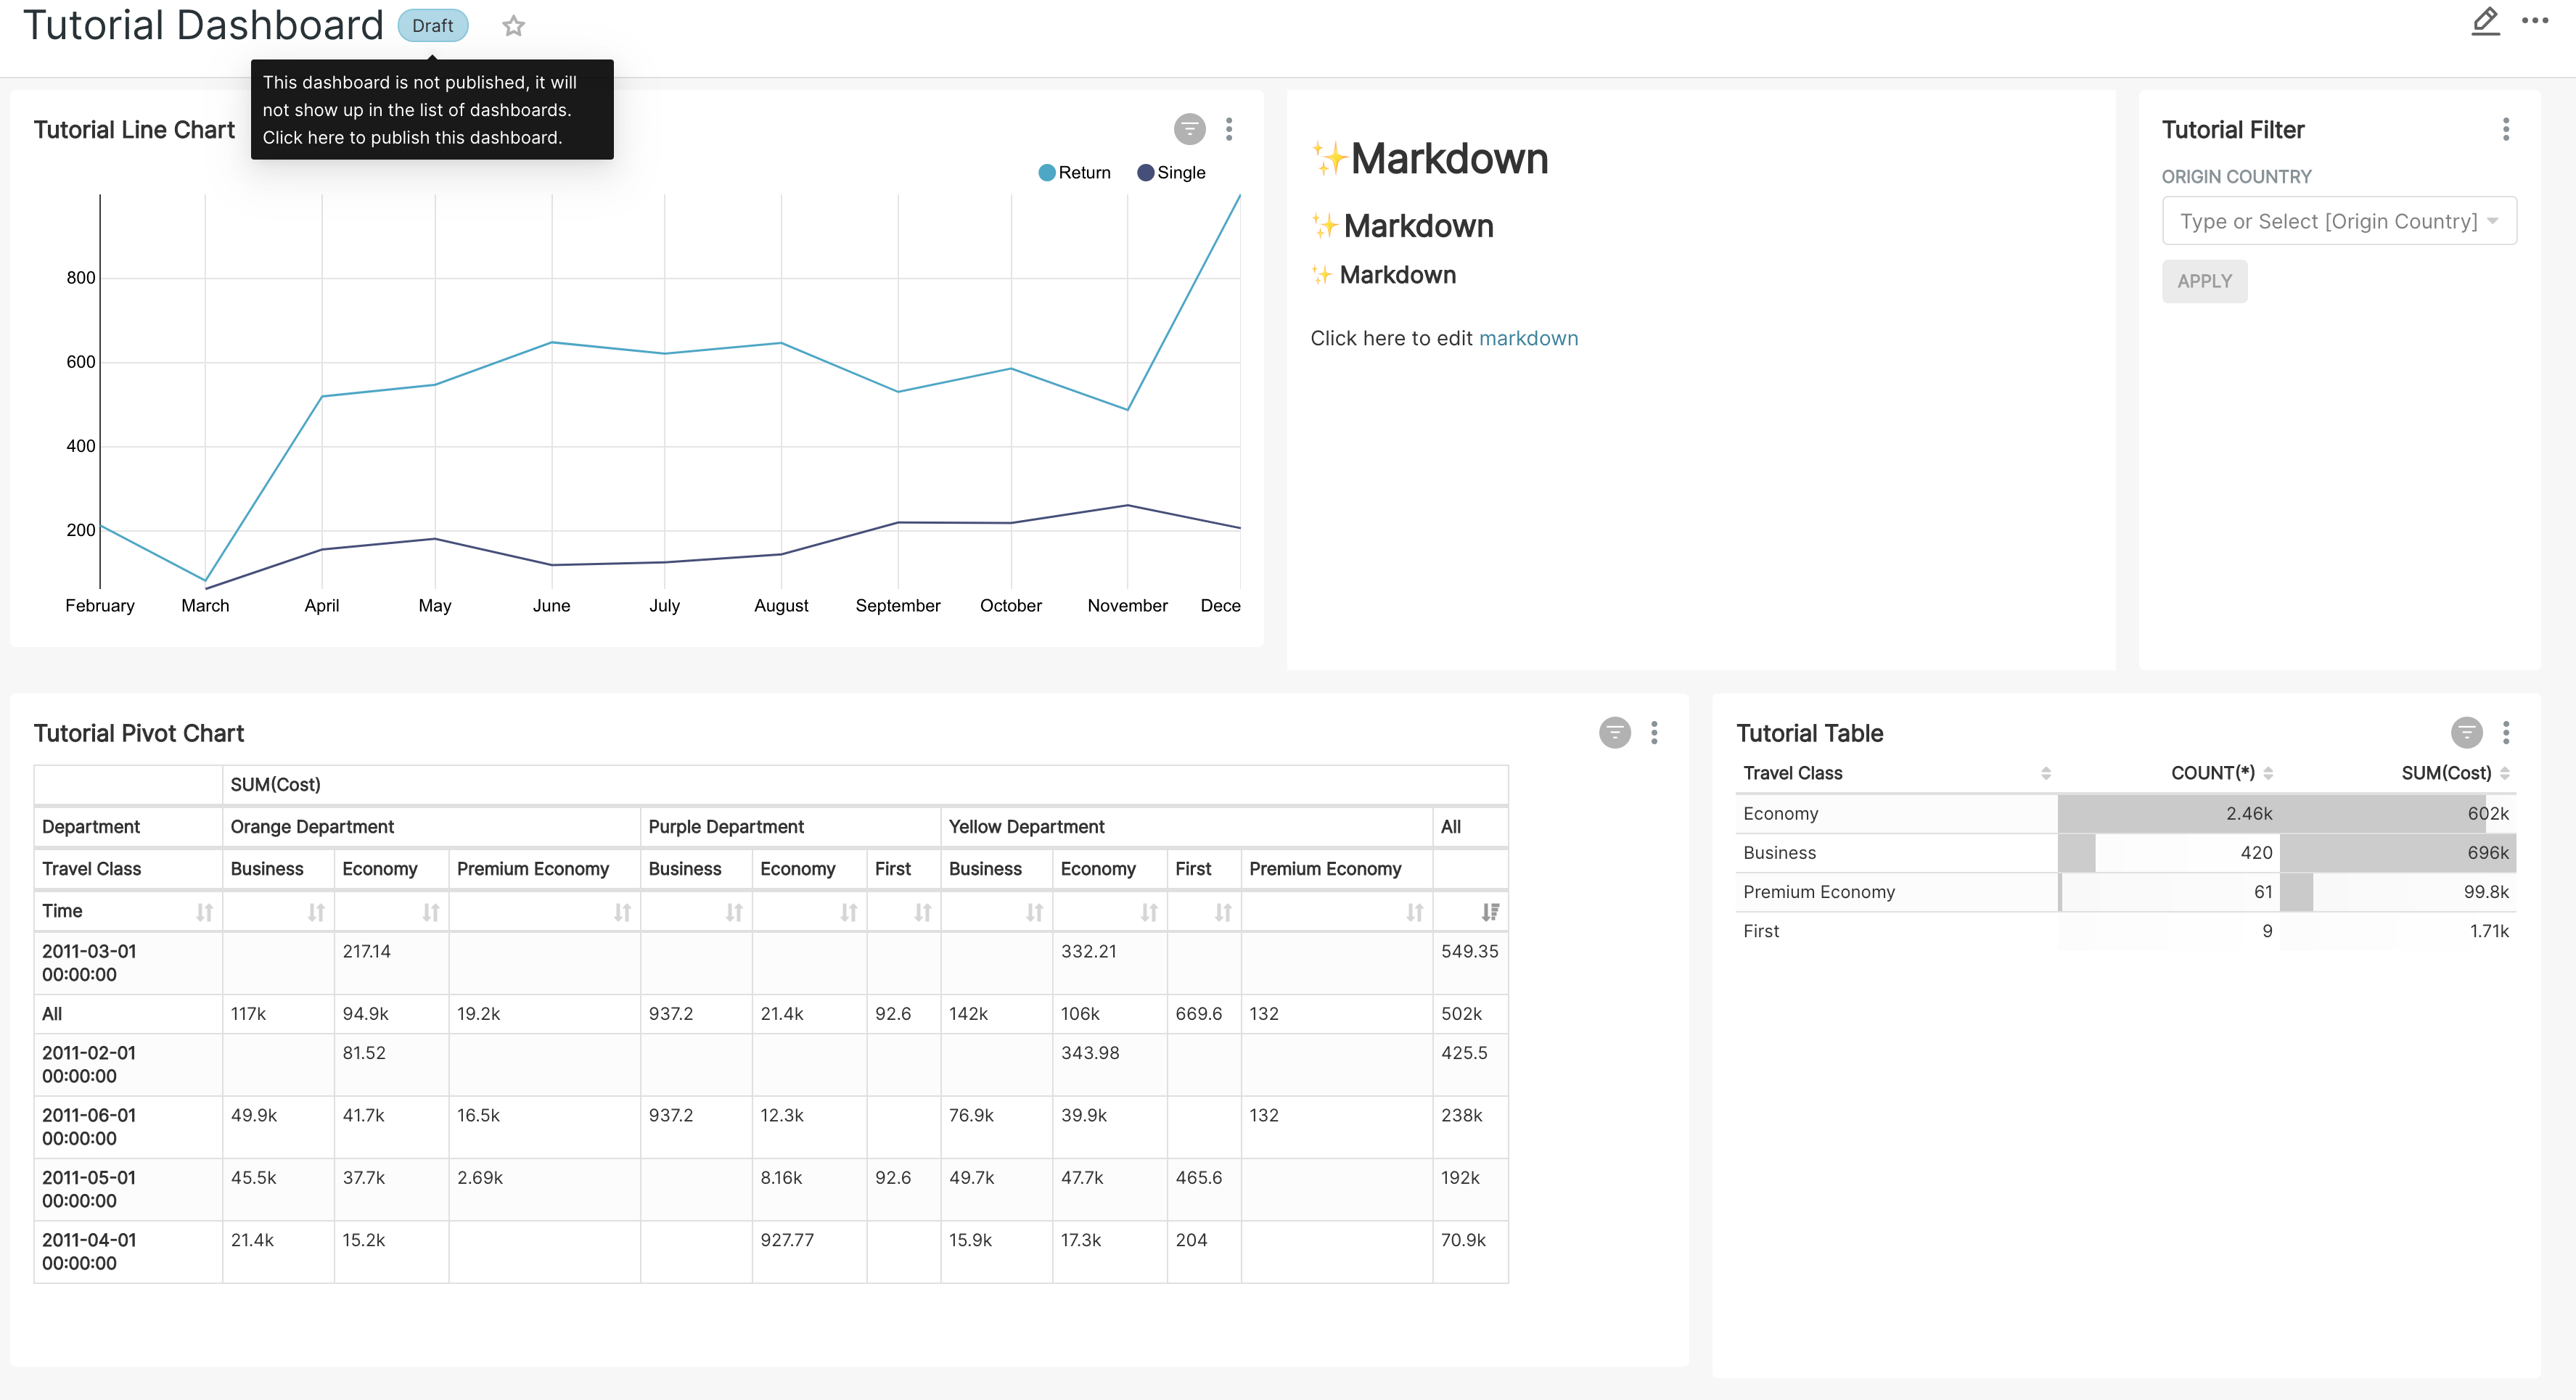
Step 7: Publish the dashboard
To allow other users to use your dashboard, simply select Draft in the upper-left corner of the dashboard title. This changes the status to Published. You can also select the star icon to favorite the dashboard.
Application demonstration