







A tenant is a container for various database objects and resources such as CPU, memory, and I/O. You can create a primary tenant based on your business needs.
You can create a primary tenant in the following two ways:
Create a tenant on the Tenant Overview page.
Create a tenant on the Tenant Management page of the target cluster.
This topic describes how to create a tenant on the Tenant Overview page.
Prerequisites
Make sure that the user who logs in to the OCP console has the following permissions:
- Cluster Maintenance resource permission.
- Overview menu permission for the tenant.
The tenant's cluster must be the primary cluster and in the Running state.
Tenants in the same cluster must have different names.
Before you enable the arbitration service for the tenant, make sure that the following conditions are met:
The tenant's cluster has added the arbitration service, and the arbitration service is in the RUNNING state.
The tenant's locality is 2F (F: full-featured replicas) or 4F.
The remaining resources on the host where the arbitration service is located meet the resource requirements.
You can modify the resource requirements based on the actual situation. For more information about the parameters that you can modify, see Modify system parameters.
ocp.arbitration.min.remain.disk.size: the minimum remaining disk space for the arbitration service host when the tenant arbitration service is enabled, in MB. The value (a,b) indicates the values when the tenant replica is 2F or 4F respectively. Default value: [12,24].ocp.arbitration.max.cpu.used.percentage: the maximum CPU usage of the arbitration service host when the tenant arbitration service is enabled, in %. Default value: 90.ocp.arbitration.max.memory.used.percentage: the maximum memory usage of the arbitration service host when the tenant arbitration service is enabled, in %. Default value: 90.
If the tenant belongs to OceanBase Database of a version earlier than RHEL 8, make sure that the host where the OBServer is located has created a soft link for Python when you create the tenant. You can run the
ln -s /usr/bin/python3 /usr/bin/pythoncommand to create the soft link.- (-∞, V4.2.1.7)
- [V4.2.2, V4.2.4)
- [V4.3.0, V4.3.2)
(Optional) You have created a parameter template based on Manage tenant parameter templates.
If you need to create multiple tenants with the same parameter configurations, you can create a parameter template in advance to avoid configuring the same set of parameters repeatedly.
Procedure
Log in to the OCP console.
In the left-side navigation pane, select Tenant. The Tenants page automatically appears.
On the Tenants page, click Create Tenant.

Specify the information on the Basic Settings tab. The following table describes the basic settings that you must specify.
ParameterDescriptionTenant Type Select Primary Tenant. Description
If the cluster version is earlier than V4.2, you cannot select the tenant type. The primary tenant is selected by default.Cluster Select the cluster to which the tenant belongs. Description
If you create a primary tenant on the tenant management page of the specified cluster, the cluster is selected by default.Tenant Name The tenant name must start with an English letter and end with an English letter or a number. It can contain English letters, numbers, and underscores. It must be 2 to 32 characters in length. Administrator Password The password of the tenant administrator account. Randomly generated passwords are supported. - For the MySQL mode, the administrator account is root.
- For the Oracle mode, the administrator account is SYS.
- It must be 8 to 32 characters in length.
- It must contain at least three of the following four types: numbers (0-9), uppercase letters (A-Z), lowercase letters (a-z), and special characters. The supported special characters are
~!@#%^&*_-+=|(){}[]:;,.?/.
Character Set and Encoding - For the MySQL mode, the available character sets are binary, utf8mb4, gbk, gb18030, latin1, gb18030_2022, ascii, and tis620. The default is utf8mb4.
- For the Oracle mode, the available character sets are utf8mb4, gbk, and gb18030. The default is utf8mb4.
Collation The detailed collation corresponding to the character set. Service Name Optional. OceanBase provides a new database access method through service names, which can be considered an alias for the cluster name and tenant name, allowing applications to access databases through service names. For more information about service names, see Manage service names. - The service name must start with an English letter, can contain English letters, numbers, and underscores, and must be 2 to 64 characters in length.
- To configure a service name for the tenant, the following version requirements must be met:
- OceanBase: V4.2.1.9, [V4.2.4.0, V4.3.0.0), and [V4.3.3.0, +∞)
- OBProxy: [V4.3.1.0, +∞)
Note
If a service name is set for the primary tenant, the service name is automatically filled in.
Remarks Optional. Load Type You can select a load type for the tenant. To avoid affecting the database performance, select a load type that matches your actual load. The following table describes the load types. - Express OLTP: suitable for workloads such as core systems in trade and payment, and high-throughput internet applications. It has no limitations on foreign keys, no stored procedures, no long transactions, no large transactions, no complex joins, and no complex subqueries.
Version limit: V4.2.5 and later versions of OceanBase Database. - HTAP: suitable for hybrid OLAP and OLTP workloads. It is usually used to obtain real-time insights from active operational data, fraud detection, and personalized recommendations.
Version limit: V4.2.5 and later versions of OceanBase Database. - OLAP: used for real-time data warehouse analysis scenarios.
Version limit: V4.3.0 and later versions of OceanBase Database. - Complex OLTP: suitable for workloads such as banking and insurance systems. These workloads usually have complex joins, complex correlated subqueries, PL-based batch jobs, long transactions, and large transactions. Parallel execution is sometimes used for short-term queries.
Version limit: V4.2.5 and later versions of OceanBase Database. - OBKV: used for key-value workloads and wide-column workloads similar to HBase. These workloads usually have very high throughput and are sensitive to latency.
Version limit: V4.2.5 and later versions of OceanBase Database.
Note
We recommend that you set the load type of the tenant to the same value as that of the cluster.

Specify the information on the Replica Settings tab.
By default, the system displays a list of configurable zones based on the zones of the selected cluster. If a zone does not require a replica, you can click the delete icon next to the zone to delete the zone entry. The following table describes the parameters that you must specify.
ParameterDescriptionReplica Type Select multiple all-purpose replicas to ensure that the majority of the replicas are all-purpose. - All-purpose replica: a general-purpose replica that contains all complete data and features, including transaction logs, MemTables, and SSTables. It can quickly switch to the leader to provide services.
- Read-only replica: contains complete logs, MemTables, and SSTables. It does not participate in Paxos voting as a member but serves as an observer to catch up with the logs of the Paxos members and replay them locally.
- Log replica: contains only logs and has no MemTables or SSTables. It participates in log voting and provides log services. It can participate in the recovery of other replicas but cannot become a leader to provide database services.
- Read-only column store replica: does not participate in Paxos voting. All baseline data of user tables is stored in column store format. It supports only read operations and adapts to TP-enhanced hybrid workloads (real-time decision analysis).
When you select a read-only column store replica, the OceanBase cluster must be associated with at least two OBProxy clusters to ensure that one OBProxy cluster is used for forwarding client requests related to read-only column store replicas. The OBProxy cluster must be V4.3.2 or later and must meet the following parameter requirements:alter proxyconfig set route_target_replica_type='ColumnStore';alter proxyconfig set proxy_route_policy='TARGET_REPLICA_TYPE_FOLLOWER_ONLY';alter proxyconfig set init_sql='set @@ob_route_policy = COLUMN_STORE_ONLY';alter proxyconfig set obproxy_read_only=0;alter proxyconfig set obproxy_read_consistency=1;
Note
- When the cluster is a distributed cluster of V4.3.3 or later, the following replica types are supported: Full-featured Replica, Read-only Replica, and Read-only Columnstore Replica.
- When the cluster is a distributed cluster of V4.2.0 or later but earlier than V4.3.3, the following replica types are supported: Full-featured Replica and Read-only Replica.
- When the cluster is a distributed cluster of V4.0.0 or later but earlier than V4.2.0, only Full-featured Replica is supported.
- When the cluster is a distributed cluster of V3.x, the following replica types are supported: Full-featured Replica, Read-only Replica, and Log Replica.
- When the tenant is a Standalone Centralized tenant, only Full-featured Replica is supported.
Unit Specifications OCP provides a list of unit specifications. You can select one from the list or click Add Specification at the bottom of the list to add a custom specification. Notice
- We recommend that you set the same unit specification and quantity for all-purpose replicas. Different unit specifications and quantities may cause performance or stability issues.
- When the tenant is in a cluster of V4.0.0 or later, the following settings apply:
- CPU specifications must be 1C or more.
- By default, the minimum memory specification is limited for a cluster. You can modify the
__min_full_resource_pool_memoryparameter. For example, in a cluster of V4.1.0, you can modify the parameter by following the instructions in Modify cluster settings.
Units Specifies the number of units in the zone. The number of units cannot exceed the number of servers in the zone. - When the cluster is V4.0 or later, you cannot set the number of units on a zone-by-zone basis. The number of units must be the same for all zones. The default value is 1.
- When the cluster is earlier than V4.0, you can set different numbers of units for different zones.
Note
When the tenant is a Standalone Centralized tenant, the number of units is 1 by default and cannot be modified.
Zone Priority Rankings Specifies whether to set the priority for the zones of the tenant. The priority setting affects the primary zone of the sys tenant. - If you do not specify a priority, the default priority is inherited from the sys tenant.
- If you enable "Zone Priority Sorting" but do not set any zone priorities, the default priority is random.
- To set the zone priorities, you can select one or more zones from the left-side list box and add them to the right-side list box. The left-side list box displays all zones of the current cluster. By default, the priority of the zones selected first is higher than that of the zones selected later. The priorities of multiple zones selected at the same time are the same. After the zones are added to the right-side list box, you can drag the zones to adjust the order. The zones at the top of the list box have a higher priority than those at the bottom of the list box.
Note
When the tenant is a Standalone Centralized tenant, zone priority sorting is not displayed. Zone1 is the first priority by default.
Enable Arbitration Service Specifies whether to enable the arbitration service for the tenant. The default value is disabled. 
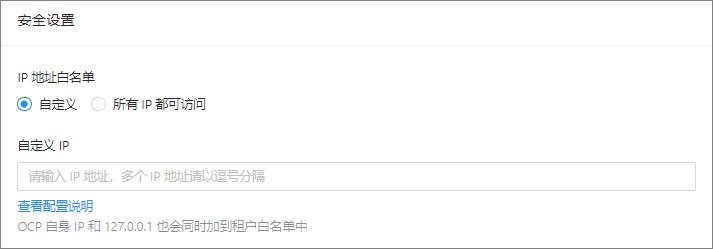
Configure the Security Settings tab.
All IPs are allowed: All IPs are allowed to access the tenant.
Notice
There is a security risk in this method. Proceed with caution.
Custom: Specify a list of allowed client IPs. The supported formats include IP address, subnet/mask, fuzzy matching, mixed formats, and special instructions. Example:
FormatExampleIP Address xxx.xxx.xxx.1,xxx.xxx.xxx.2 Subnet/Mask xxx.xxx.xxx.1/24 Fuzzy Matching xxx.xxx.xxx.% or xxx.xxx.xxx._ Mixed Formats xxx.xxx.xxx.1,xxx.xxx.xxx.2,xxx.xxx.xxx.%,xxx.xxx.xxx._,xxx.xxx.xxx.1/24 Special Instructions % indicates that all clients can be connected. Notice
The IP address of the OCP server and the IP address of the OBProxy on which it relies must be in the list. Otherwise, the OCP server cannot manage the tenant.
Enable the Parameter Configuration module and configure tenant parameters.
If you specify a load type on the Basic Settings tab, the system selects the corresponding parameter template by default.
You can add and configure startup parameters one by one in the section marked ① in the following figure.
You can also click Select Parameter Template in the section marked ② in the following figure to select a parameter template. The system automatically fills in the parameters in the template to the current section. If no tenant parameter template exists, you can click Create Tenant Template to create a parameter template. For more information, see Manage tenant parameter templates.
The system provides the following four built-in templates, which contain commonly used parameter settings. You can directly apply the templates to initialize the cluster. The following table describes the built-in templates.
TemplateDescriptionDefault Parameters for Complex OLTP Corresponds to the Complex OLTP load type. This template is applicable only to OceanBase Database V4.2.5 and later. Default Parameters for HTAP Corresponds to the HTAP load type. This template is applicable only to OceanBase Database V4.2.5 and later. Default Parameters for OLAP Corresponds to the OLAP load type. This template is applicable only to OceanBase Database V4.3.0 and later. Default Parameters for Express OLTP Corresponds to the Express OLTP load type. This template is applicable only to OceanBase Database V4.2.5 and later.
Note
If your tenant mode is MySQL and the selected parameter template contains only Oracle-defined parameters, you need to manually delete these parameters after the template is filled in.

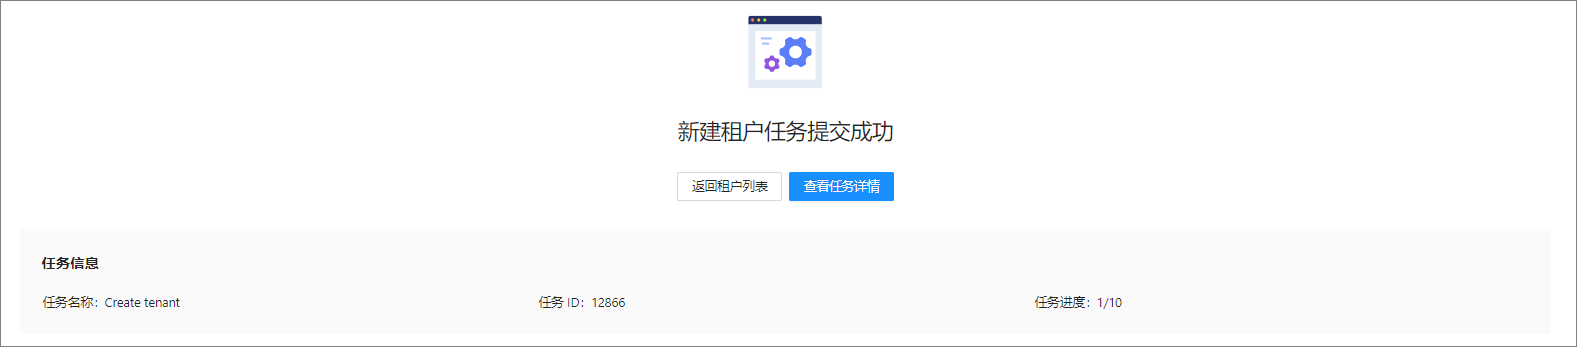
Click Submit. The system displays a message indicating that the Tenant creation task submitted. task is submitted. You can view the task information on this page.
You can click View Task Details to view the task details.
You can also click Return to Tenants List to return to the tenants page. On the tenants page, you can view the creation status and task details of the created tenant, and delete a tenant that failed to be created.
Note
When the task status is Completed and the status of the tenant is Running in the Tenants list on the Tenant Management page, the tenant is created.