


Apache NiFi is an automated dataflow processing platform that enables efficient and reliable data transfer between systems. By reading OceanBase Database's Binlog data, you can distribute data to various destinations including file systems, message queues (e.g., Kafka), or HTTP endpoints.
Prerequisites
You have deployed OceanBase Database and created a MySQL-compatible tenant. For more information about how to create a tenant, see Create a tenant.
- You have enabled the Binlog service in the MySQL-compatibile tenant. For more information, see OceanBase Binlog service.
Your runtime environment supports Java Development Kit (JDK) 1.8 or a later version.
You have downloaded the Apache NiFi installation package.
Procedure
Step 1: Obtain the database connection information
Contact the deployment personnel or administrator of OceanBase Database to obtain the database connection string. For example:
obclient -h$host -P$port -u$user_name -p$password -D$database_name
Parameters:
$host: the IP address for connecting to OceanBase Database. For connection through OceanBase Database Proxy (ODP), use the IP address of an ODP. For direct connection, use the IP address of an OBServer node.$port: the port for connecting to OceanBase Database. For connection through ODP, the default value is2883, which can be customized when ODP is deployed. For direct connection, the default value is2881, which can be customized when OceanBase Database is deployed.$database_name: the name of the database to be accessed.Notice
The user used to connect to the tenant must have the
CREATE,INSERT,DROP, andSELECTprivileges on the database. For more information about user privileges, see Privilege types in MySQL mode.$user_name: the tenant connection account. For connection through ODP, the format isusername@tenant name#cluster nameorcluster name:tenant name:username. For direct connection, the format isusername@tenant name.$password: the password of the account.
For more information about connection strings, see Connect to an OceanBase tenant by using OBClient.
Step 2: Configure NiFi runtime environment
Extract the NiFi installation package to your target directory.
Modify the
conf/nifi.propertiesconfiguration file as follows (using HTTP connection as example):# Disable HTTPS and configure HTTP access nifi.web.https.host= nifi.web.https.port= nifi.web.http.host=0.0.0.0 nifi.web.http.port=<custom_port_number> # Allow insecure remote connections nifi.remote.input.secure=falseUpload the MySQL driver to your NiFi server.
Execute the following commands in the NiFi installation directory. Use
bin/nifi.sh stopto stop the service.# Start service bin/nifi.sh start
Step 3: Configure dataflow pipeline
Access the NiFi console at
http://<nifi_server_ip>:<port>/nifi/through your browser.Configure CaptureChangeMySQL Processor:
Drag the Processor icon from the top toolbar to the canvas, search for and select
CaptureChangeMySQL, then click ADD.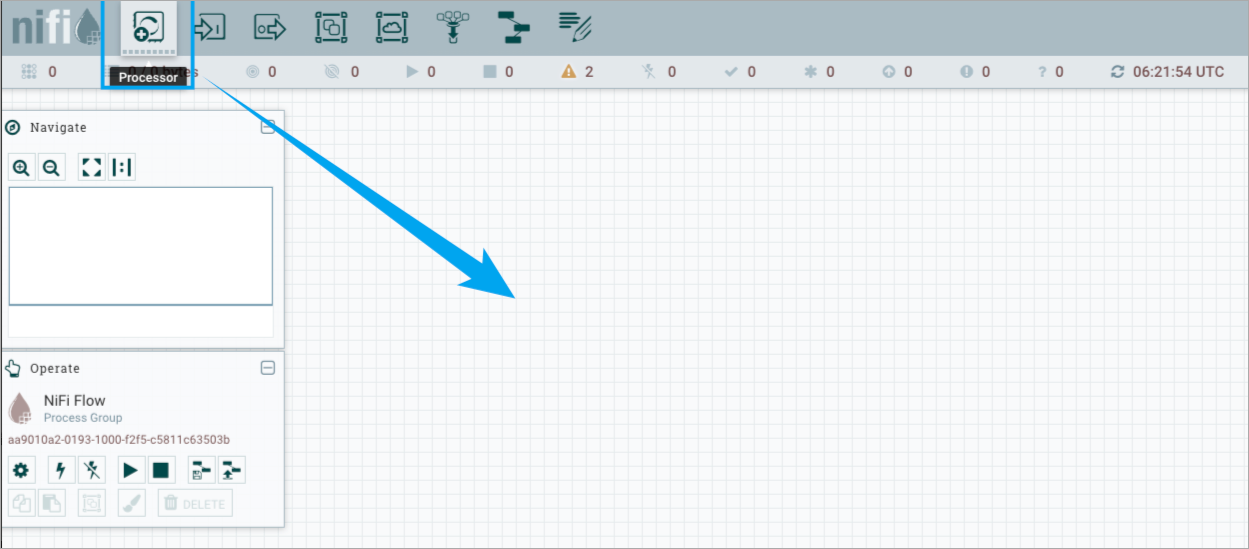
Right-click the CaptureChangeMySQL Processor and select Configure. Under the PROPERTIES tab, set these parameters and click APPLY:
PropertyDescriptionMySQL Nodes OceanBase Database address and port MySQL Driver Class Name JDBC driver class: com.mysql.cj.jdbc.DriverMySQL Driver Location Directory containing the driver JAR file Username Database username you created Password Database user password Database/Schema Name Pattern Database to capture Binlog from (supports regex) Table Name Pattern Tables to capture Binlog from (supports regex) Include DDL Events Set to trueto capture DDL changes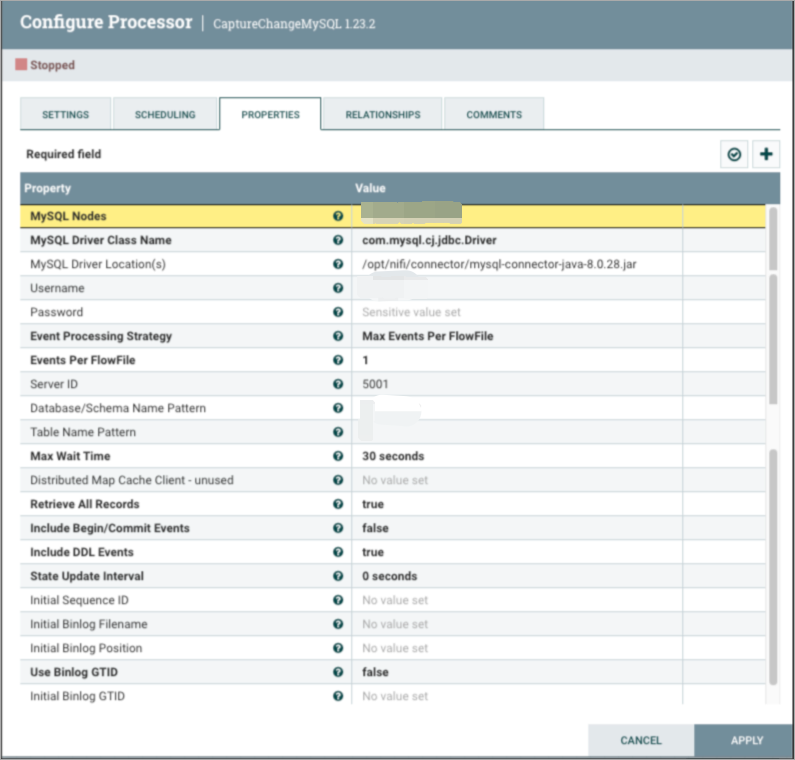
Configure PutFile Processor:
Drag another processor to the canvas, search for and select
PutFile, then click ADD.Right-click the PutFile Processor and select Configure. Under PROPERTIES, set the
Directoryproperty where Binlog files will be output. Click APPLY.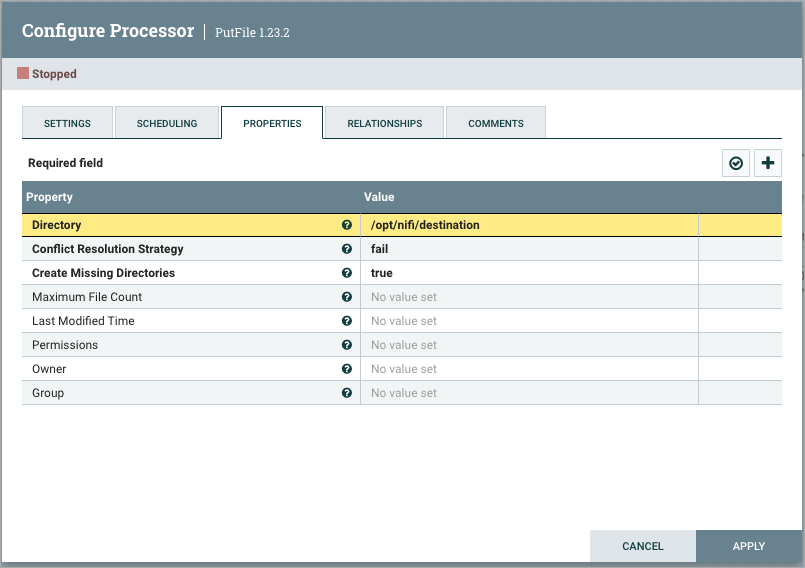
Establish dataflow connection:
On the canvas, click the arrow on
CaptureChangeMySQLand connect it toPutFile.In the Create Connection dialog, click ADD.
Right-click the PutFile Processor and select Configure. Under RELATIONSHIPS, set both
failureandsuccessto terminate. Click APPLY.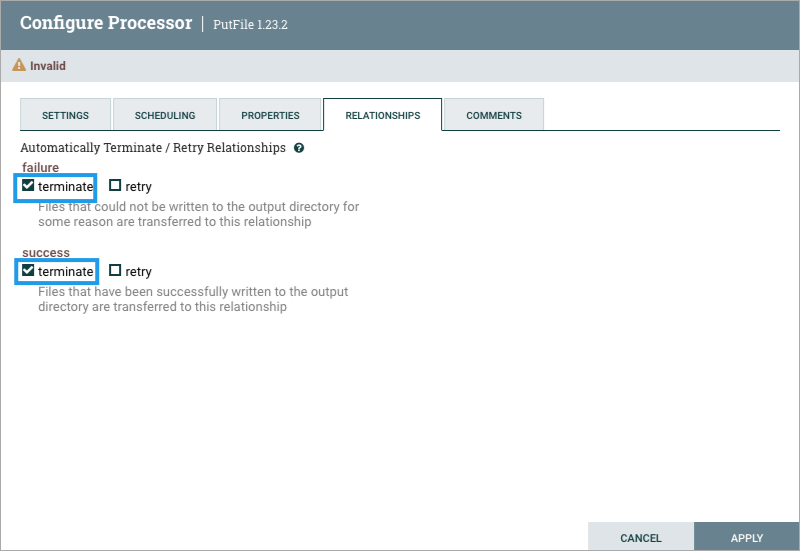
Start the dataflow:
Right-click the CaptureChangeMySQL Processor and select Start.
Similarly, right-click the PutFile Processor and select Start.
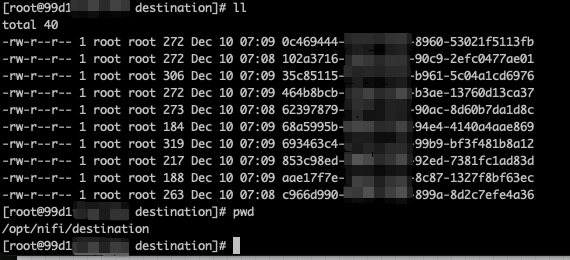
Step 4: Verify data synchronization
Insert test data into your OceanBase Database.
Verify files are generated in the PutFile directory.
Inspect file contents to view the captured SQL statement information.
