


CloudCanal is a data migration and synchronization tool that helps enterprises quickly build high-quality data flow channels. The product includes both SaaS mode and private output exclusive mode. The core members of the development team come from major tech companies, with backgrounds in database kernels, large-scale distributed systems, and cloud product construction. They understand databases, distributed systems, and the business and service models of cloud products.
This topic will guide you on how to use CloudCanal Community Edition v2.2.6.9 to migrate data from a MySQL OceanBase database to a MySQL database.
Applicability
- CloudCanal Community Edition supports migrating data from a MySQL OceanBase database to a MySQL database as of version 2.2.3.0. For more information, see 2.2.3.0.
- CloudCanal currently supports OceanBase Database V3.2.3.0 and earlier as the source database.
Prerequisites
Follow Deploy CloudCanal (Linux/MacOS) to install and deploy CloudCanal Community Edition.
Follow Deploy OceanBase Binlog Service to install and deploy OceanBase Binlog Service.
Procedure
- Add a data source.
- Create a task.
- View the task.
Add data sources
Log in to the CloudCanal console.

Go to the data source management page and click Add Data Source.

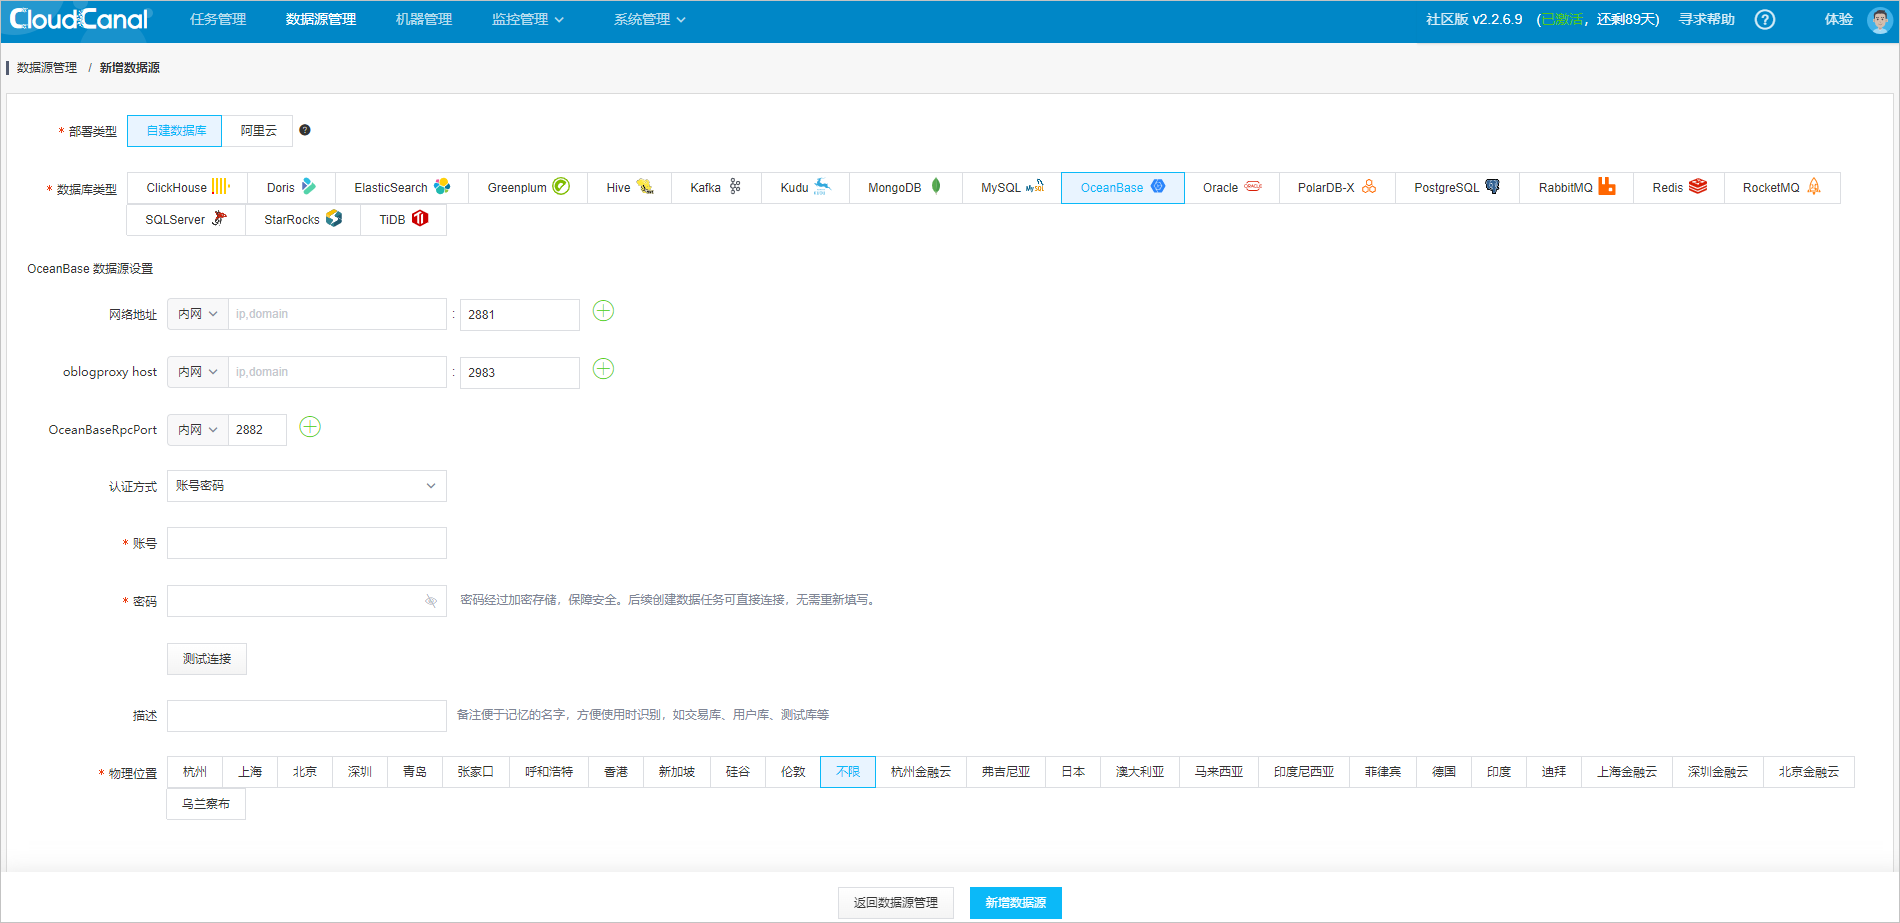
On the Add Data Source page, specify the data source information.
Deployment Type: indicates whether the data source is a Self-managed database or Alibaba Cloud database.
- Alibaba Cloud: a database instance purchased on Alibaba Cloud.
- Self-managed database: a database instance that you have deployed.
Database Type: the type of the data source.
Two data sources, OceanBase and MySQL, are added as the source and target databases for synchronization:
Choose OceanBase from the self-managed database option to add the OceanBase database instance that you have deployed.
Configure the OceanBase data source:
- Network Address: the IP address for connecting to OceanBase Database, which can be a direct connection or an ODP connection.
- oblogproxy host: the IP address of OceanBase Binlog Service. If you synchronize data from OceanBase Database as the source, this parameter is required. If you synchronize data to OceanBase Database as the target, this parameter can be left empty. For more information about OceanBase Binlog Service, see OceanBase Binlog Service.
- OceanBaseRpcPort: the OceanBase RPC port. The default value is 2882.
- Authentication: the authentication mode. It can be No Password, With Password, or Username/Password. The default value is Username/Password.
- Username: the username for connecting to OceanBase Database. In direct connection, the username format is username@tenant name; in ODP connection, the username format is username@tenant name#cluster name.
- Password: the password corresponding to the username.
- Description: the description. It is an optional parameter. You can add remarks to facilitate identification later on. For example, you can use transaction database, user database, or test database as the remarks.
Choose MySQL from the self-managed database option to add the MySQL database instance that you have deployed.
Configure the MySQL data source:
- Network Address: the IP address of the MySQL database.
- Authentication: the authentication mode. It can be No Password, With Password, or Username/Password. The default value is Username/Password.
- Username: the username for connecting to the MySQL database.
- Password: the password corresponding to the username.
- Description: the description. It is an optional parameter. You can add remarks to facilitate identification later on. For example, you can use transaction database, user database, or test database as the remarks.

View the two data sources that you have added.

Create a task
After the data source is added, perform full data migration, incremental synchronization, or schema migration following these steps:
Go to the Task Management page and click Create Task.

Configure the source and target databases.
Select Task Run Cluster. The task will be scheduled to run on a server in the cluster. After the Community Edition is deployed, a default run cluster will be provided.
Select OceanBase as the source database and MySQL as the target database, and click Test Connection.
Select the databases for migration, synchronization, or verification and configure the database mappings.
Click Next.

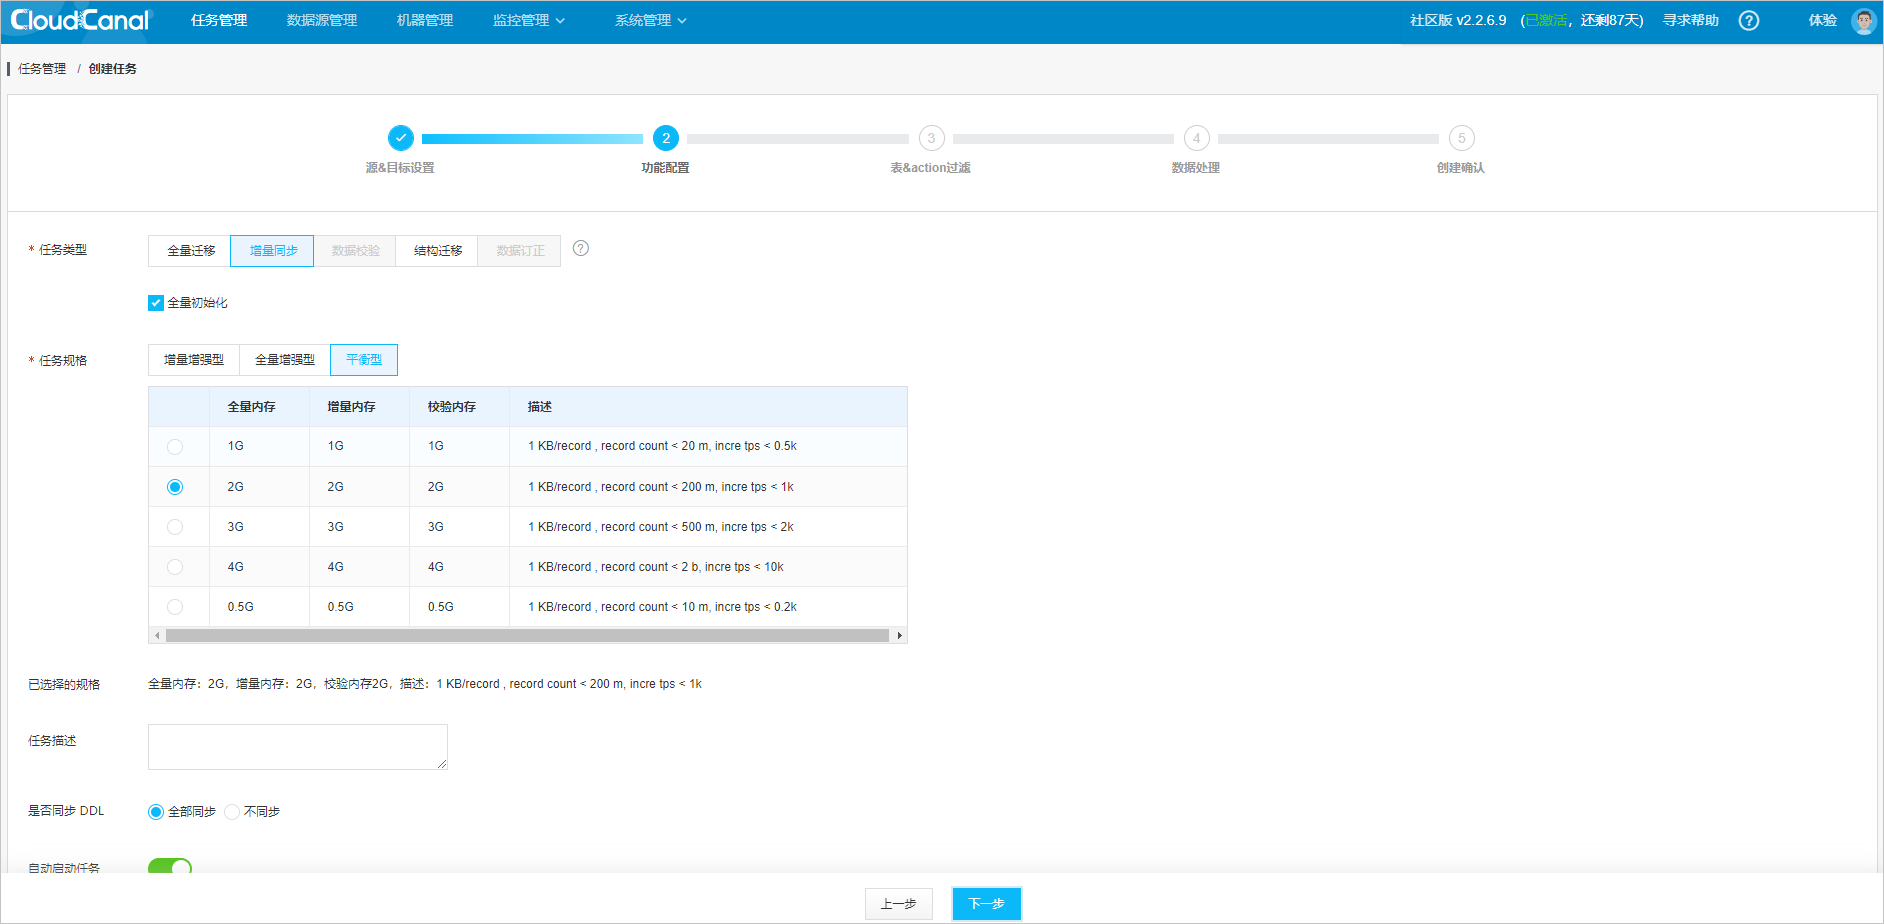
Configure the task.
Select Incremental Synchronization. The system will first perform full synchronization by querying tables, and then perform incremental synchronization by consuming binlog.
The task types are described as follows:
- Full migration: Primarily for full data migration and short-term incremental synchronization.
- Incremental synchronization: The default option. It includes full initialization by default. Primarily for long-term incremental synchronization.
- Data verification: Accurate data verification is performed by comparing data in the source and target databases. Verification can be performed once or multiple times at scheduled intervals. The Community Edition does not support this feature.
- Schema migration: The system automatically creates corresponding databases and tables based on the selected databases and tables.
- Data correction: Data inconsistency between the source and target databases is automatically corrected. The Community Edition does not support this feature.
The default task specification is sufficient for most scenarios.
Click Next.
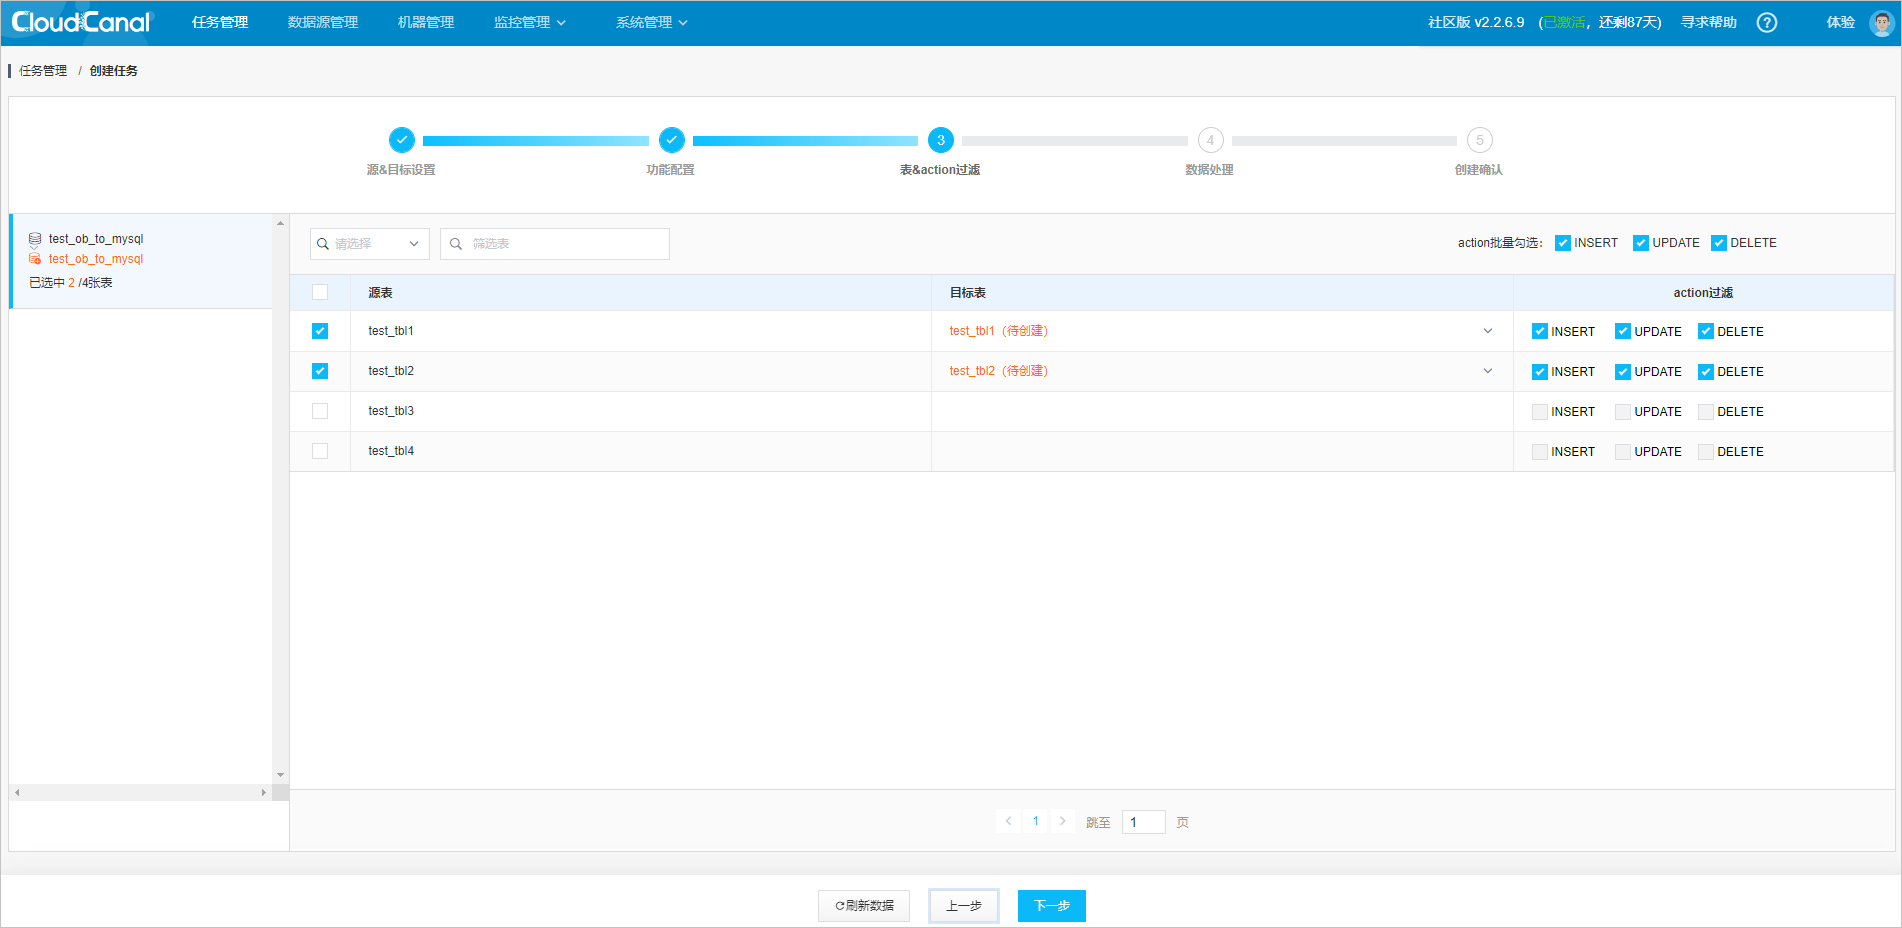
Filter tables and actions.
Select the tables to synchronize. To ensure consistency between the
UPDATEandDELETEoperations in the target database and those in the source database, the source database table must have a primary key or unique constraint.Click Next.
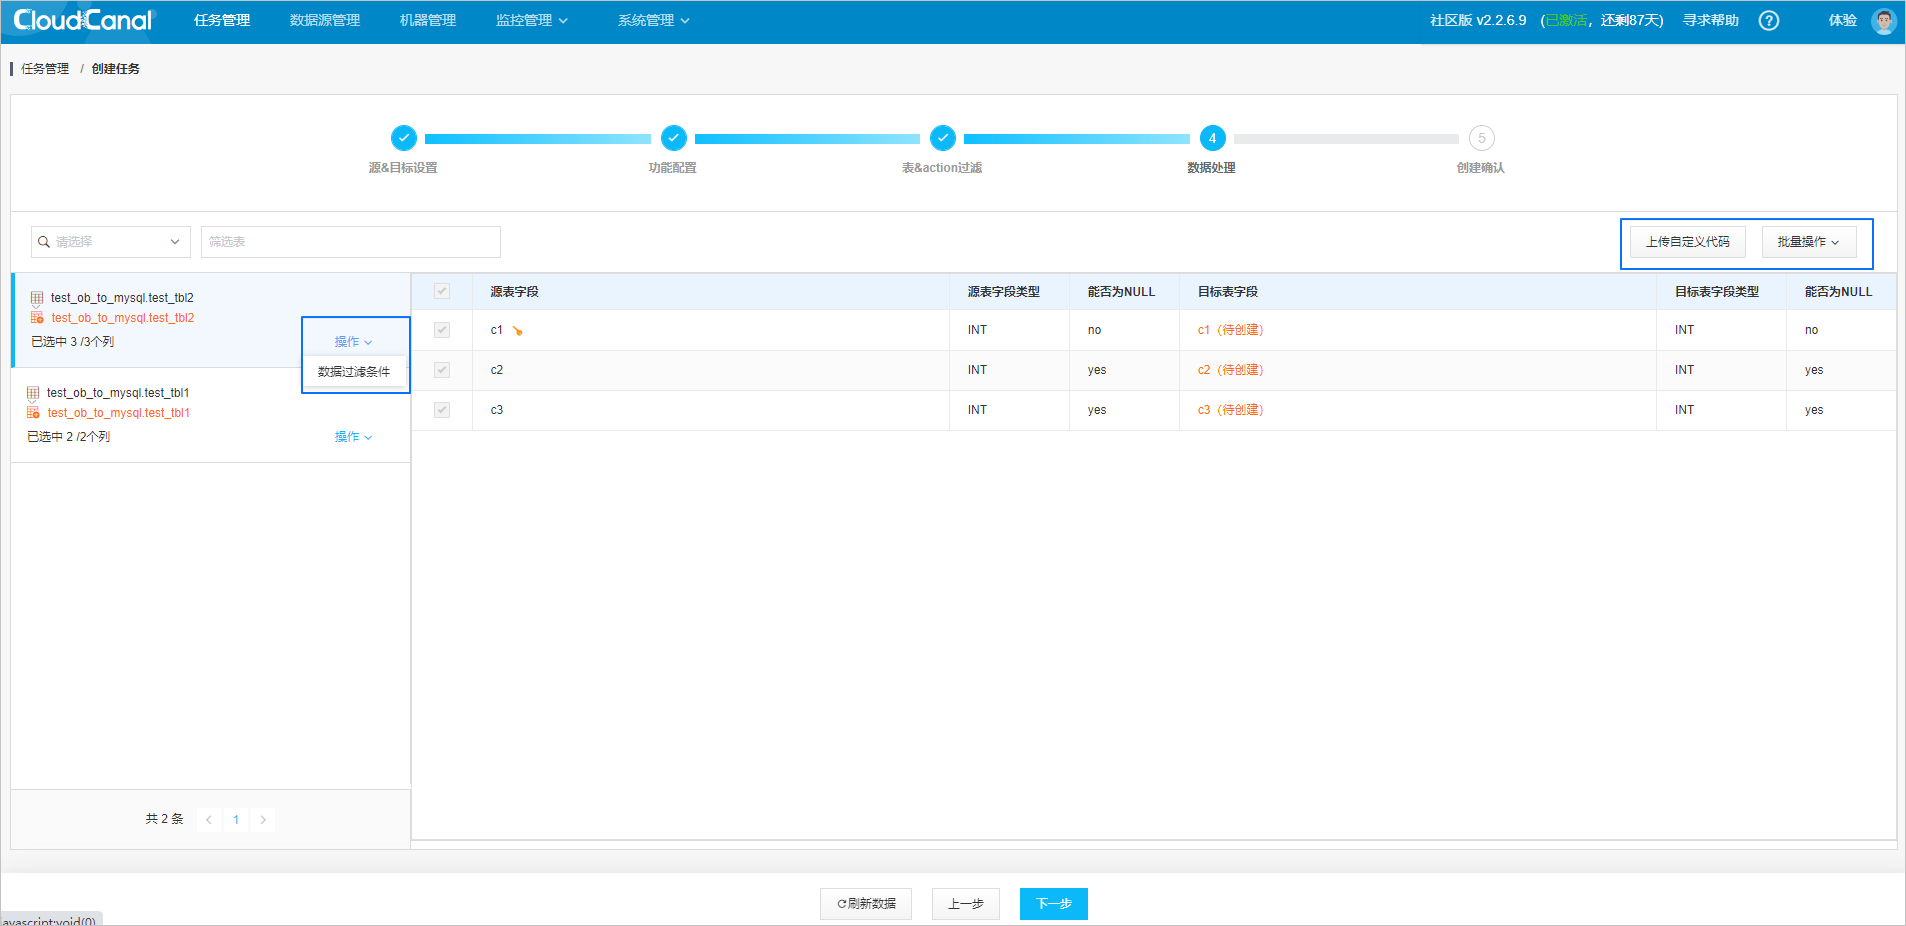
Configure data processing.
You can add data filtering conditions, upload custom code, and perform batch operations.
- Data filtering conditions: Add data filtering conditions on the left side of the data processing page in the Actions column of the table.
- Upload custom code: Custom code allows you to process data rows in real time using Java. After you upload the code to CloudCanal, the code will take effect automatically on all full and incremental data synchronization tasks. Then the processed data will be transmitted to the destination data source.
- Batch operations: You can add data filtering conditions in batches and trim columns.
Click Next.
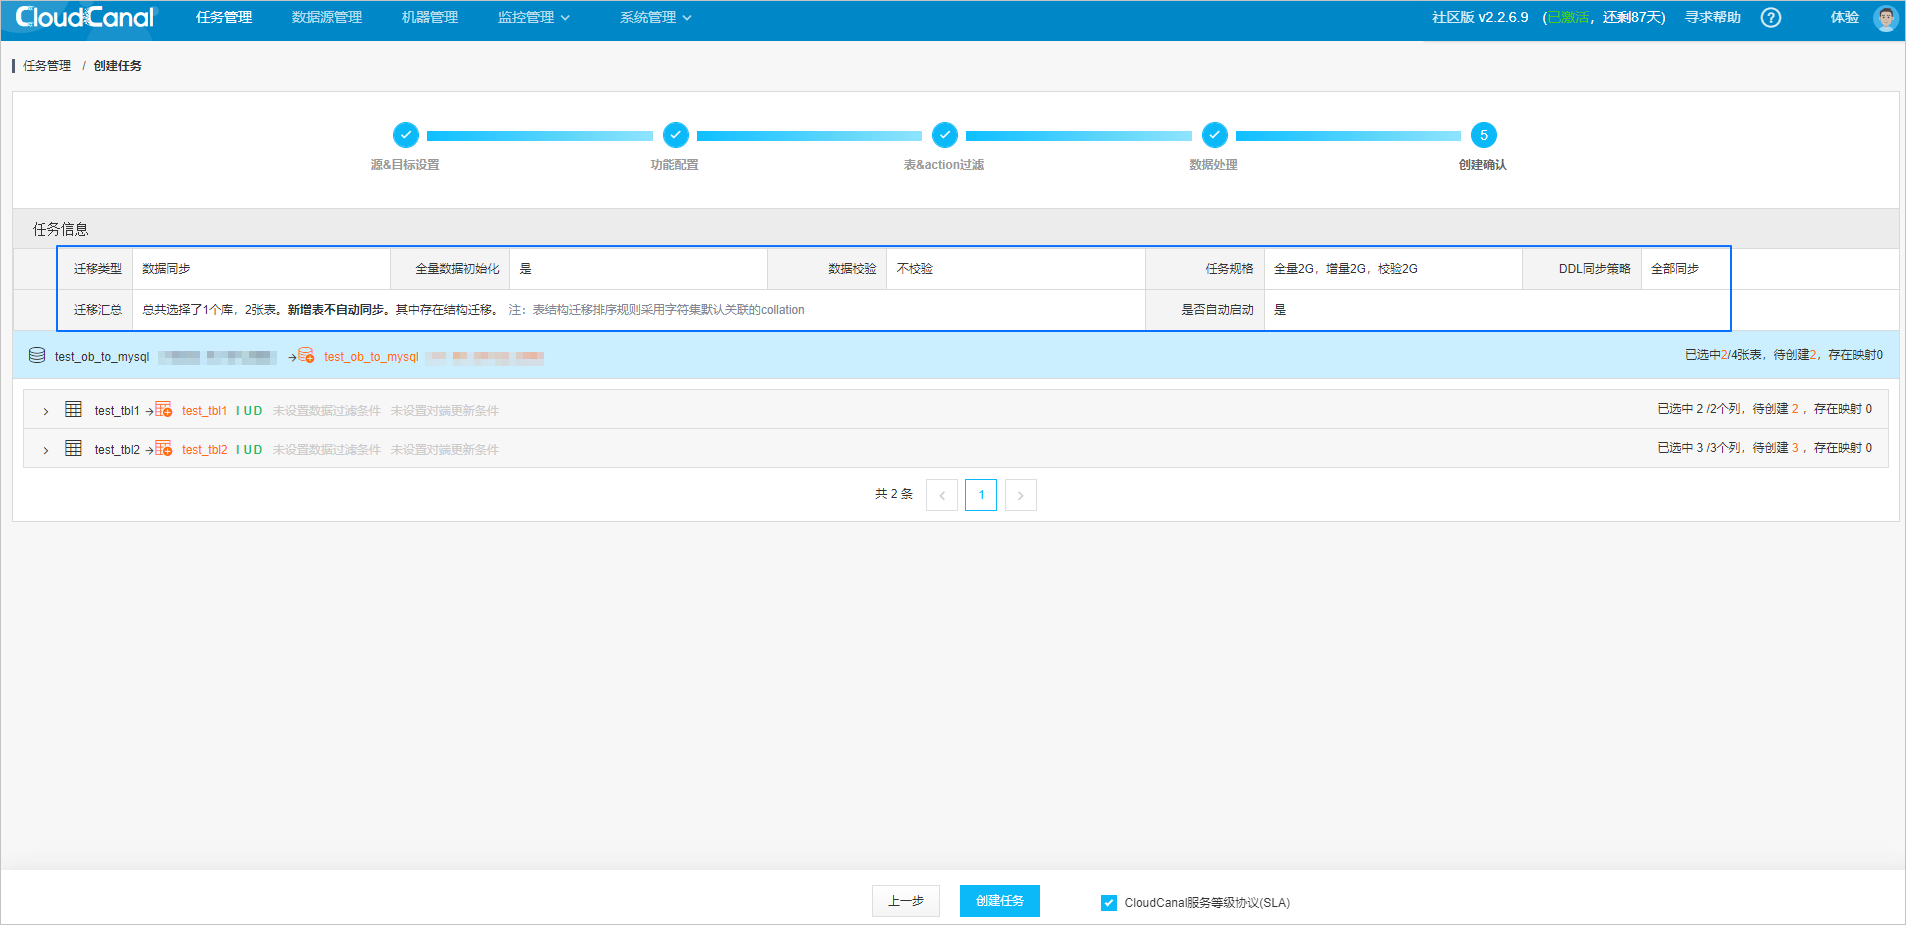
Verify the task configuration.
Click Create Task after you verify that the task configuration is correct.
View the task status
After an incremental synchronization task is created, it will default perform Schema Migration, Full Data Migration, and Incremental Synchronization.
Go to the CloudCanal task management console and click Refresh in the upper-right corner to view the real-time status of the task.

References
For more information about CloudCanal, see CloudCanal Documentation.