


You can create users and manage user permissions on the User Management page of OceanBase Developer Center (ODC).
Log on to ODC as the administrator, and go to the Public Resource Console page. In the left-side navigation pane, choose Member Management > User Management to display the User Management page on the right.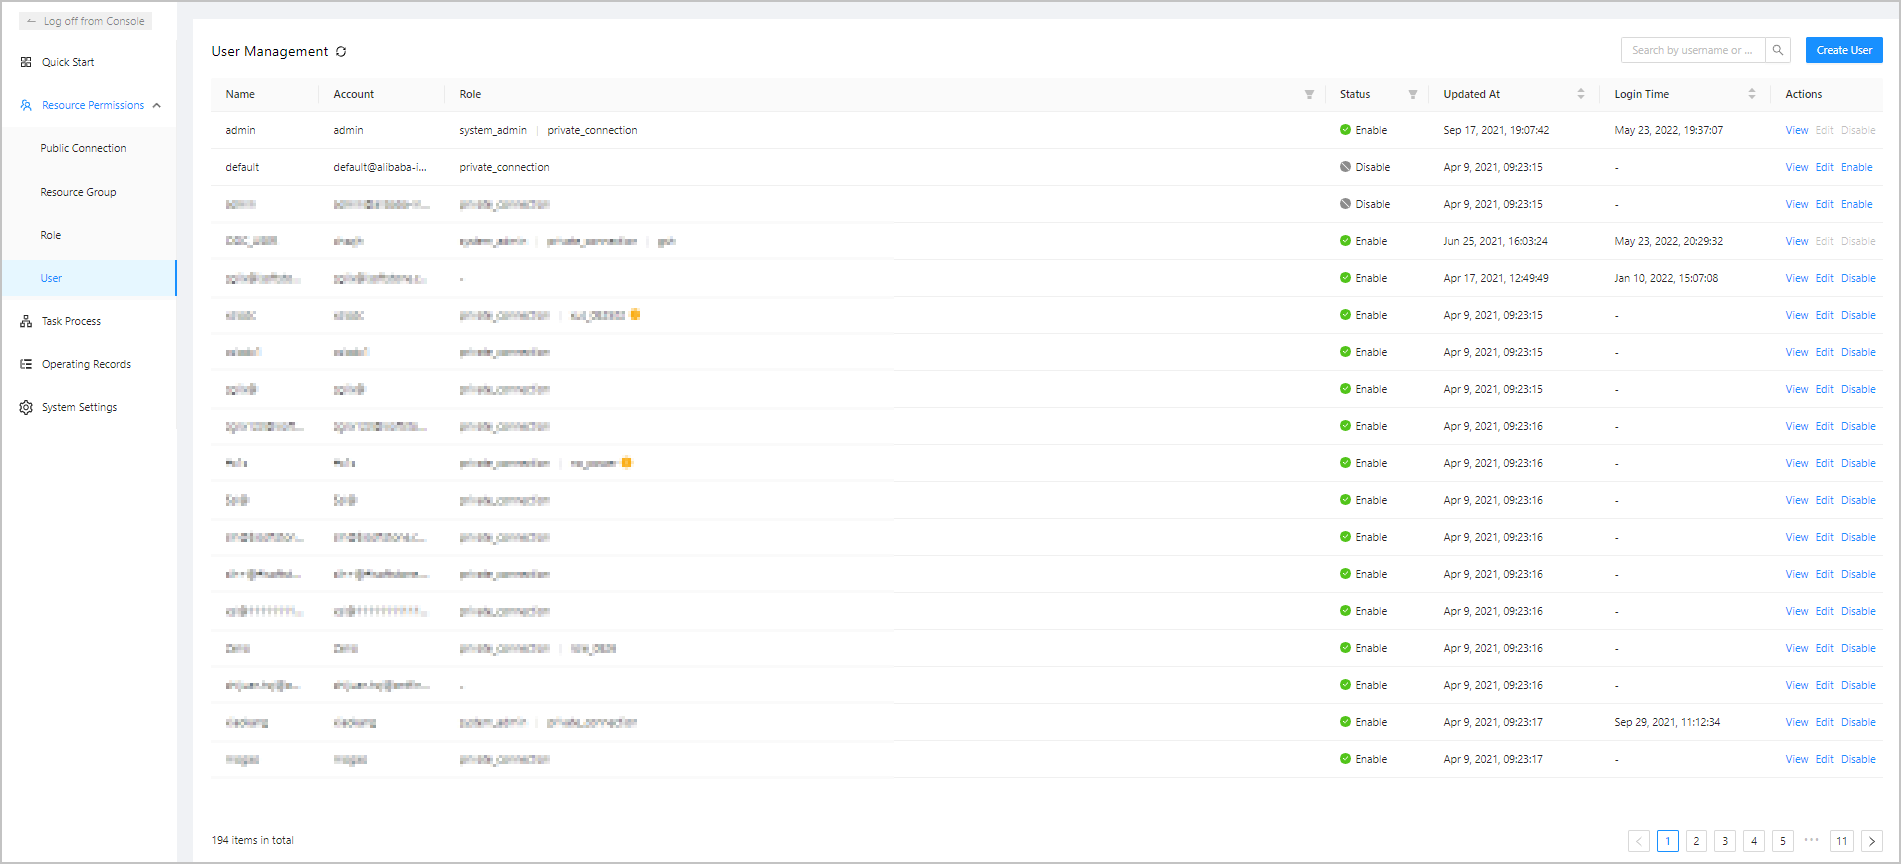
Built-in user
ODC has a built-in account admin that is automatically assigned the administrator role system_admin . The administrator account has all system permissions and has access to all public resources. You cannot edit, delete, or disable the account.
Create a user
Click Create User in the upper-right corner of the User Management page. The Create User panel appears.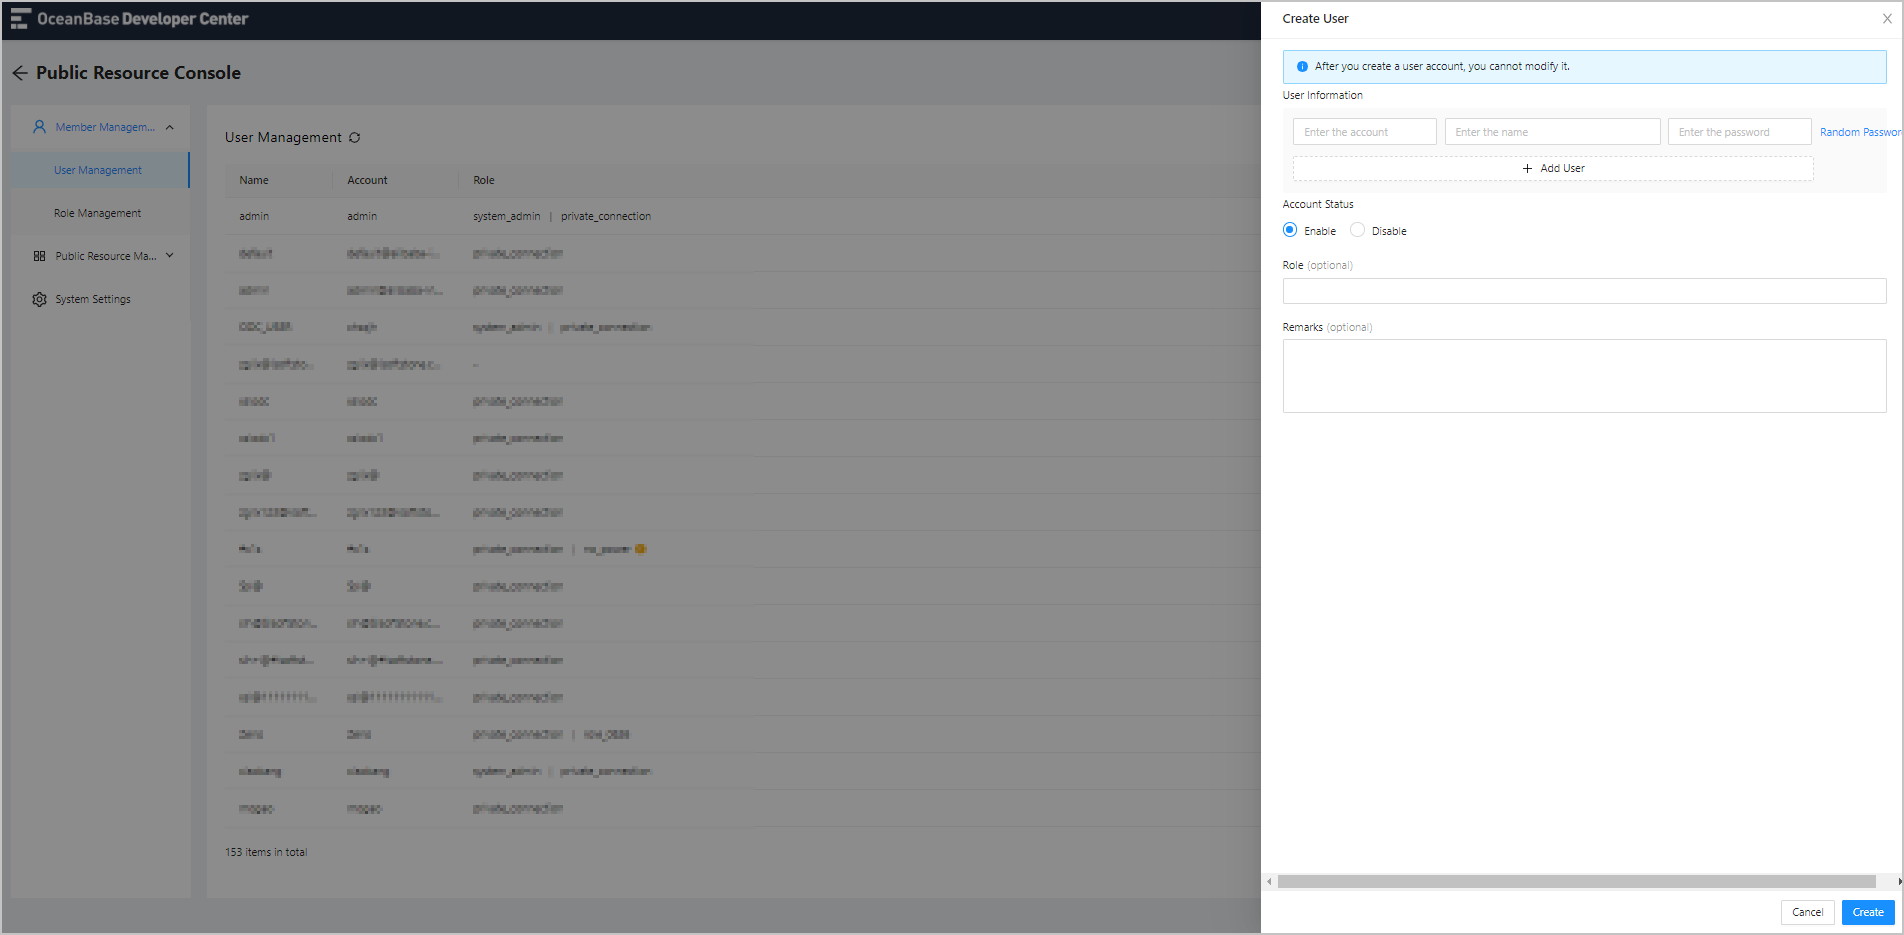
You can take the following steps to create a user:
Specify the User Information .
User information includes the following three parts: * Account : specifies the account used to log on to ODC. You must specify a unique account of 4 to 48 characters in length using letters, digits, and the following special characters:_ + @ # $ %.
Name : specifies the screen name to be displayed after the user logs on to ODC. The name must be specified and cannot exceed 110 characters in length.
Password : specifies the password used to log on to ODC. The password must be specified and must be 8 to 32 characters in length, containing at least two digits, two uppercase letters, two lowercase letters, and two of the following special characters:_ + @ # $ %. You can also click Random Password next to the field to generate a random password.
ODC allows you to create multiple users at a time. Click Add User to specify the information for multiple users.
Specify the Account Status .
By default, the new user is created in the Enabled status. You can manually disable it . A disabled account is unable to log on.
Assign roles to the new user.
The roles are optional and you can assign multiple roles to a user. Click the field. In the drop-down list, select the roles that you want to assign to all users you just added. If no role is available, go to the Create Role page to create a one.
Specify the Remarks (optional).
Enter the description in the field. The remarks are optional and cannot exceed 140 characters in length.
Submit user information.
In the lower-right corner of the panel, click Create to submit user information.
Save user information.
In the User Created dialog box appears after you click Create, you can view the information of all users you just created. In the dialog box, you can click Copy User Information and Download User Information to save the information of multiple users in local storage.
Manage users
On the User Management page, you can view the information of all users, and search for specific users by using the search box in the upper-right corner of the page. You can also view and manage the created users by using the buttons provided in the Actions column.
Information of users
The information of users is provided by columns, which are described in the following table. A filter is provided on top of some columns for you to filter users.
| Column | Description |
|---|---|
| Name | Indicates the name of the user. |
| Account | Indicates the account of the user. |
| Role | Indicates the role assigned to the user. |
| Status | Indicates the user status. Valid values: Enabled and Disabled . |
| Updated At | Indicates the time of the last update of the user information. |
| Logon Time | Indicates the time of the last logon to the ODC. |
| Actions | Indicates the actions you can take, including View , Edit , and Disable / Enable . You can click Disable / Enable to change the user status . |
View a user
Click View in the Actions column. In the User Information panel, You can see the User Details and Related Resources tabs. The following table describes the information displayed on the tabs.
| Tab | Description |
|---|---|
| User Details | * User creation information, including Account , Name , Password , Role , and Remarks that you specified when you created the user. The password is masked, and a Reset Password button is provided for you to change the logon password. * Operation information, including the creator, creation time, update time, and logon time. * Delete a user: You can click Delete User in the lower part of the tab to delete the user. After the user is deleted, the corresponding account cannot log on to ODC and its related data cannot be recovered. |
| Related Resources | This tab displays the names of the public connections that are accessible by the current user, the resource groups to which the public connections belong, and the access permissions for the resource groups. |
| Edit | In the User Information panel, click Edit to go to the Edit User panel. |
Edit a user
Click Edit in the Actions column to go to the Edit User panel.
In the Edit User panel, you can view all information specified when you create a user. After the user is created, the Account cannot be modified. However, you can modify the Name , Account Status , Roles , and Remarks , and can change the Password when viewing the user details page.