


A role is an object that holds user permissions, and users of the same role have the same permissions. OceanBase Developer Center (ODC) allows you to grant permissions to customized roles and assign the roles to users.
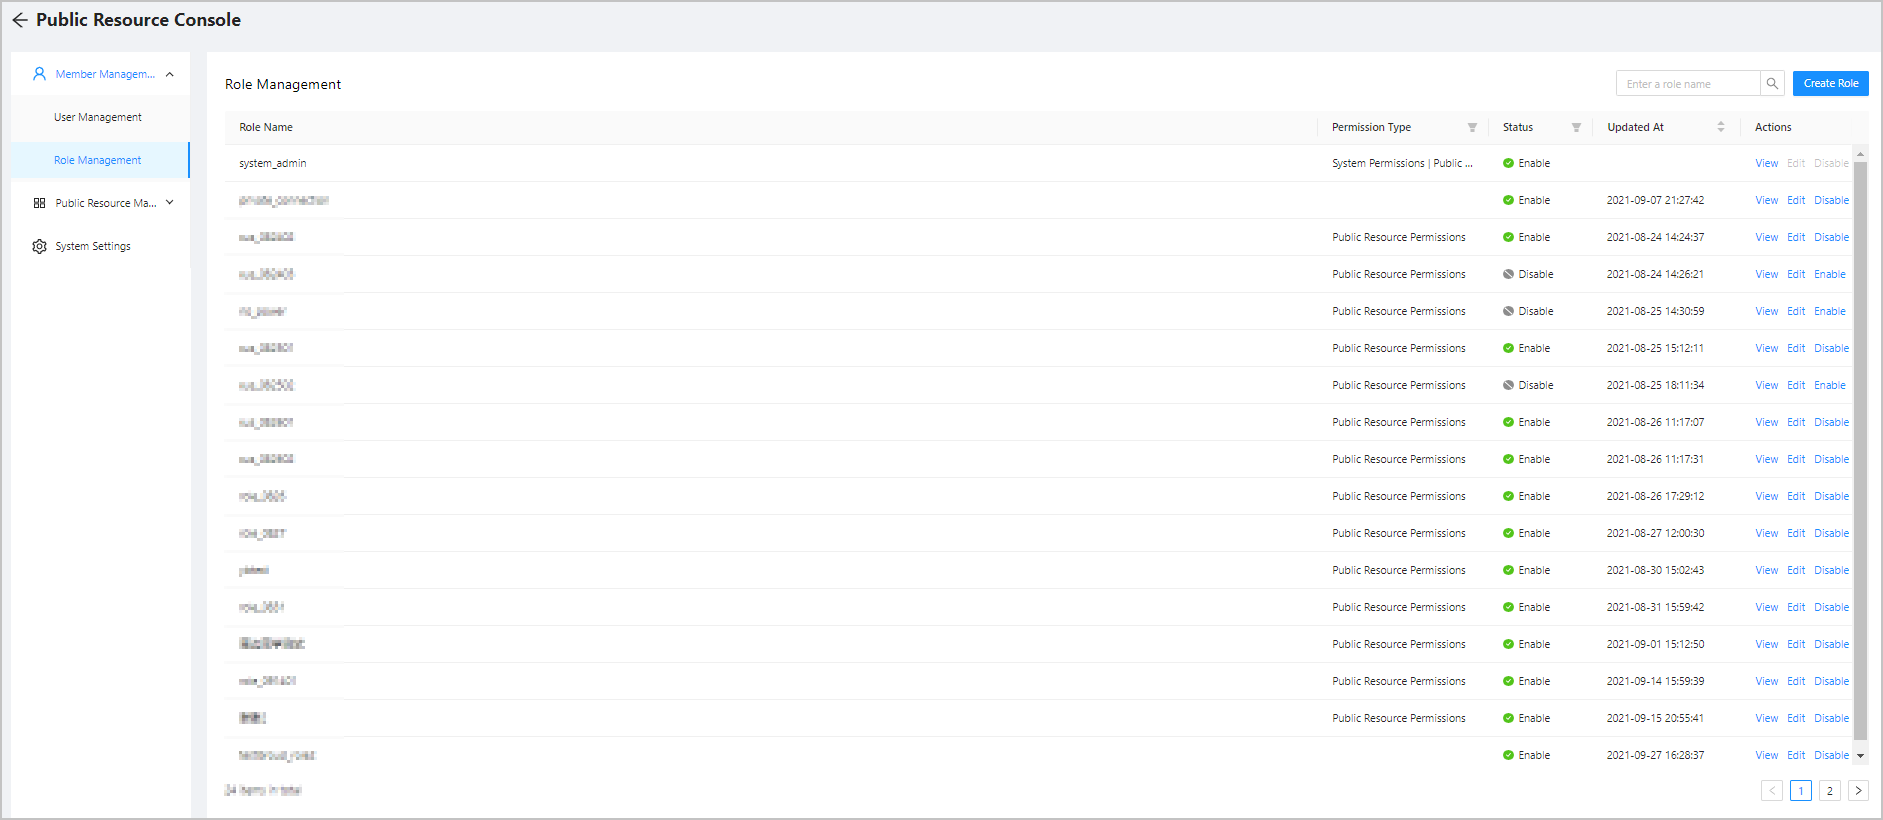
Log on to ODC as the administrator, and go to the Public Resource Console , and choose Member Management in the left-side navigation pane. In the list that appears, click Role Management . The Role Management page appears.
Built-in roles
ODC has a built-in administrator role system_admin that is automatically assigned to the administrator, whose username is admin . The administrator role has all system permissions and has access to all public and private resources. You cannot edit, delete, or disable the administrator role.
Create a role
Click Create Role in the upper-right corner of the Role Management page. The Create Role panel appears.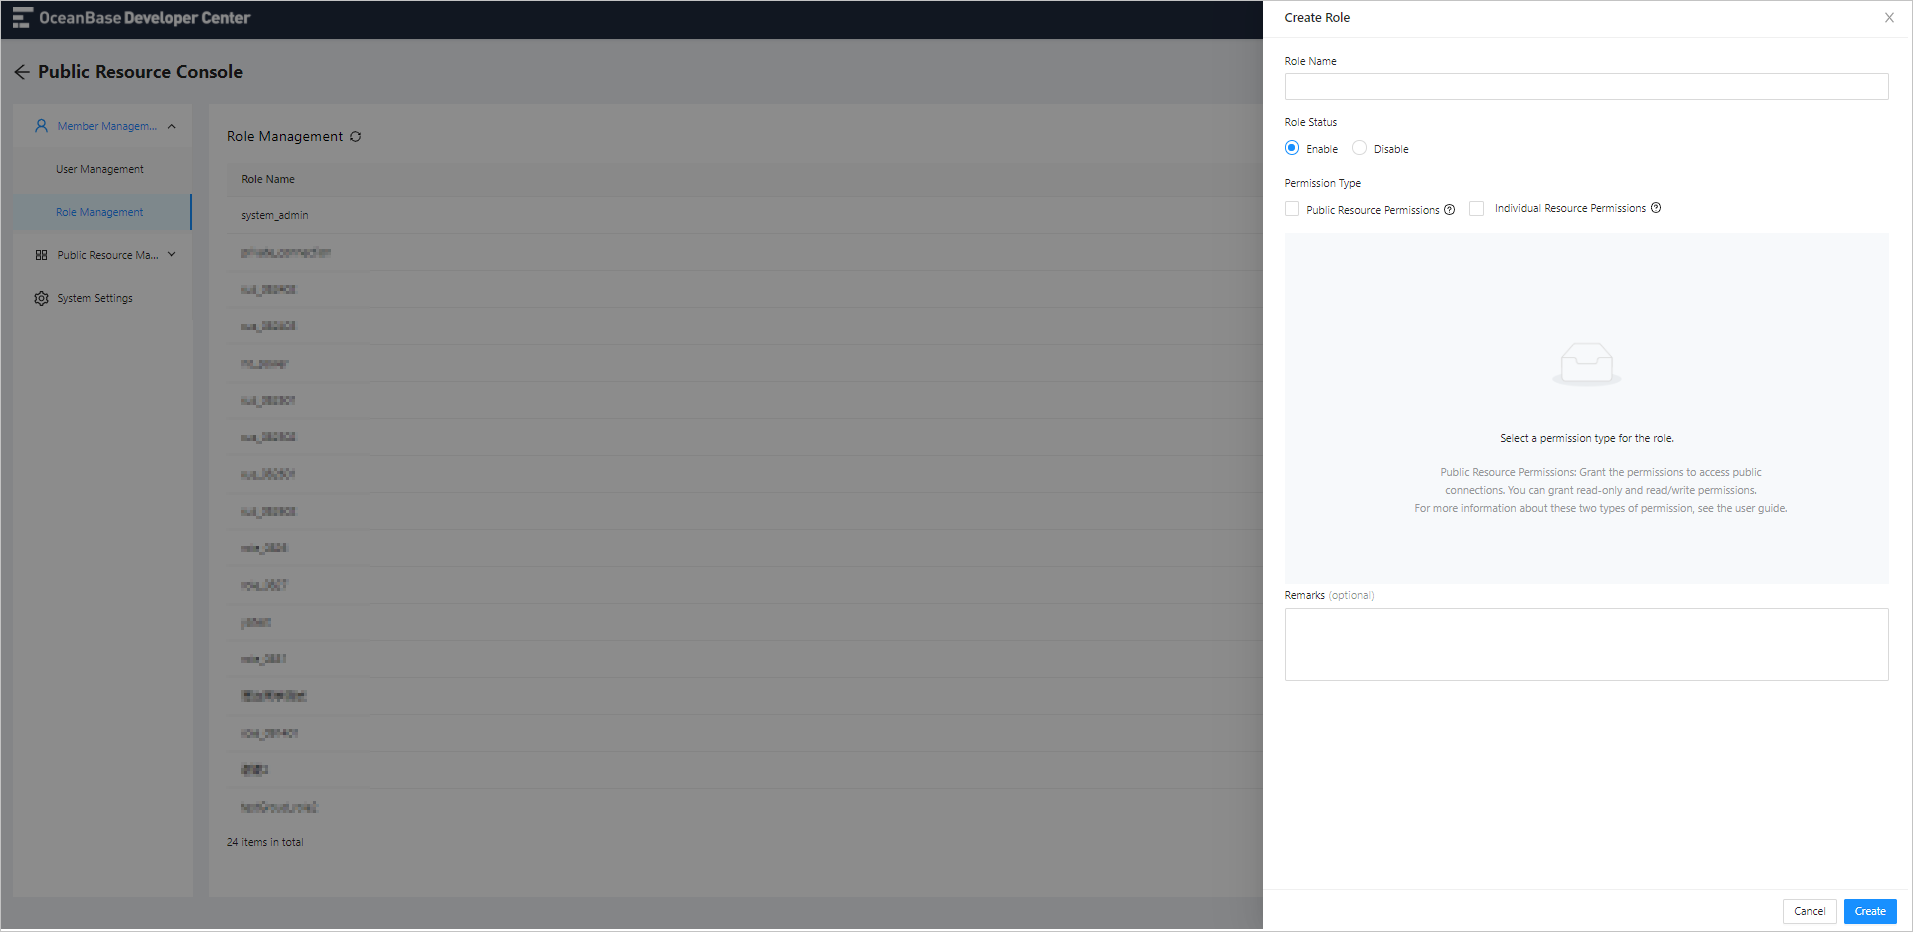
To create a role, perform the following steps:
Specify the Role Name .
The role name must be specified and must be 1 to 48 characters in length.
Specify the Role Status .
By default, the new role is created in the Enabled status. You can manually disable it. The permissions for a disabled role do not take effect.
Specify the Permission Type .
You must specify at least one permission type for the role.
ODC allows you to specify Public Resource Permissions and Individual Resource Permissions . After you select the permission type, the Permission Settings section appears below it.
Configure Permission Settings .
The following table shows options in each Permission Type tab in the Permission Settings section.
Permission typeDescriptionPublic Resource Permissions * Resource types: Public Connection and Resource Group . Click the first field and select the resources as needed from the drop-down list. * Resource Name: Click the second field and select the resources as needed from the drop-down list. Depending on the selected resource type, the list displays the names of the resources that have been created in the current system. * Resource Permission: Click the third field and select the public resource permissions as needed from the drop-down list. Permissions for public resources include Read-only and Read & Write. For more information, see the Permission description section below. Click Add Resource to grant the role the permission for multiple public resources. Individual Resource Permissions Select All individual resource permissions to view, manage, and use connections. Specify Remarks (optional) .
Enter the description in the field. The remarks are optional and cannot exceed 140 characters in length.
Complete the creation.
Click Create in the lower-right corner of the panel to create the role.
Permission description
ODC supports Public Resource Permissions and Individual Resource Permissions .The types of the public resource are Public Connection and Resource Group two types. The following table shows the scope and description of supported permissions.
Permission scope |
Read-only |
Read & write |
|---|---|---|
| SQL window | Supports query statements at the SQL window | Supports control statements at the SQL window Supports query statements at the SQL window Supports data change statements at the SQL window Supports schema change statements at the SQL window |
| Result set | View the result set Export the result set | View the result set Export the result set Modify the result set |
| Anonymous block window | Supports operations other than writing. | Supports all operations at the anonymous block window |
| Command-line window | Supports operations other than writing. | Supports all operations at the command-line window |
| Data mocking | Not supported | Supports all permissions for data mocking |
| Asynchronous execution | Supports operations other than writing. | Supports all permissions for asynchronous execution |
| Import and export | Supports data export | Supports data import Supports data export |
| Session | View session properties View sessions | View session properties Modify session properties View sessions Modify the list of sessions |
| Recycle bin | View the recycle bin | View the recycle bin Modify the recycle bin |
| Table (non-SQL statement operations) | View table definition View table data | View table definition View table data Modify table definition Modify table data Create a table Delete a table |
| View (non-SQL statement operations) | View the view definition Check the view data | View the view definition Check the view data Create a view Delete a view |
| Function (non-SQL statement operations) | View the function definition | View the function definition Modify the function definition Run a function Compile a function Debug a function Create a function Delete a function |
| Stored procedure (non-SQL statement operations) | View the stored procedure definition | View the stored procedure definition Modify the stored procedure definition Run a stored procedure Compile a stored procedure Debug a stored procedure Create a stored procedure Delete a stored procedure |
| Program package (non-SQL statement operations) | View the program package definition | View the program package definition Modify the program package definition Run a program package Compile a program package Debug a program package Create a program package Remove a program package |
| Trigger (non-SQL statement operations) | View the trigger definition | View the trigger definition Modify the trigger definition Create a trigger Delete a trigger Compile a trigger |
| Type (non-SQL statement operations) | View the type definition | View the type definition Modify the type definition Create a type Delete a type Compile a type |
| Synonym (non-SQL statement operations) | View the synonym definition | View the synonym definition Create a synonym Delete a synonym |
| Sequence (non-SQL statement operations) | View the sequence definition | View the sequence definition Modify the sequence definition Create a sequence Delete a sequence |
Manage roles
The information of roles is displayed in a list on the Role Management page, where you can perform the following operations:
Click the refresh icon to manually refresh the list.
Search for roles by using the search box in the upper-right corner of the list.
You can also view and manage the created roles by using the buttons provided in the Actions column on the Role Management page.
Information of roles
The information of roles is provided by columns, which are described in the following table. A filter is provided on top of columns for you to filter roles.
Column |
Description |
|---|---|
| Role Name | Indicates the name of the role. |
| Permission Type | Indicates the type of permissions granted to the role. |
| Status | Indicates the role status. Valid values: Enabled and Disabled . |
| Updated At | Indicates the time of the last update of the role information. |
| Actions | Indicates the actions you can take, including View , Edit , and Disable / Enable . You can click Disable / Enable to change the role status. |
View a role
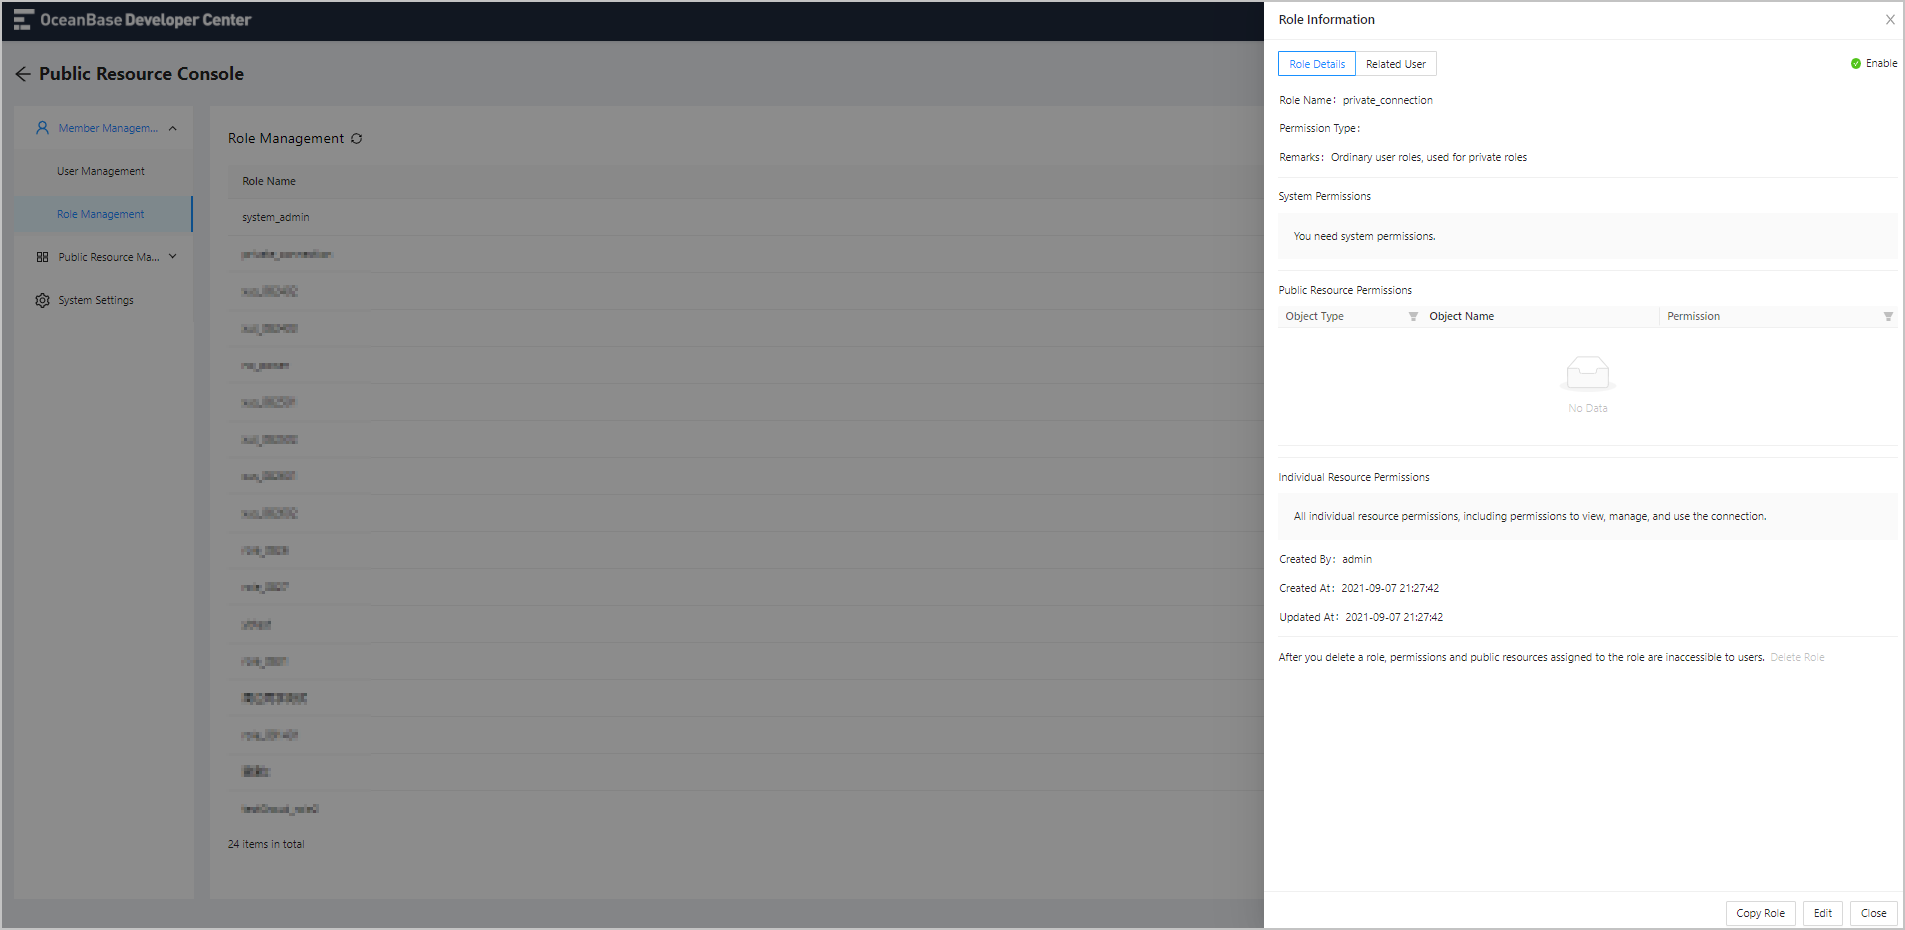
Click View in the Actions column. In the Role Information panel, you can see the tabs Role Details and Related Users .The following table describes the information displayed on the tabs.
Tab |
Description |
|---|---|
| Role Details | * Role creation information: displays the information you specified when you created the role in fields such as the role name, permission type, remarks, and permission setting details. * Operation information: displays information in fields such as Created By, Created At, and Updated At. * Delete a role: You can click Delete Role in the lower part of the tab to delete the role. After the role is deleted, all data associated with the role cannot be recovered, and the user permissions granted to the role are revoked. The user logon is not affected. |
| Related Users | The Related Users tab displays users that are granted the role. The user information is provided in the following columns: Username , Roles , and Status . In the lower part of the Role Information panel, you can click Edit to go to the Edit Role panel, and click Copy Role to go to the Create Role panel. In the panel that appears, the information of current role is automatically populated. |
Edit a role
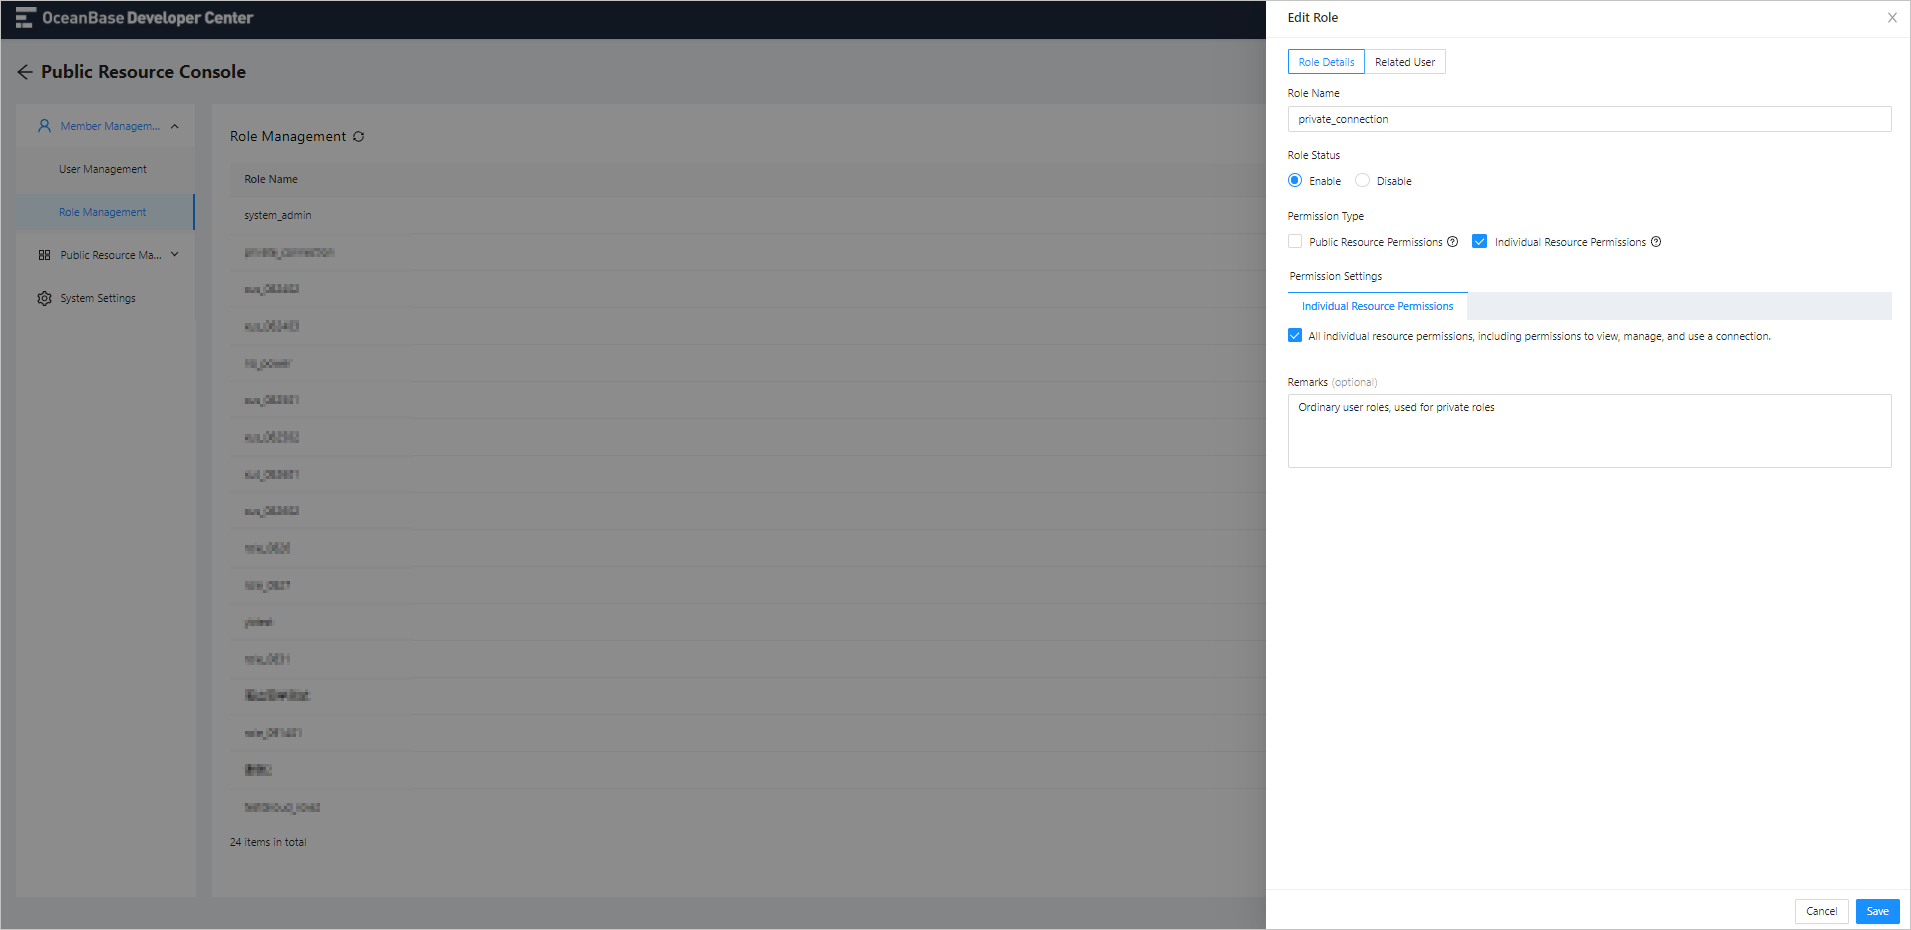
Click Edit in the Actions column to go to the Edit Role panel.
On the Role Details tab, you can edit all the information specified when you created the role.
On the Related Users tab, you can select new users in the Add User field and assign the role to the selected users.