


CloudCanal is a data migration and synchronization tool that helps enterprises quickly build high-quality data channels. It is available in SaaS and private deployment modes. The development team of CloudCanal comprises experts from major Internet companies with backgrounds in database kernel development, large-scale distributed systems, and cloud product management. CloudCanal understands databases, distributed systems, and cloud product commercial and service models.
This topic describes how to use CloudCanal Community Edition v2.2.5.36 to synchronize data from a MySQL database to a MySQL database in OceanBase Database.
Applicability
- CloudCanal Community Edition supports migrating data from a MySQL database to a MySQL database in OceanBase Database since v2.2.0.7. For more information, see v2.2.0.7.
- CloudCanal currently supports only MySQL V5.6 and later as the source database.
Prerequisites
You have installed CloudCanal Community Edition, applied for a free license, and activated it. For more information, see Get started (Linux/MacOS).
Migrate data
- Add a data source.
- Create a task.
- View the task.
Add data sources
Log in to the CloudCanal console.

Go to the data source management page and click Add Data Source.

On the Add Data Source page, specify the data source information.
Deployment Type: indicates whether the data source is a Self-managed database or an Alibaba Cloud database.
- Alibaba Cloud: an instance of a database that you have purchased on Alibaba Cloud.
- Self-managed database: an instance of a database that you have deployed yourself.
Database Type: the type of the data source.
You can add two data sources, MySQL and OceanBase, to serve as the source and target databases for synchronization:
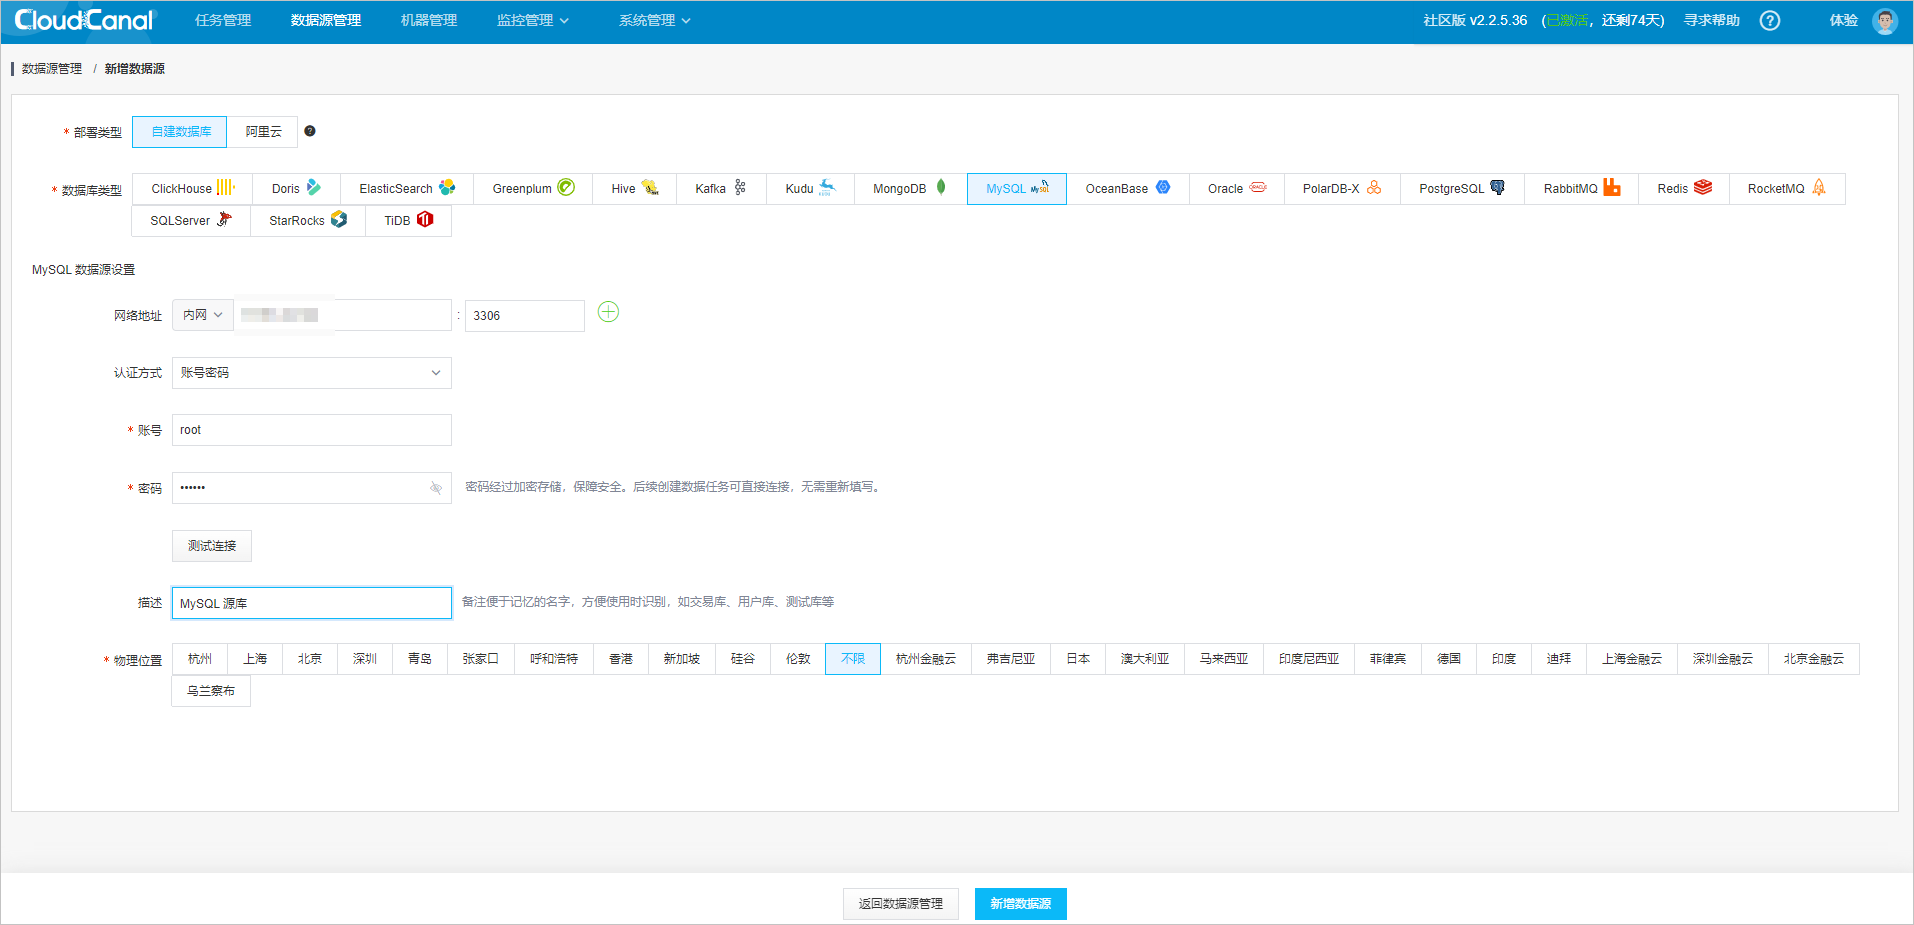
To add a MySQL data source, select the self-managed database option and specify the details of the MySQL database instance that you have deployed:
Set up a MySQL data source:
- Network Address: the IP address of the MySQL database.
- Authentication: the authentication method. The options are Username and Password, Token, and No Authentication. The default value is Username and Password.
- Username: the username for connecting to the MySQL database.
- Password: the password corresponding to the username.
- Description: an optional field for noting a memorable name that helps with identification when used, such as TradeDB, UserDB, and TestDB.
To add an OceanBase data source, select the self-managed database option and specify the details of the OceanBase database instance that you have deployed:
Set up an OceanBase data source:
- Network Address: the IP address for connecting to OceanBase Database, which can be a direct connection or an ODP connection.
- oblogproxy host: the IP address of OceanBase Binlog Service. It is required when OceanBase Database is used as the source database for incremental synchronization but can be left empty when it is used as the target database. For more information about OceanBase Binlog Service, see OceanBase Binlog Service.
- OceanBaseRpcPort: the OceanBase Rpc port, which is 2882 by default.
- Authentication: the authentication method. The options are Username and Password, Token, and No Authentication. The default value is Username and Password.
- Username: the username for connecting to OceanBase Database. It is in the username@tenant name format for a direct connection or the username@tenant name#cluster name format for an ODP connection.
- Password: the password corresponding to the username.
- Description: an optional field for noting a memorable name that helps with identification when used, such as TradeDB, UserDB, and TestDB.

View the two data sources that you have added.

Create a task
After the data source is added, perform full data migration, incremental synchronization, and schema migration by following these steps.
Choose Create Task in the task management console.

Configure the source and target databases.
Select Task Run Cluster. The task will be scheduled to run on a server in the selected cluster. After the Community Edition is deployed, a default run cluster will be provided.
Select the source MySQL database and the target OceanBase database. Then click Test Connection.
Select the databases for migration, synchronization, or verification and configure the database mappings.
Click Next.

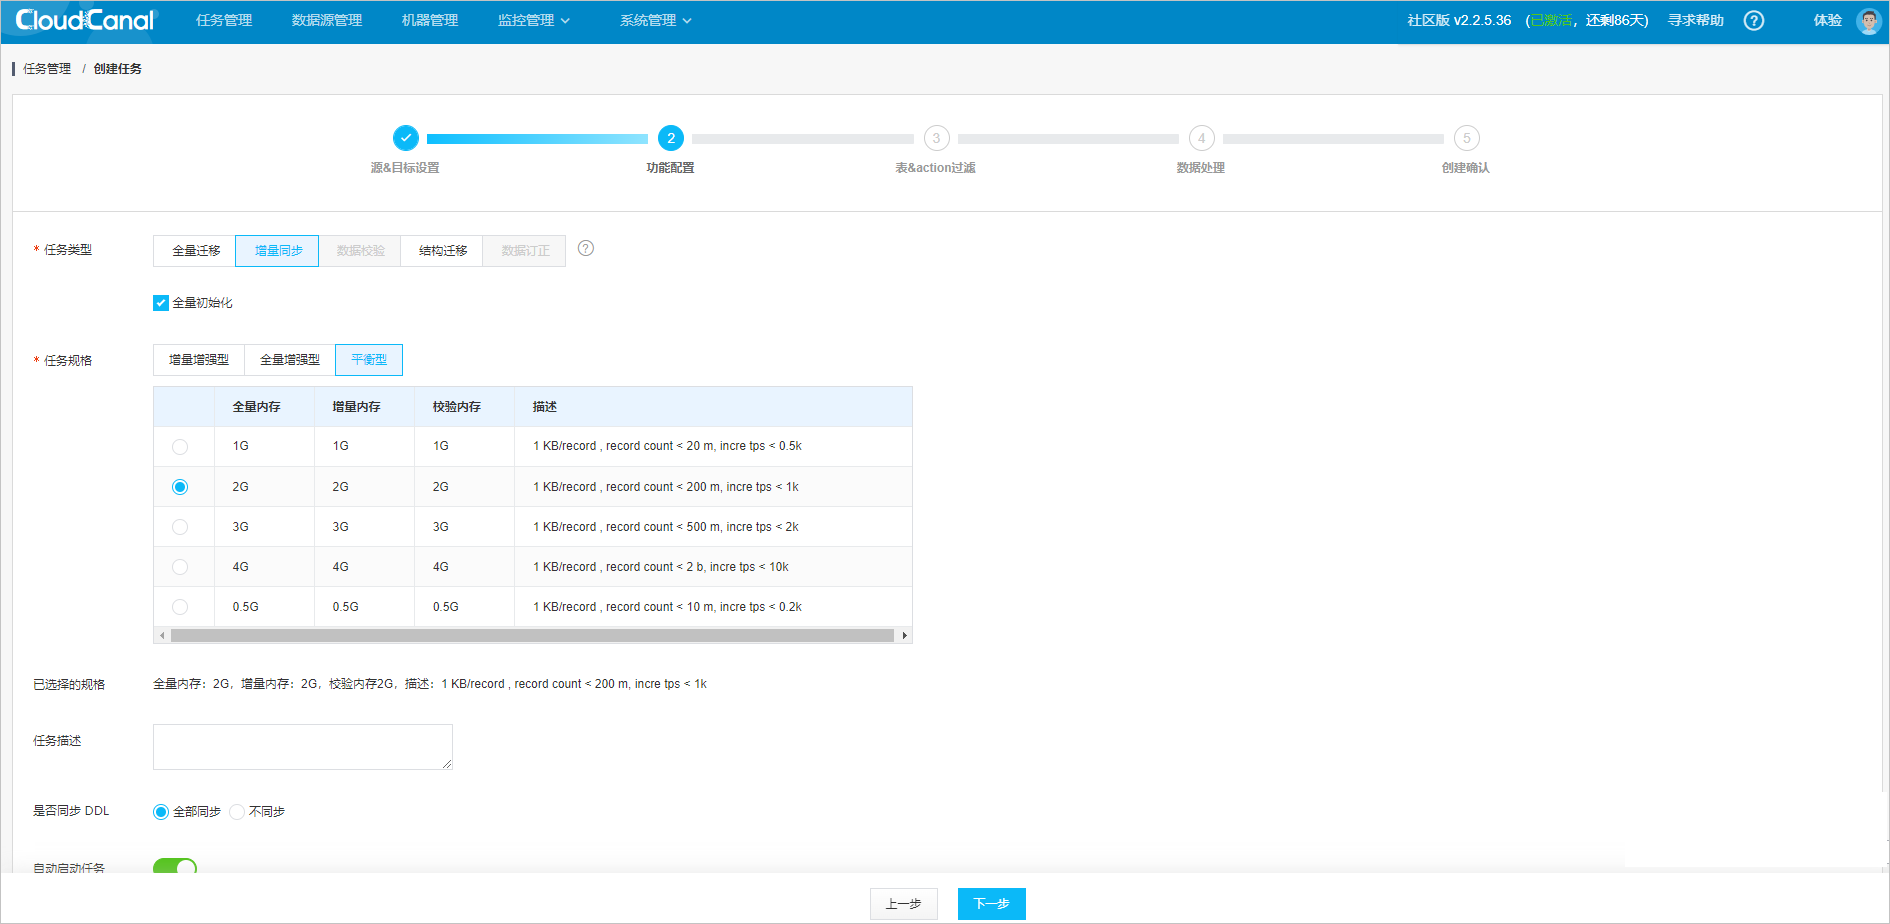
Configure features.
Select the Incremental Synchronization feature. The system will first perform full data synchronization and then consume the incremental data from the binlog.
The task type you select will have the following effects:
- Full Migration: This task type is primarily for data migration and is suitable for full data relocation and short-term incremental synchronization.
- Incremental Synchronization: This is the default task type, which is provided with Full Initialization by default. This task type is primarily for long-term incremental synchronization.
- Data Verification: This task type is used to verify the accuracy of data migration on a one-time or scheduled basis. The Community Edition does not support this feature.
- Schema Migration: This task type will automatically create corresponding databases and tables based on the ones you select.
- Data Correction: This task type will automatically correct inconsistent data based on the one in the source database.
The default task specification, such as Balanced and 2 GB, is sufficient.
Click Next.
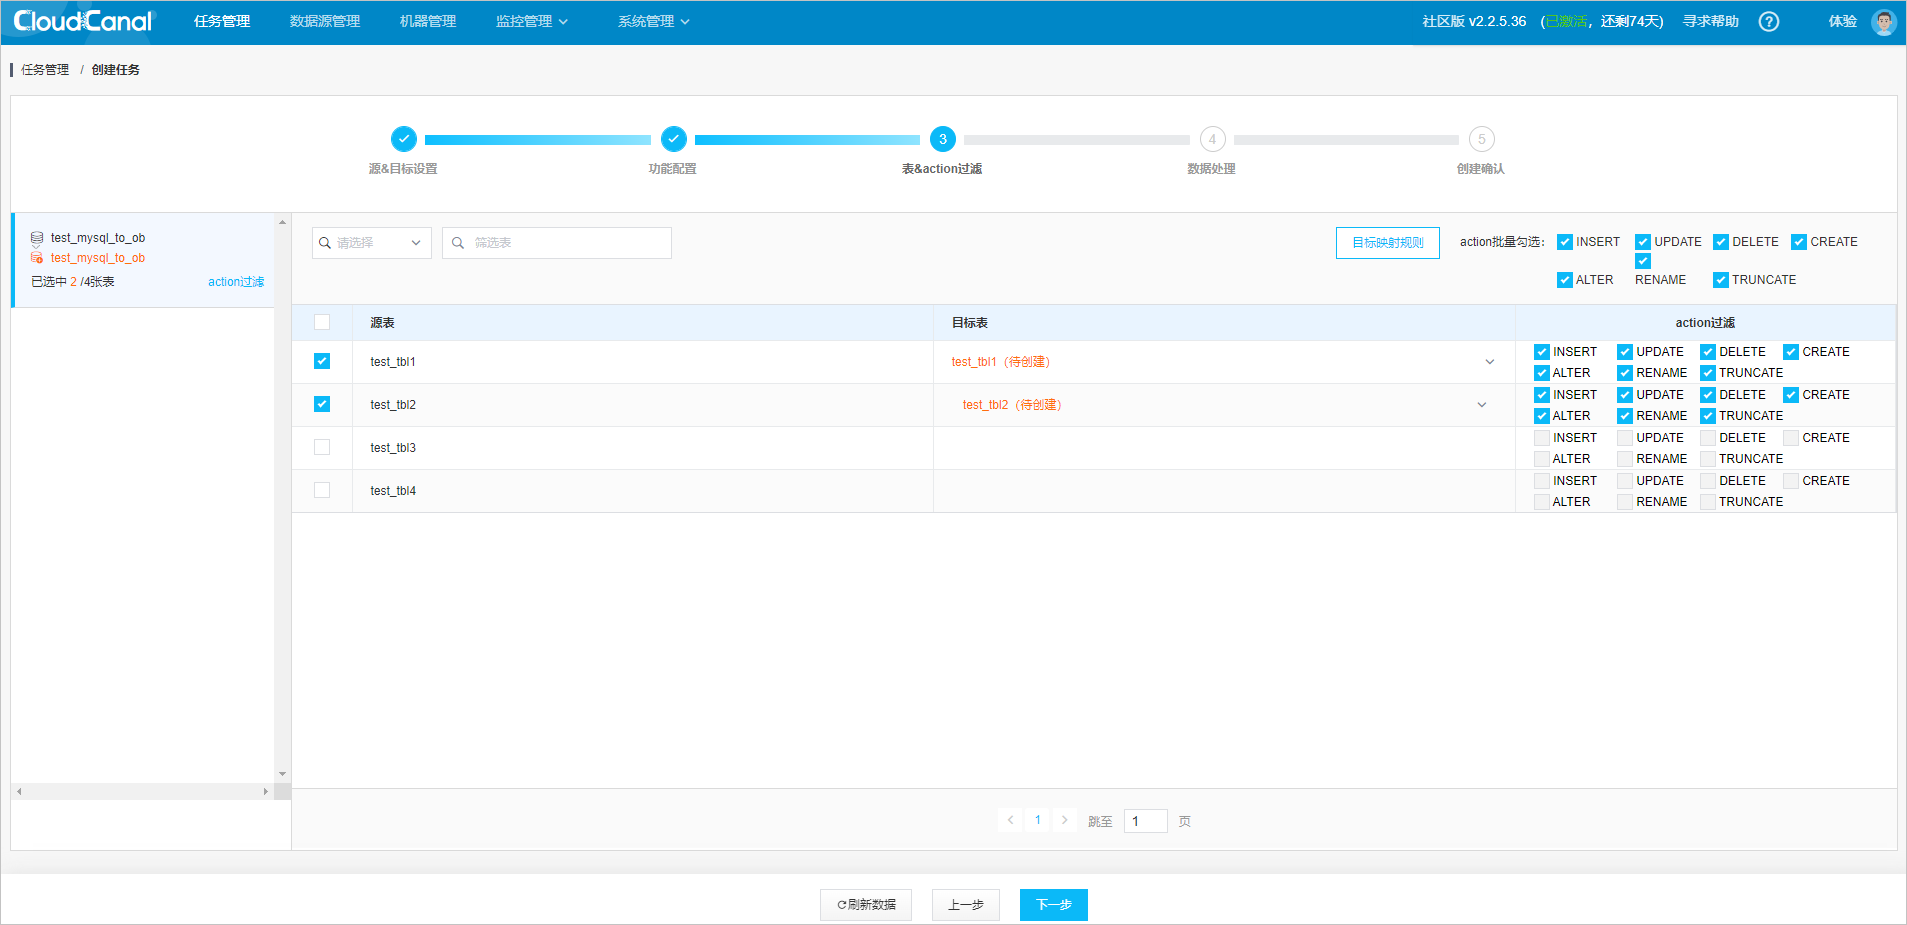
Filter tables and actions.
Select the tables to synchronize. To ensure consistency between the
UPDATEandDELETEoperations in the target database and those in the source database, make sure that the source tables have primary keys or unique constraints.Click Next.
Configure data processing.
Select the columns to synchronize from the tables.
Click Next.

Create the task.
On the last page, review the configurations and click Create.

View the task status
After the task is created, the system will migrate the schema, followed by the full data and then the incremental data. The progress bar will change accordingly. Return to the CloudCanal task management console, refresh the page, and view the real-time status of the task as it progresses from schema migration, data initialization, to data synchronization.

References
For more information about CloudCanal, see CloudCanal Documentation.