


SQL window editing area
The toolbar in the SQL window editing area supports the following features:

Feature |
Description |
|---|---|
 |
Run all SQL statements in the current SQL window. You can also run all SQL statements by using the shortcut key Ctrl+Enter. |
 |
Run all selected SQL statements or the SQL statement on the line where the cursor is located. You can also run the current statement by using the shortcut key Ctrl+Shift+Enter. |
 |
View the execution plan estimated by the system before executing the selected or the SQL statement on the line where the cursor is located (EXPLAIN operation result). The displayed execution data may be slightly different from the actual execution data. You can use this feature to evaluate the SQL statement.Click Execution Plan and then click View Formatting Information on the Plan Details tab to switch to the formatting display page. |
 |
Enter content in the search box to search in the script. After the search, you can enter content in the replace box to replace the searched content. |
 |
Roll back the script to the result of the previous operation. |
 |
After you execute the Undo operation, re-execute the operations before the undo. |
 |
Click this button to uniformly format (indent, line break, and highlight keywords, etc.) the selected SQL statements or all SQL statements in the current SQL window. |
 |
A batch copy conversion tool that is used to convert copied rows or columns into a specified format when you query data. After you paste the batch data to the SQL editing area, select the copied data and click Convert IN Values to convert the data into an IN ('A', 'B') format.
|
 |
Provides three effects: All Caps, All Lowercase, and Capitalize First Letter. Convert the selected statements in the script to the corresponding form. |
 |
Provides two effects: Add Indent and Delete Indent. Add or delete indents included in the selected statements in the script. |
 |
Provides two effects: Add Comment and Delete Comment. Convert the selected statements in the script to comments or to SQL statements. |
 |
|
 |
Supports searching for and switching databases based on keywords. |
Table objects
Manage table properties
Basic information
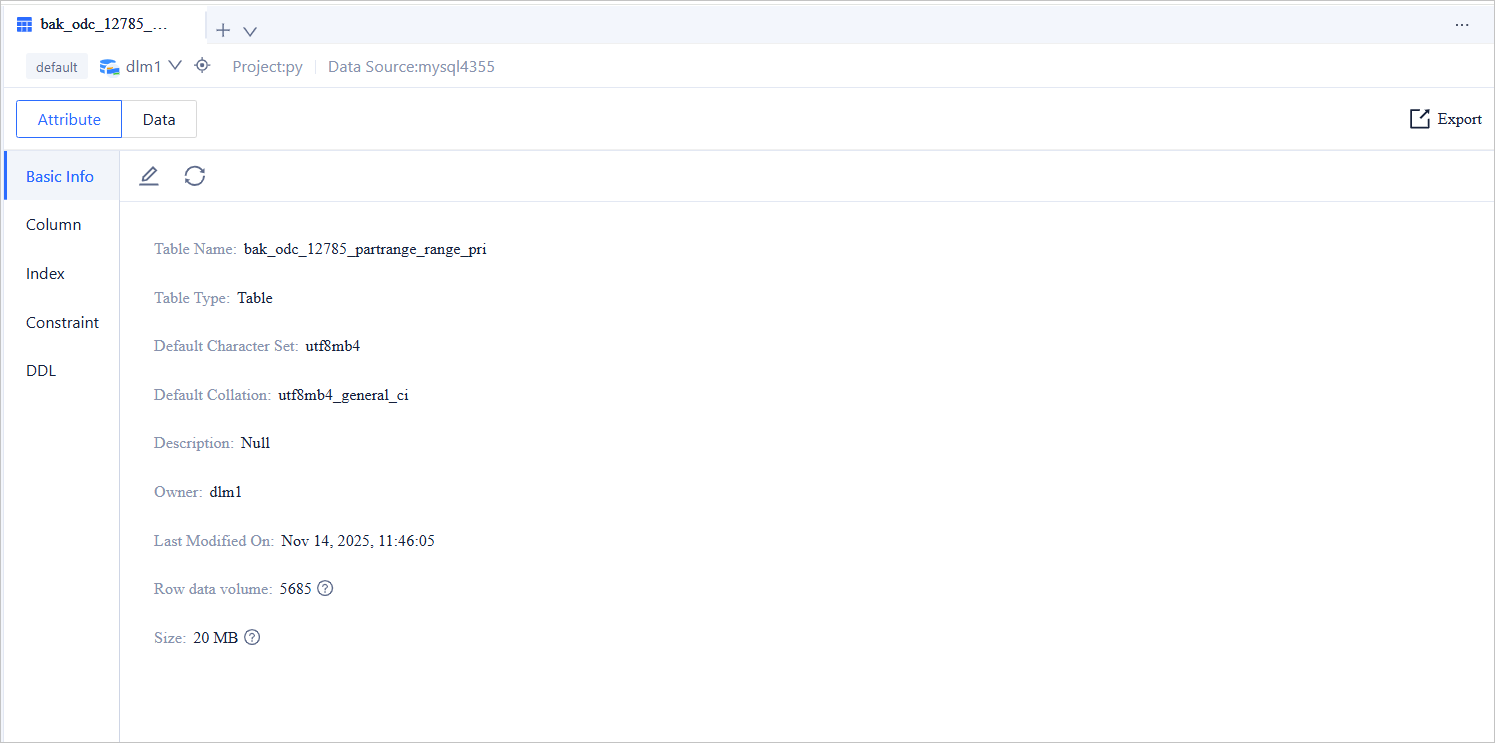
On the Properties tab, the basic information page provides the following buttons:
Button |
Description |
|---|---|
| Edit | Click |
| Refresh | Click |
| Export | Click the export icon in the upper-right corner to export single-table data. For more information, see Export schema and data. |
Column information
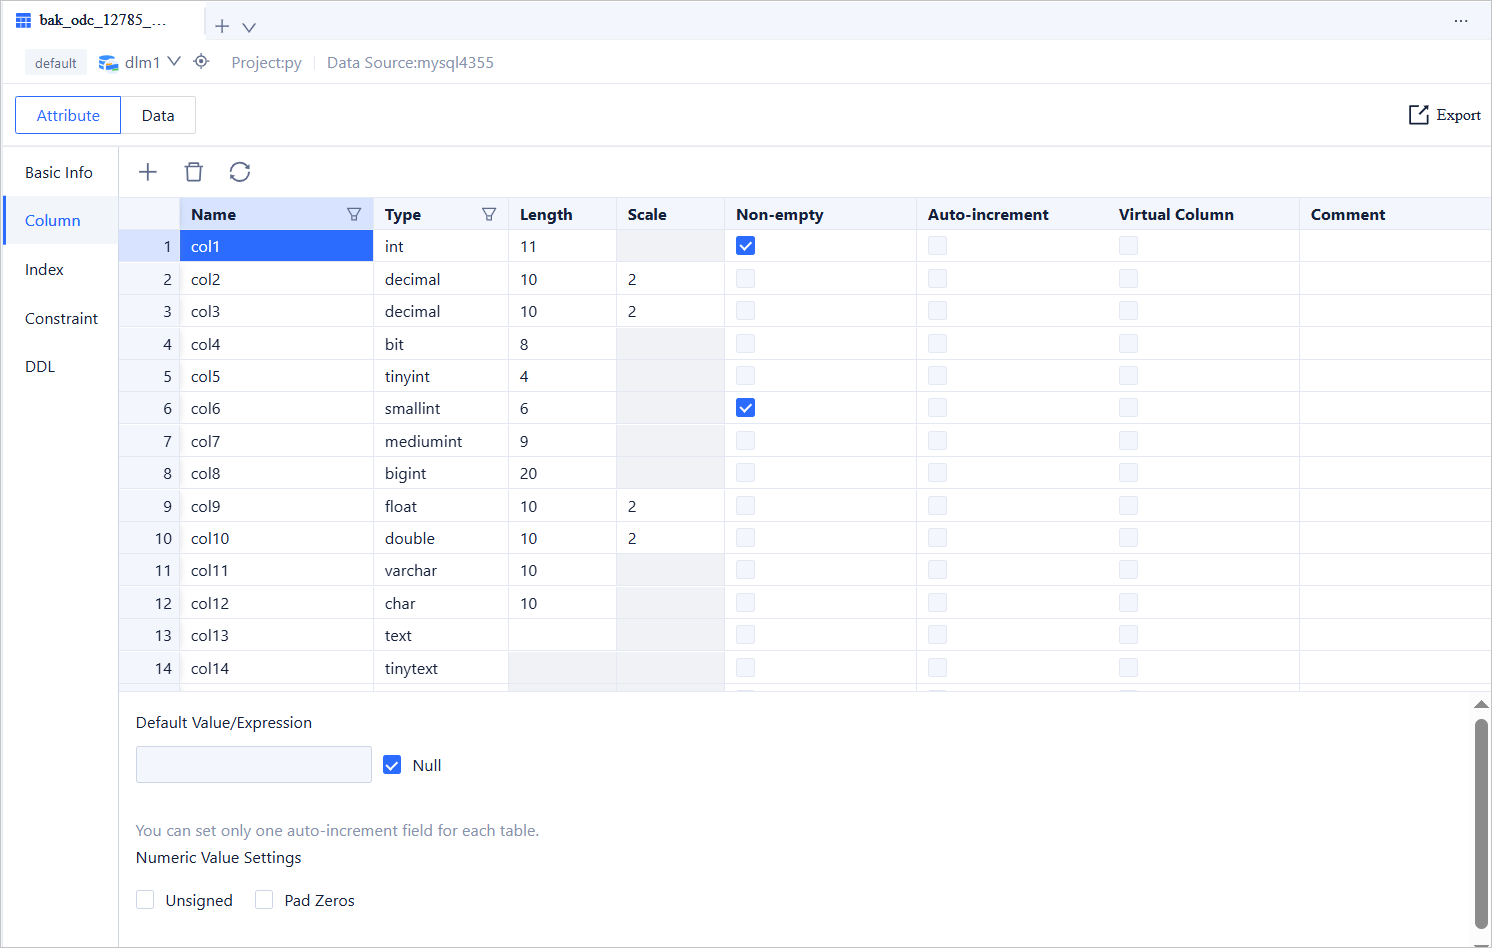
The toolbar provides the following buttons:
Button |
Description |
|---|---|
| New | Click + to add a field (column) to the table. |
| Delete | Click |
| Refresh | Click |
| Filter | Click |
| Export | Click the export icon in the upper-right corner to export single-table data. For more information, see Export schema and data. |
Index information
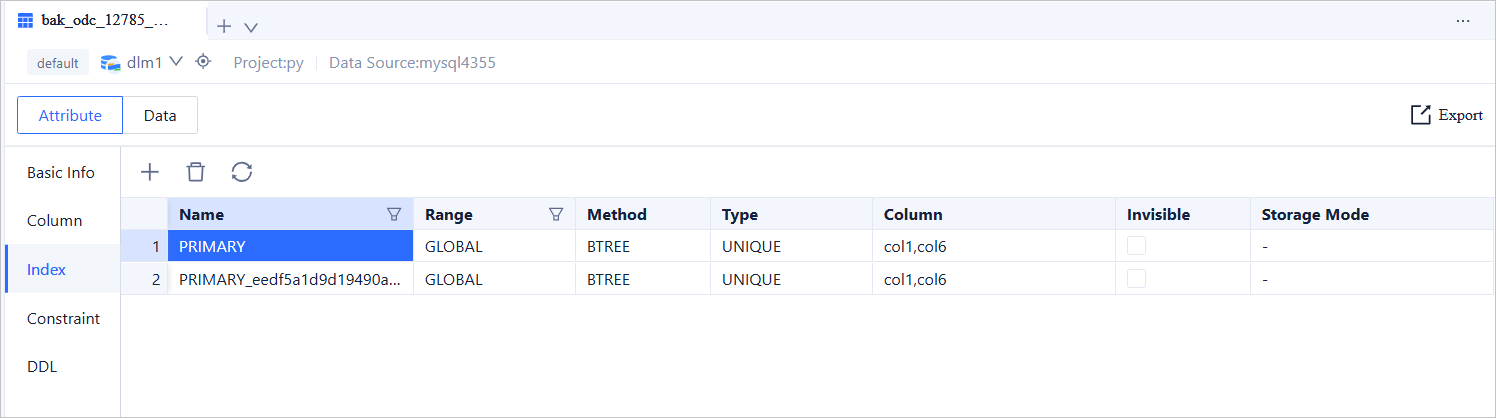
The toolbar provides the following buttons:
Button |
Description |
|---|---|
| New | Click + to add an index to the table. |
| Delete | Click |
| Refresh | Click |
| Filter | Click |
| Export | Click the export icon in the upper-right corner to export data from a single table. For more information, see Export schema and data. |
Constraint information
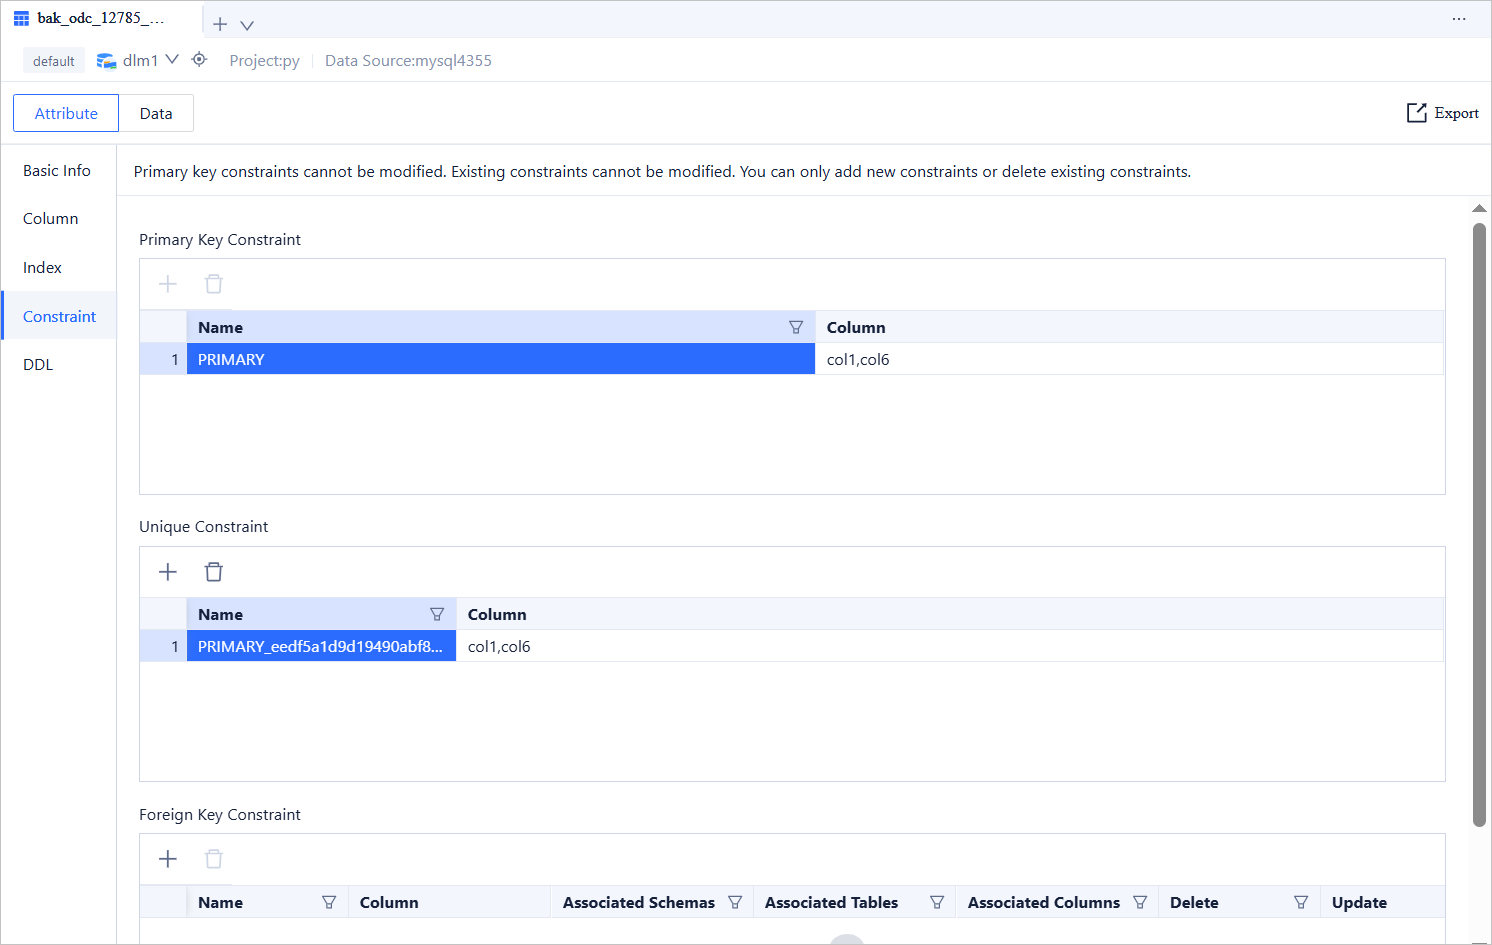
OceanBase Database supports different types of constraints in MySQL mode and Oracle mode. The required information for each type of constraint varies. Therefore, please specify the required information based on the selected constraint method as shown on the page.
The toolbar provides the following buttons:
Button |
Description |
|---|---|
| New | Click + to add a constraint to the table. |
| Delete | Click |
| Refresh | Click |
| Filter | Click |
| Export | Click the export icon in the upper-right corner to export data from a single table. For more information, see Export schema and data. |
Partitioning rules
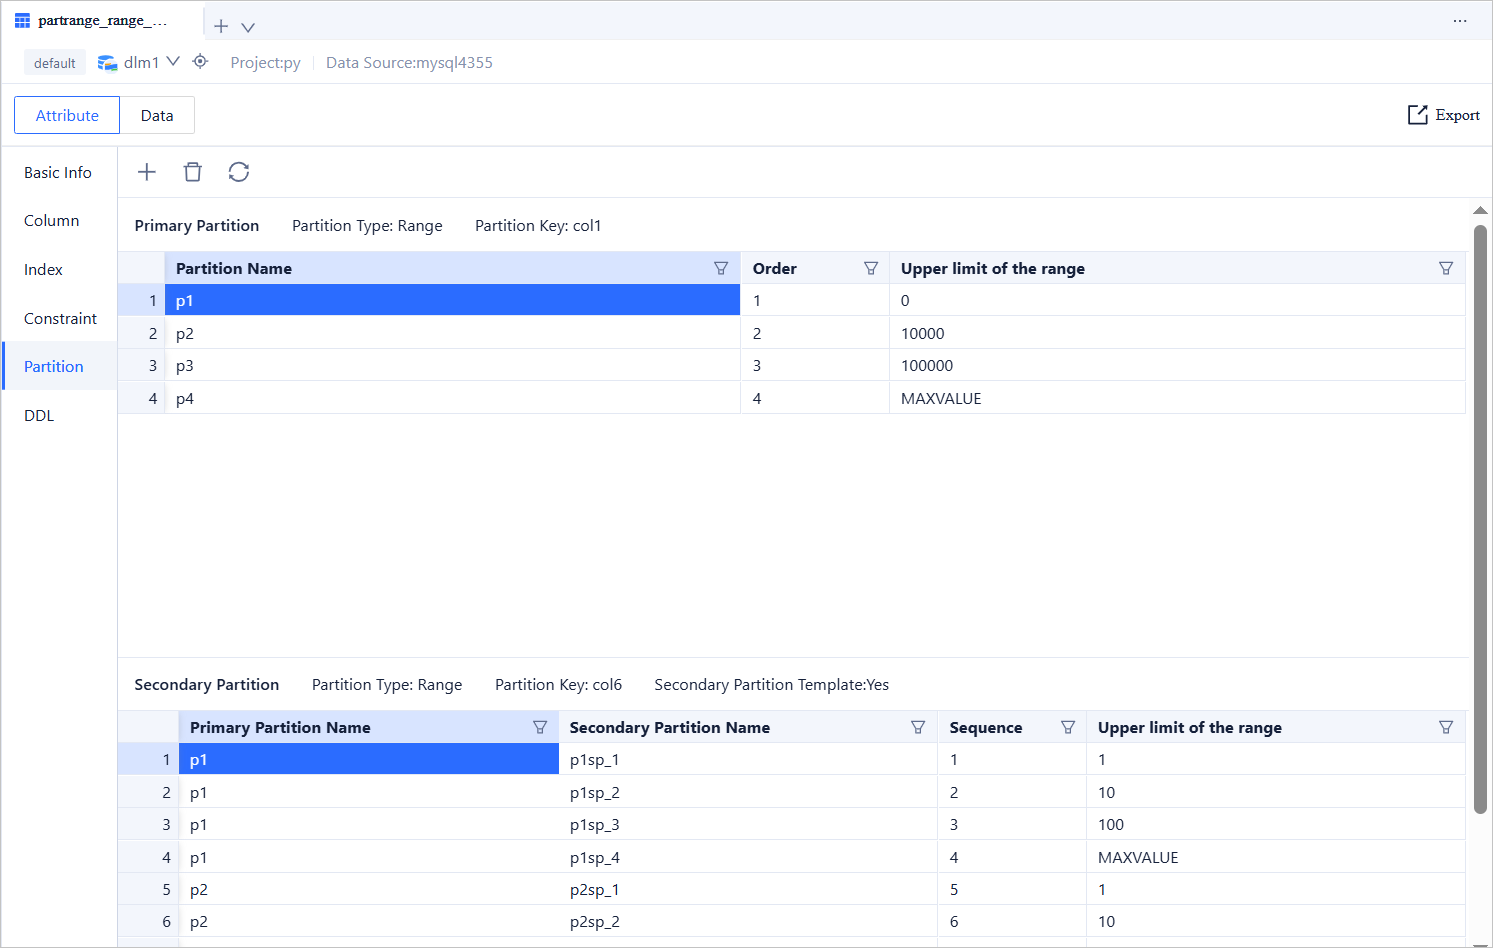
Click Partition in the left-side navigation pane of the attribute tab to view information such as Partition Name, Order, Partition Method, Expression (partitioning key in Oracle mode), Upper Bound Value, or Enumeration Value that is set when the table is created. Different partitioning methods display different partitioning information. The toolbar provides the following buttons:
Button |
Description |
|---|---|
| Delete | Click |
| Refresh | Click |
| Filter | Click  to filter or search for partition names, order, or upper bound values. to filter or search for partition names, order, or upper bound values. |
| Export | Click the export icon in the upper-right corner to export data from a single table. For more information, see Export schema and data. |
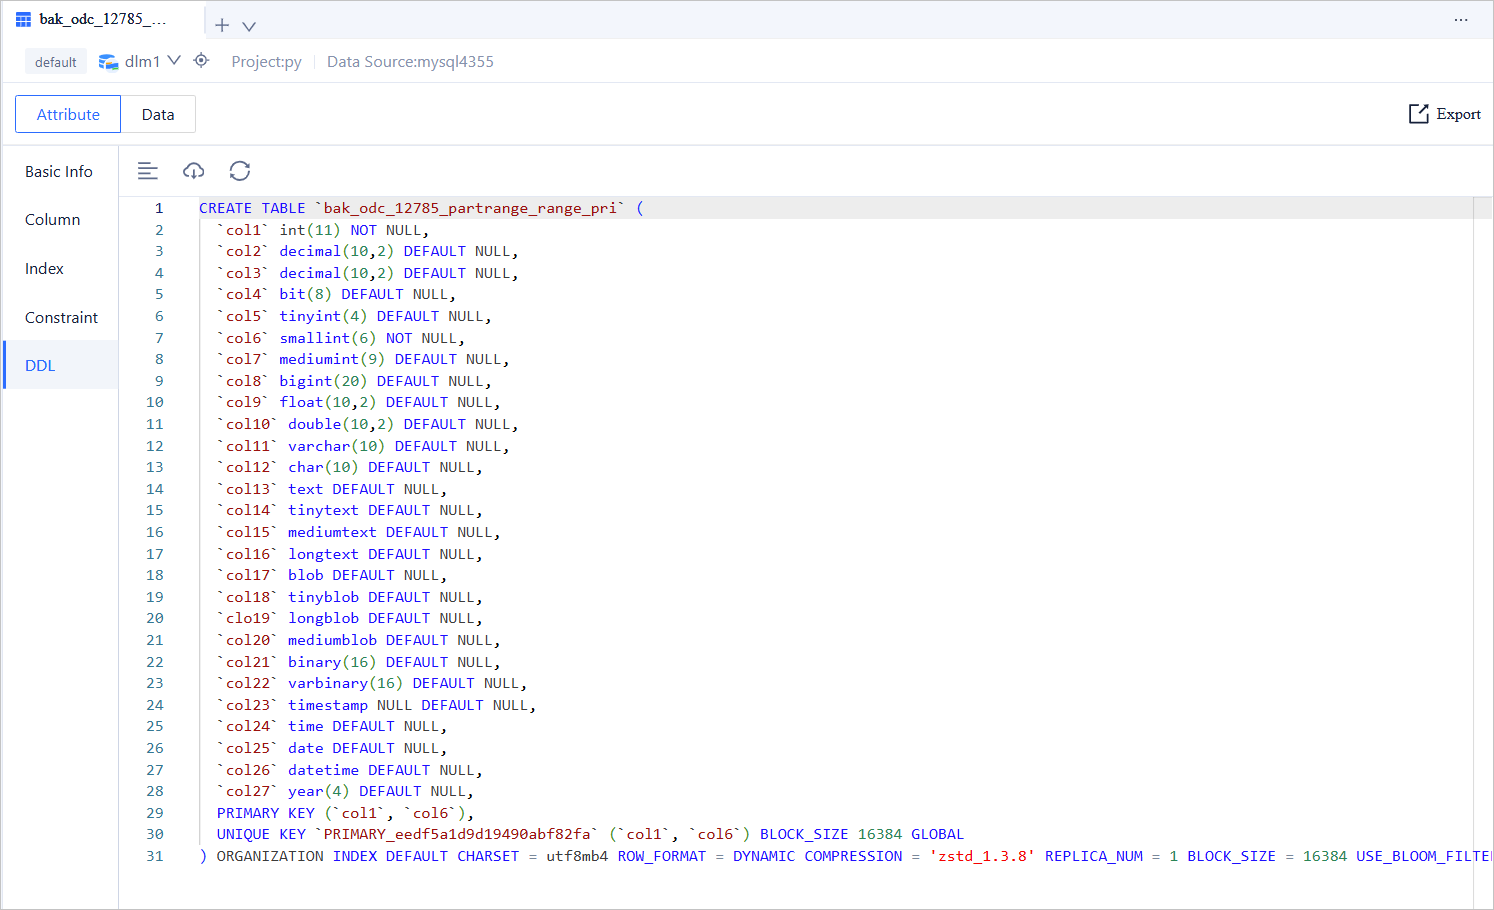
DDL information
The toolbar provides the following buttons:
Button |
Description |
|---|---|
| Format | Click |
| Download | Click |
| Refresh | Click |
| Export | Click the export icon in the upper-right corner to export data from a single table. For more information, see Export schema and data. |
Manage table data
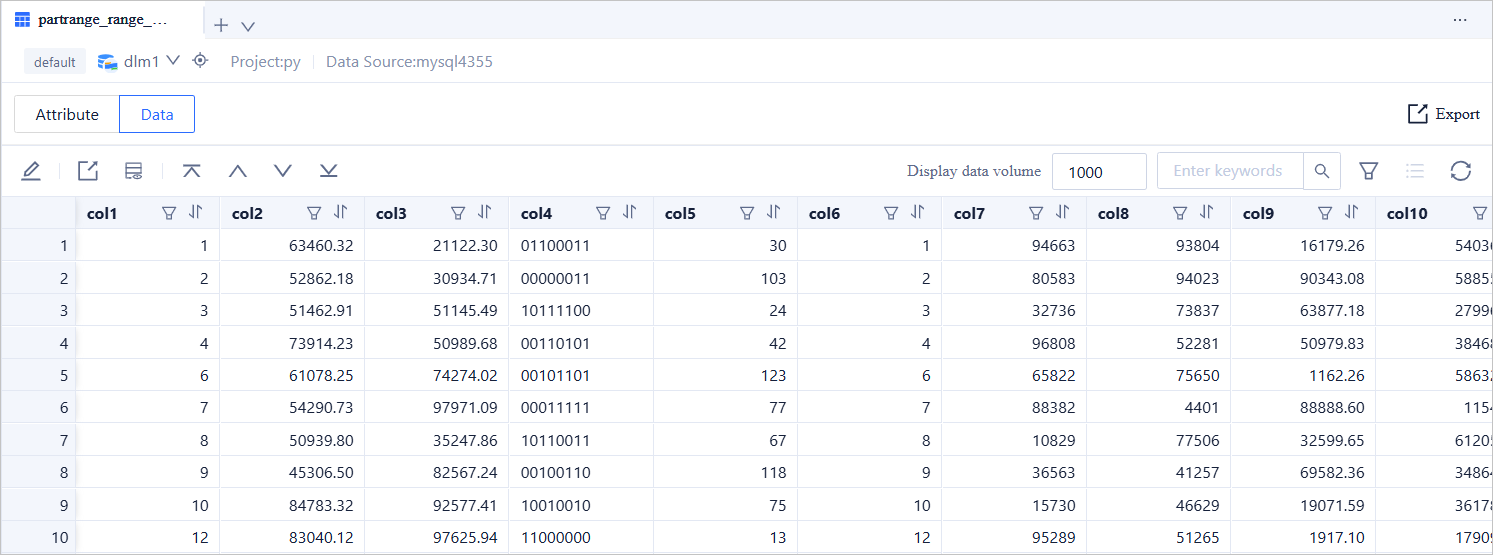
The toolbar on the Edit Result Set page provides the following buttons:
Feature |
Description |
|---|---|
 |
Edit the current result set. In edit mode, you can perform operations such as Add Row, Delete, Copy Current Row, Cancel, and Confirm Modification (when auto-commit is enabled, clicking this button automatically commits the transaction). |
|
View the estimated execution plan of the selected or currently highlighted SQL statement before it is executed (EXPLAIN operation results). The displayed execution data may differ slightly from the actual data after execution. You can use this feature to evaluate the SQL statement.Click Execution Plan to view the execution plan details on the Plan Details tab. Then, click View Formatted Information to switch to the formatted display page. |
 |
View the full-chain trace details for the current SQL statement. Full-chain tracing helps quickly identify the execution time of SQL statements or transactions at each node, making it easier to locate anomalies.
NoteOnly OceanBase Database V4.1.0 and later versions support viewing full-chain traces. |
 |
Enter keywords in the search box to query the desired results. |
 |
Filter the columns displayed on the page. |
 |
Display the selected data in a table format. On the column mode page, you can switch between rows. For scenarios with a large number of columns, column mode provides a convenient way to view row data. Here are the steps:
|
View objects

The following buttons are available in the toolbar of the editing page:
Button |
Description |
|---|---|
| Format | Click this button to uniformly format the selected SQL statements or all SQL statements in the current SQL window (such as indentation, line breaks, and keyword highlighting). |
| Find/Replace | Enter content in the search box to search in the script. After searching, you can enter content in the replacement box to replace the found content. |
| Undo | Reverts the script to the result of the previous operation. |
| Redo | Executes the Undo operation and then re-executes the operation before the undo. |
| Case Sensitivity | Provides three effects: All Caps, All Lowercase, and Capitalize First Letter, which convert the selected statements in the script to the corresponding case. |
| Indent | Provides two effects: Add Indent and Remove Indent, which add or remove indentation from the selected statements in the script. |
| Comments | Provides two effects: Add Comment and Delete Comment, which convert the selected statements in the script to comments or back to SQL statements. |
| IN Value Conversion | Converts values in the format A B to the format ('A', 'B'). |
| Previous Step | Returns to the Create View page, where you can continue to edit or modify the specified values on the Basic Info, Base Table Selection, and Field Selection tabs. |
Function objects
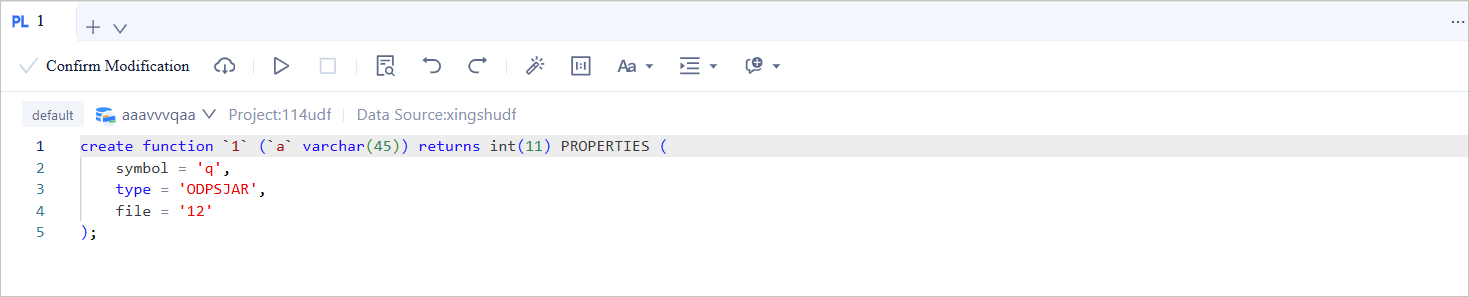
The toolbar on the edit function page provides the following buttons:
Feature |
Description |
|---|---|
| Confirm Modification | Click this button to update the current modification. |
 |
Download the SQL file of the function object. |
 |
Run the current function. |
 |
Compile the target function. |
 |
Enter content in the search box to search in the script. After searching, you can enter content in the replacement box to replace the searched content. |
 |
Roll back the script to the result of the previous operation. |
 |
After executing the Undo operation, re-execute the operations before the undo. |
 |
Click this button to uniformly format the selected SQL statements or all SQL statements in the current SQL window (such as indentation, line breaks, and keyword highlighting). |
 |
Batch copy conversion tool, suitable for converting the copied rows or columns when querying data. After pasting the batch data into the SQL editing area, select the copied data and click the IN Value Conversion button to convert it into the in('A','B') format.
|
 |
Provides three effects: All Uppercase, All Lowercase, and Capitalize First Letter, which convert the selected statements in the script to the corresponding form. |
 |
Provides two effects: Add Comment and Delete Comment, which convert the selected statements in the script to comments or to SQL statements. |
 |
Provides two effects: Add Indentation and Delete Indentation, which add or remove the included indentation from the selected statements in the script. |
Stored procedure Objects

The following buttons are provided in the toolbar on the editing page:
Feature |
Description |
|---|---|
| Confirm Modification | Click this button to update the current modification. |
|
Download the SQL file of the stored procedure object. |
|
Run the current stored procedure. |
|
Compile the target stored procedure. |
|
Enter content in the search box to search in the script, and enter content in the replace box to replace the found content. |
|
Revert the script to the result of the previous operation. |
|
After executing the Undo operation, re-execute the operations before the undo. |
|
Click this button to uniformly format the selected SQL statements or all SQL statements in the current SQL window (such as indentation, line breaks, and keyword highlighting). |
|
Batch copy conversion tool for formatting copied rows or column results when querying data. After pasting batch data into the SQL editing area, select the copied data and click the IN Value Conversion button to convert it into the IN ('A', 'B') format.
|
|
Provides three effects: All Uppercase, All Lowercase, and Capitalize First Letter. These effects convert the selected statements in the script to the corresponding format. |
|
Provides two effects: Add Comment and Delete Comment. These effects convert the selected statements in the script to comments or back to SQL statements. |
|
Provides two effects: Add Indentation and Delete Indentation. These effects add or remove indentation from the selected statements in the script. |
Trigger objects
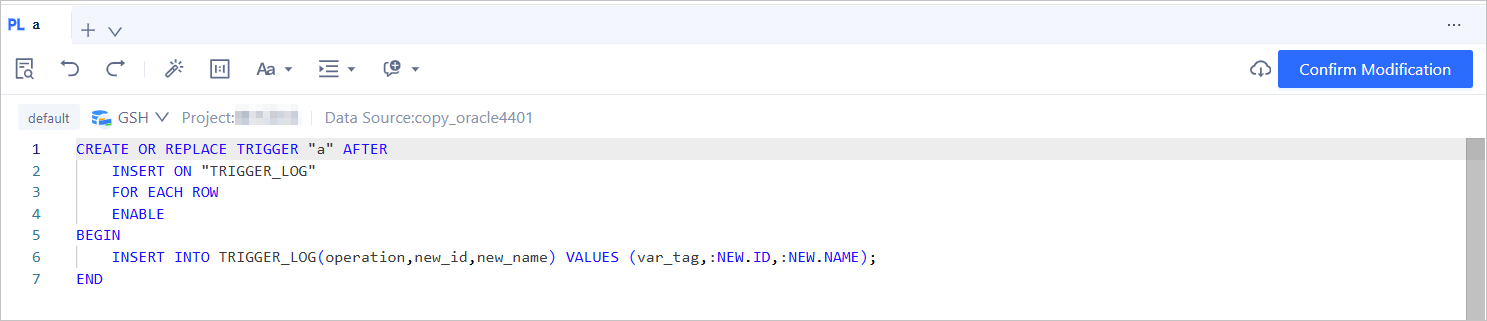
The following buttons are provided in the toolbar of the editing page:
Feature |
Description |
|---|---|
| Confirm Modification | Click this button to update the current modification. |
|
Enter content in the search box to search in the script. After the search, you can enter content in the replace box to replace the searched content. |
|
Roll back the script to the result of the previous operation. |
|
After you execute the Undo operation, re-execute the operations before the undo. |
|
Click this button to uniformly format (indent, line break, and highlight keywords, etc.) the selected SQL statements or all SQL statements in the current SQL window. |
|
A batch copy conversion tool that is used to convert copied rows or columns into a specified format when you query data. After you paste the batch data to the SQL editing area, select the copied data and click Convert IN Values to convert the data into an IN ('A', 'B') format.
|
|
Provides three effects: All Caps, All Lowercase, and Capitalize First Letter. Convert the selected statements in the script to the corresponding form. |
|
Provides two effects: Add Comment and Delete Comment. Convert the selected statements in the script to comments or to SQL statements. |
|
Provides two effects: Add Indent and Delete Indent. Add or delete indents included in the selected statements in the script. |
Types

The toolbar on the Create Type page provides the following buttons:
Feature |
Description |
|---|---|
|
Enter content in the search box to search in the script. After the search, you can enter content in the replace box to replace the searched content. |
|
Roll back the script to the result of the previous operation. |
|
After you execute the Undo operation, re-execute the operations before the undo. |
|
Click this button to uniformly format (indent, line break, and highlight keywords, etc.) the selected SQL statements or all SQL statements in the current SQL window. |
|
A batch copy conversion tool that is used to convert copied rows or columns into a specified format when you query data. After you paste the batch data to the SQL editing area, select the copied data and click Convert IN Values to convert the data into an IN ('A', 'B') format.
|
|
Provides three effects: All Caps, All Lowercase, and Capitalize First Letter. Convert the selected statements in the script to the corresponding form. |
|
Provides two effects: Add Comment and Delete Comment. Convert the selected statements in the script to comments or to SQL statements. |
|
Provides two effects: Add Indent and Delete Indent. Add or delete indents included in the selected statements in the script. |