


This topic describes how to use OceanBase Migration Service (OMS) to migrate data from a MySQL tenant of OceanBase Database, which can be a physical data source or an ApsaraDB for OceanBase data source, to a DB2 LUW database.
Prerequisites
You have created dedicated database users in the source MySQL tenant of OceanBase Database and the destination DB2 LUW database for data migration and granted the corresponding privileges to the users. For more information, see Create a database user.
You have configured log retention of OceanBase Database for at least one day in case of unexpected pullback.
Limitations
Limitations on the source database
Do not perform DDL operations that modify database or table schemas during schema migration or full data migration. Otherwise, the data migration project may be interrupted.
DB2 LUW 10.1, 10.5, 11.1, and 11.5 for Linux and AIX are supported. OceanBase Database V2.2.7x, V3.1.0, and V3.2.x are supported.
OMS cannot migrate a table without a primary key from a MySQL tenant of OceanBase Database to a DB2 LUW database.
In an ARM CPU architecture, OMS does not support reverse incremental migration from a MySQL tenant of OceanBase Database to a DB2 LUW database.
If the destination is a database, OMS does not support triggers in the destination database. If triggers exist in the destination database, the data migration may fail.
If the UTF-8 character set is used in the source, we recommend that you use a compatible character set, such as UTF-8 or UTF-16, in the destination to avoid garbled characters.
Data source identifiers and user accounts must be globally unique in OMS.
If temporary tables exist in the MySQL tenant of OceanBase Database of a version earlier than V4.0.0, full migration fails.
OMS supports the migration of only objects whose database name, table name, and column name are ASCII-encoded and do not contain special characters. The special characters are spaces, line breaks, and the following characters:
. | " ' ` ( ) = ; / & \.OMS does not support a standby OceanBase database as the source.
Length limitations
The data of the CHAR or BINARY type cannot exceed 255 bytes in length in a DB2 LUW database. If the data of the CHAR or BINARY type written to a MySQL tenant of OceanBase Database exceeds 255 bytes, OMS reports an error for the data migration project.
The data of the VARCHAR or BINARY type cannot exceed 32 KB in length in a DB2 LUW database. If the data of the VARCHAR or BINARY type written to a MySQL tenant of OceanBase Database exceeds 32 KB, OMS reports an error for the data migration project.
The Decimal(dp, ds) type in a DB2 LUW database is equivalent to the NUMERIC type in a MySQL tenant of OceanBase Database. The length of dp cannot exceed 31 and must be greater than that of ds.
The number written to a MySQL tenant of OceanBase Database cannot exceed the maximum allowed number. By default, the data of the NUMERIC, INT, SMALLINT, and NUMBER(*, s) types is 38 bytes in length in a MySQL tenant of OceanBase Database. You need to explicitly define NUMBER(p,s) to a length that is compatible with the business application and the source and destination databases.
The data of the NCHAR type cannot exceed 63 bytes in length in a DB2 LUW database or 2,000 bytes in a MySQL tenant of OceanBase Database. Therefore, if a field contains data of the NCHAR type exceeding 63 bytes in a MySQL tenant of OceanBase Database, the field is truncated when it is migrated to a DB2 LUW database. This causes data loss.
Data type limitations
The data of the TIME type in a DB2 LUW database cannot be migrated as the partitioning key.
The data of the XML type is not supported.
We do not recommend that you use CODEUNITS16 or CODEUNITS32 to define or store multi-byte data of the NCHAR, GRAPHIC, or other types.
The default value of the BLOB-type data cannot be modified.
OMS does not support primary keys that contain data of the FLOAT or DOUBLE type.
Spaces on the right side of data of the VARCHAR and VARGRAPHIC types are not compared in a DB2 LUW database. If the primary key lacks a space during incremental data synchronization, the data can become inconsistent. This causes data loss in the destination database.
Note that when a data type in a DB2 LUW database is converted to the LOB type in a MySQL tenant of OceanBase Database, the data of the LOB type cannot exceed 48 MB in size.
Case sensitivity limitations
If the data in the source MySQL tenant of OceanBase Database is case-sensitive, OMS does not support the migration of the data to a DB2 LUW database.
If the data in the source MySQL tenant of OceanBase Database is case-insensitive and the database names and table names are in lowercase, the database names and table names of the destination DB2 LUW database during schema migration or DDL migration are also in lowercase by default.
In a project for migrating data from a MySQL tenant of OceanBase Database of a version earlier than V3.2.x to a DB2 LUW database, if the source table is a multi-partition table with a global unique index and you update the values of the partitioning key of the table, data may be lost during migration.
Considerations
If you use OceanBase Database V4.x, we recommend that you enable log archiving. If you enable log archiving, OMS implements incremental synchronization by consuming archive logs after clogs are recycled. For more information about how to enable log archiving, see the Log archive chapter.
When DDL synchronization is disabled, if you change the unique index of the destination, you must restart the Incr-Sync component. Otherwise, the data may be inconsistent.
If the clocks between nodes or between the client and the server are out of synchronization, the latency may be inaccurate during incremental synchronization or reverse incremental migration.
For example, if the clock is earlier than the standard time, the latency can be negative. If the clock is later than the standard time, the latency can be positive.
Take note of the following points if you want to perform data merge migration:
We recommend that you configure the mappings between the source and destination databases by specifying matching rules.
We recommend that you manually create schemas at the destination. If you use OMS to create schemas, skip failed objects in the schema migration step.
In a data migration project where the source is an OceanBase database and DDL synchronization is enabled, if a RENAME operation is performed on a table in the source, we recommend that you restart the project to avoid data loss during incremental synchronization.
If you select only Incremental Synchronization when you create a data migration project, OMS requires that the local incremental logs in the source database be retained for more than 48 hours.
If you select Full Data Migration and Incremental Synchronization when you create a data migration project, OMS requires that the local incremental logs in the source database be retained for at least 7 days. Otherwise, the data migration project will fail or the data in the source and destination databases will be inconsistent because OMS cannot obtain incremental logs.
Data type mappings
MySQL tenant of OceanBase Database |
DB2 LUW database |
|---|---|
| INTEGER | INTEGER. The value range is -2147483648 to 2147483647. |
| TINYINT | SMALLINT. The value range is -128 to 127. |
| SMALLINT | SMALLINT. The value range is -32768 to 32767. |
| MEDIUMINT | INTEGER. The value range is -8388608 to 8388607. |
| BIGINT | BIGINT. The value range is -9223372036854775808 to 9223372036854775807. |
| FLOAT | FLOAT |
| DOUBLE | DOUBLE |
| REAL | DOUBLE |
| DECIMAL | DECIMAL |
| NUMERIC | NUMERIC |
| BOOLEAN | BOOLEAN |
| DATE | DATE |
| DATETIME | TIMESTAMP |
| TIMESTAMP(n) | TIMESTAMP(n) The maximum precision for a MySQL tenant of OceanBase Database is 6, and that for a DB2 LUW database is 12. |
| TIME | TIME |
| YEAR | INTEGER |
| CHAR |
|
| VARCHAR |
|
| TINYBLOB | BLOB(255) |
| BLOB | BLOB(65K) |
| MEDIUMBLOB | BLOB(16M) |
| LONGBLOB | BLOB(2G) |
| TINYTEXT | CLOB(255) |
| TEXT | CLOB(65K) |
| MEDIUMTEXT | CLOB(16M) |
| LONGTEXT | CLOB(2G) |
| BINARY |
|
| VARBINARY |
|
| BIT(n) |
|
Procedure
Create a data migration project.

Log on to the OMS console.
In the left-side navigation pane, click Data Migration.
On the Data Migration page, click Create Migration Project in the upper-right corner.
On the Select Source and Destination page, configure the parameters.
ParameterDescriptionMigration Project Name We recommend that you set it to a combination of digits and letters. It must not contain any spaces and cannot exceed 64 characters in length. Tag (Optional) Click the field and select a target tag from the drop-down list. You can also click Manage Tags to create, modify, and delete tags. For more information, see Use tags to manage data migration projects. Source If you have created a MySQL tenant of OceanBase Database data source, which can be a physical data source or an ApsaraDB for OceanBase data source, select it from the drop-down list. Only tables with a primary key (tables with the primary key constraint or non-null unique key constraint) and tables with a unique key are displayed. If you have not created such a data source, click New Data Source in the drop-down list and create one in the dialog box that appears on the right. For more information about the parameters, see Create a physical OceanBase data source or Create a public cloud OceanBase data source. Destination If you have created a DB2 LUW data source, select it from the drop-down list. If not, click New Data Source in the drop-down list and create one in the dialog box that appears on the right. For more information, see Create a DB2 LUW data source.
Notice
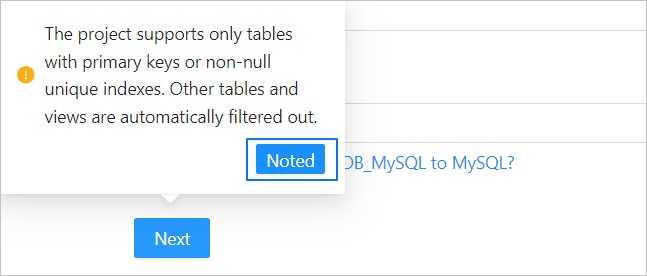
The column specified as the unique key in a DB2 LUW database must have the NOT NULL constraint.Click Next. In the dialog box that appears, click OK.
Note that this project supports only tables and views with a primary key or a non-null unique index and those without are automatically filtered out.
On the Select Migration Type page, configure the parameters.
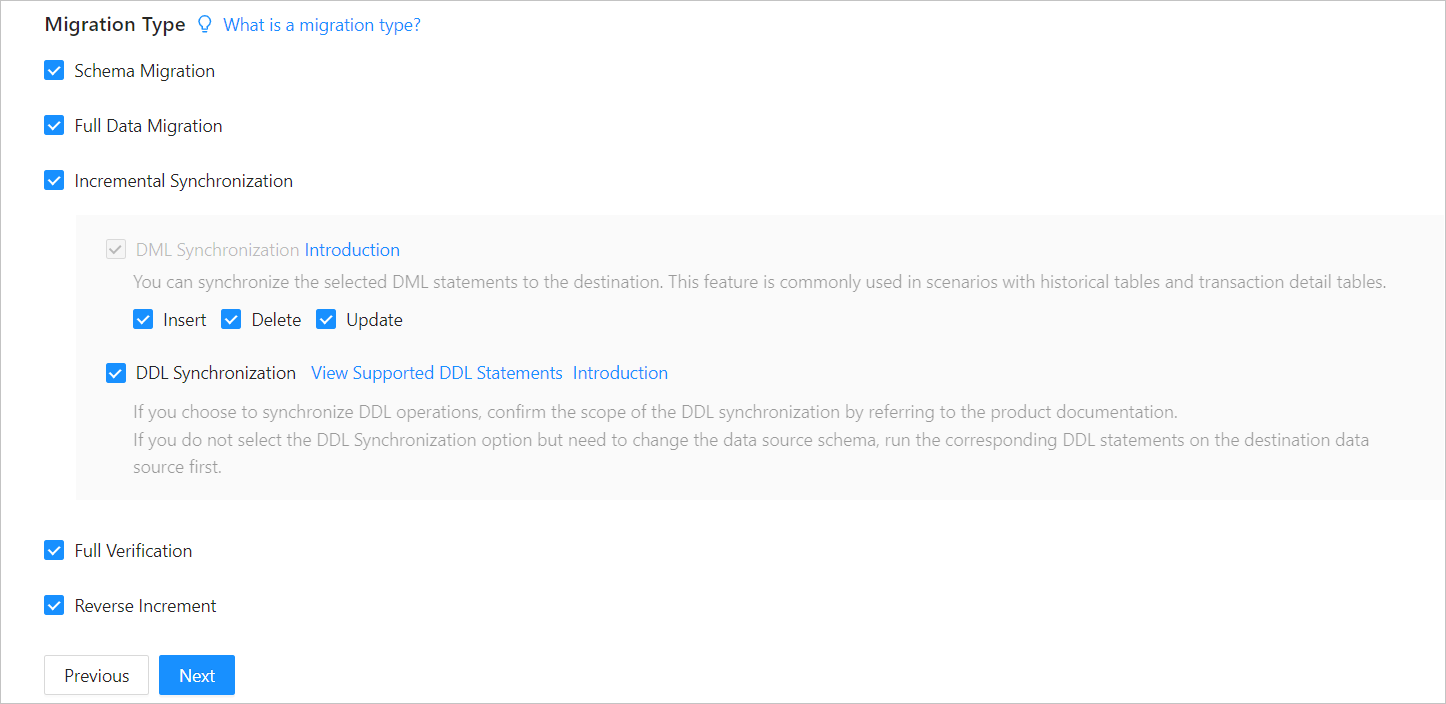
Options for Migration Type are Schema Migration, Full Data Migration, Incremental Synchronization, Full Verification, and Reverse Increment.
Migration typeDescriptionSchema migration When a schema migration task starts, OMS migrates the definitions of data objects, such as tables, indexes, constraints, comments, and views, from the source database to the destination database. Temporary tables are automatically filtered out. Full migration When a full migration task starts, OMS migrates the existing data from tables in the source database to the corresponding tables in the destination database. If you select Full Data Migration, we recommend that you collect the statistics of the MySQL tenant of OceanBase Database before the data migration. For more information, see Manually collect statistics. Incremental synchronization When an incremental synchronization task starts, OMS synchronizes changed data in the source database to the corresponding tables in the destination database. Data changes are data addition, modification, and deletion.
Options for Incremental Synchronization are DML Synchronization and DDL Synchronization. You can select the options as needed. For more information about DDL synchronization, see Synchronize DDL operations from a MySQL tenant of OceanBase Database to a DB2 LUW database.
During the incremental synchronization from a MySQL tenant of OceanBase Database to a DB2 LUW database, the comments are automatically filtered out. Incremental Synchronization has the following limitations:- If you select DDL Synchronization, when you perform a DDL operation that cannot be synchronized by OMS in the source database, data migration may be interrupted.
- If the DDL operation creates a new column, we recommend that you set the attribute of the column to NULL. Otherwise, data migration may be interrupted.
Full verification After the full data migration and incremental data synchronization are completed, OMS automatically initiates a full data verification task to verify the data tables in the source and destination databases. - If you select Full Verification, we recommend that you collect the statistics of the MySQL tenant of OceanBase Database and use the
RUNSTATSstatement to collect the statistics of the DB2 LUW database before the full verification. - If you have selected Incremental Synchronization but did not select all DML statements in the DML Synchronization section, OMS does not support full verification.
Reverse incremental migration When a reverse incremental migration task starts, OMS migrates the data changed in the destination database after the business switchover back to the source database in real time. You cannot select Reverse Increment in the following cases: - Data merge migration that involves multiple tables is enabled.
- Multiple source schemas map to the same destination schema.
(Optional) Click Next.
If you have selected Schema Migration or Incremental Synchronization but the related parameters are not configured for the source MySQL tenant of OceanBase Database, the More About Data Sources dialog box appears, prompting you to configure the related parameters. For more information about the parameters, see Create a physical OceanBase data source or Create a public cloud OceanBase data source.
After you configure the parameters, click Test Connection. After the test succeeds, click OK.
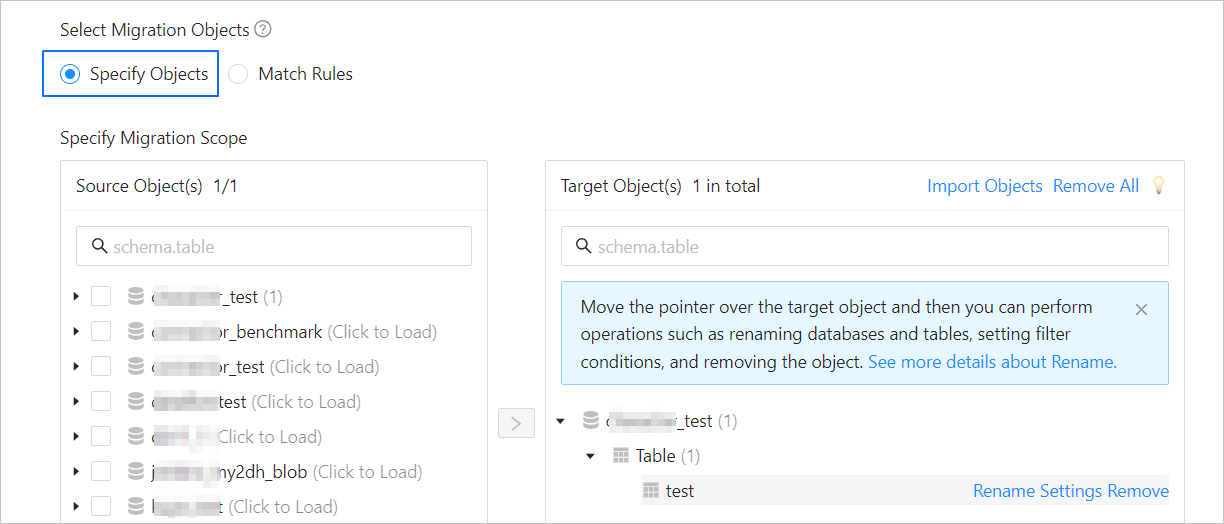
Click Next. On the Select Migration Objects page, specify the migration objects and migration scope.
You can select Specify Objects or Match Rules to specify the migration objects.
Select Specify Objects. Then select the objects to be migrated on the left and click > to add them to the list on the right. You can select tables and views of one or more databases as the migration objects.
Notice
The names of tables to be migrated, as well as the names of columns in the tables, must not contain Chinese characters.
If the database or table name contains a double dollar sign ($$), you cannot create the migration project.
After you select migration objects by using the Specify Objects option, the DDL operations take effect only for selected objects, and table creation is not supported.
OMS automatically filters out unsupported tables.
OMS also allows you to import objects from text, rename objects, set row filters, view column information, and remove a single object or all objects to be migrated.
 OperationDescription
Import objects - In the list on the right of the Specify Migration Scope section, click Import Objects in the upper-right corner.
- In the dialog box that appears, click OK.
Notice
This operation will overwrite previous selections. Proceed with caution. - In the Import Objects dialog box, import the objects to be migrated.
You can import CSV files to rename databases/tables and set row filtering conditions. For more information, see Download and import the settings of migration objects. - Click Validate.
- After the validation succeeds, click OK.
Rename objects OMS allows you to rename the migration objects. For more information, see Rename a migration or synchronization object. Configure settings OMS allows you to use the WHEREclause to filter rows. For more information, see Use SQL conditions to filter data.
You can also view column information of the migration object in the View Column section.Remove one or all objects During data mapping, OMS allows you to remove one or more selected objects to be migrated or synchronized to the destination. - To remove a single migration object:
In the list on the right of the Specify Migration Scope section, move the pointer over the target object, and click Remove. - To remove all migration objects:
In the list on the right of the Specify Migration Scope section, click Remove All in the upper-right corner. In the dialog box that appears, click OK.
Select Match Rules. For more information, see Configure matching rules for migration objects.
Click Next. On the Migration Options page, configure the following parameters.
Full migration
The following parameters are displayed only if you have selected Full Data Migration on the Select Migration Type page.
 ParameterDescription
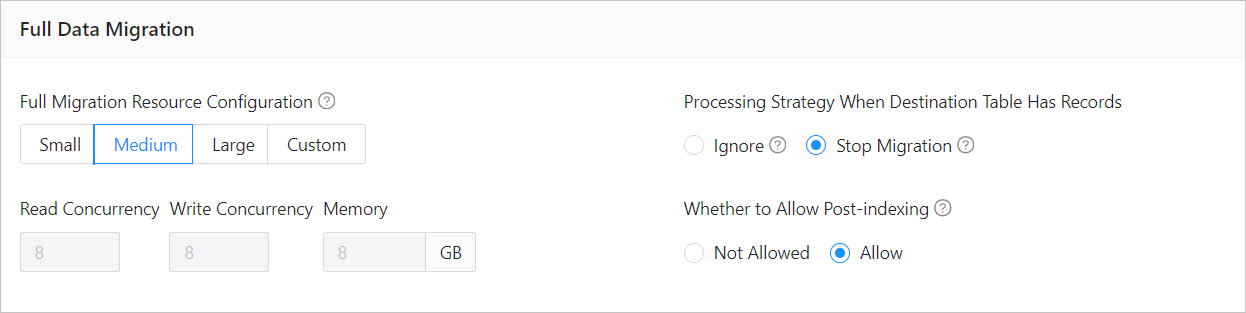
Full Migration Resource Configuration You can select Small, Medium, or Large to use the corresponding default values of Read Concurrency, Write Concurrency, and Memory. You can also customize the resource configurations for full migration. Through resource configuration for the Full-Import component, you can limit the resource consumption of a project in the full migration phase. Notice
In the case of custom configurations, the minimum value is 1, and only integers are supported.
Processing Strategy When Destination Table Has Records Valid values: Ignore and Stop Migration. - If you select Ignore, when the data to be written conflicts with the existing data of a destination table, OMS logs the conflicting data while retaining the existing data.
Notice
If you select Ignore, data is pulled in IN mode for full verification. In this case, the scenario where the destination contains more data than the source cannot be verified, and the verification efficiency will be decreased.
- If you select Stop Migration and a destination table contains records, an error is returned during full migration, indicating that the migration is not allowed. In this case, you must clear the data in the destination table before you can continue with the migration.
Notice
After an error is returned, if you click Resume in the dialog box, OMS ignores this error and continues to migrate data. Proceed with caution.
Whether to Allow Post-indexing Specifies whether to create indexes after the full migration is completed. Post-indexing can shorten the time required for full migration. For more information about the considerations on post-indexing, see the description below. Notice
This feature is supported only if you have selected both Schema Migration and Full Data Migration on the Select Migration Type page.
- Only non-unique key indexes can be created after the migration is completed.
- OceanBase Database V1.x does not support the post-indexing feature.
If post-indexing is allowed, we recommend that you adjust the parameters based on the hardware conditions of your OceanBase database and the current business traffic.
If you use OceanBase Database V4.x, adjust the following parameters of the
systenant and business tenants by using a CLI client.Adjust the parameters of the
systenant// parallel_servers_target specifies the queuing conditions for parallel queries on each server. // To maximize performance, we recommend that you set this parameter to a value greater than, for example, 1.5 times, the number of physical CPU cores. In addition, make sure that the value does not exceed 64, to prevent database kernels from contending for locks. set global parallel_servers_target = 64;Adjust the parameters of a business tenant
// Specify the limit on the file memory buffer size.
alter system set _temporary_file_io_area_size = '10' tenant = 'xxx';
// Disable throttling in V4.x.
alter system set sys_bkgd_net_percentage = 100;
If you use OceanBase Database V2.x or V3.x, adjust the following parameters of the
systenant by using a CLI client.// parallel_servers_target specifies the queuing conditions for parallel queries on each server. // To maximize performance, we recommend that you set this parameter to a value greater than, for example, 1.5 times, the number of physical CPU cores. In addition, make sure that the value does not exceed 64, to prevent database kernels from contending for locks. set global parallel_servers_target = 64; // data_copy_concurrency specifies the maximum number of concurrent data migration and replication tasks allowed in the system. alter system set data_copy_concurrency = 200;
- If you select Ignore, when the data to be written conflicts with the existing data of a destination table, OMS logs the conflicting data while retaining the existing data.
Incremental synchronization
The following parameters are displayed only if you have selected Incremental Synchronization on the Select Migration Type page.
 ParameterDescription
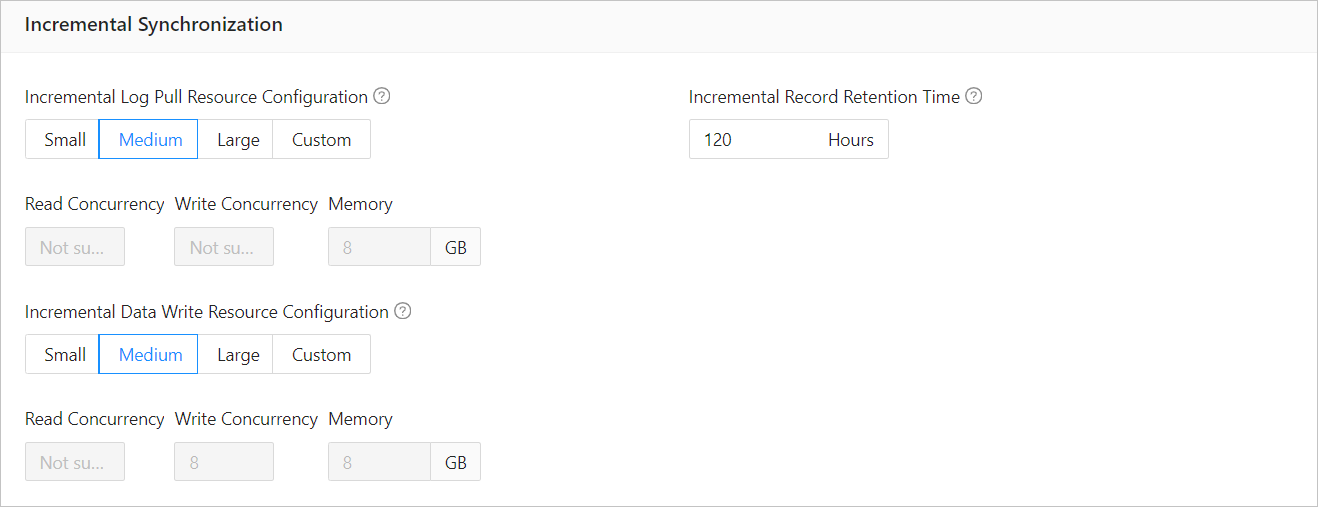
Incremental Log Pull Resource Configuration You can select Small, Medium, or Large to use the corresponding default value of Memory. You can also customize the resource configurations for incremental log pull. Through resource configuration for the Store component, you can limit the resource consumption of a project in log pull in the incremental synchronization phase. Notice
In the case of custom configurations, the minimum value is 1, and only integers are supported.
Incremental Data Write Resource Configuration You can select Small, Medium, or Large to use the corresponding default values of Write Concurrency and Memory. You can also customize the resource configurations for incremental data write. Through resource configuration for the Incr-Sync component, you can limit the resource consumption of a project in data writes in the incremental synchronization phase. Notice
In the case of custom configurations, the minimum value is 1, and only integers are supported.
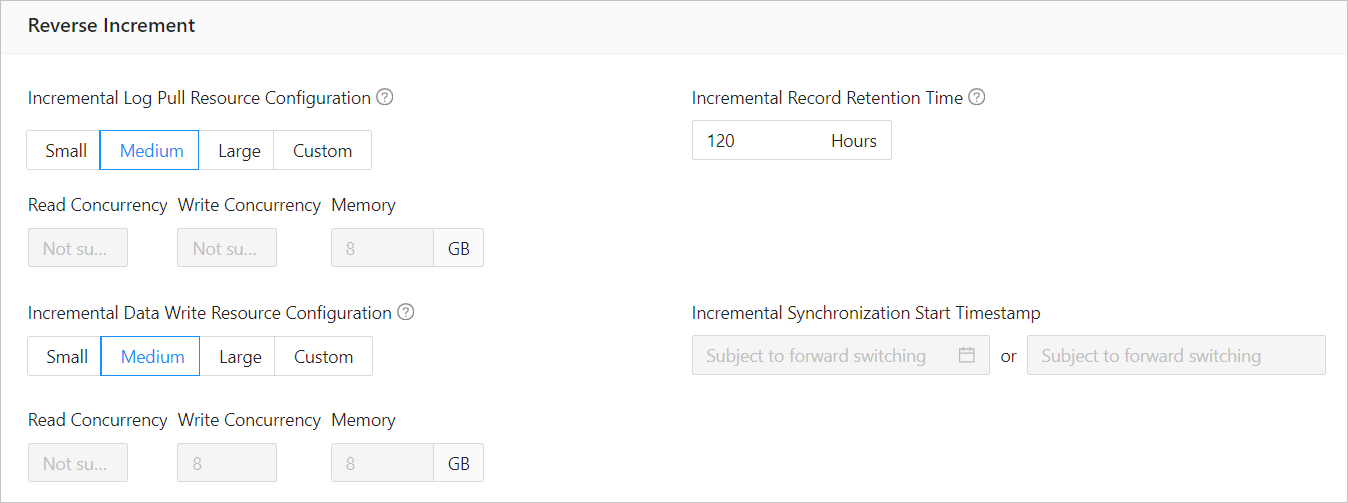
Incremental Record Retention Time The duration that incremental parsed files are cached in OMS. A longer retention period results in more disk space occupied by the Store component. Incremental Synchronization Start Timestamp - If you have set the migration type to Full Data Migration, this parameter is not displayed.
- If you have selected Incremental Synchronization but not Full Data Migration, specify a point in time after which the data is to be synchronized. The default value is the current system time. For more information, see Set an incremental synchronization timestamp.
Reverse incremental migration
The following parameters are displayed only if you have selected Reverse Increment on the Select Migration Type page. The parameters for reverse incremental migration are consistent with those for incremental synchronization. You can select Reuse Incremental Synchronization Configuration in the upper-right corner.
Full verification
The following parameters are displayed only if you have selected Full Verification on the Select Migration Type page.
 ParameterDescription
Full Verification Resource Configuration You can select Small, Medium, or Large to use the corresponding default values of Read Concurrency and Memory. You can also customize the resource configurations for full verification. Through resource configuration for the Full-Verification component, you can limit the resource consumption of a project in the full verification phase. Notice
In the case of custom configurations, the minimum value is 1, and only integers are supported.
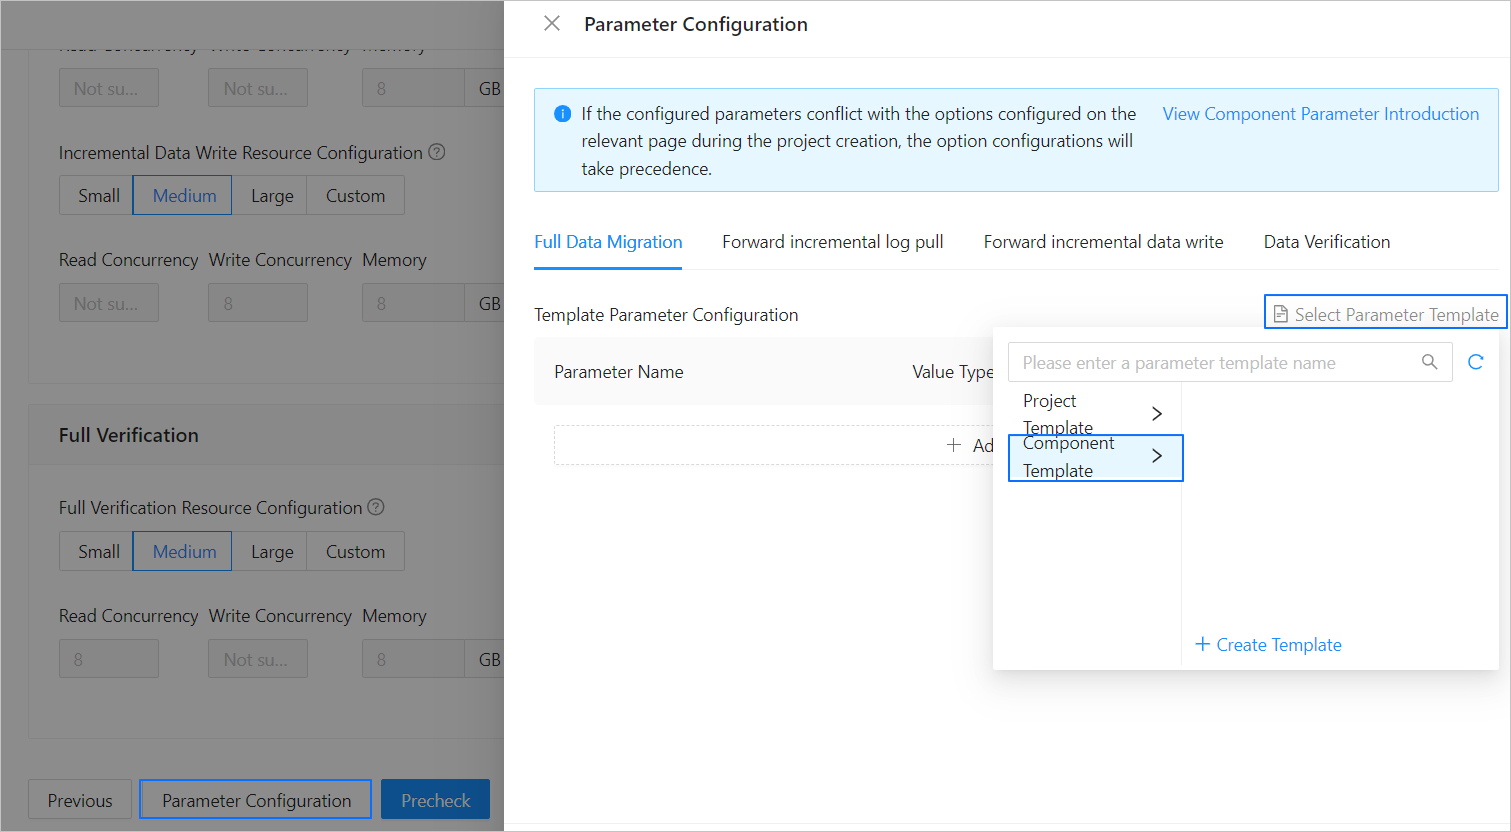
If the parameter settings on the page cannot meet your requirements, you can click Parameter Configuration in the lower part of the page to configure more specific settings. You can also reference an existing project or component template.
Click Precheck to start a precheck on the data migration project.
During the precheck, OMS checks the read and write privileges of the database users and the network connections of the databases. The data migration project can be started only after it passes all check items. You can perform one of the following operations if an error is returned during the precheck:
Identify and troubleshoot the problem and then perform the precheck again.
Click Skip in the Actions column of a failed precheck item. In the dialog box that appears, you can view the prompt for the consequences of the operation and click OK.
Click Start Project. If you do not need to start the project now, click Save to go to the details page of the data migration project. You can start the project later as needed.
OMS allows you to modify the migration objects when the data migration project is running. For more information, see View and modify migration objects. After a data migration project is started, the migration subtasks will be executed based on the selected migration types. For more information, see the "View migration details" section in the View details of a data migration project topic.