







OceanBase Migration Service (OMS) allows you to download the settings of synchronization objects in a data synchronization task and supports automatic configuration and verification of object settings based on imported CSV files. This allows you to save task settings and configure multiple synchronization tasks at a time. This feature is suitable for renaming and setting hundreds of objects at a time.
Requirements for imported objects
In tasks synchronizing data from a logical table of OceanBase Database Proxy (ODP) to a MySQL-compatible tenant of OceanBase Database, the CSV files that you want to import must contain the following columns:
Source database name, source table name, target database name, target table name, column mapping, and sharding columns. The sharding columns must be separated by semicolons (;).
In tasks other than those synchronizing data from a logical table of ODP to a MySQL-compatible tenant of OceanBase Database, the CSV files to import must contain the following columns:
Source database name, source table name, target database name, target table name, selected columns, column mapping, sharding columns, and row filter conditions. The selected columns and sharding columns must be separated by semicolons (;).
Download object settings
After you create a data synchronization task that synchronizes data from a data source other than IDB, you can download the settings of the synchronization objects.
Notice
You cannot download the object settings of a data synchronization task that synchronizes data from an IDB data source.
Log in to the OMS console.
In the left-side navigation pane, click Data Synchronization.
On the Data Synchronization page, click the name of the task whose object settings you want to download.
On the details page of the task, click the More icon in the upper-right corner, and then select Download Objects Settings.
Import object settings
OMS allows you to rename databases and tables and set row filter conditions, filter columns, and sharding columns by importing CSV files. You can download the CSV file containing the object settings of an existing task or the template CSV file, modify the file as needed, and then import it.
Notice
If you edit the object settings in an Excel file, separate the columns with commas (,), save the file as a CSV file, and then import the CSV file.
The CSV files that you want to import must contain the following columns: source database name, source table name, target database name, target table name, column mapping, and sharding columns.
Create a data synchronization task.
Log in to the OMS console.
In the left-side navigation pane, click Data Synchronization.
On the Data Synchronization page, click New Task in the upper-right corner.
Configure the data synchronization task as needed. In the Select Synchronization Objects step, click Import Objects in the upper-right corner of the right-side list.
Notice
You cannot import objects to a data synchronization task that synchronizes data from an IDB data source.
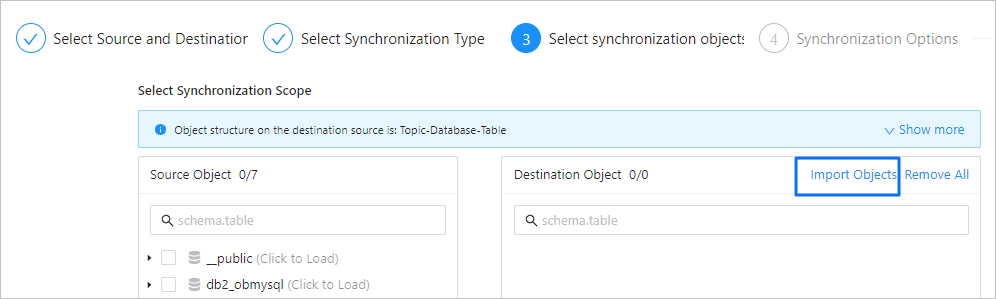
The specific procedure of creating a data synchronization task depends on the source and target nodes you select. For more information, see topics in the Data synchronization chapter of OMS documentation.
In the dialog box that appears, click OK.
Click Import CSV File in the lower part of the Import Synchronization Objects dialog box, and select a local CSV file to import it.
You can also click Download CSV Template in the lower part of the dialog box to download a template. Then, configure the settings in the template as needed and click Import CSV File to import the synchronization objects.
Edit the CSV file as needed.
Note
You can edit the CSV file manually or by using an SQL script. You can also click Download Objects Settings on the details page of the task to generate a CSV file.
You can enter target database and table names different from source database and table names to establish a mapping between them.
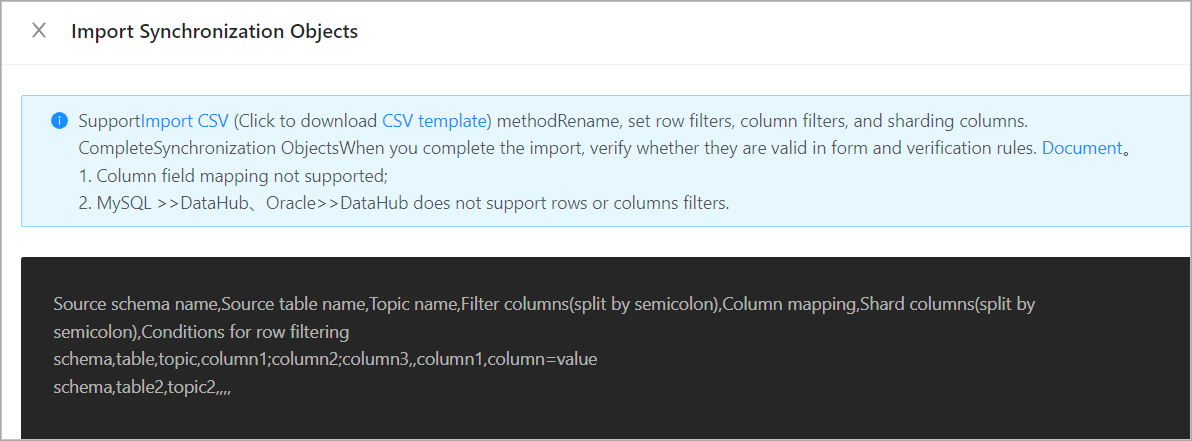
Click Validate to check whether the source objects exist and whether the row filter conditions are correct. If the verification succeeds, the number of verified tables and views is displayed.
Click OK to return to the Select Synchronization Objects step of the data synchronization task.
Complete subsequent task settings as prompted.