


This topic describes how to add or delete a component on the GUI.
Prerequisites
Make sure that the following conditions are met:
You have installed OceanBase Deployer (obd) V2.10.0 or later. For information about how to upgrade obd, see the How do I upgrade obd? section in FAQ.
At least one OceanBase cluster that runs properly is managed in obd.
The password-free SSH login from the current server to the node where the new component resides is supported. For information about the setting method, see (Optional) Set password-free SSH login.
Install components
Step 1: Go to the GUI
Go to the GUI.
Run the
obd webcommand on the command-line interface (CLI), and click the generated URL to go to the GUI.[admin@test001 ~]$ obd web start OBD WEB in 0.0.0.0:8680 please open http://10.10.10.1:8680Note
The default port in the URL is 8680. You can use the
obd web -p <PORT>command to specify a port.On Alibaba Cloud or other cloud environments, the program may fail to obtain a public IP address but return an intranet IP address. You must use a correct public IP address to access the GUI.
The
obd webcommand is bound to the IP address0.0.0.0. In a deployment scenario where multiple network interface cards (NICs) are used, you can access the GUI from any accessible IP address.
(Optional) To change the display language, click the English icon in the upper-right corner of the page and select a language as needed.
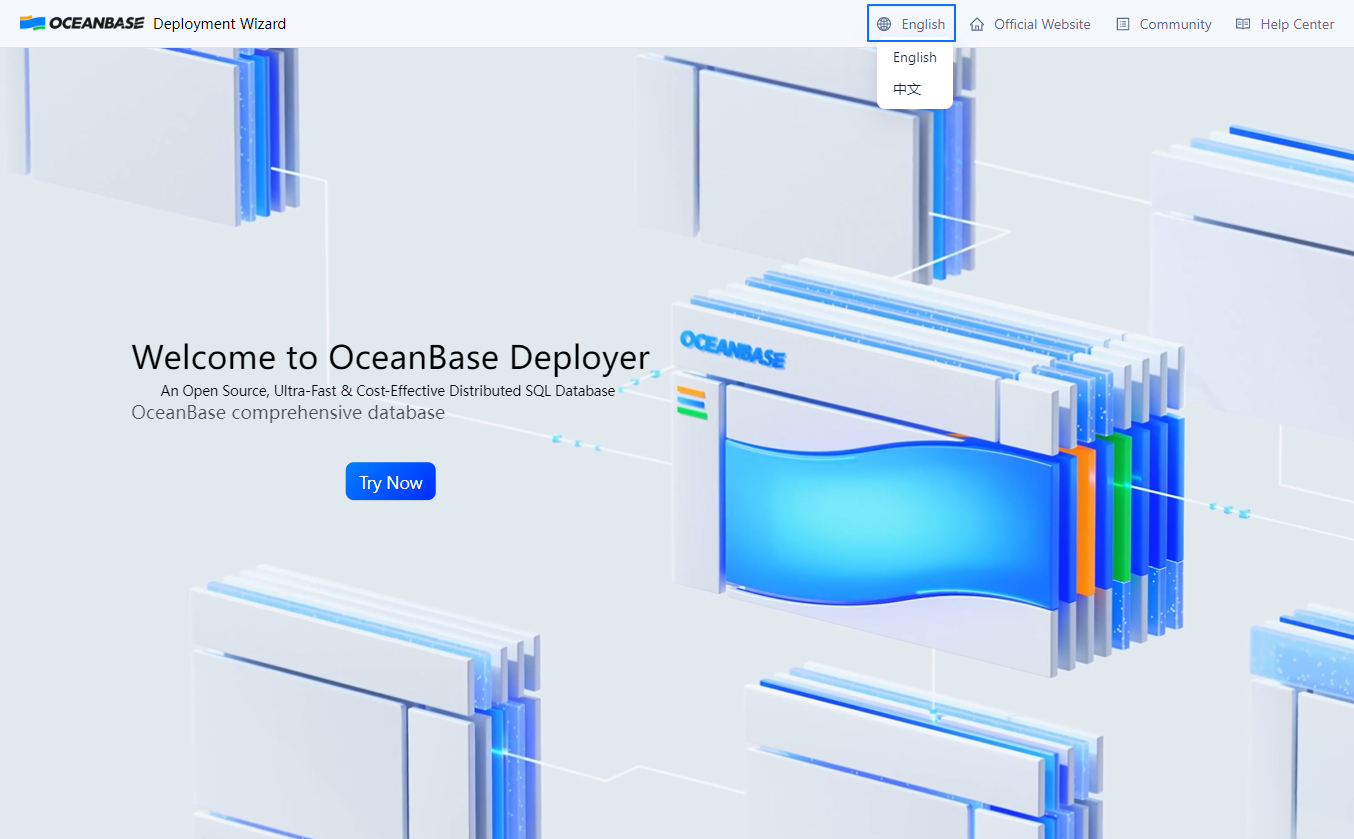
On the GUI, click Try Now to go to the Welcome to the OceanBase Deployment Wizard page. On the page that appears, select Component Management, move your pointer on Management, and then select a component management operation. In this example, select Component installation.
Step 2: Deployment configuration
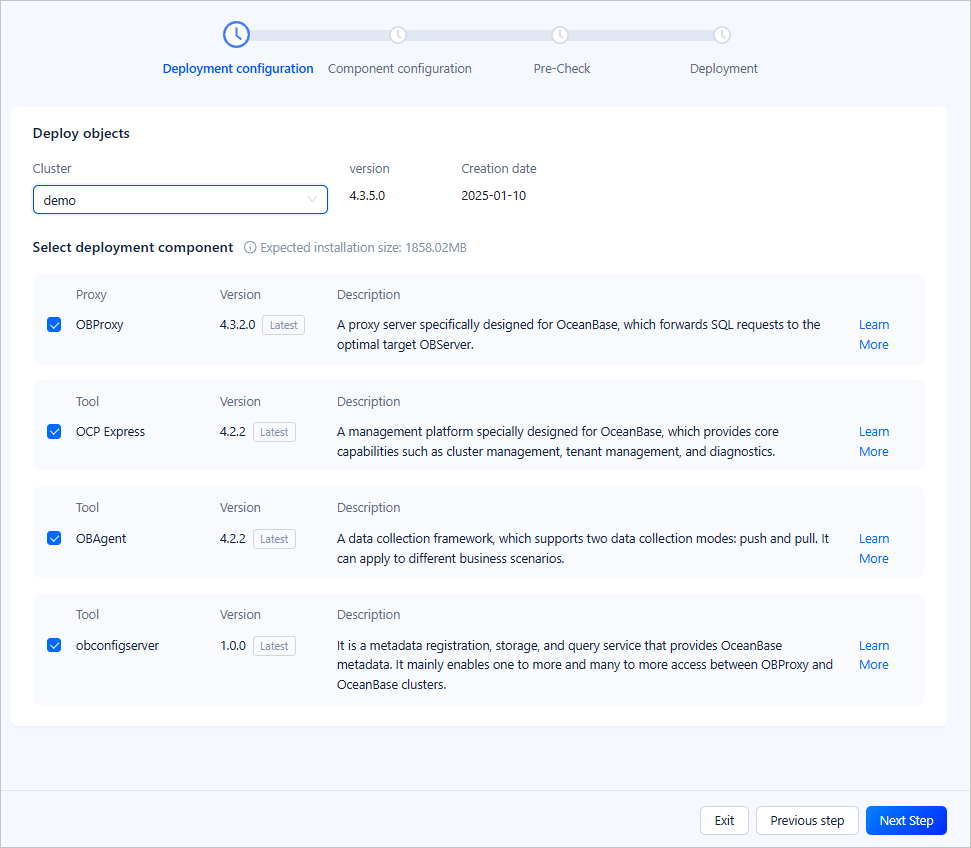
On the Deployment configuration page, select the components to install, as shown in the following figure:
Section |
Description |
|---|---|
| Deploy objects | Select a cluster to which you want to add components from the Cluster drop-down list. The Cluster drop-down list contains all clusters in the running state that are managed by obd. You can click the name of a cluster to select it. |
| Select deployment component | This section displays all components deployed in the cluster and those to install. Select the components that you want to install. The latest versions of the selected components will be installed. You can click Learn More in the row of a component to view its documentation.
NoteIf OceanBase Cloud Platform (OCP) Express and OceanBase Agent (OBAgent) are not installed in the cluster, you can select OBAgent, and OCP Express is selected along with OBAgent automatically. When you deselect OBAgent, OCP Express is automatically deselected. |
Click Next Step in the lower-right corner to go to the Component configuration page.
Step 3: Component configuration
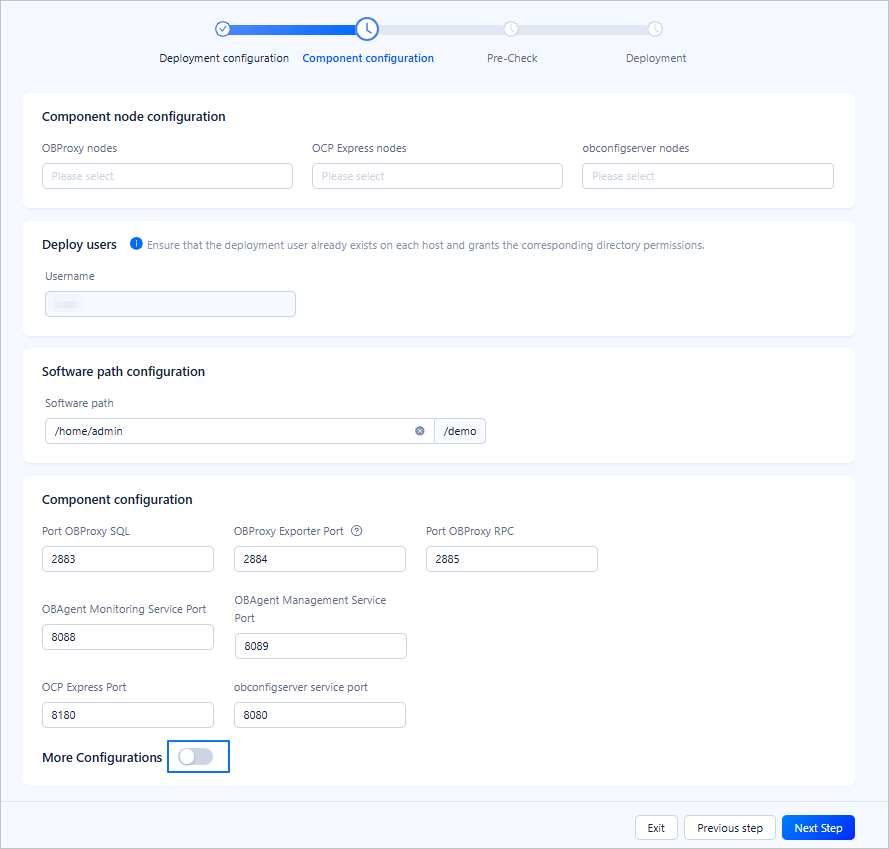
On the Component configuration page, configure nodes, ports, and other information of the components to install, as shown in the following figure:
Section |
Description |
|---|---|
| Component node configuration | Configure nodes for the selected components. After you specify the IP address of a node for a component, you can press Enter to specify the IP address of another node for the component. You can configure multiple ODP and Config Server nodes, but only one OCP Express node.
NoticeThe IP address of a node cannot be |
| Deploy users | By default, the username is the one used to deploy the current cluster. The username cannot be modified. Make sure that the user exists on all servers and has required privileges on the specified directory. |
| Software path configuration | By default, the software path is the installation path of the current cluster. You can modify the path. The software path must be an absolute path beginning with a slash (/). |
| Component configuration | Configure ports for the selected components. For more information, see the Step 4: Cluster configuration section in Deploy an OceanBase cluster on the GUI. |
| More Configurations | You can enable More Configurations to view more cluster parameters. You can retain the default settings or modify the settings.
NoteIf multiple nodes are configured in the Config Server Node section on the Component configuration page, you must enable More Configurations and specify the |
Click Next Step in the lower-right corner to go to the Pre-Check page.
Step 4: Pre-Check
On the Pre-Check page, confirm all the configuration information. If any information is incorrect, you can click Previous step to modify the information. After you confirm that all the information is correct, click Pre-Check.
If the pre-check reports an error, and the error can be automatically fixed, you can click Automatic Repair to fix the error. You can also click Learn more to fix the reported error by referring to the error code document. After all the errors are fixed, click Re-check to perform a pre-check again.
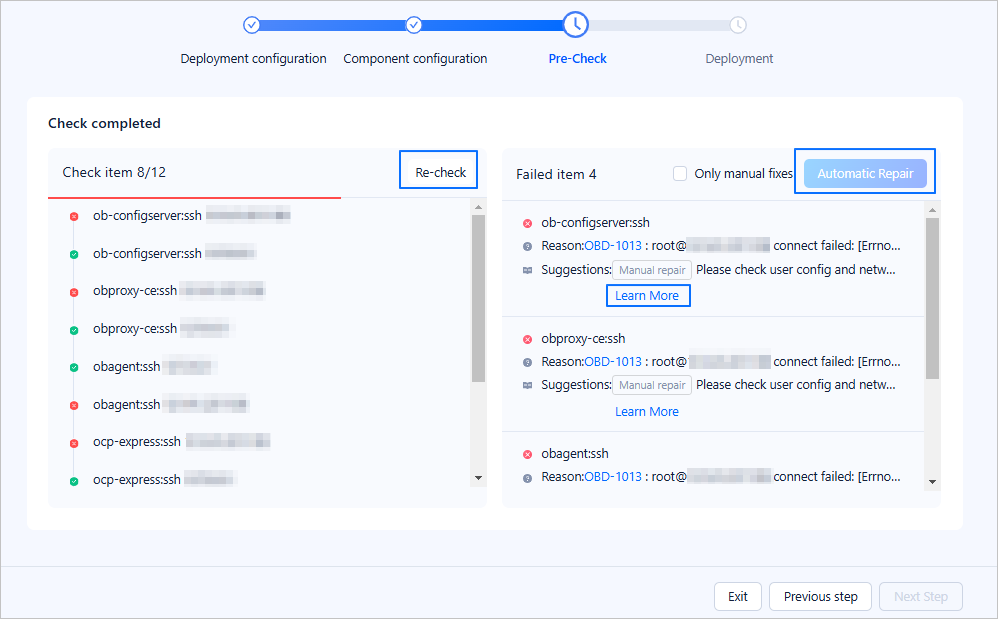
After the pre-check is passed, click Deployment to start the deployment.
Step 5: Deployment
You can perform the following operations:
After the deployment of ODP succeeds, copy the displayed connection string of OceanBase Database and use it to connect to ODP from the CLI as the
root@proxysysuser.Click the connection string of OCP Express to go to the logon page of OCP Express. Log on with the account username and password provided on the deployment page, and then change the password. Then, you can manage the cluster on the GUI.
Note
On Alibaba Cloud or other cloud environments, the program may fail to obtain a public IP address but return an intranet IP address. You must use a correct public IP address to access the GUI.
In the Deployment Report section, click the Expand icon before a component to view its deployment logs on the GUI. You can also move your pointer on View Details in the row of a component to view the command for querying its logs. Then, you can click the Copy icon next to the command to copy the command and run the command on the central control server to view the log location of the component.
Click One-click Copy to save the access address and account information of all deployed components. Then, click Finish to exit.
Uninstall components
Step 1: Go to the GUI
Go to the GUI.
Run the
obd webcommand on the CLI, and click the generated URL to go to the GUI.[admin@test001 ~]$ obd web start OBD WEB in 0.0.0.0:8680 please open http://10.10.10.1:8680Note
The default port in the URL is 8680. You can use the
obd web -p <PORT>command to specify a port.On Alibaba Cloud or other cloud environments, the program may fail to obtain a public IP address but return an intranet IP address. You must use a correct public IP address to access the GUI.
The
obd webcommand is bound to the IP address0.0.0.0. In a deployment where multiple NICs are used, you can access the GUI from any accessible IP address.
(Optional) To change the display language, click the English icon in the upper-right corner of the page and select a language as needed.
On the GUI, click Try Now to go to the Welcome to the OceanBase Deployment Wizard page. On the page that appears, select Component Management, move your pointer on Management, and then select a component management operation. In this example, select Component uninstallation.
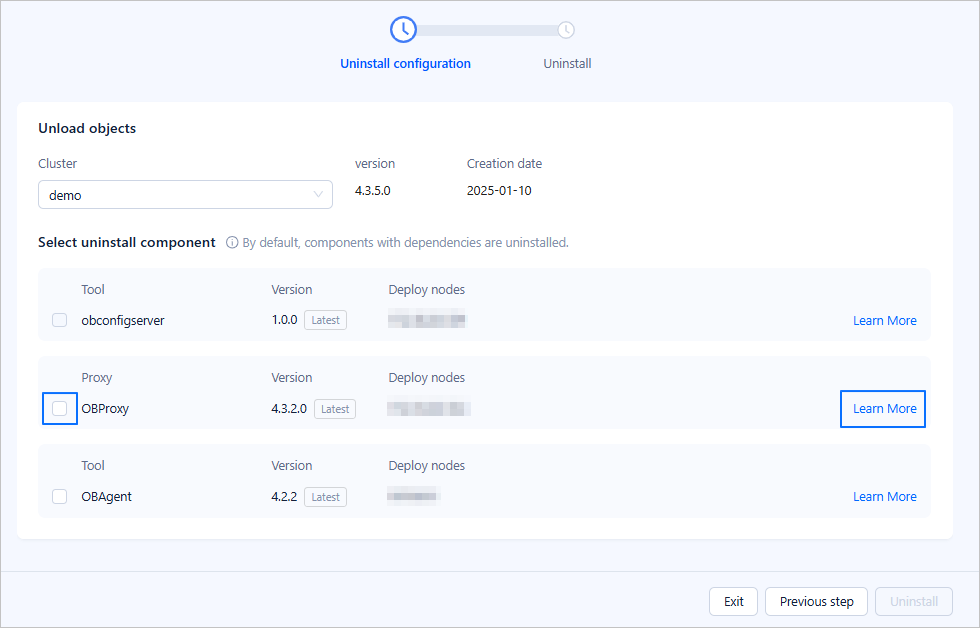
Step 2: Uninstallation configuration
On the Uninstall configuration page, select the components to uninstall, as shown in the following figure:
Section |
Description |
|---|---|
| Unload objects | Select a cluster for which you want to uninstall components from the Cluster drop-down list. The Cluster drop-down list contains all clusters in the running state that are managed by obd. You can click the name of a cluster to select it. |
| Select uninstall component | This section displays all components that you can uninstall from the cluster. You can select the components that you want to uninstall. By default, all components are selected. You can click Learn More in the row of a component to view its documentation.
Note
|
Click Uninstall in the lower-right corner. In the dialog box that appears, click OK to go to the Uninstall page.
Step 3: Uninstallation
On the Uninstall page, you can view the uninstallation progress and results. The Status column indicates whether the uninstallation is successful. You can move your pointer on View running logs in the Actions column to view the uninstallation logs of a component.
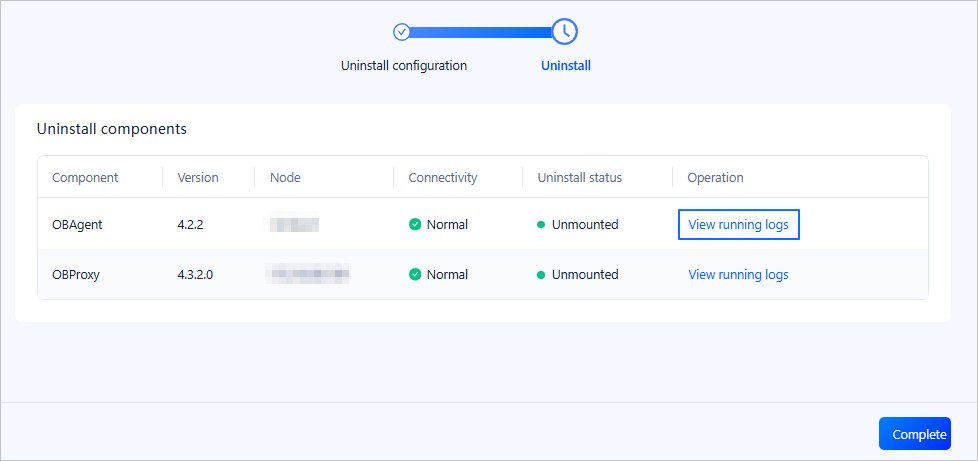
The following table describes possible uninstallation results and supported operations.
Connectivity |
Uninstall status |
Operation |
|---|---|---|
| Checking | To be uninstalled | Wait for the system to uninstall the component.
NoteWhen you uninstall OBAgent and OCP Express at a time, OBAgent enters the Pending state if the uninstallation of OCP Express fails. The system uninstalls OBAgent only after OCP Express is uninstalled or forcibly removed. |
| Normal | Unmounting | The system is uninstalling the component. You can move your pointer over View running logs in the Actions column to view the uninstallation logs of the component. |
| Uninstall Failed | Move your pointer over the prompt icon next to Uninstall failed to view the failure cause. You can perform the following operations:
|
|
| Unmounted | Move your pointer over View running logs in the Actions column to view the uninstallation logs of the component. | |
| Unable to connect | Cannot Be Uninstalled | Move your pointer over the prompt icon next to Unable to uninstall to view the failure cause. You can click Force Removal in the Actions column. After reconfirmation, the system attempts to uninstall the component again. The Force Removal operation only cancels the dependency between OceanBase Database and the component, without uninstalling the component from the server. |
| Removing | Wait for the system to remove the component. | |
| Removed Successfully | You do not need to perform any operation. |
Click Complete in the lower-right corner. In the dialog box that appears, click Exit.