


Load and run an ODC image
After you initialize the MetaDB of OceanBase Developer Center (ODC), you need to obtain and run the ODC image on each node to install ODC.
Load the image
Notice
- The images of ODC V4.2.0 and later versions have been published to Docker Hub. If your local device running ODC can access Docker Hub, you can directly start ODC Docker without downloading the image. For details, see the Running Image content below.
- If Docker Hub cannot be accessed directly, you still need to download and load the image file.
To obtain the ODC image on the host, select the required image from the Maintenance Tools of the OceanBase Download Center.
After you obtain the image, run the following command in the command-line tool to load it:
gunzip -c obodc-{$version}.tar.gz docker load
Run the image
Execute the following sample statement in the command-line tool to run the image:
#!/usr/bin/env bash
docker run -v /var/log/odc:/opt/odc/log -v /var/data/odc:/opt/odc/data \
-d -i --net host --cpu-period 100000 --cpu-quota 400000 --memory 8G --name "obodc" \
-e "DATABASE_HOST=xxx.xx.xx.xx" \
-e "DATABASE_PORT=60805" \
-e "DATABASE_USERNAME=db_user@tenant_name#cluster_name" \
-e "DATABASE_PASSWORD=******" \
-e "DATABASE_NAME=odc_metadb" \
-e "ODC_PROFILE_MODE=alipay" \
-e "ODC_ADMIN_INITIAL_PASSWORD=******" \
oceanbase/odc:4.2.2
The following table describes parameters used in the preceding sample statement.
Parameter |
Description |
|---|---|
| -v |
|
| --net | The network configuration of the Docker container. If you set this parameter to host, the host network is directly used. You can also use the --publish (-p) parameter to configure port mapping. However, the Docker container may fail to start in some circumstances due to incorrect DNS resolution in the Docker container. In this case, run the --net host command to start the Docker container. |
| --cpu-period --cpu-quota | * The ---cpu-period parameter specifies the interval at which the CPU cores of the Docker container are reallocated. Unit: microseconds. * The ---cpu-quota parameter specifies the maximum time for running the current Docker container in this interval. Unit: microseconds. You can use these two parameters in combination to specify the number of CPU cores that the Docker container uses. The value is calculated by dividing cpu-quota by cpu-period. In the preceding sample statement, the values of cpu-quota and cpu-period are respectively 400000 and 100000, indicating that the Docker container can use at most four CPU cores. |
| --memory | The maximum memory size for the Docker container. |
| --name | The name of the container. |
| DATABASE_HOST | The IP address of the MetaDB. |
| DATABASE_PORT | The port number of the MetaDB. |
| DATABASE_USERNAME | The username of the MetaDB. In OceanBase Database, the username is given in the db_user@tenant_name#cluster_name format. |
| DATABASE_PASSWORD | The password for connecting to the database. |
| DATABASE_NAME | The name of the MetaDB. |
| ODC_PROFILE_MODE | The mode. Default value: alipay. |
| ODC_ADMIN_INITIAL_PASSWORD | Specify the initial password of the ODC administrator account.
Notice |
In addition to the preceding parameters, you can also use the following parameters when running the image.
Parameter |
Description |
|---|---|
| ODC_LOG_DIR | The log directory. Default value: /opt/odc/log. |
| ODC_JVM_HEAP_OPTIONS | The JVM memory configuration. Default value: -XX:MaxRAMPercentage=60.0 -XX:InitialRAMPercentage=60.0, indicating that 60% of the memory is used, and the JVM memory can be customized by specifying the parameter ODC_JVM_HEAP_OPTIONS. Example: -Xmx2048m -Xms2048m, indicating that the heap memory is set to 2G. |
| ODC_JVM_GC_OPTIONS | The garbage collection (GC) strategy for JVM. Default value: -XX:+UseG1GC -XX:+PrintAdaptiveSizePolicy -XX:+PrintGCDetails -XX:+PrintGCTimeStamps -XX:+PrintGCDateStamps -Xloggc:/opt/odc/log/gc.log -XX:+UseGCLogFileRotation -XX:GCLogFileSize=50M -XX:NumberOfGCLogFiles=5. |
| ODC_JVM_OOM_OPTIONS | The OutOfMemory strategy for JVM. Default value: -XX:+ExitOnOutOfMemoryError. |
| ODC_JVM_EXTRA_OPTIONS | Other JVM parameters. By default, no parameter is specified. |
| ODC_SERVER_PORT | The HTTP listening port for ODC-Server. Default value: 8989. |
| ODC_HOST | The IP address of ODC, which can be used as the destination IP address for remote procedure calls in high-availability deployment scenarios. |
| ODC_MAPPING_PORT | |
| The port number of the ODC runtime to avoid the problem that the port number cannot be used due to the deployment environment. This parameter is suitable for port mapping when deploying ODC in Docker. | |
| ODC_APP_EXTRA_ARGS | Other App parameters need to be specified. For example, --server.servlet.session.timeout=10m, indicating that the Session period is 10 minutes. The default value is empty. |
Deploy SSL certificate
When you log on to Web ODC in a browser over HTTP for the first time, you will receive a message indicating that the connection is not secure. To ensure access security, you can deploy an SSL certificate to access ODC over HTTPS. You can apply for a CA certificate or configure an HTTPS self-signed certificate. If you do not want to access ODC over HTTPS, you can skip this step and directly deploy NGINX.
Apply for a CA certificate
To apply for a CA certificate, we recommend that you purchase an SSL certificate and an SSL certificate service on Alibaba Cloud. For more information, see SSL certificate.
In the intranet environment, you can consult your IT administrator for the procedure of applying for a CA certificate.
Configure an SSL self-signed certificate
The ODC image package contains an executable file that can generate a certificate and private keys: generate-odc-ssl-certificate.sh. You can run this file on the host to generate a certificate. The self-signed certificate can implement encrypted communication. However, an OS does not trust a self-signed certificate by default. You can add the certificate to the Trusted Root Certificate Authorities in the browser to configure certificate trust.
The following code shows how to run the executable file. The value for domain must be consistent with the domain name used by your ODC. Otherwise, the browser considers that the certificate does not match the site.
$./generate-odc-ssl-certificate.sh
Enter your domain [www.example.com]:
Enter your province [Zhejiang]:
Enter your city [Hangzhou]:
Enter your company name [OceanBase]:
Enter your company unit name [DBA]:
generate certificate...
Generating a 2048 bit RSA private key
.......................................+++
.......................
......+++
writing new private key to '/etc/pki/nginx/odcserver.key'
-----
end of string encountered while processing type of subject name element #5
problems making Certificate Request
check generated files:
-rw-r--r-- 1 root root 1424 Jun  3 15:18 server.crt
-rw-r--r-- 1 root root 1708 Jun  3 15:18 server.key
The following code shows the content of the generate-odc-ssl-certificate.sh file. You can directly run the following command to generate a self-signed certificate.
#!/usr/bin/env bash
# for generate self certificated ssl certificate files

echo try create directory '/etc/pki/nginx' if not exists...
sudo mkdir -p /etc/pki/nginx
cd /etc/pki/nginx || exit

#read configurations
read -rp "Enter your domain [www.example.com]: " DOMAIN
read -rp "Enter your province [Zhejiang]: " PROVINCE
read -rp "Enter your city [Hangzhou]: " CITY
read -rp "Enter your company name [OceanBase]: " COMPANY
read -rp "Enter your company unit name [DBA]: " UNIT

echo generate certificate...
SUBJ="/C=CN/ST=${PROVINCE}/L=${CITY}/O=${COMPANY}/OU=${UNIT}/CN=${DOMAIN}"
sudo openssl req -x509 -nodes -days 3650 -newkey rsa:2048 \
    -keyout /etc/pki/nginx/odcserver.key \
    -out /etc/pki/nginx/odcserver.crt \
    -subj "${SUBJ}"

echo "check generated files (use ls -l odcserver.*):"
ls -l odcserver.*
Deploy the Nginx proxy
After you deploy the image of OceanBase Developer Center (ODC) on all nodes, you need to deploy an NGINX proxy on an ODC node to route your requests to applications on different nodes. To deploy the NGINX proxy, you need to obtain and run the NGINX image on one node, copy the configuration file locally, and then modify the file. After the modification, stop running the NGINX image and then restart it to apply the modified configuration file.
Load the image
Select a node and load and run the NGINX image. You can use the following methods to load the NGINX image:
Pull the image from the Docker warehouse on the host.
Download the image package to a local device, copy the package to the host, and decompress the package.
Pull the image from the Docker warehouse
Ensure that Docker is installed on the host and the host has access to the Internet. Then, run the following command in the command-line tool to pull the NGINX image from the Docker warehouse:
docker pull nginx
Copy the image package to the host and decompress the package
Ensure that Docker is installed on the host and the host has access to the Internet. Then, run the following command on the host to download the image package to a local device:
docker save nginx:latest | gzip - >nginx.tar.gzCopy the image package to the host and run the following command to load the image:
gunzip -c nginx.tar.gz | docker load
Configure the configuration file
Before you start running the NGINX image, you must modify settings of the configuration file. The ODC image package contains templates of the configuration file. You can copy a template to a local device and edit the configuration where necessary. The templates of the configuration file vary, depending on whether you have deployed a self-signed certificate. We recommend that you copy a template based on the deployment and modify the configuration where necessary.
Configure the configuration file that does not contain the self-signed certificate
Run the following command to copy the configuration file from the image package to the host for editing. You can customize the copy path as needed, and replace the tilde (~) with the local path of the configuration file:
docker cp -a <odc_image_name>:/opt/odc/conf/nginx.conf.template ~/<conf_local_path>
The following code shows a template of the configuration file. We recommend that you pay attention to the content that requires changes based on the comments.
# Nginx conf template for http deployment
# For more information on configuration, see:
#   * Official English Documentation: http://nginx.org/en/docs/

user nginx;
worker_processes auto;
error_log /var/log/nginx/error.log;
pid /run/nginx.pid;

# Load dynamic modules. See /usr/share/doc/nginx/README.dynamic.
include /usr/share/nginx/modules/*.conf;

events {
    worker_connections 1024;
}

http {
    log_format  main  '$remote_addr - $remote_user [$time_local] "$request" '
                      '$status $body_bytes_sent "$http_referer" '
                      '"$http_user_agent" "$http_x_forwarded_for"';

    access_log  /var/log/nginx/access.log  main;

    sendfile            on;
    tcp_nopush          on;
    tcp_nodelay         on;
    keepalive_timeout   65;
    types_hash_max_size 2048;

    #set 0 to disable request body size check, for support large size file upload
    client_max_body_size 0;

    include             /etc/nginx/mime.types;
    default_type        application/octet-stream;

    # for websocket configuration
    map $http_upgrade $connection_upgrade {
        default upgrade;
        '' close;
    }

    # load balancing configuration
    # notice under_score character are not allowed for upsteram name, 400 Bad Request happens if used
    # please use ip_hash strategy
    # one server line for each odc-server node
    upstream odcbackends {
      ip_hash;
      # PLEASE CHANGE to real odc-server address (Optional)
      server xxx.x.x.x:8989;
      # add more servers here
    }

    #https server, proxy to odc-server 8989 port
    server {
        listen 80;
        # uncomment below if ipv6 enabled

        #listen [::]:80;

        # PLEASE CHANGE to your site domain (Optional)
        server_name  odc.oceanbase.com;

        location / {
            proxy_pass http://odcbackends;
            proxy_http_version 1.1;
            proxy_set_header Upgrade $http_upgrade;
            proxy_set_header Connection "upgrade";
            proxy_set_header X-Forwarded-Host $host;
            proxy_set_header X-Forwarded-For  $proxy_add_x_forwarded_for;
            proxy_read_timeout 1800;
            proxy_send_timeout 1800;
            proxy_connect_timeout 75;
            proxy_next_upstream off;
        }
    }

}
Configure the configuration file that contains a self-signed certificate
Run the following command to copy the configuration file from the image package to the host for editing. You can customize the copy path as needed, and replace the tilde (~) with the local path of the configuration file:
docker cp -a <odc_image_name>:/opt/odc/conf/nginx.conf.https.template ~/<conf_local_path>
The following code shows a template of the configuration file. We recommend that you pay attention to the content that requires changes based on the comments.
# Nginx conf template for https deployment
# For more information on configuration, see:
#   * Official English Documentation: http://nginx.org/en/docs/

user nginx;
worker_processes auto;
error_log /var/log/nginx/error.log;
pid /run/nginx.pid;

# Load dynamic modules. See /usr/share/doc/nginx/README.dynamic.
include /usr/share/nginx/modules/*.conf;

events {
    worker_connections 1024;
}

http {
    log_format  main  '$remote_addr - $remote_user [$time_local] "$request" '
                      '$status $body_bytes_sent "$http_referer" '
                      '"$http_user_agent" "$http_x_forwarded_for"';

    access_log  /var/log/nginx/access.log  main;

    sendfile            on;
    tcp_nopush          on;
    tcp_nodelay         on;
    keepalive_timeout   65;
    types_hash_max_size 2048;

    #set 0 to disable request body size check, for support large size file upload
    client_max_body_size 0;

    include             /etc/nginx/mime.types;
    default_type        application/octet-stream;

    # for websocket configuration
    map $http_upgrade $connection_upgrade {
        default upgrade;
        '' close;
    }

    # load balancing configuration
    # notice under_score character are not allowed for upsteram name, 400 Bad Request happens if used
    # please use ip_hash strategy
    # one server line for each odc-server node
    upstream odcbackends {
      ip_hash;
      # PLEASE CHANGE to real odc-server address (Optional)
      server xxx.x.x.x:8989;
      #add more servers here
    }

    # redirect http to https
    server {
        listen 80 default_server;

        # uncomment below if ipv6 enabled

        #listen [::]:80 default_server;

        location / {
            return 301 https://$host$request_uri;
        }
    }

    # https server, proxy to odc-server 8989 port
    server {
        listen 443 ssl http2;
        # uncomment below if ipv6 enabled

        #listen [::]:443 ssl http2;

        # PLEASE CHANGE to your site domain (Optional)
        server_name  odc.oceanbase.com;

        # you can use /opt/odc/bin/generate-odc-ssl-certificate.sh
        # to generate self certificated SSL certificates


        # PLEASE CHANGE certificate file location if unmatched

        ssl_certificate /etc/pki/nginx/odcserver.crt;
        ssl_certificate_key /etc/pki/nginx/odcserver.key;
        ssl_session_timeout 1d;
        ssl_session_cache shared:MozSSL:10m;  # about 40000 sessions
        ssl_session_tickets off;

        # intermediate configuration
        ssl_protocols TLSv1.2 TLSv1.3;
        ssl_ciphers ECDHE-ECDSA-AES128-GCM-SHA256:ECDHE-RSA-AES128-GCM-SHA256:ECDHE-ECDSA-AES256-GCM-SHA384:ECDHE-RSA-AES256-GCM-SHA384:ECDHE-ECDSA-CHACHA20-POLY1305:ECDHE-RSA-CHACHA20-POLY1305:DHE-RSA-AES128-GCM-SHA256:DHE-RSA-AES256-GCM-SHA384;
        ssl_prefer_server_ciphers off;

        # HSTS (ngx_http_headers_module is required) (63072000 seconds)
        add_header Strict-Transport-Security "max-age=63072000" always;

        location / {
            proxy_pass http://odcbackends;
            proxy_http_version 1.1;
            proxy_set_header Upgrade $http_upgrade;
            proxy_set_header Connection "upgrade";
            proxy_set_header X-Forwarded-Host $host;
            proxy_set_header X-Forwarded-For  $proxy_add_x_forwarded_for;
            proxy_read_timeout 1800;
            proxy_send_timeout 1800;
            proxy_connect_timeout 75;
            proxy_next_upstream off;
        }
    }

}
Note
- You can modify the load balancing configurations to ensure a sufficient proxy server timeout. The modification takes effect after you restart the Nginx proxy.
- We recommend that you set the
proxy_connect_timeoutparameter to a value not longer than 75 seconds. For more information, see proxy_connect_timeout. - If you do not set the
proxy_next_upstreamparameter tooff, the Nginx proxy will forward your requests to the next ODC node. In this case, you need to log on to ODC again, and cannot use features related to file upload and download, such as downloading the result set of an asynchronous task.
Start an image
After the configuration file is modified locally, run the following command in the command-line tool to restart the NGINX image. The tilde (~) indicates the local path of the configuration file.
docker run --network host --name nginx -v ~/<conf_local_path>:/etc/nginx/nginx.conf -v /etc/pki/nginx/:/etc/pki/nginx/ -d nginx
The following table lists parameters in the statement.
Parameter |
Description |
|---|---|
| --network host | Specifies to use a network port of the host. You do not need to configure port mapping in this case. If you do not want to directly use the port of the host, you can specify the mapping ports using the -p parameter. For example, -p 8080:80 specifies to map port 8080 of the host to port 80 of the Docker container. Likewise, -p 8443:443 specifies to map port 8443 of the host to port 443 of the Docker container. |
| --name nginx | Sets the name of the container to nginx for easier management. You can use other names, for example, odc-nginx. |
| -v ~/<conf_local_path>:/etc/nginx/nginx.conf | Mounts the Docker container to the specified directory of the host and maps the local files of the host to the Docker container. <conf_local_path> specifies a local path of the configuration file on the host, and then maps the configuration file to the /etc/nginx/nginx.conf file in the Docker container. |
| -v /etc/pki/nginx/:/etc/pki/nginx/ | Maps the /etc/pki/nginx/ path of the host to the /etc/pki/nginx/ path of the Docker container. |
| -d nginx | Specifies to run the Docker container in the background. |
Configure certificate trust
A browser does not trust a self-signed certificate. You must manually configure certificate trust in the browser.
Notice
Google Chrome does not trust a self-signed certificate. After you complete the certificate trust configuration, you will receive a message indicating that the connection is not secure.
Configure certificate trust in Windows
Google Chrome is used as an example to describe the certificate trust configuration procedure.
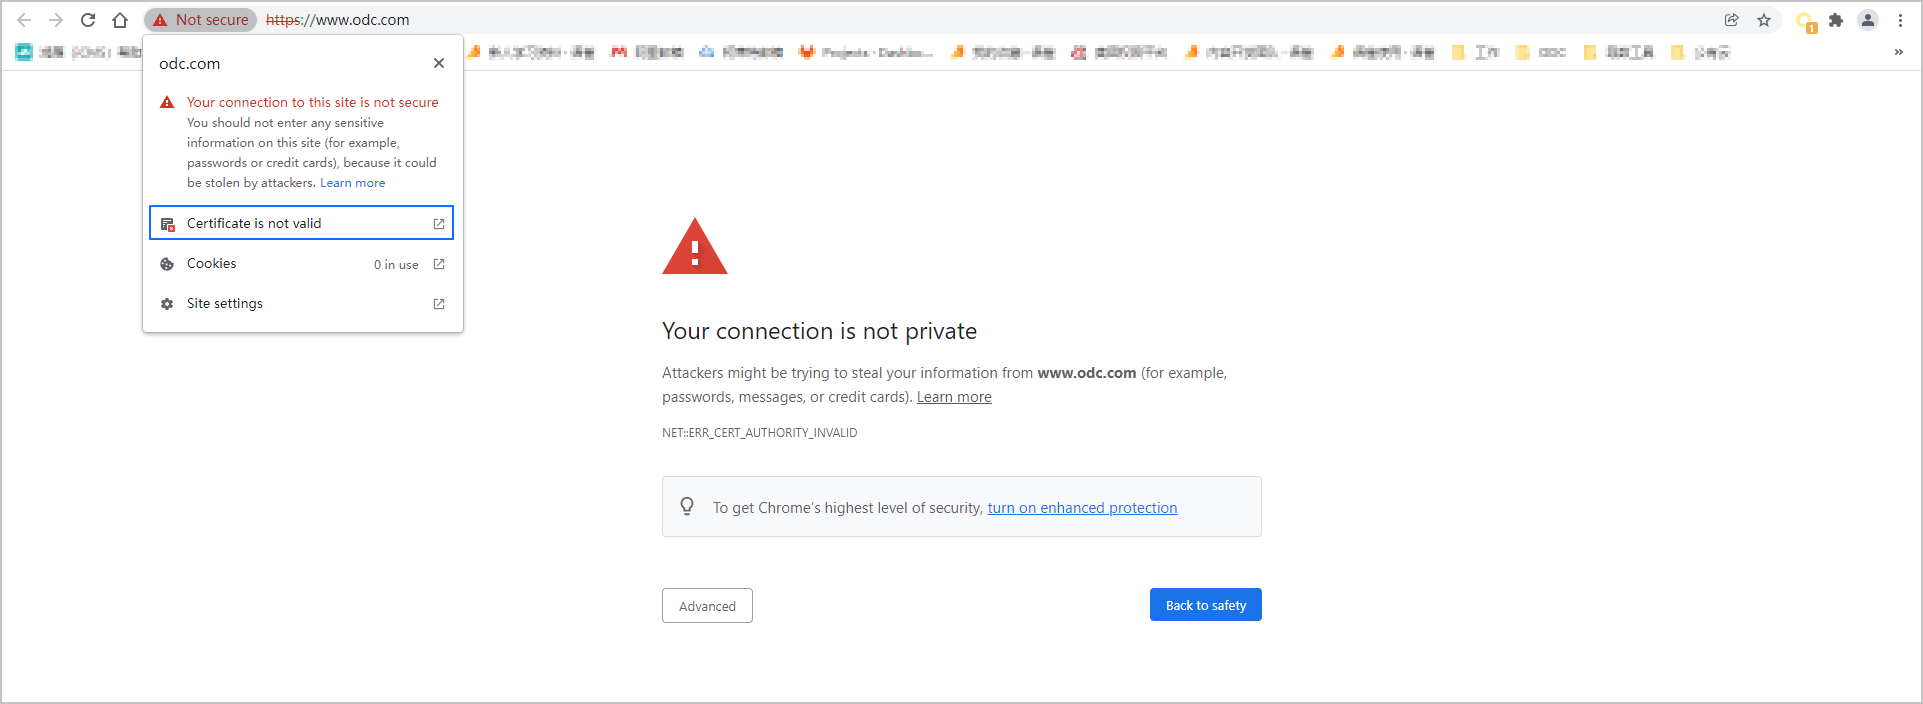
Log on to ODC in Chrome. When the system prompts that the connection is not secure, click Not Secure on the left side of the address bar and click Certificate in the list that appears to view the certificate details.
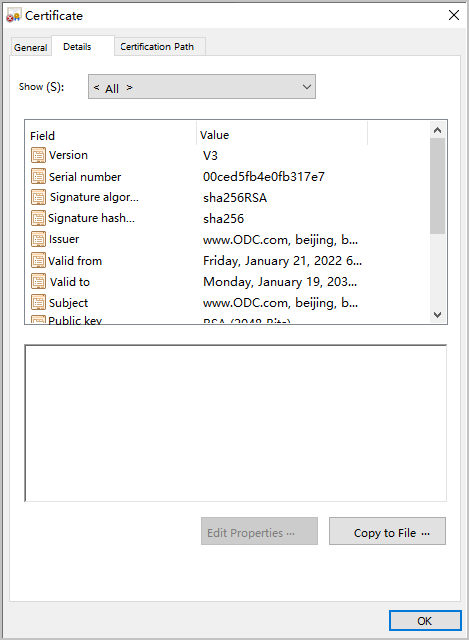
In the Certificate window that appears, click the Details tab and click Copy to File in the lower-right corner of the tab.
In the Certificate Export Wizard step, click Next.
In the file export format setting step, select DER encoded binary X.509 (CER) and click Next.
In the file path selection step, click Browse . In the file resource manager window, select an export path, enter a file name in the File Name field, and click Save to go back to the Certificate Export Wizard step. Then, click Next.
In the Completing the Certificate Export Wizard step, click Finish in the lower-right corner to export the file to a local device.
Find the certificate file in the path specified in Step 5, right-click the certificate file, and then select Install Certificate from the context menu that appears.
In the Certificate Import Wizard window, click Next.
In the Certificate Store step, select Place all certificates in the following store and click Browse . In the Select Certificate Store window, select Trusted Root Certification Authorities and click OK. In the Certificate Store step, click Next.
In the Completing the Certificate Export Wizard step, click Finish in the lower-right corner.
After the certificate trust configuration is completed, log on to ODC again in the browser.
Configure certificate trust in macOS
Google Chrome is used as an example to describe the certificate trust configuration procedure.
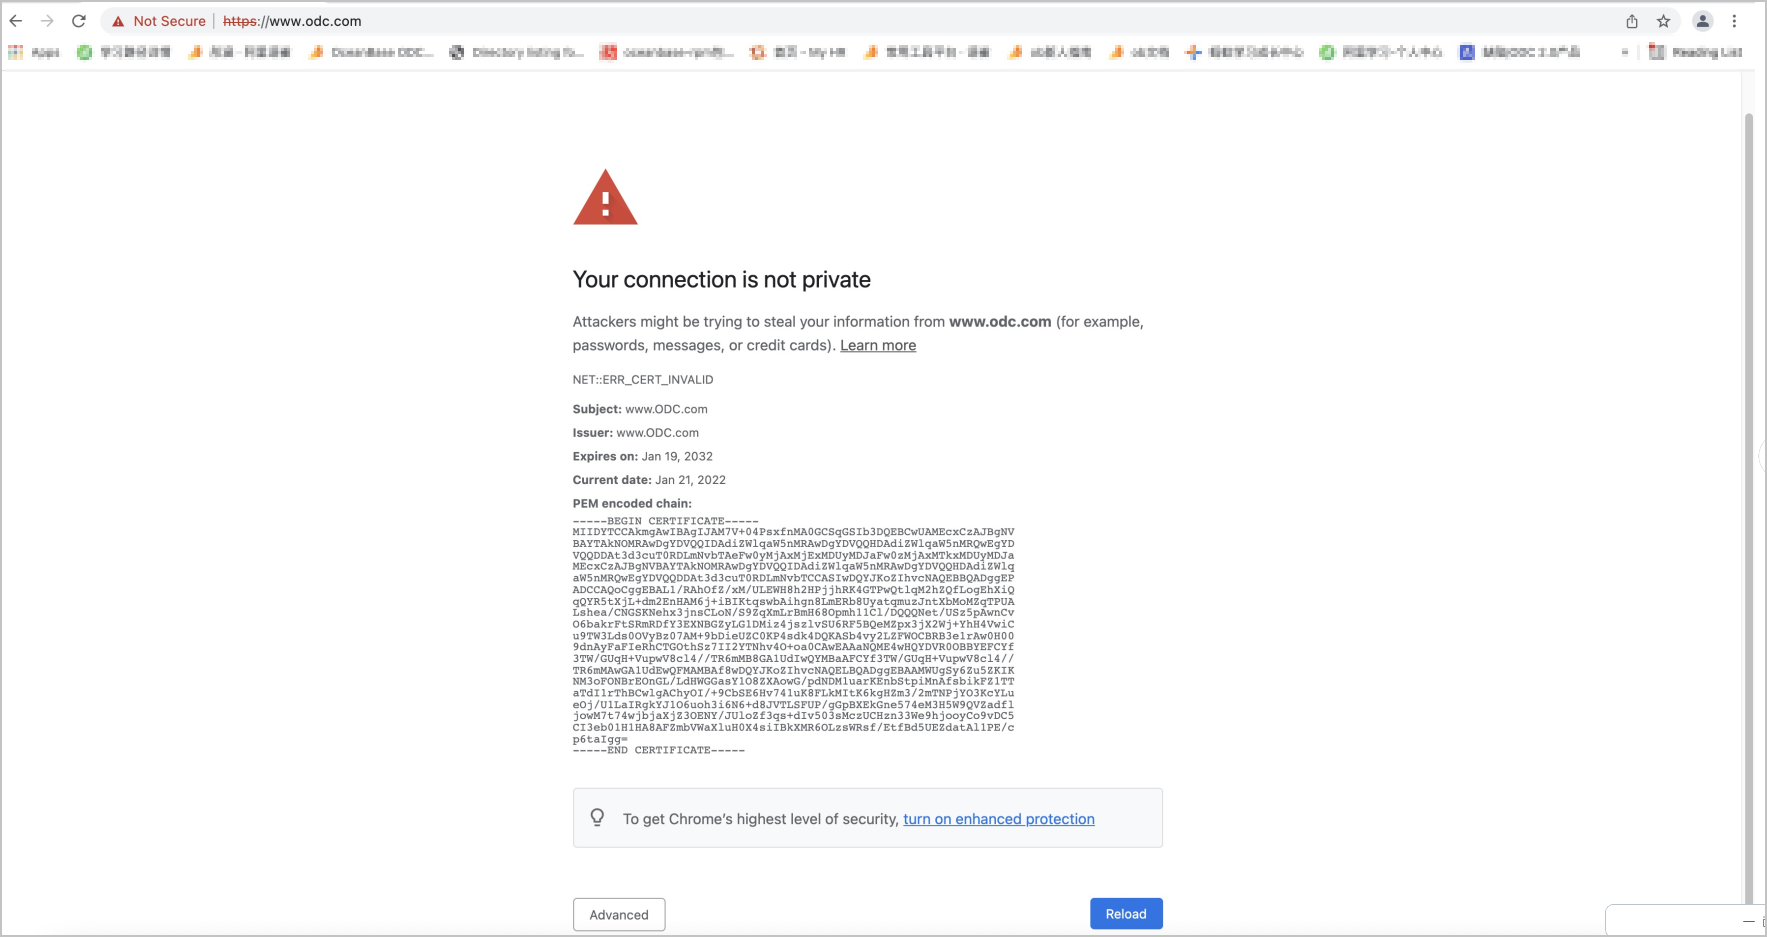
Log on to ODC in Chrome. When the system prompts that the connection is not secure, click Not Secure on the left side of the address bar and click Certificate in the list that appears to view the certificate details.

Details of the certificate are displayed.
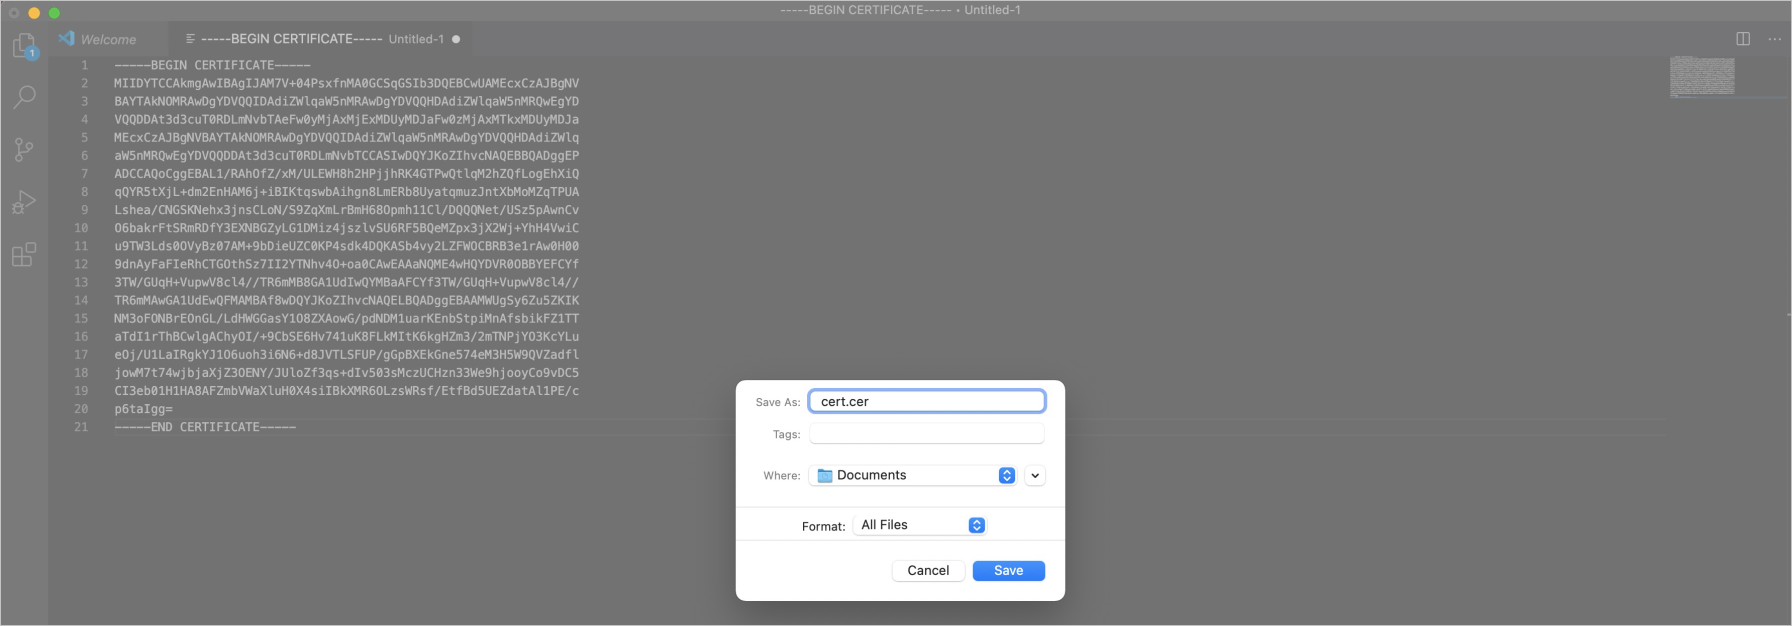
Create a file with the extension of .cer, copy the certificate details to this file, and save the file.
In macOS, choose Applications > Utilities > Keychain Access . The Keychain Access window appears. In the left-side navigation pane, click System and click the plus sign (+) in the quick access toolbar. In the window that appears, select the certificate file that is created in the previous step to add the certificate into the system.
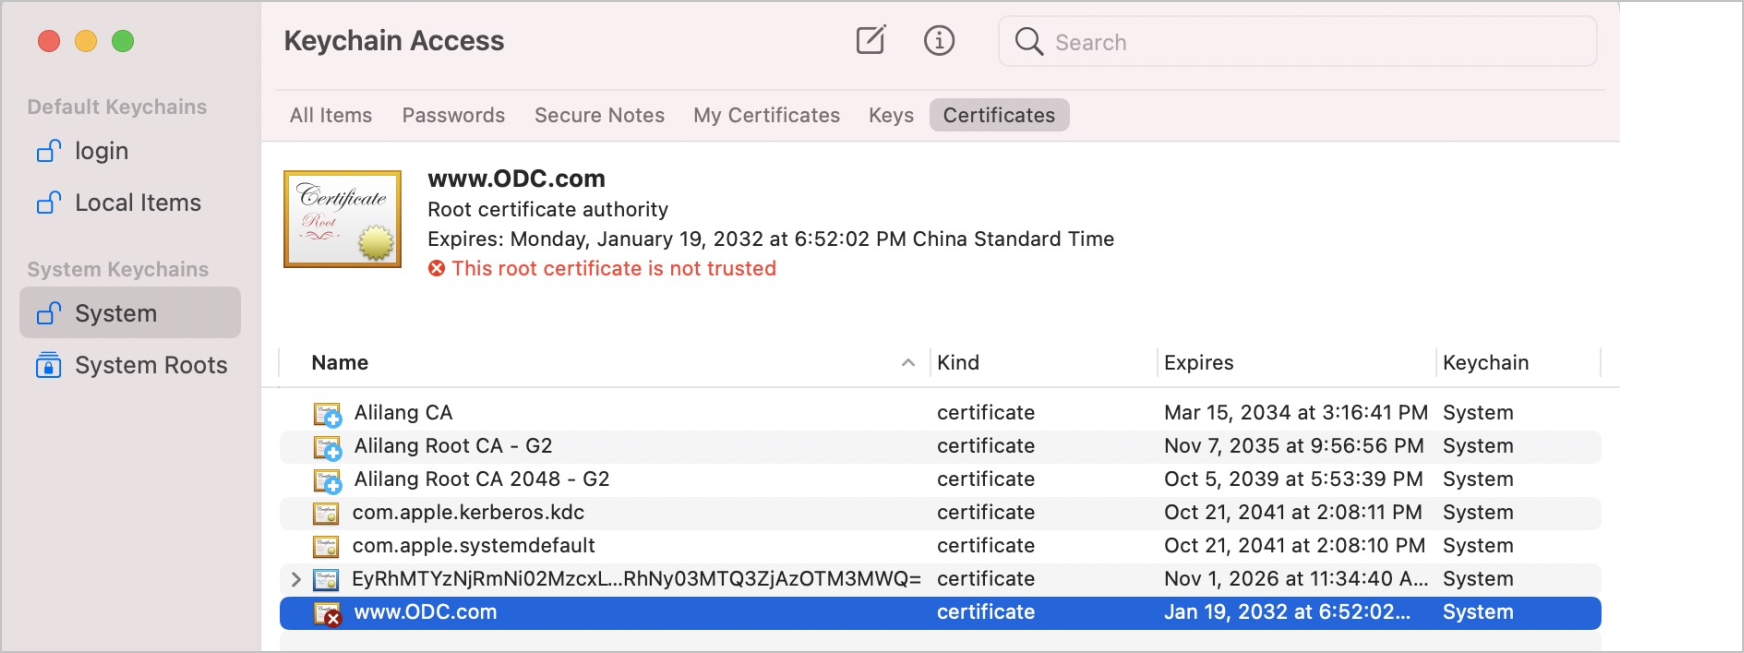
Double-click the odc.oceanbase.com,odc.oceanbse.net certificate. In the certificate details window that appears, click Trust . In the configuration list that appears, set When using this certificate to Always Trust .

Close the certificate details window. When you try to close the window, the system reminds you to enter a password to make the configuration take effect. Enter the password to finish the configuration.
After the certificate trust configuration is completed, log on to ODC again in the browser.