


ODC supports visualized function creation. This topic describes how to create a function with ODC.
Overview
A function is a subprogram defined in a database. You can call functions by using built-in SQL statements. If the built-in functions cannot meet your business requirements, OceanBase Developer Center (ODC) allows you to create functions. User-defined functions not only help you perform some calculations and special operations, but also reduce coding redundancy to improve the program readability.
A function is a procedural object that is similar to a stored procedure in a database. Like a stored procedure, a function is a code snippet of SQL statements and procedural statements, and can be called by applications and other SQL statements.
Differences between a user-defined function and a stored procedure:
A function returns only one result and is suitable for data processing that generates one result. A stored procedure may return zero or multiple results and is suitable for batch insertion and batch update.
You can call a function by using a
SELECTstatement. You can call a stored procedure by using aCALLstatement.
As shown in the preceding figure, you can create a function in the following six steps:
Specify the function name.
Specify the data type of the return value.
Specify parameters.
Verify the parameters of the new function.
Edit the function.
Complete the function creation.
Procedure
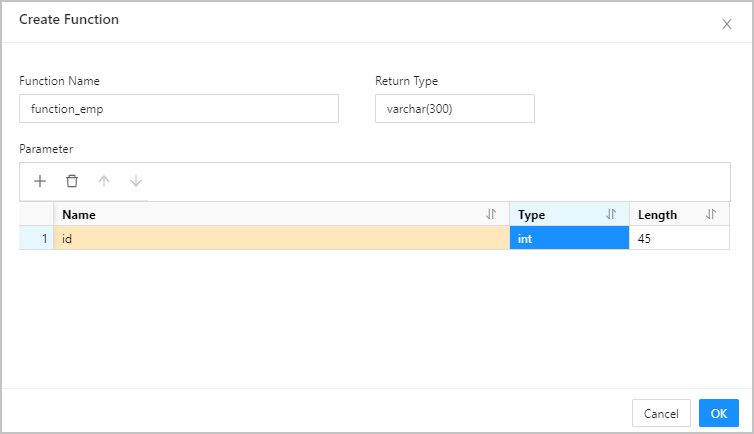
In the following example, a function named function_emp is created in the ODC console to obtain the employee name from an employee table based on the employee ID. The function_emp function contains an INT type id parameter. Procedure:
Step 1: Specify the function name.
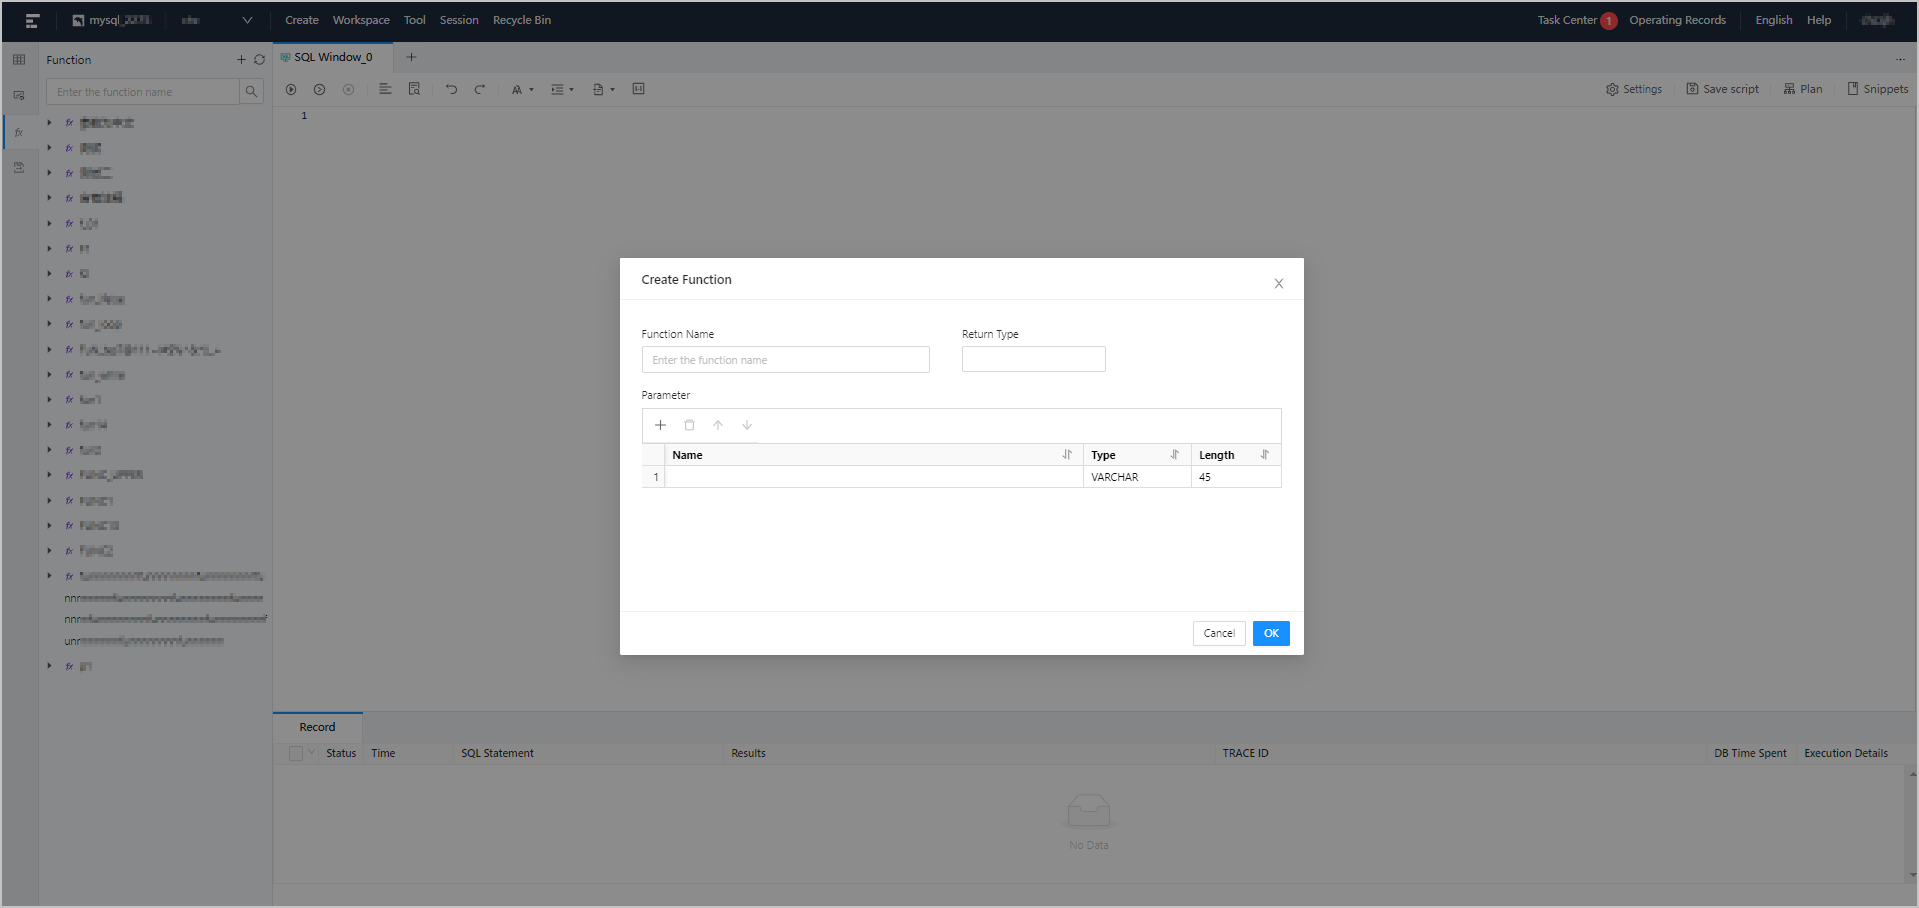
Log on to the ODC console and click the name of a connection to go to the corresponding connection management page. You can click Function in the left-side navigation pane to get a list of functions. To create a function, click + in the upper-right corner of the function list or click Create in the top navigation bar.
Step 2: Specify the data type of the return value.
For more information about data types, see OceanBase Database Developer Guide.
Step 3: Specify parameters.
Parameters specify the information passed to a function when the function is called.
In Oracle mode, specify the following fields: Name, Mode, Type, and Default Value.
In MySQL mode, specify the following fields: Name, Type, and Length.
You can specify parameters by using one of the following three methods.
Method |
Description |
|---|---|
| Use the quick access toolbar | In the quick access toolbar, you can add, delete, and move up and down parameters. |
| Click the row number | - You can click a row number to select a row and display the quick access toolbar that allows you to delete the row or move the row up or down. - You can click a row number to select the row, and then drag the row to adjust its order. |
| Right-click | Right-click the mouse to select the entire row, copy row or move down the row. |
You need to specify the mode for the parameters.
The parameter mode setting is unavailable in MySQL mode. The Oracle mode supports the following parameter modes: IN, OUT, and INOUT.
Parameter |
Type |
|---|---|
| IN | Indicates an input parameter. When a function is called, the input parameter is passed to the function and used in the execution of the function. |
| OUT | Indicates an output parameter. When a function is called, the value of the output parameter is ignored and an empty value is passed to the function. The output parameter in the function body can be modified. The modified result is returned and passed to the argument that the output parameter represents. |
| INOUT | Indicates an inout parameter. An inout parameter is both an input parameter and an output parameter. |
Note
In Oracle mode, both functions and stored procedures support IN, OUT, and INOUT modes. In MySQL mode, functions support only IN mode, and stored procedures support IN, OUT, and INOUT modes.
Step 4: Verify the parameters of the new function.
Click OK to go to the Create Function page.
Step 5: Edit the function.
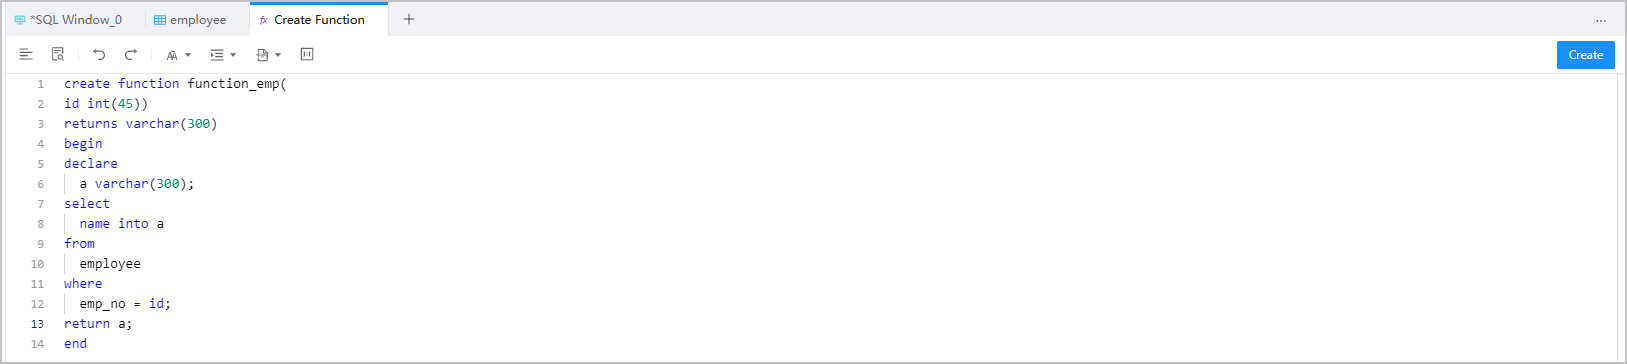
Edit the function statement on the Create Function page. You can edit the SQL statements of the created function on the Create Function page. Syntax:
CREATE FUNCTION < function name > ([ <parameter 1> <type 1> [ , <parameter 2> <type 2>] ] …)
RETURNS < type >
< function body >
Parameters
Parameter |
Description |
|---|---|
| < function name > | The name of the user-defined function. Notice The name of a user-defined function cannot be the same as that of a stored procedure. |
| < parameter >< type > | Parameters of the function. This field contains only the name and type. You cannot specify the IN, OUT, or INOUT keyword. |
| RETURNS< type > | The data type of the return value. <type> specifies the data type of the return value.Notice The SELECT statement in a RETURN VALUE statement returns only a single-row and single-column value. |
| < function body > | The body of the user-defined function. The function body must contain a RETURN <value> statement, where <value> specifies the return value of the user-defined function. |
Example:
CREATE FUNCTION `function_emp` ( `id` int(45)) RETURNS VARCHAR(300)

-- The start of the function body.
BEGIN

-- Declare a variable.
DECLARE
  a VARCHAR(300);

-- Assign a value to the variable.
SELECT
  name INTO a
FROM
  employee
WHERE
  emp_no = id;

-- The return value.
RETURN a;

-- The end of the function body.
END
Step 6: Complete the function creation.
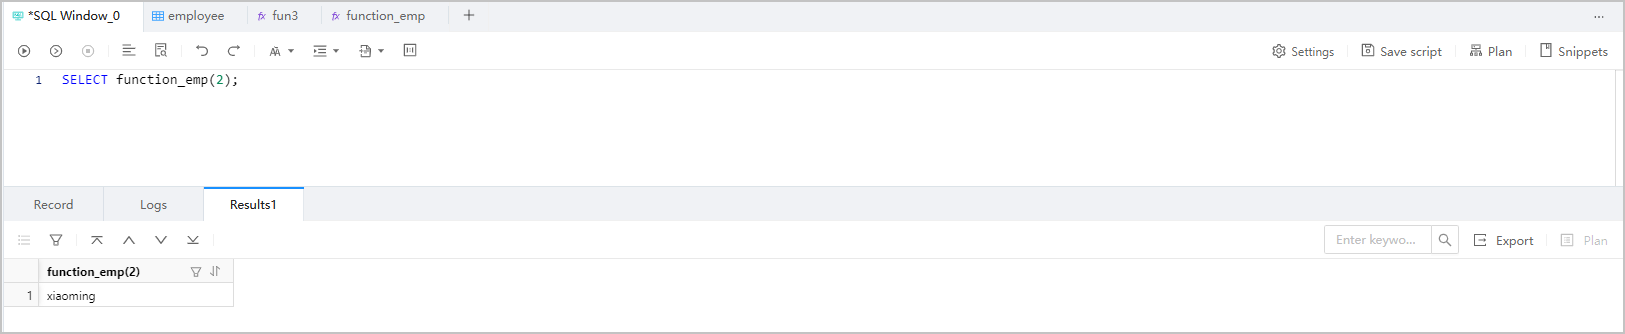
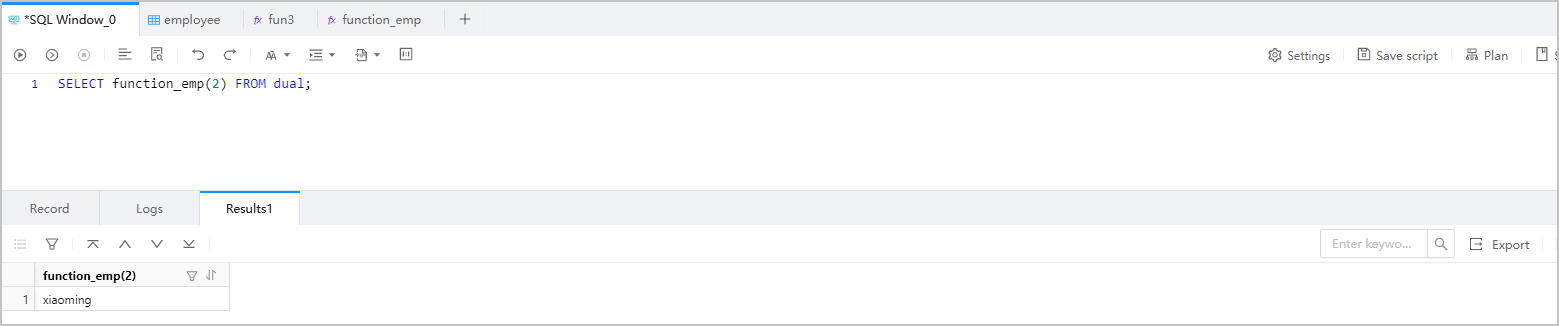
Click Create in the upper-right corner to create the function. After a user-defined function is created, you can use the SELECT statement to call it, just like how you call a built-in function.
Note
To manage a function, right-click the function name in the left-side navigation pane, and select the required operation from the context menu, which provides the following options: View, Create, Edit, Compile, Debug, Run, Download, Delete, and Refresh. Edit , Compile , and Debug are not supported in MySQL mode. For more information, see Manage functions.
Syntax:
SELECT <function name> ([<parameter> [,...]])
Example:
SELECT function_emp(2);
MySQL mode
Oracle mode
Notice
- In Oracle mode, if a user-defined function contains an OUT parameter, you must call the function by using the
CALLstatement. - A yellow icon in the function list indicates an error or alert.
- In Oracle mode, if a user-defined function contains an OUT parameter, you must call the function by using the
Related topics
Create a table Create a view Create a stored procedure Create a sequence Create a program package Create a trigger Create a type Create a synonym